Monday, May 11, 2020

Ink to Paper May Release Countdown Day 1 {My heart is with you}

Welcome to day 1 of the Ink to Paper May release countdown!  I have a lot to share with you today, so get cozy and let's dive in! First up is a Mother's Day design, which I realize is after the fact, but that is what COVID-19 has brought us! The Just Sentiments: Mother's Day and Inside Greetings: Mother's Day were delayed, but they are great staples to be used for years to come! I shared a sneaky peek of these two cards a few days ago on Instagram.

Mother's Day is a time to celebrate all kinds of mothers, and for these cards, I chose to make 2 cards to give to some amazing women and mothers! The "You're Amazing" and the "My Dear Friend" sentiments are from the fabulous Frame It Out: Wishes Stamp Set. I love the size and font of these two sentiments and they accent the "Happy Mother's 
Day" die very well.

To begin these two designs, I used the Love to Layer: Notched Die to die cut the pink pieces and then used the new Nifty Plaid background stamp (upcoming later in the release) to add the plaid background. I placed the sentiments in my Mini MISTI and stamped them in black ink. 
I added some Pale Peony inkblending around the edges to give it some added definition. The "Happy Mother's Day" die is die cut twice for each card and then glued together using liquid glue. I also added it to the pink panel using liquid glue. I added this panel to a top folding A2 card base using foam squares. I also die cut the new Skinny Frames: Diagonal Border and added ink around the edges as well. This is added directly to the card base using liquid glue. These come in a nesting set with three different sizes. I've used two of the three sizes on different cards for today's post.

I added a quick sentiment using the new Inside Greetings: Mother's Day and a leftover flower from the outside.
My kind sister sent me a beautiful arrangement of flowers which included tulips in pink and yellow and purple irises. I decided to use that same color scheme for these cards. I stamped the flowers, which are from the A Mother's Love stamp set, in black and then colored them with alcohol markers. I used the coordinating A Mother's Love die collection to die cut the flowers and the leaves.
I colored the leaves with green copic markers  and then arranged the flowers and leaves around the card using both foam squares and liquid glue. A few sparkling clear sequins finish off these two designs.
Up next are three cards using a new stamp set called Wild Fields. I chose to use it in a few different ways to show the versatility that it has. This first design is sweet and simple sympathy design that uses just two of the different grass images and the sweet little flower.
To begin this design, I did some generation stamping with the two different grass images, changing the placement to give the card some movement. I also added some leaves here and there.

I also stamped the flowers in three different colors and then added some additional stamped flowers that have been die cut using the Wild Fields Die collection. This gives a simple design like this some added depth and dimension by giving the illusion that some of the flowers are farther away. I did add the black paint splatter BEFORE I added the die cuts.  I also added the stamped "With Sympathy" sentiment in black using my Mini MISTI. This is one of the two included sentiments in the Wild Fields stamp set.

I added some simple stitching across the top using my sewing machine. This panel is added to a 4 by 5 1/4 inch piece of Kraft cardstock using foam squares. I also added the Winter Wisteria Skinny Frames: Diagonal Border using additional foam squares.

A few sparkling clear sequins finish off this simple floral design! This would be one to create in multiples and have fun with different color combinations!
I switched gears completely with this second design using Wild Fields for a masculine design that would work well for either a birthday or Father's Day. I'm showing the Dad and Hero setniments a few days early, but they are from the Just Sentiments: Father's Day stamp set. 

To begin this design, I created a blended panel that looked like a sunset using Distress Oxide inks in Faded Jeans, Peacock Feathers, and Shabby Shutters. This is one of Kristina Werner's color combos that she shared quite a while back. It then inspired me to add the To Die For Sentiments By Line For You die to the top. It was die cut twice and then glued together with liquid glue.

I added the two other sentiments using black ink and then added some black paint splatter. After that was done, I added the word die using additional liquid glue. This set the stage to add the Cat Tails and bird outline.

The finishing touch is a frame die cut using the Skinny Frames: Diagonal border. I also added a few dew drops for some added detail that isn't frilly or fussy in any way.

My third and final card using the Wild Fields stamp set uses the next size of the Skinny Frames: Diagonal Border. I did some ink blending with Hawaiian Shores ink around the white panel and the frame. I also added some ink splatter to give it a speckled look that I love so much. The sentiment was bent slightly to line up on the Banner Builder: Basics Die. This is the second sentiment that is included in the set.
I added the stems and the different flowers using foam squares for dimension. I didn't worry about keeping the same color or flowers on one particular stem, but just added them in a way that created movement.
The sentiment banner is added over the top with additional foam squares.  A few sparkling clear sequins finish off this floral design.
I'll be back tomorrow with day 2 of the release with more fun products! Thanks for fluttering by!


Thursday, May 7, 2020

Pinkfresh Studio {Rainbows and Hugs}

Welcome friends! I'm over on the Pinkfresh Studio blog today sharing these two cards using lots of new products from the latest release! I'm also sharing them here as well and I will explain how I created both of these colorful designs!

It is so much fun creating rainbows using nothing more than white cardstock and Ink! To begin this colorful design, I die cut the new Color Block Stripes die. This creates the strips as well as a frame that you can use as a guide when placing the strips back into place. You don't have to use this piece if you don't want, but I did use it on this particular card. In the end, it got covered up with the die cut on top, but it is there! LOL! One of the things that I like about this die is the quantity of strips that it makes so you can really get a lot of different colors to really make the rainbow pop! I simply used my blender brushes and ink, making sure to apply more saturated color to the top and let it fade out toward the bottom. 

The rainbow strips are added onto the panel using foam squares for dimension. I spritzed the entire piece with Shimmer Spray for sparkle, shine, and added detail. I die cut the Ornate Floral Die portion and added it to the top using liquid glue. 

As soon as I saw the "you are my rainbow" sentiment that is included in the Simply Sentiments Hello stamp set I knew it would be used right away! I paired it with the "friend" die from the Phrase Builder Hello die collection and popped everything up with foam squares. I added some black paint splatter for some added contrast. The finishing touch is a few Essentials Jewels glued to the center of each flower.

My second card for today uses the same Ornate Floral die, but this time I did some inlaid die cutting for a bold look. To begin, I die cut the Ornate Floral die and carefully tried to punch out the pieces as correctly as possible. Once that was done, I glued the outline portion to a top folding A2 card base using liquid glue. I normally shy away from doing any type of inlaid techniques, but since puzzles are the world's current favorite pastime,  I thought I'd give it a try! LOL! As you can see, I didn't use ALL of the pieces, but rather the flowers and a good portion of the leaves. I wanted to leave some white space to really let the flowers shine!

I did some ink blending on each of the colored pieces and then popped them back into place using foam squares and liquid glue if they were too small. I really love the dimension that the foam squares give the design!

This card also has some black paint splatter and then the sentiments are added using additional foam squares. The heat embossed sentiment is from the new Keep Going Stamp Set and is the perfect complement to the Hugs die cut! Of course this card got a misting of Shimmer Spray as well and a few jewels to finish it off! I really had a good time putting both of these cards together! The ink blending and puzzle piecing was very therapeutic! Thanks for fluttering by!

Saturday, May 2, 2020

Spring is in the Air

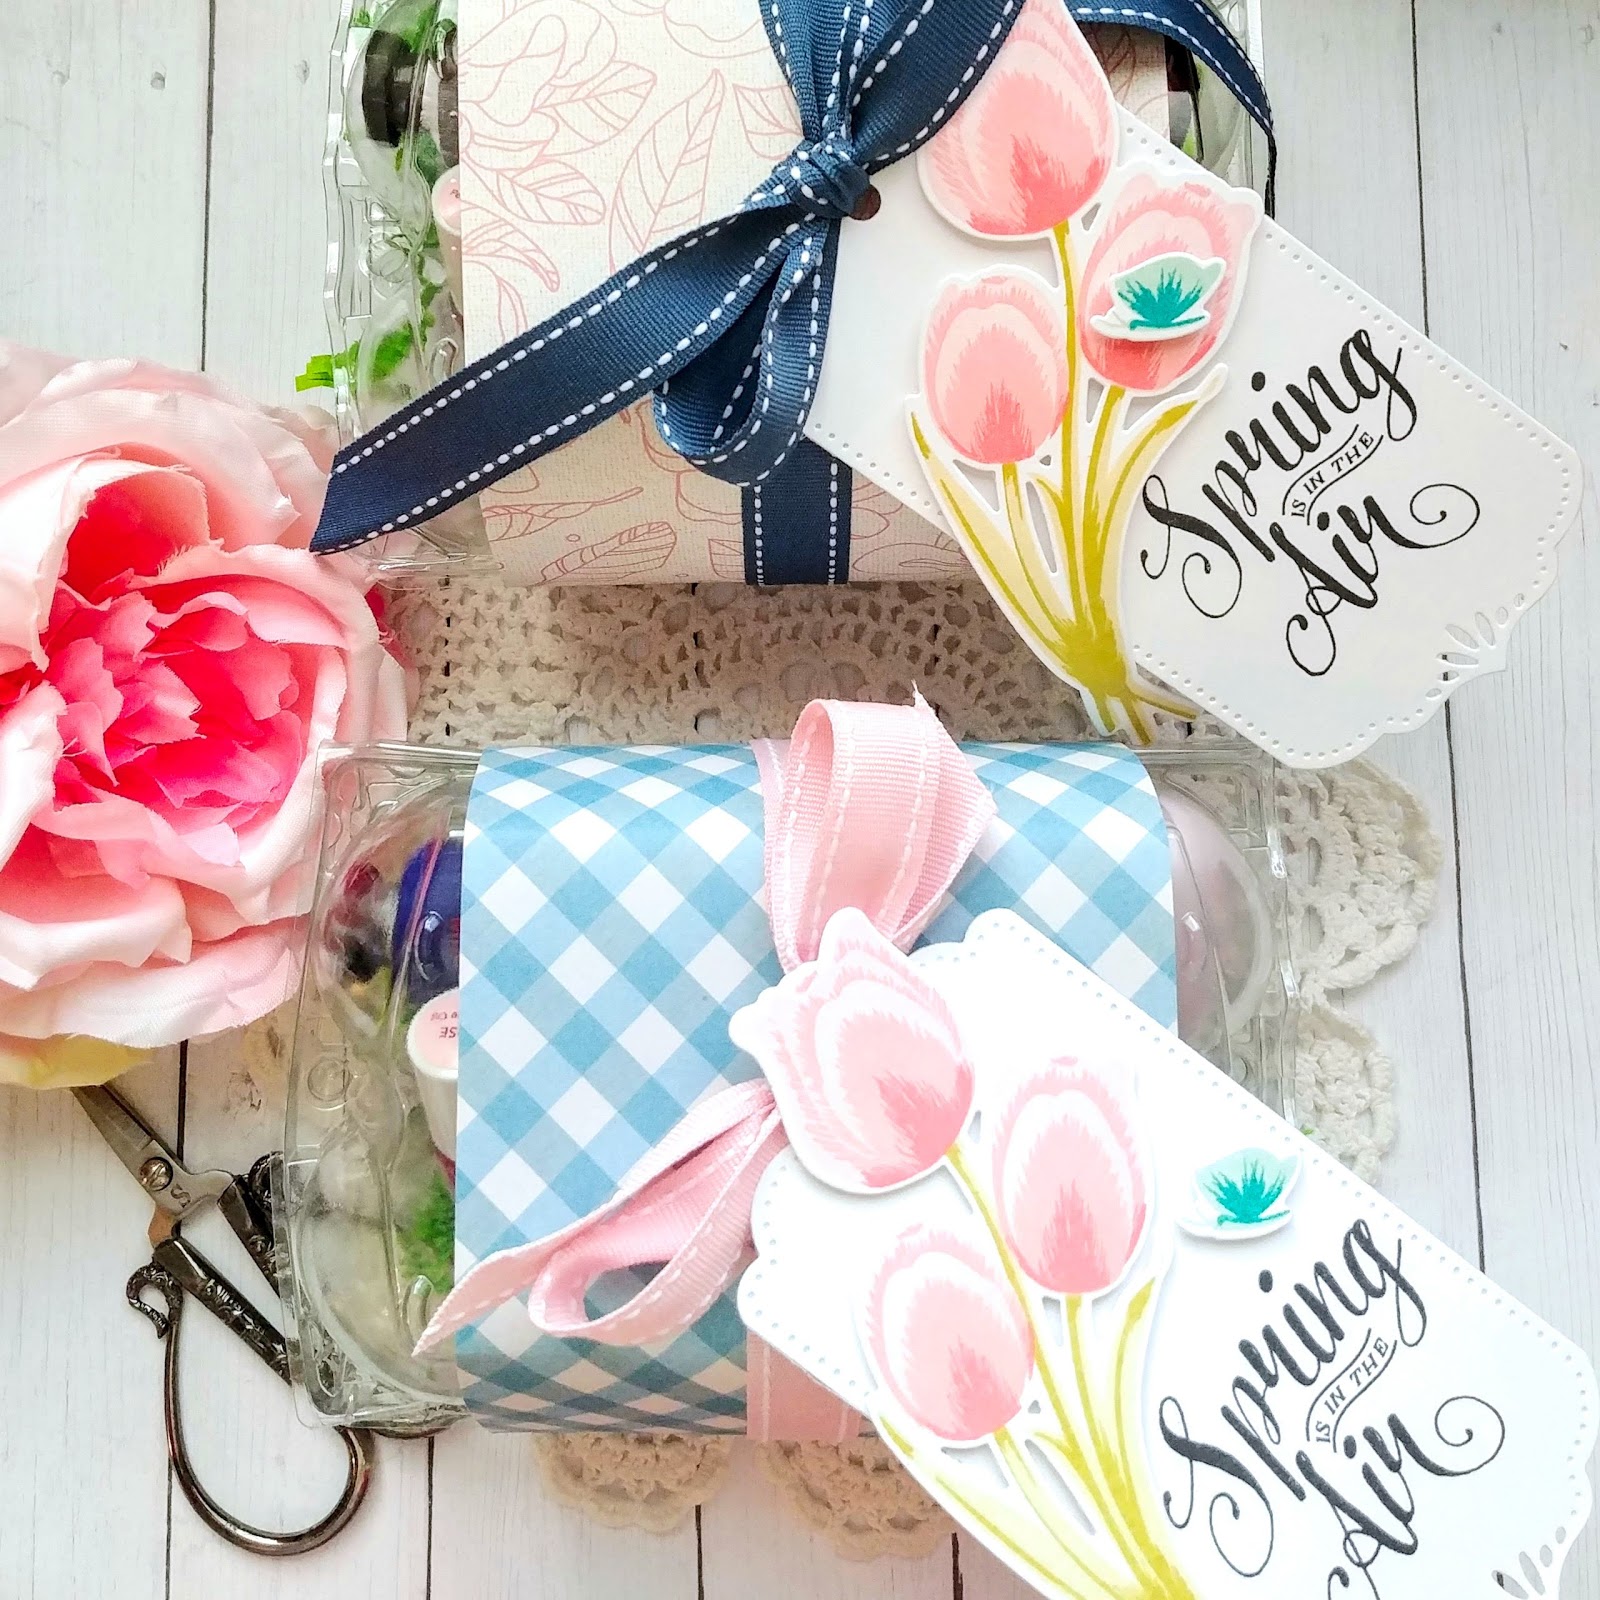
I hope you're all having a wonderful weekend and maybe even getting some creative time! I'm popping in really quickly today to share a fun and easy project that I've been working on! In addition to planning for May Day, which I will talk about at the bottom of today's post, I wanted to use up the rest of the egg containers that I used for THIS project. I bought an assortment of Springtime gifts that would fit nicely into the egg cups that would hopefully bring a smile to the recipient's face! I made 6 gifts in total; two of each pattern shown.
The tags are VERY simple, but the tulips images are so pretty, they make up the difference! LOL! To begin the tags, I die cut them using the Basic Bookmark 3 die out of White cardstock and set those aside. After that, I got to work on the stamped images. I die cut the tulips and butterflies using the Tulip Time Die Collection. Once that was done, I used my mini MISTI to do all of the stamping using the Tulip Time stamp set. 

I stamped the "Spring is in the Air" sentiment in black using the mini MISTI as well. I love how big this particular sentiment is, which is why I kept the design so simple as well. Between the stylized font and the beautiful stamped images, I think they are just right!

Each egg container has a strip of pattern paper wrapped around it and then I tied a bow with the tag attached.

I snapped a quick picture of the contents before I wrapped them up. Each gift contains a roller perfume, a hand sanitizer, a succulent tea light candle, a tube of hand cream and an eos lip balm.  These will be a fun little doorstep gift to leave for friends!

Let me do a little May Day recap for you, if you are interested! My baskets FINALLY arrived at around 5:00 on May 1st! I was getting fretful they wouldn't arrive in time! When they did come, they were MUCH smaller than I anticipated and that was already my second try! I was feeling frantic as I assembled each of the 6 baskets I planned. 

This is a little bird's eye view of some of the May Day goodies! When it was all said and done, I didn't include a SINGLE hand stamped or paper crafted item! Can you even believe that? I realized that my May Day shenanigans could hardly be kept a secret if they had anything remotely crafty included! LOL! Silly me! That didn't even work anyway, because one of the recipients called me this morning asking if it was me that dropped it off! LOL! I told her it was supposed to be a surprise, but she guessed it anyway! Oh well! It was nerve wracking up until the baskets came, and then my daughter and I had fun delivering them! Note to self: make sure the baskets are the FIRST thing to buy so you can plan accordingly! Quarantine May Day was one for the books! Thanks for fluttering by!

Friday, May 1, 2020

Ink to Paper Project: Reach Out {Count your Blessings}


Happy May Day, friends! Thanks for joining me today! It's time for another installment of the Ink to Paper Project: Reach Out! I hope you've all been having fun creating cards and projects to send out during this time! I know it is so easy to start feeling down and discouraged as we face the unknown. I've been trying to make a conscious effort to count my blessings during this time to keep my head in a good place. While I've been sending out a lot of "hope" and "cheer" type cards, I also took some time to send some thank you cards as well! There is so much good in the world and if you stop to think, there is always someone or something to be thankful for. I'm challenging each of you to "count your blessings" today and create some thank you cards for anyone that you feel deserves one!

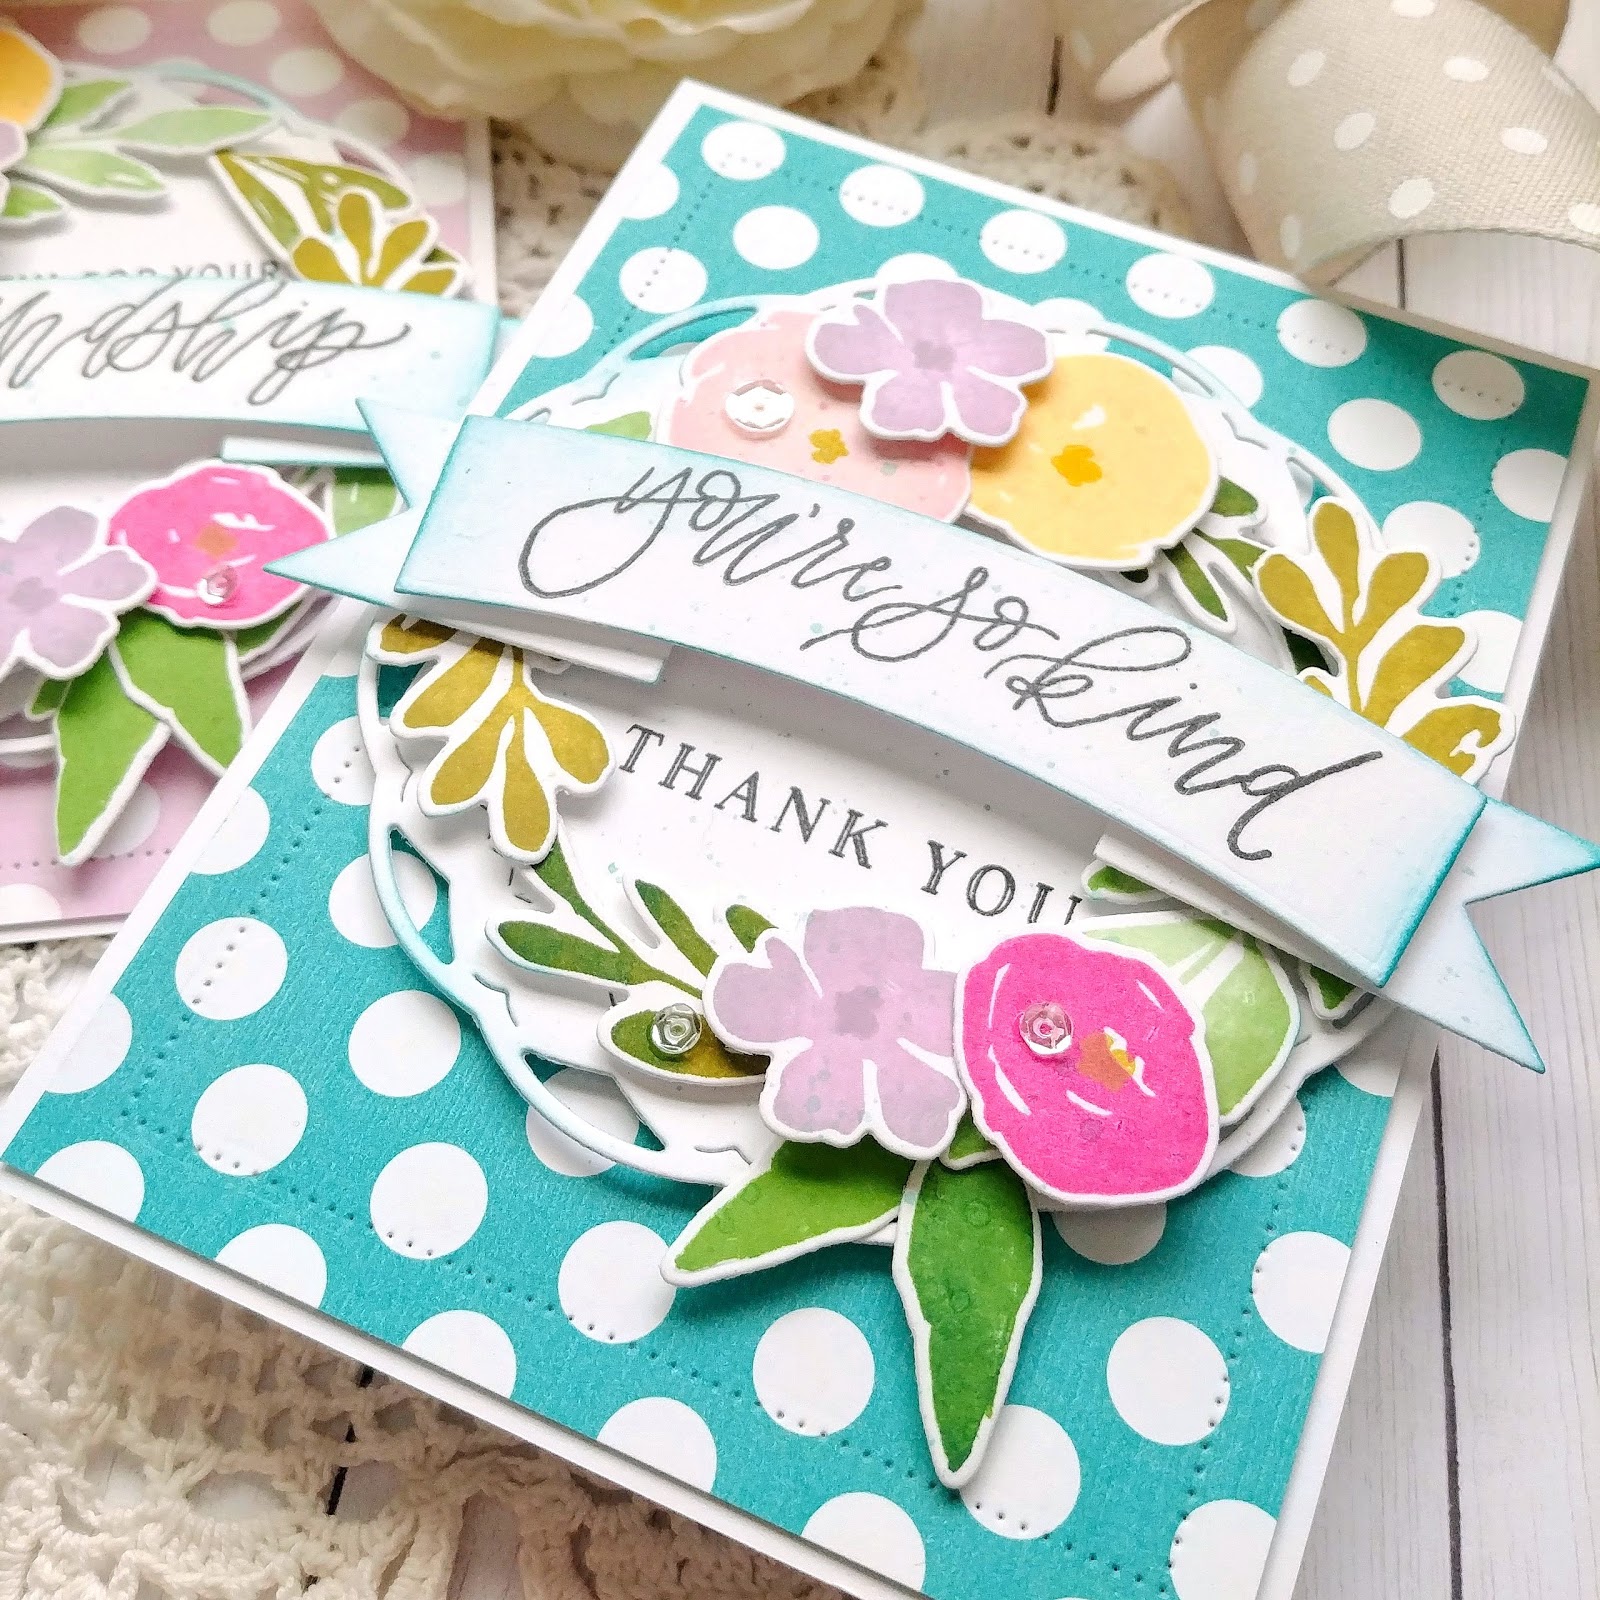
I made 2 thank you cards, and there's a bonus card at the end of this post as well, so make sure to scroll to the bottom to see the third design! For today's cards, I chose to use the Bold Blooms stamp set because of the amazing flowers and foliage, but also because I LOVE the sentiments! They are perfect for today's projects!

To begin, I die cut the flowers and leaves using the Bold Blooms die collection and then stamped everything assembly line style. I really like stamping a bunch of images so I can have fun creating the floral arrangements.

The Shape Shifters: Circle 4 die is the perfect backdrop to add the flowers and leaves to create a wreath type look. It is so easy to follow the curve of the circle to create a visually pleasing piece. Before you begin arranging the flowers, though, be thoughtful about the sentiments you will be using for placement. In this case, I stamped the "thank you" portion of the sentiment to begin with before adding all of the stamped i mages. 

The larger scripted sentiments work perfectly with the Banner Builder Basics die collection and have been one of my recent "go-to" element. I did some ink blending and ink splatter for some added detail and interest.

The background for this card is a 4 by 5 1/4 inch piece ofBitty Big: Hawaiian Shores paper that is die cut using the Nesting Basics: Pierced Rectangles. I just love the hint of added detail that it adds to my cards!

I layered everything onto a top folding A2 cardbase using a tape runner. I also added some sparkling clear sequins here and there for some sparkle and shine. Each of the two cards has a stamped sentiment on the inside from the Inside Greetings: Gratitude Mini Stamp Set. I forgot to photograph the inside, but it really is just the sentiment to reinforce my feelings of gratitude. 

My second card is identical to the first in almost every way. I did arrange the flowers slightly different because I'm just crazy like that! LOL! I used the Bitty Big: Lilac Grace for the background on this one.

I took into consideration the sentiment again on this one and stamped the "so thankful for our friendship" before I arranged the flowers and leaves.

I've shared this tip before, but I'll share it again; when I am using straight sentiments with the curved banner pieces, I lay the die directly underneath an acrylic block and then look through while holding the stamp to place it so it will curve nicely. These sentiments were just "slightly" larger, but I think they work just fine!
My bonus card uses the leftover bits and pieces of greenery so they are a little more sparse than the previous two, but with the sentiment strip you can hardly tell!  This is the last sentiment included in the set so I wanted to use it as well. I chose to add the "always" sentiment to keep it consistent with the look and feel of the first two designs. This little sentiment is from the Just Sentiments: Belated Birthday stamp set.

I hope you get a chance to count your blessings and make a few thank you/gratitude cards for those that you are thinking of! Thanks for fluttering by!


Thursday, April 30, 2020

Pinkfresh Studio April 2020 Stamp and Die Release


Hello and welcome! Today is the Pinkfresh Studio April 2020 Stamp and Die Release Blog Hop and it is all smiles, hugs, and rainbows! You're going to fall in LOVE with the entire release, I can guarantee it! I'm sharing three projects with you today, so make sure to scroll to the bottom of the post to see each of the projects! Three lucky winner will receive the entire April release; one from the Pinkfresh Instagram, one from the Pinkfresh Facebook page, and one from the Pinkfresh Studio Blog. One lucky winner will receive a $25 gift certificate to the Pinkfresh Studio shop by leaving a comment here!
There's also a shipping promotion going on for the release as well!
Also, don't forget to hop along to the other designers' blogs to see how they've used these amazing products!

You are invited to the Inlinkz link party!
Click here to enter
My first card for today's hop uses a fun combination of new products! To begin, stamped the sentiments from the Hugs and Good Vibes Stamp Set. This sweet sentiment is just the cutest thing ever, if I do say so myself! It is perfect to send to out as we are social distancing and wishing we could give hugs! I die cut the amazing new Color Block Rainbow Die out of white cardstock and then used the Pinkfresh Studio Ink Pads to color each of the "rays" of the rainbow! I used foam squares to add them to the white outline that is adhered to the white panel using liquid glue.
I'm completely in love with the new Modern Layered Floral Stamp Set and knew it would be the perfect accent for my rainbow! I die cut it using the Modern Layered Floral Die and then stamped it using my Mini MISTI. I layered it sideways on the rainbow panel and then snipped the excess off using my paper trimmer for a nice, straight edge.


I used a post it note to cover up the sentiment portion and then added some black paint splatter using a fine tip paintbrush. I spritzed the entire panel with Shimmer Spray for some sparkle and shine!

I also added a few Essentials Jewels to both the rainbow and a few of the flowers. I layered the entire rainbow focal panel onto a top folding black card base using foam squares for added dimension.

I'm loving the rainbows, hugs, and flower combination, so I used it again on my next design, but in a different way!

For this card, I used the AMAZING new Chevron Background stamp. This is a red rubber cling mount stamp and has removable pieces so you can stamp it in many colors easily. To begin, I placed the entire background into my mini MISTI and then removed the outer frame edge. This part is not needed for the design, so I removed it for ease in stamping.

Once I had it all placed, I removed everything but the smallest chevron on the bottom. I stamped that and then placed the next piece. Once that was in position, I removed the smallest piece and then stamped the next piece. I continued on like that until I reached the top portion where it splits off into two difference sections (the blue portion). The thing I like about these stamps is that they have very tiny perforations where you split the pieces apart for each section. This leaves a guide so to speak so you can line everything up properly.

Once the stamping was done, I die cut the entire panel using the Essentials Fancy Diagonal Stripes Die Collection. I love how it gives it just the right amount of extra detail! Once that was done, I heat embossed the large sentiment from the Hugs and Good Vibes Stamp Set onto a strip of vellum using white detail embossing powder. I wrapped it around the stamped panel and secured it to the back using clear tape.
I added some of the fun flowers from the previously released Simple Blossoms stamp set here and there for some added interest.  The entire panel is layered onto a top folding A2 card base using foam squares and a few jewels finish this rainbow design!

My third and final project for today is a trio of tags using the new Believe in Yourself Stamp Set with the coordinating Believe in Yourself Die. 

If you visit my blog regularly, then you'll know that I've been preparing some baskets for May Day tomorrow! These little tags are the perfect accent to add to the baskets.
I bought some tea towels to place in the bottom of the baskets and this floral design reminds me of the pattern. This floral cluster also has solid images to stamp inside of the outline and has a kind of "textile" feel to it which will be perfect to accent the towels.

Each tag is die cut using the Essentials Classic Tags with Fillable Elements and then I added  some inkblending around the edges using ink and a blender brush. I also added some ink splatter to them for some added detail and interest.

The sentiment, which is from the new Simply Sentiments Hello stamp set, is the perfect addition for these tags and says just the right thing! The finishing touch is one of the new Artistic Bows which I am in love with! I can't wait to experiment with them more! 
I had so much fun creating all of these projects for today! Don't forget to leave a comment to be eligible to win a gift certificate! Thanks for fluttering by!