Hello and welcome to day 1 of the Papertrey Ink July release countdown! Today the team is introducing the ever-so-adorable Above Ground Stamp/Die set. I'll also be sharing another project using the new Into the Blooms: Above Ground Die.
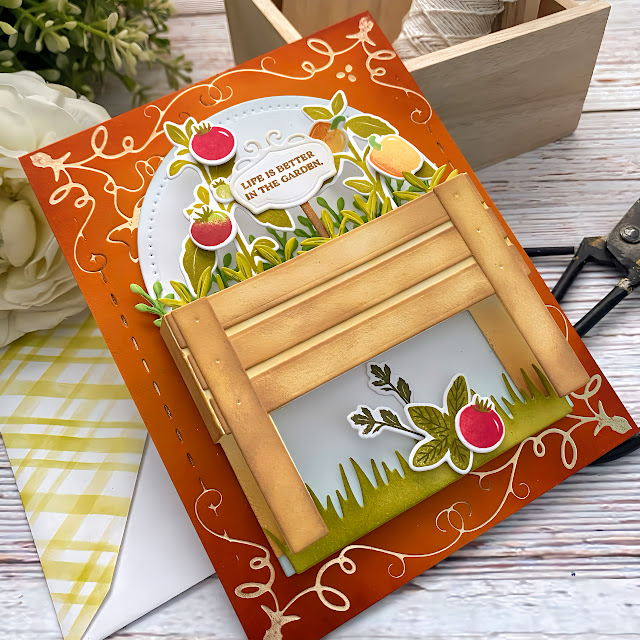
For my first card, I chose to create a vegetable garden; my next card features a herb garden (with a few other veggies). I had so much fun creating both cards and I can't wait to try this raised bed with a flower garden. The Above Ground stamp set includes some really cute sentiments that you can add on the garden signs or anywhere you choose.
To begin, I die cut all of the pieces twice using the Above Ground Die. I wasn't sure how many of each image I would need, so I just got started with two. That gave me PLENTY so I was able to make two cards. You can tell on this photo that the raised garden container has some depth to it; you can press it to the side to place inside an envelope to give to the recipient or to mail, but it pops back up when it comes out of the envelope!
This particular die set comes with both dies for the stamped images, the raised bed, and some foliage that doesn't have stamps. I simply colored them with dye inks and a blender brush and then added some details using a freshly sharpened green color pencil. It doesn't take much time, but the result really adds to the realism.
The raised bed was die cut from white cardstock (everything is from white) and then I used finger daubers and distress oxide inks to color it The planks are glued on using liquid glue.
I had fun arranging the garden and getting it all 'planted'! ha ha! Once that was done, I used the Fall Harvest Hot Foil Plate on a panel of Canyon Clay cardstock using champagne foil. I added some Terracotta Tile ink around the edges using a blender brush for added dimension. I used the Love to Layer: Arches Die to cut the largest arch, added some Aqua Mist ink around the corners and arc and then adhered it to the foiled panel using foam squares. The garden was attached using liquid glue and then I tucked some grass and extra foliage and veggies underneath for some added interest.
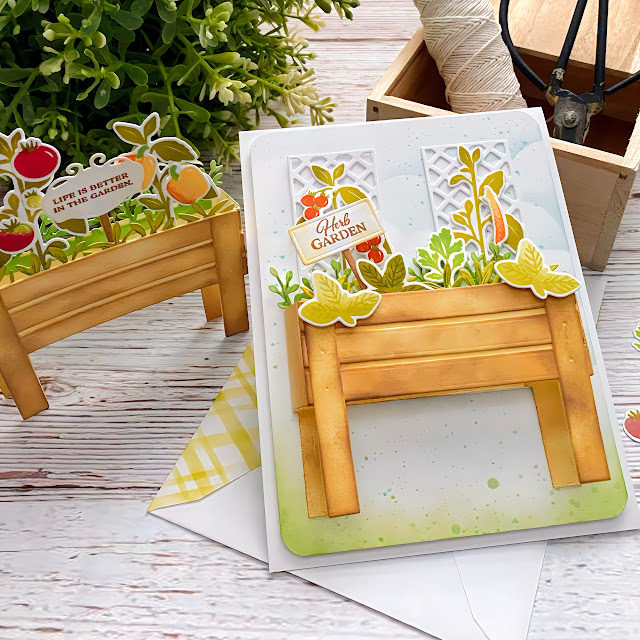
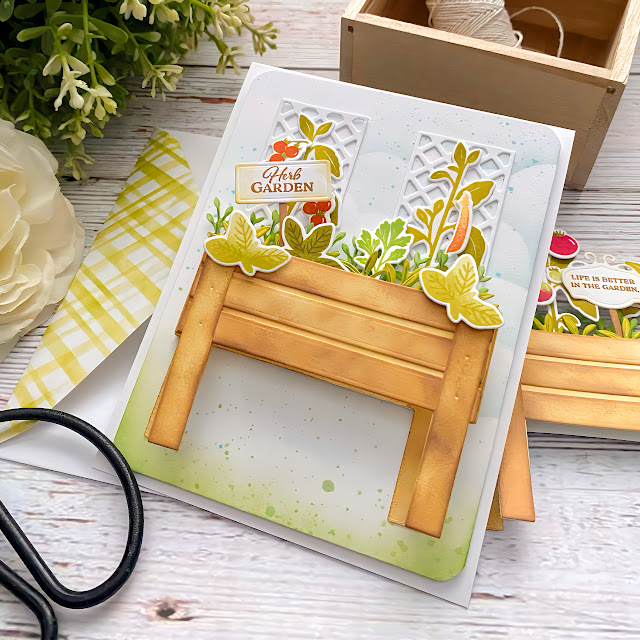
My second card, which is actually my first card (you can see the other veggie garden in the background), uses the herbs and a few of the veggies because they're just too cute!
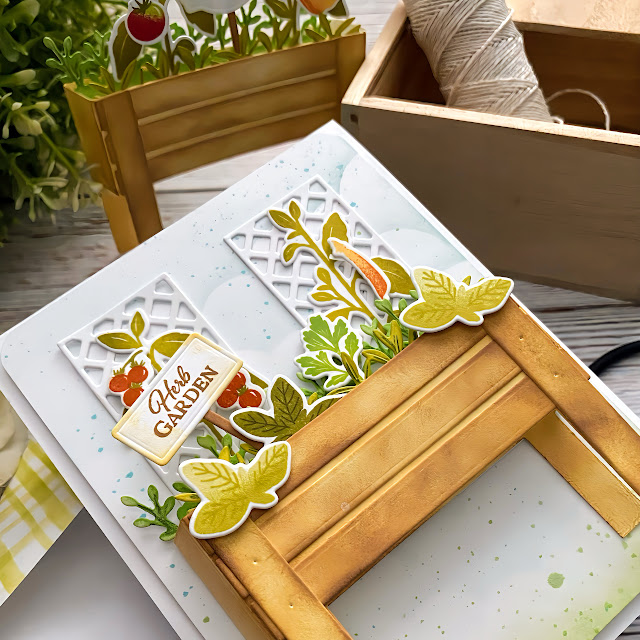
This card also features the cute trellis die cuts; this is an option you can add to the front of the raised bed instead of the planks, but I thought it would be fun to use them behind the herbs. Also, you can see the dimension of the other garden because it is standing up next to this card (left side)
The process for this card is the same as the other card, but the background was created by using a cloud stencil on a panel of white cardstock measuring 4 by 5 1/4. I also added a bit of green ink and splatter to the bottom. I used a corner rounder punch on the corners and then added it to a top-folding A2 card base.
There are three styles of garden signs that you can attach to a stake. All of the sentiments fit on each of the signs, so the choice is yours on what style you are after.
I decorated the flap of an envelope using the Show Your Stripes Stencil Collection for added detail.
The backside of the legs of the raised bed need to be colored as well, along with the sides.
I used an assortment of liquid glue and foam strips to really create the illusion of a dimensional garden.
I really can't get over how cute and well-designed this set is!
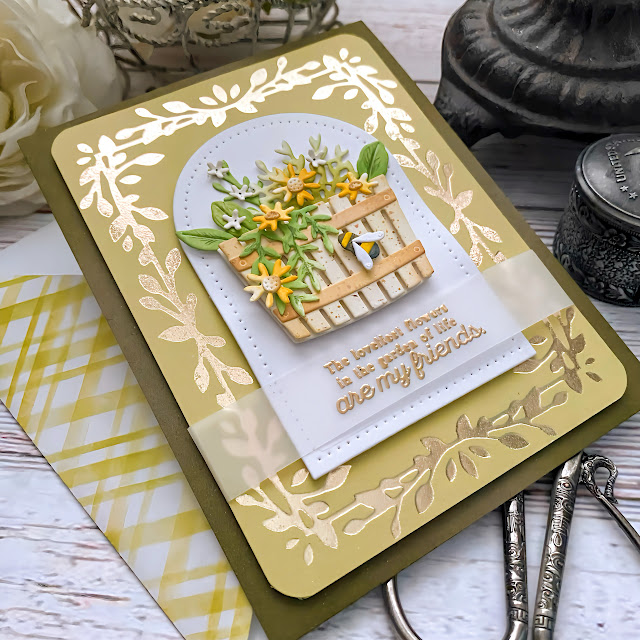
My third card for today features the new Into the Blooms: Above Ground Die. I feel like both sets being showcased today would work so nicely together. I know a lot of people like to grow their tomatoes in barrels like this.
There are quite an assortment of different flowers you can add to the container, but I chose to create a daisy card using a few of the smaller flowers and bee from the previously released Into the Blooms: Wild Wood Die.
As I am typing this, I realized I was going to add one of the cute signs from the Above Ground Stamp/Die set (woops)! Wouldn't that have been cute? Looks like I need to go make another card! wink!
I die cut the barrel from Rustic Cream cardstock and then used Antique Linen and Gathered Twigs Distress Oxide ink to the bands around the barrels and then a bit of ink for dimension on the barrel and some brown ink splatter.
I die cut the flowers and foliage from white cardstock and colored them using blender brushes and dye ink. I set everything aside to get started on the background and sentiment.
I used the Exquisite Leaf Frame Hot Foil Plate with champagne foil on Spring Moss cardstock. I trimmed it down and rounded the corners. The sentiment, which is included in the Garden Blessings Stamp Set, is heat embossed in gold onto a strip of vellum. I wrapped it around the foiled panel, layering the arch ahead of time. I adhered it to an A2 panel of Olive Twist cardstock using foam squares.
I used foam squares to attach the barrel, arranged the foliage and flowers and then gave it a good spritz of shimmer spray. I glued it to a top-folding A2 card base using liquid glue. This is such a fun set and I know I will be reaching for it often! Thanks for fluttering by!










2 comments:
BEAUTIFUL WORK, Kelly! I LOVE the little planter box & basket! NICELY DONE!
How gorgeous! Beautiful and very creative!
Post a Comment