Hello, and welcome back for day 2 of the Papertrey Ink July release countdown! My first card for today features the new Mat Stack: Thank You So Much suite of products! To begin, I die cut the largest mat included in the die set from Aqua Mist cardstock. I am down to my last few scraps, so I knew I HAD to make this work, not matter what! ha ha! I used one of the stencils included in the Mat Stack: Thank You So Much Stencil Collection to add the Aqua Mist ink around the edges. I kept the middle clear so that the sentiment wouldn't get too busy with the background.
I die cut the sentiment from Bitty Big: Harvest Gold patterned paper and twice from white and then glued them together. I added it to the mat using thin strips of foam tape and then added Glossy Accents over the top. I set that aside to dry while I got to work on the background.
I cut a panel of white cardstock and then used the new In the Meadow Stencil Collection to create the beautiful background. My next card also features this stencil collection so you'll be able to see it more fully. I layered the sentiment panel over the top using foam squares.
I didn't participate in last month's release so I was itching to use the beautiful new Build-a-Butterfly Die. I love how it looks with the new stenciled background! I die cut all of the pieces I uses from white cardstock and then added the color using blender brushes. I also used the new Build-a-Butterfly Stencil Collection to give it the beautiful pattern. I played around with adding the gems to some of the wing's detail, but it looked tacky, so I'm glad they came off easily! ha ha!
I added the butterfly to the bottom and then arranged the flowers around the edges.
I added the entire panel to a top-folding A2 card base using liquid glue.
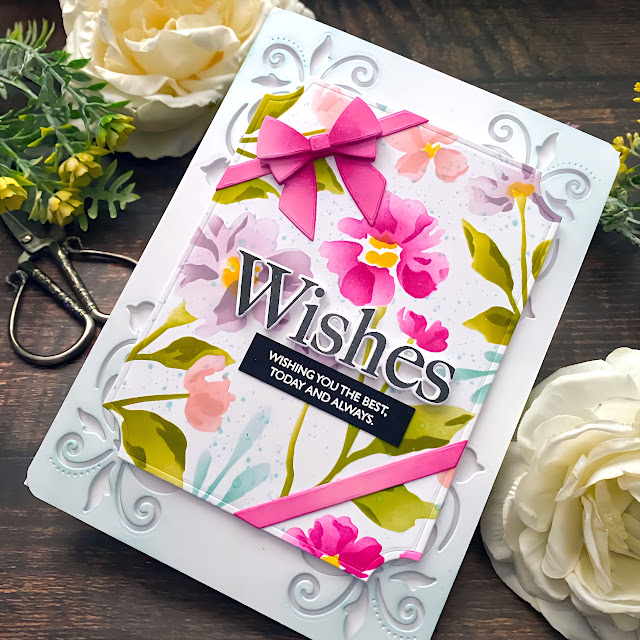
My second card also features the new In the Meadow Stencil Collection paired with the new Cornered: In Full Bloom Die. This card measures 5 by 7 so I could showcase the beautiful stencil and maximize the beautiful corners.
The sentiment is from the new This Is Big Sentiments: Wishes Stamp/Die set.
To begin this card, I used the In the Meadow Stencils on an A2 panel using a few colors of ink to give the card more interest. Once that was done, I die cut it using the Love to Layer: Notched Die. I didn't want to waste any of the beautiful stencil panel, so I chose that die in particular because it only took off a tiny bit. I also added some Hawaiian Shores ink splatter to the panel.
I cut a piece of white cardstock to measure 5 by 7 and then die cut the corners using the Cornered: In Full Bloom Die. I rounded the corners with a corner rounder punch and then added some Aqua Mist ink around the edges to give them more definition.
I die cut the bow pieces from Lovely Lady cardstock using the Wrap-it Ribbons Die. I added some Raspberry Fizz ink to give it added depth and interest. I put it together using liquid glue and foam squares for dimension. For the sentiments, I die cut the large Wishes portion and then stamped it in black ink; the companion sentiment is heat embossed on True Black cardstock using white powder. I gave it a good spritz of shimmer spray and then added the entire panel to a 5 by 6 card base using foam squares so you could really see the die cut corners. Join me tomorrow for day 3 of the countdown! Thanks for fluttering by!


2 comments:
Beautiful cards. Love the new stencil.
Kelly, your cards are STUNNING! I too LOVE that butterfly die! QUITE NICE! And you added all the patterns behind it, PERFECTLY! I don't do patterns well, so I know NICE when I see it! LOL And your second card, is SO LOVELY with the floral stencil (Sorry, the name slipped my mind, as I was trying to remember it!) behind too! That stencil is STUNNING with the colors you chose! BEAUTIFULLY DONE!!! ;)
Post a Comment