Monday, October 5, 2020

Flash Sale {Warm Christmas Wishes}

Happy Monday, friends! I'm back today with this week's Papertrey Ink/Ink to Paper Flash Sale! I think I've mentioned this before, but if you'd like a sneak peek of what will be included in this week's sale, sign up for the Papertrey Ink newsletter and you can find out Sunday afternnon/evening! I chose to use traditional colors this week, but with a vintage twist! I absolutely adore using Vintage Jadeite for my Christmas cards! This week's sale will run from today at noon ET until Wednesday, Oct. 7th at noon!

INK: Pure Poppy, Pinefeather, Scarlet Jewel, Versarmark, Vintage Jadeite, New Leaf

PAPER: Vintage Jadeite, Soft Stone, Bitty Big: Pure Poppy, Luxe Silver cardstock


My Christmas card stash is GROWING! I had so much fun creating these playful, vintage-ish Christmas designs! I absolutely love any stamp set that has berries and holiday foliage for me to use!

I cut two 4 by 5 1/4 inch panels of Vintage Jadeite and then die cut them using the Tin Stitch die to give the outer detail. This is one of my favorite dies and I find myself reaching for it quite a bit! I added some New Leaf ink around the edges for some darker contrast. I die cut and stamped a bunch of the berries, leaves, and greenery so I would have a lot of different design options.

For this card, I die cut and stamped the wooden sign frame in Pure Poppy and then stamped the sentiment in black. The Rustic Brick Background is heat embossed in white onto a panel of Soft Stone cardstock.
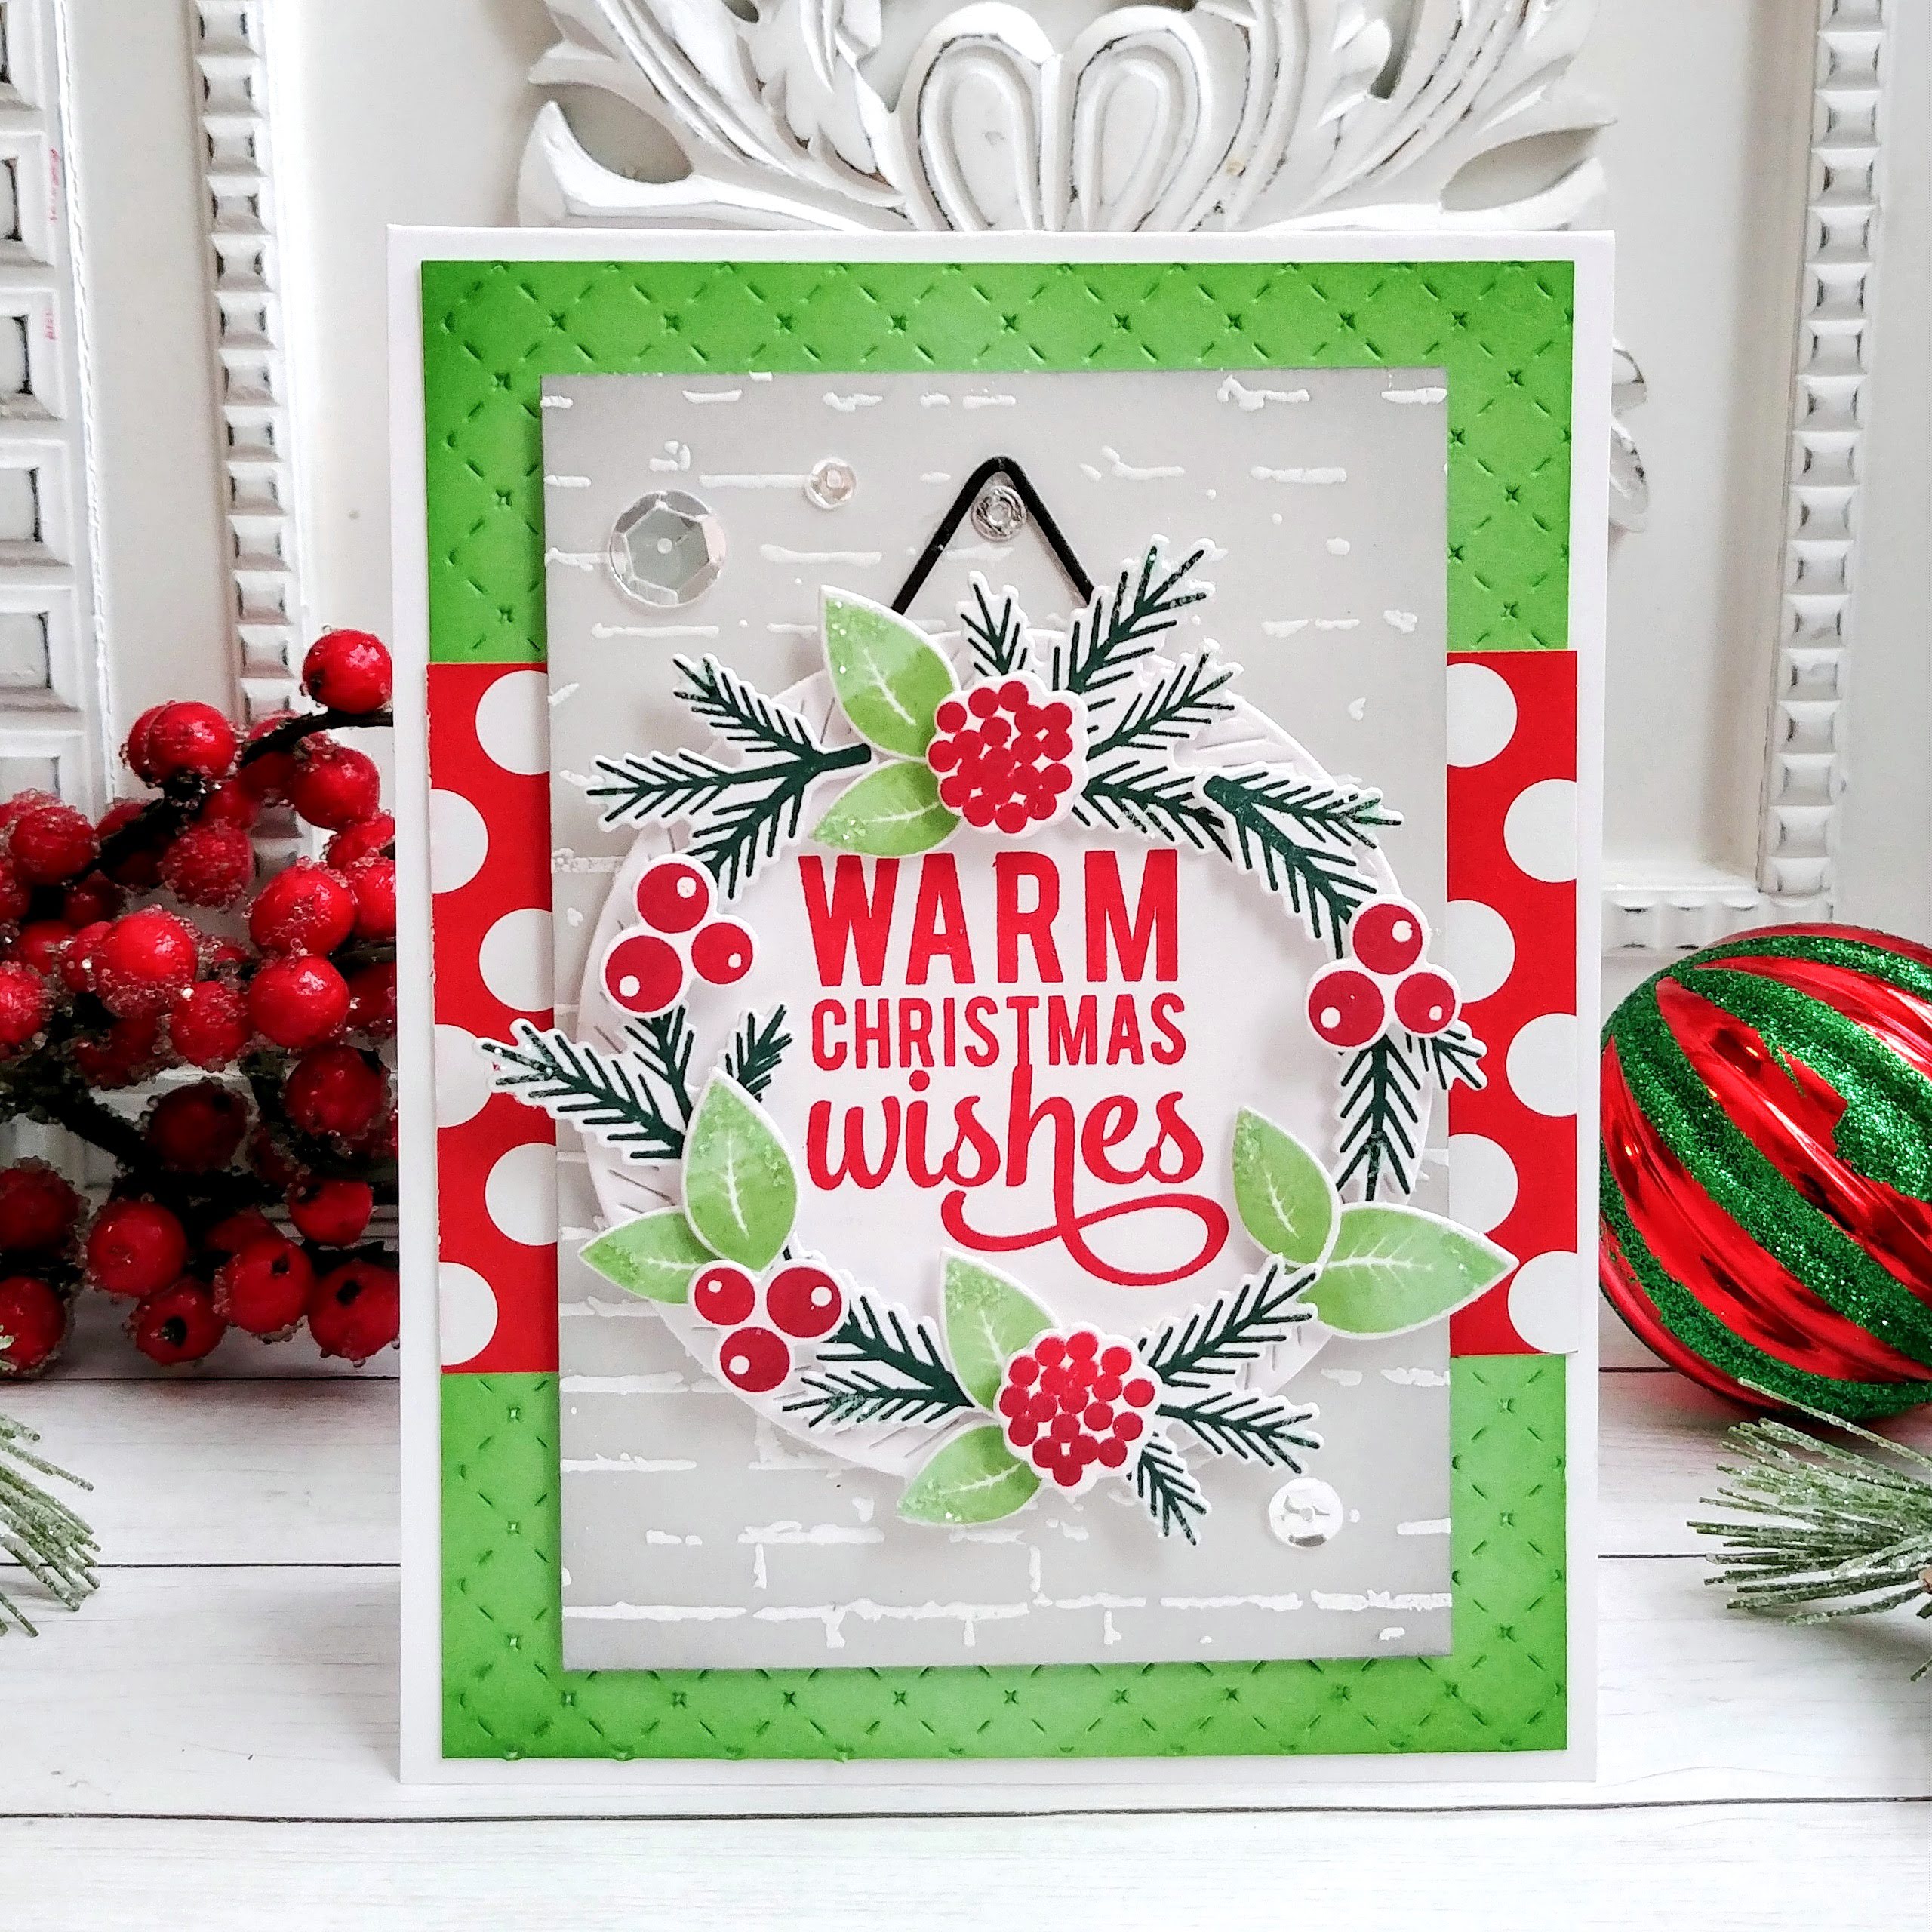

For this card, I used the scalloped circle as a guide to use the greenery to create a holiday wreath. I just added the leaves and such here and there to create a cheerful wreath.

The berries are stamped in both Pure Poppy and Scarlet Jewel ink to give them some shadowy dimension. The leaves are stamped in Vintage Jadeite and New Leaf, with the pine boughs stamped in Pinefeather.

The "nails" are die cut from silver cardstock and the "hanger" portion is die cut from black cardstock. I added these using liquid glue with a precision tip.

I always like adding an inside greeting to my Christmas card for a more polished and professional look. I used the Inside Greetings: Holiday Magic stamp set for these two cards and stamped the sentiment in Pure Poppy ink! A bit of glitter and sequins finish these off! Thanks for fluttering by!


Saturday, October 3, 2020

World Cardmaking Day with Pinkfresh Studio {With all my Sympathy}

Happy World Cardmaking Day, friends! Today Pinkfresh Studio is hosting an ALL DAY event over on their BLOG with tons of challenges, inspiration and prizes using many popular techniques and card categories. I chose to focus on Sympathy cards, which for me, I HATE needing, but they are essentials to have in your stash to send out in a timely manner. I actually just sent out the last one in my stash this last week, so I thought it would be a good time to get some made!
I made two identical cards using two of the beautiful sentiments from the Forever in our Hearts stamp set. I simply switched colors and sentiments for variety. I still need to make a few more cards to add to my stash, but this is a good start!

To begin both cards, I die cut and stamped the beautiful bouquet from the Modern Layered Floral stamp set in pinks and yellows. I adore this beautiful bouquet and use it often on many types of cards. This design would work well for any occasion, really!

I die cut three of the different styles of the Lacey Edgers and added Coral Reef and Passion Fruit ink to the pink ones and Sweet Mustard and Marigold to the yellow ones, leaving one white for a soft transition.

I used my mini MISTI to stamp the sentiments near the bottom right corner of each of the cards, leaving enough room for the lace portions AND the bouquet. I added the lacey pieces using 1/8 inch ScorTape for security. I created the outer frame using the Diagonal Stitched Rectangles and added it using think foam strips. The bouquet it layered over the top using foam squares for dimension.

It's no secret how much I love the Artistic Bows so I added one to each of the bouquets using hot glue. A few sparkling clear sequins and Essentials: Jewels finish off these two cards. I layered them onto soft gray card bases using ScorTape. I hope you get a chance to make a few sympathy cards for your stash! Thanks for fluttering by!


Monday, September 28, 2020

Flash Sale {Cheerful Tree}

Things are Merry and Bright around here with the projects for this week's Papertrey Ink/Ink to Paper Flash Sale! I've chosen a fun holiday set and some bright, fun holiday colors for this week's sale! As usual, the sale will go from today at noon until Wednesday at noon EDT!

INK: Pale Peony, Raspberry Fizz, Tropical Teal, Green Parakeet, New Leaf

Cardstock: Green Parakeet, Tropical Teal, Raspberry Fizz


Cheerful Tree was released this time last year and is such a fun set to create cute little scenes. I had so much fun die cutting and stamping all of the boxes, bows, and trees! I almost had as much fun putting these gifts together as I do when I'm getting my own holiday packages ready to go under the tree!

As I played around with different layout ideas, it was Clean and Simple for the win! I really felt like this clean look really shows off the cute details! I did decided to add the "be Merry" sentiment, which is from the Just Sentiments: Be Merry stamp set to give it just a little something extra and a pop of color!

This tree is stamped in Green Parakeet and New Leaf ink to give it a more traditional look with some Raspberry Fizz garland. A Raspberry Fizz star adorns the top with a Raspberry Fizz and Pale Peony pot at the bottom to hold the tree!

I chose two of my favorite sentiments from the set and stamped those in black at the bottom! The "tis' the season" sentiment almost nestled perfectly around the striped pot.

I chose Raspberry Fizz and Pale Peony for this cheerful tree! I've always loved pink Christmas trees and the sky is the limit with this fun set! 

Both focal panels measure 5 by 3 3/4 inches to give a nice border with the card bases. I chose Tropical Teal and Green Parakeet to contrast with the two trees and their fun packages and pots! I added a few sparkling clear sequins for some holiday sparkle! Thanks for fluttering by!


Friday, September 25, 2020

Keeping Christmas {It's the MOST wonderful time of the year!}


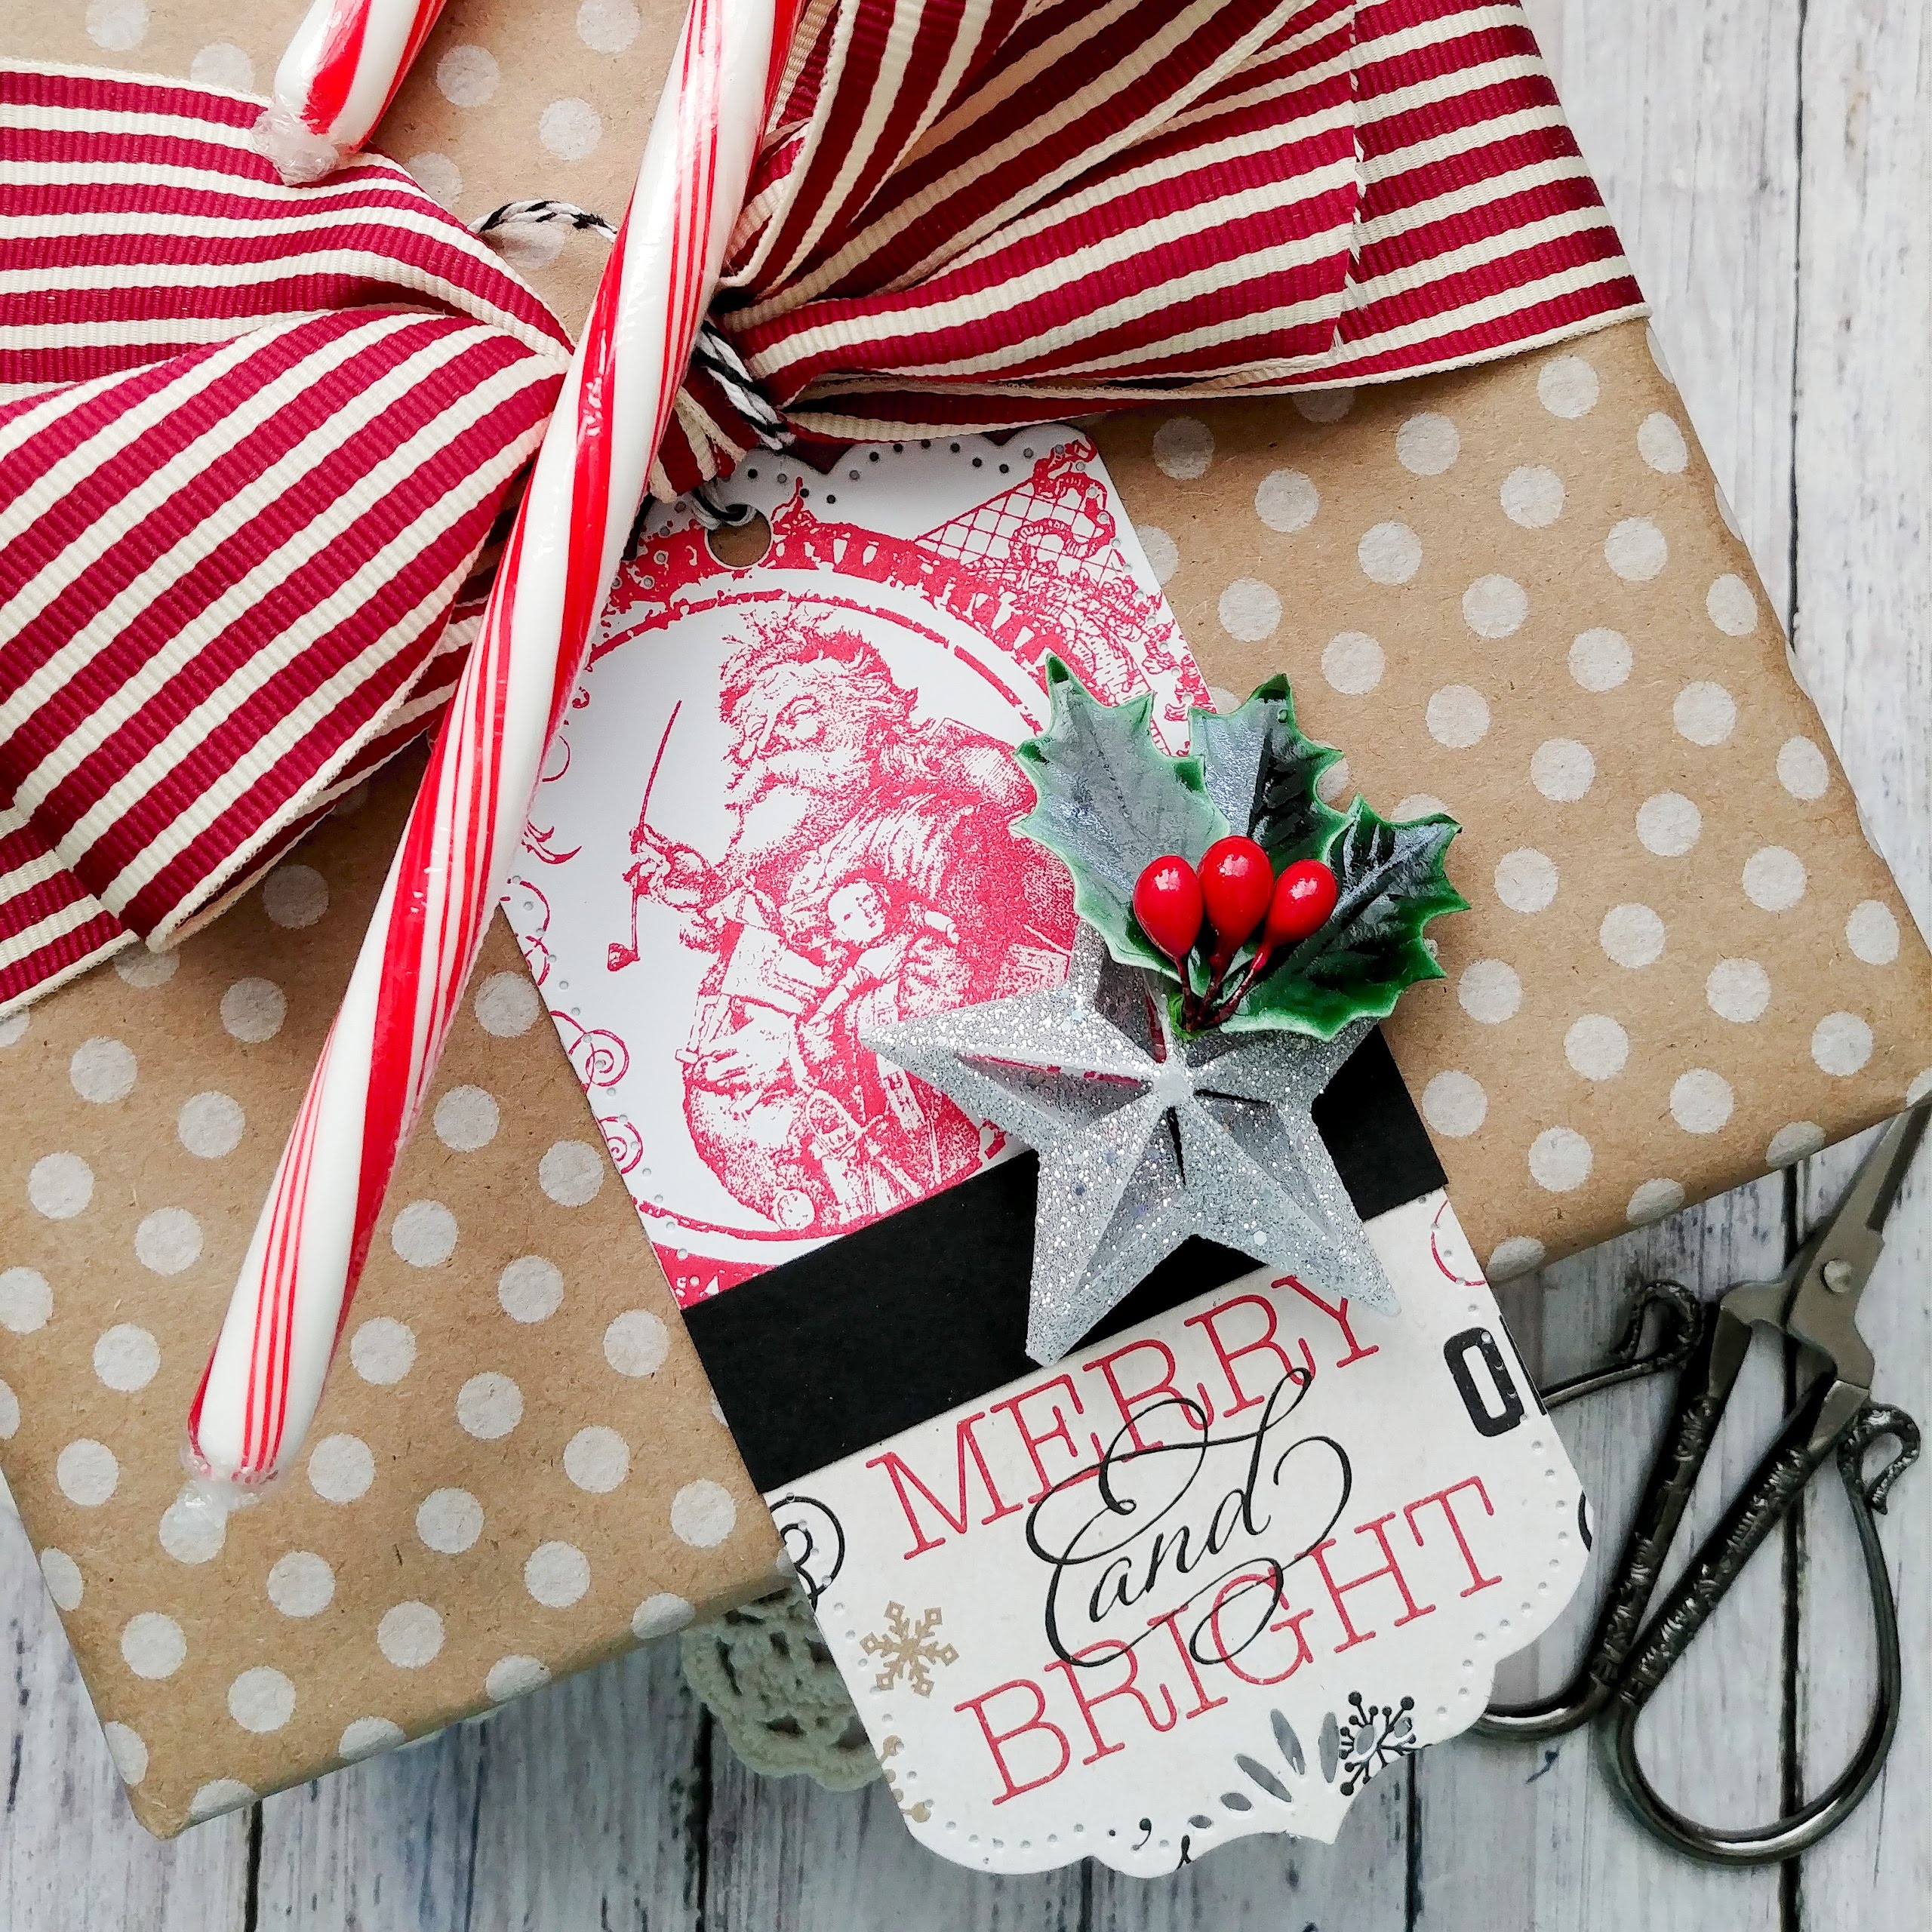
Hello and welcome! It's the 25th and that means that it's time for the Keeping Christmas Blog Hop! Christmas is exactly 3 months away and the countdown is on! I have two different projects to share with you today. Up first is a set of vintage Santa tags using a new Santa stamp that I got from Amazon this week! Before I dive into the details, here are the links to the other designers' blogs! I can't wait to see what they've been up to!

Kelly Lunceford (Creator)


It is from the Deep Red stamp company and I just love how nicely it fits onto these large tags! You can see it HERE. It is quite a large image, but I chose to just use a portion of it on today's tags. 

I die cut three of the Basic Bookmark 3 die out of white cardstock and then stamped the Santa image in Pure Poppy ink. The bottom portion of the tag is die cut using the same die, but this time out of pattern paper, making sure to line it up with the sentiments I wanted to use.

I added a strip of black cardstock where the image and the pattern paper meet. I rummaged around in my Christmas embellishment collection to unearth these fabulous glittery stars!

I added them to the tags using hot glue as well as the holly sprigs that I use so much! I quickly perused the Christmas section at Hobby Lobby the other day and didn't see that they had these in stock yet! I sure hope they carry them again this year...they are one of my favorite go-to embellishments for Christmas crafting!

My next project uses scraps left over from last month's Keeping Christmas post. I have quite a few left over and I thought I'd put them to good use by making some little favor boxes using the Favor It Box 4 die collection.

I also used the Scalloped Tag Collection for the tags all decked out with trees, candycanes, wreaths, snowflakes and gingerbread boys!

I made 5 of these in total, but really could have kept going with all of the scraps I have! I'm planning on using these to fill with a little lotion, lip balm, and sweet treats....most likely a vintage foil wrapped Santa! I think he would be so cute peeking out of the top!

I tied the tags up with some Pure Poppy Baker's Twine and then added the tags using foam squares. I felt this was much easier than trying to tie the twine around the handle of the bag. This ensures that the tag will lay exactly how I want it! LOL!

The sentiments are heat embossed in white onto the tags using Ranger's White Detail embossing powder. This my favorite white powder!


I'm excited to add these to my stash of Christmas creations! This is the time of year where I take inventory of what all I have. Once that is done, I can see which areas need a little bit more attention! I've been a cardmaking machine these last few months with all of my design team commitments, so I think I'm set on cards! Tags are always my favorite! Thanks for fluttering by!


Tuesday, September 22, 2020

Pinkfresh Studio {Making Merry}

Hello and welcome! I'm over on the Pinkfresh Studio Blog today sharing this Christmas design using a few of my favorites from the latest release!  I had so much fun coloring this beautiful Winterberry Background stamp for one of my card during the release and I couldn't wait to try it again! 

I chose to heat emboss it in silver and then color it with some icy blues with a pop of red on the berries! I die cut the panel using the Essentials: Diagonal Stitched Rectangles. This is my favorite quick trick to give my panel some added detail easily!  The letters were die cut out of teal cardstock using the fabulous Lea's Ornate Uppercase and lowercase alphabet dies twice fo each letter and glued them together with liquid glue.

I added them to the heat embossedMerry and Bright Frame  using little foam squares for dimension.  The Layered Snowflakes are die cut from silver specialty cardstock to add detail around the Frame. I also heat embossed the "Christmas is here bringing good cheer" sentiment, which is from the To You and Yours stamp set, onto a strip of vellum. I wrapped it around the focal panel and secured it in the back with clear tape.

I added the largest size of the Essentials: Jewels to the center of each snowflake using liquid glue to add sparkle, shine, AND to hide the little foam square! wink wink!
The Jewels come in 12 different colors and each color has an assortment of sizes in each of the colors to give your projects that little something extra!

This design would also work well in traditional colors if that is more your style. I really like creating an assortment of different kind of cards to send to the different people on my list. 

I layered the focal panel onto a top folding A2 cardbase using the same color cardstock for a subdued look. I toyed around with red, teal, and white, but ultimately settled on the grey. 

I love putting on some music and coloring this beautiful background...it is very therapeutic for me! I had a lot of fun creating this card! Thanks for fluttering by!


Monday, September 21, 2020

Flash Sale {Tidings of Joy}


It's Monday which means there is a brand-new Papertrey Ink/Ink to Paper Flash Sale! I know many of you are working hard at getting a head start on your holiday cards and projects so I chose one of my favorite stamp sets for this week's sale! I've also chosen some unexpected holiday colors to create two projects using the Season of Joy stamp set! This week's sale will run from today, September 21st at noon until Wednesday, September 23rd at noon. The sale will include:
STAMPS: Season of Joy

INK: Autumn Rose, Weathervane, Spring Rain, Scarlet Jewel

CARDSTOCK: Autumn Rose, Weathervane, Spring Rain Scarlet Jewel


I created two projects for you today using the cardstock and ink that is on sale this week. The first card {on the left} uses letters stamped in Scarlet Jewel and the wreath is stamped using the multi-step option. The second card has letters stamped in Autumn Rose and the wreath is stamped using the one-step stamp, but with two different inks: Spring Rain and Weathervane on the edges.

I heat embossed the "this holiday season" portion of the sentiment onto Scarlet Jewel cardstock to help balance the letters. I stamped "Tidings of" using Weathervane ink onto a panel of Spring Rain cardstock. I also added some Weathervane ink around the edges of the panel to give it a smokey look.

I heat embossed the "this blessed Christmas season" sentiment onto a strip of vellum and wrapped it around the Scarlet Jewel cardstock. It really made this section look so soft and pretty against the Autumn Rose letters.

Each card got a generous amount of white paint splatter to really make it look like snow. I use post-it notes to cover up certain areas that I don't want to get ink on them. In this case, the heat embossed portion on both cards.

I added some Ruby Slippers and White Nuvo drops here and there for some added pops of color. A few sparkling clear sequins here and there finish of these two designs! Thanks for fluttering by!


Saturday, September 19, 2020

Simon Says Stamp STAMPtember with Pinkfresh Studio


September is always such a fun month as we celebrate Simon Says Stamp's fun STAMPtember event! Today I'm sharing with you a card made using this year's collaborative set with Pinkfresh Studio! It is a beautiful set that allows you to create this floral arrangement in 4 easy to align images! I chose to use it as a frame in two different colorways; Peach and Coral!

This limited-edition, collaborative set will only be available in limited quantities and when they sell out, they're GONE! It does have a coordinating die, but I didn't use it on today's card. You can purchase this limited set at Simon Says Stamp under the STAMPtember category. 

I used my MISTI to align the stamps to create this colorful panel. Once I was done and saw how pretty it turned out, I wish I would have stamped a few more! This is a PERFECT stamp set to mass-produce cards...just swap out the sentiments and you could have an all-occasion set of cards made in no time!

The INK COLORS that I used on today's card are: Fresh Pear and Olive for the leaves, Apricot and Peach Fuzz for one set of flowers and Coral Reed and Passion Fruit for the other. The sentiment is stamped in black for some contrast and to let it pop! There are some really fun and unique sentiments in this set that you won't find anywhere else! A few Jewels in coordinating colors finish off this floral design! Thanks for fluttering by!