Tuesday, September 10, 2019

Ink to Paper Transformation Tuesday {Grateful from the bottom of my Heart}

It's my turn for this week's Ink to Paper Transformation Tuesday! Just as summer is transforming into fall, I took one of my summer designs and tweaked it into today's new design! While not a single leaf on my trees have changed color, I am sure having fun with all of the fun new products from the last release!

My original card is shown below, and was one of my favorites from the July release! It has long since been given to its new owner so I thought it would be fun to swap out the On the Border: Floral Bliss die for the new On the Border: Fall for Foliage die
This is my original card; I did the ink blending directly on the die on this card. I also used a stamped sentiment directly on the card base and blended the ink in the center.

To begin this new design, I die cut the border 4 times; I wanted to double stack each piece for a nice and sturdy weight. Once that was done, I set those aside and got to work on the main panel. I used the Nesting Basics: Pierced Rectangles dies to add the detail around the 5 1/2 by 4 1/4 inch piece of white cardstock. Once that was done, I stamped the "from the bottom of my heart" portion, which is from the Thankful Thoughts stamp set ,in black using my mini MISTI. 

I die cut the "Grateful" portion using the Thankful Thoughts die collection out of Simply Chartreuse cardstock and then stamped it using black ink.

Once all of that was done, I was able to decide how large of an opening I would need between the two die cut border pieces. I measured it with a ruler and then cut 2 pieces of sticky notes to cover up the middle portion while I did the ink blending. It ended up measuring one inch which was helpful. I added Canyon Clay, Simply Chartreuse, and Harvest Gold INK.

Once the blending was done, I had a nice crisp line to attach the leaf borders using liquid glue. I also added the "Grateful" die cut using liquid glue as well. The entire panel was added to a top folding A2 card base using ScorTape. Thanks for fluttering by!

SugarPea Designs Sweet Peek Week Day 2

Hello and welcome to day 2 of the SugarPea Designs Holiday Sweet Peek Week! Didn't you just love those sweet gnomes from yesterday? Today is just as fun and today the team is showcasing even more amazing new products! You'll want to make sure to stop by the SugarPea Designs Blog linked below to read all about the prizes and festivities going on this week! Leave a comment on my blog for a chance to win!


My card for today features the new Hey Winter stamp set. If you loved the Hey Summer satmp set, you're sure to fall in love with this one as well! I've created a simple card today to really let the new Geo Snowflake Stencil shine! And...speaking of shine...these photos don't do this background any justice. I used Distress Oxide ink and Moonstone Glimmer Paste to create a gorgeous sparkly background! It really looks like sparkling snow in real life!

No photo description available.

No photo description available.


I stamped the bear and scarf and used Copic markers to color them. Once that was done, I used the Hey Winter SugarCuts to die cut them. I also used the Card Front Element Builder for the stitched detail around the blue card panel as well as the snow. The "Happy Holidays" sentiment is stamped in black and the "'tis the season" sentiment is heat embossed in white. I had a lot of fun creating this sparkling snowy card! Thanks for fluttering by!


Monday, September 9, 2019

Pinkfresh Studio STAMPtember {Smile...you've got this}

Hello and welcome! I'm thrilled to be here again sharing another fabulous Simon Says Stamp STAMPtember stamp set from Pinkfresh Studio. You can purchase the stamp/die bundle HERE. It is so amazing; the die is a partial die so you can have certain portions "flaring" away as you can see in my photos! It is a beautiful new set so I couldn't resist making 2 cards using 2 of the fabulous sentiments.

To begin these two cards, I die cut two white panels using theEssentials Stitched Rectangles dies and then die cut the floral pieces using the partial die included in the bundle (linked above). Once they were die cut, I placed the panels in my mini MISTI to stamp the beautiful floral image using black ink. I really like using my MISTI for stamps like this because you can really get a solid image.
I used an assortment of alcohol markers to color in the image. Once that was done, I die cut two hexagons from the Essentials: Basic label Frames and stamped the two sentiments using black ink. I added them to the colored panels using foam squares for dimension.

I cut two black card bases to attach the colored panels. You'll want to make sure you flip the edges of the portions of the die cut panel that you want to raise. I forgot to do that on my first card and it was a pain! LOL! I added the die cut panels to the black bases using foam squares to really give the raised portions some added depth.

I added a few Essentials Jewels to the flowers for some added detail, texture, and shine! I had a lot of fun working on these two cards! This image is so much fun to color! Thanks for fluttering by!

SugarPea Designs Sweet Peek Week Day 1

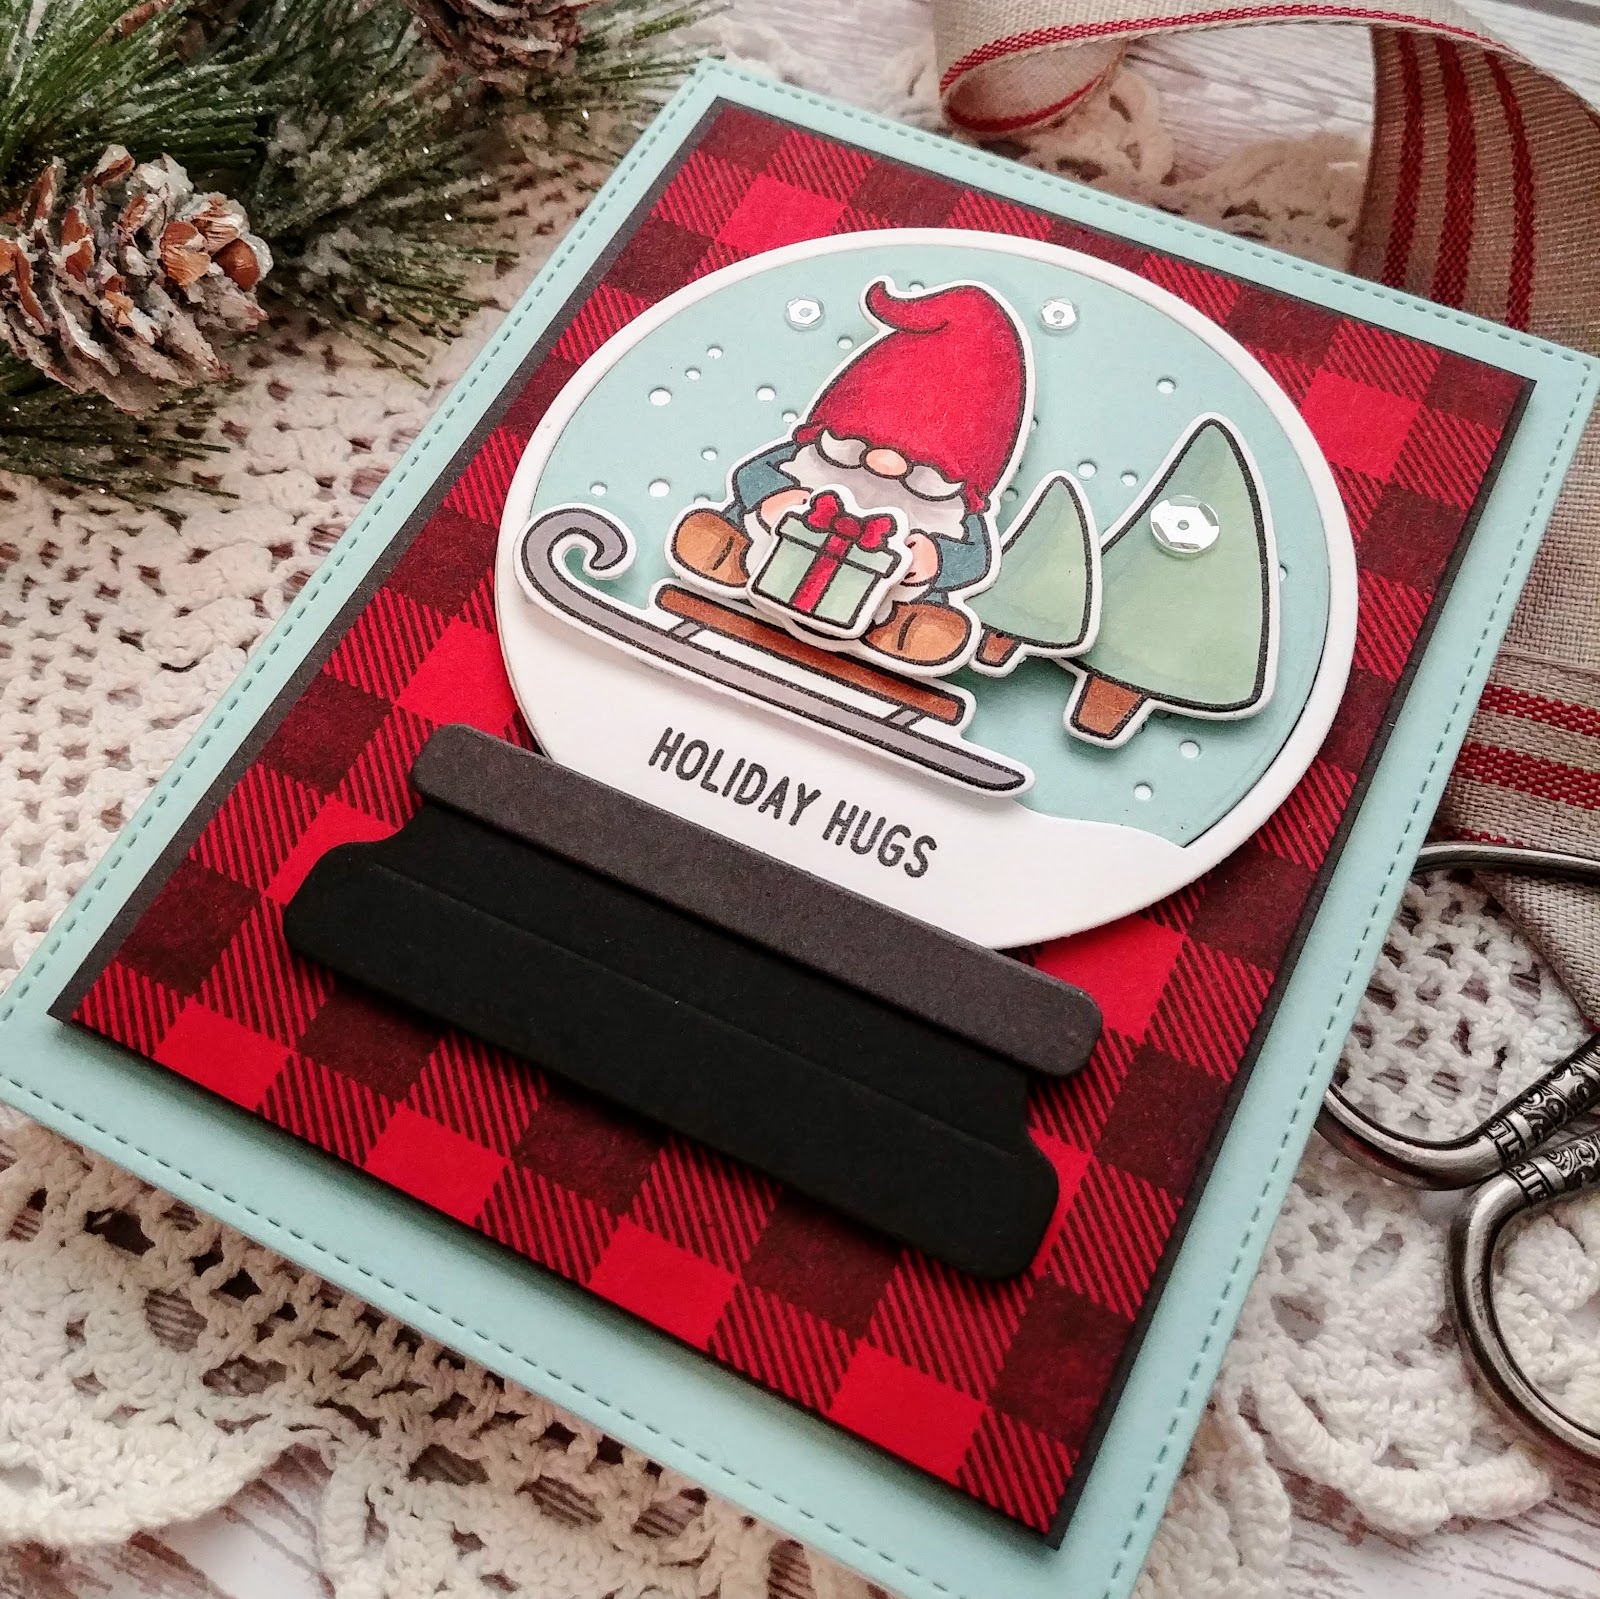
Are you ready? This week is going to be so much fun! It's the SugarPea Designs Holiday Sweet Peek Week! I love everything being released SO MUCH! Honestly, if I only had this release to play with this season, I would be perfectly happy and content to create all kinds of fun projects for family, friends, and loved ones!  Today the team is showcasing this adorable new Gnome For Christmas stamp set paired with the Buffalo Check Background Stamp and Snow Globe SugarCut. Before I dive into the details of today's project, make sure you get a chance to stop by the other designers' blogs to see what they have come up with!

I had so much fun stamping and coloring these adorable gnomes. I colored all of the images using Copic markers. I only used this one on today's card, but you'll be seeing the rest of these cuties popping up over the next few days! I colored them to look like the Travelocity Gnome! LOL! 

Once they were all colored, I used the coordinating Gnome For Christmas SugarCuts to die cut them. I set them aside to get to work on the Snow Globe, which is so much fun! I know I will be reaching for this again and again! The sentiment is stamped in black directly onto the snow portion of the snow globe. It would also be really fun to heat emboss the sentiment along the bottom of the snow globe for some realistic detail.

The red cardstock is stamped in black using the AMAZING new Buffalo Check Background Stamp. You'll be seeing this pop up quite a bit during the week as well! Ha ha!

The aqua piece of cardstock is die cut using the always useful Card Front Element Builder. Once I had all of the elements ready to go, I got to work assembling the card.
 

I added a few sparkling clear sequins here and there for some added detail. I had a lot of fun working on this design! Make sure you stop by again tomorrow for day 2! Thanks for fluttering by!

Sunday, September 8, 2019

Reverse Confetti STAMPtember {wonderful in every way}

Hello! It's September, which means it's time for Simon Says Stamp's STAMPtember event! I'm thrilled to be helping Reverse Confetti launch their collaborative set!  I've created two similar, yet different cards for the event! You can purchase the stamp set on the SSS website linked above!


I decided to create some earthy cards using the new set as well as incorporating the new Stitched Circles Cover Panel Confetti cuts that was released this weekend! To begin, I stamped the black outline of the leafy branch. I added the tree different colored leaves and berries. The stamp package was printed in these three different colors to show how they could be used and I liked the combination so well, I decided to use it on these two cards!

I added some corrugated paper to the background as well as some frames to add some extra detail and texture! I stamped the "love and hugs" and "wonderful in every way" sentiments, which are included in this new set, in black at the bottom. I added a few sparkling clear sequins for some added shine! Thanks for fluttering by!


Reverse Confetti September Release Blog Hop

Hello and welcome to the Reverse Confetti new release Blog Hop! I hope you've enjoyed the last three days festivities! Today I'm sharing a couple of cards using some of my favorites from the release! Here is the list of all of the amazing designers participating in today's hop! You'll want to stop by each and every one to see what they have come up with using these fun new stamps, dies, etc!


I'm sharing two similar cards using my unexpected favorite stamp set from the release; Joyous Holiday! I'm in love with these sweet little angels and all of the other fun details that are included. I still haven't even scratched the surface of its possibilities; the Christmas tree, the cute mouse, etc!
To begin this card, I did some ink blending around the edges of the red cardstock. Once that was done, I used the new All the Stars Confetti Cuts to die cut the stars. I layered it onto a standard top folding A2 card base using foam squares. I really like the dimension it adds and the effect as you can see through the stars!


I stamped all of the images twice because I knew I wanted to make 2 cards using these sweet images. I colored them using Copic markers and then die cut them using the Joyous Holiday Confetti Cuts


Once again, I couldn't resist using this Stitched Window Confetti Cuts to set the stage for this angelic scene! I added it to the red panel using foam squares. Once that was done, I was able to add the stamped images. The sprig of holly and holly berries is from the new Joys of the Season stamp set and I felt it added just the right touch to these two cards.


I used the  Blessed Confetti Cuts to die cut the word twice from red cardstock and once from gold specialty paper. I glued them together and carefully added it to the top of the window using a 2 way glue pen.


I added a trio of sparkling clear sequins to each of the cards using liquid glue! I had so much fun working on these two cards! Thanks for fluttering by!


Saturday, September 7, 2019

Saturday Showcase {You are AMAZING to the core!}

Hello and welcome this week's Ink to Paper Saturday Showcase! Today a few of us have created projects using the new Tag Creations: Delightful Bunch die collection and the coordinating Tag Creations: Delightful Bunch mini stamp set

While Autumn is definitely on the horizon, it's not here quite yet! I wanted to create a card with the current weather in mind; green leaves, crisp apples, and blue skies!  The Tag Creations: Delightful Bunch is one of my favorites from the new release and is perfect ot create cards and tags alike! I did't get a chance to use it on a card during the release, so I was happy to make two similar cards today!

I think it's pretty obvious how much I love the new Lovely Leaves stamp set and many of you probably thought to yourself," I can't believe she used that set AGAIN!" LOL! I hope not! I really wanted to give the feeling of these bushels of apples right below a big apple tree!
I did some ink blending around the edges of the white panels and then added the stamped and die cut leaves. I added them to the card using foam squares.

I used all of the dies that are included in the set except for the portion that creates the tag. The sentiment is heat embossed in white onto the die cut labels. The cute sentiments are perfect to adorn these bushels of apples!
I had so much fun working on these two cards! They will be perfect to go with the tags I made during the release! Thanks for fluttering by!