Wednesday, November 16, 2022

Papertrey Ink November Release Countdown Day 4

I can't believe we've made it to the last day of the Papertrey Ink November release countdown! On day one I mentioned that I hadn't listened to any Christmas music, yet, but that has ALL changed! ha ha! I was having so much fun crafting and listening to Christmas tunes finishing up my projects for the release!
My first card for today uses the new Winter Bench stamp/die set! I actually made two cards; there's one photo of the second card a little further down. I ended up die cutting everything twice because I thought I was going to use two of the trees on one card, but since I didn't, I decided to make a second card while I still had everything out!

I had fun stamping all the cute accessories to bring this fun Christmastime scene to life!

I wanted to make a plaid pillow, so I die cut the pillow shape from pattern paper. While I was looking through the pad that the plaid paper came from, I happened upon the paper I used for the background which ended up being perfect! It looks just like a wall of bead board or Shiplap. I used it horizontally on my second card so it looks more like Shiplap.

I added a pinecone and pine branches to the corner for additional detail.

This is the second card that I made, just a few differences, but I like them both! 

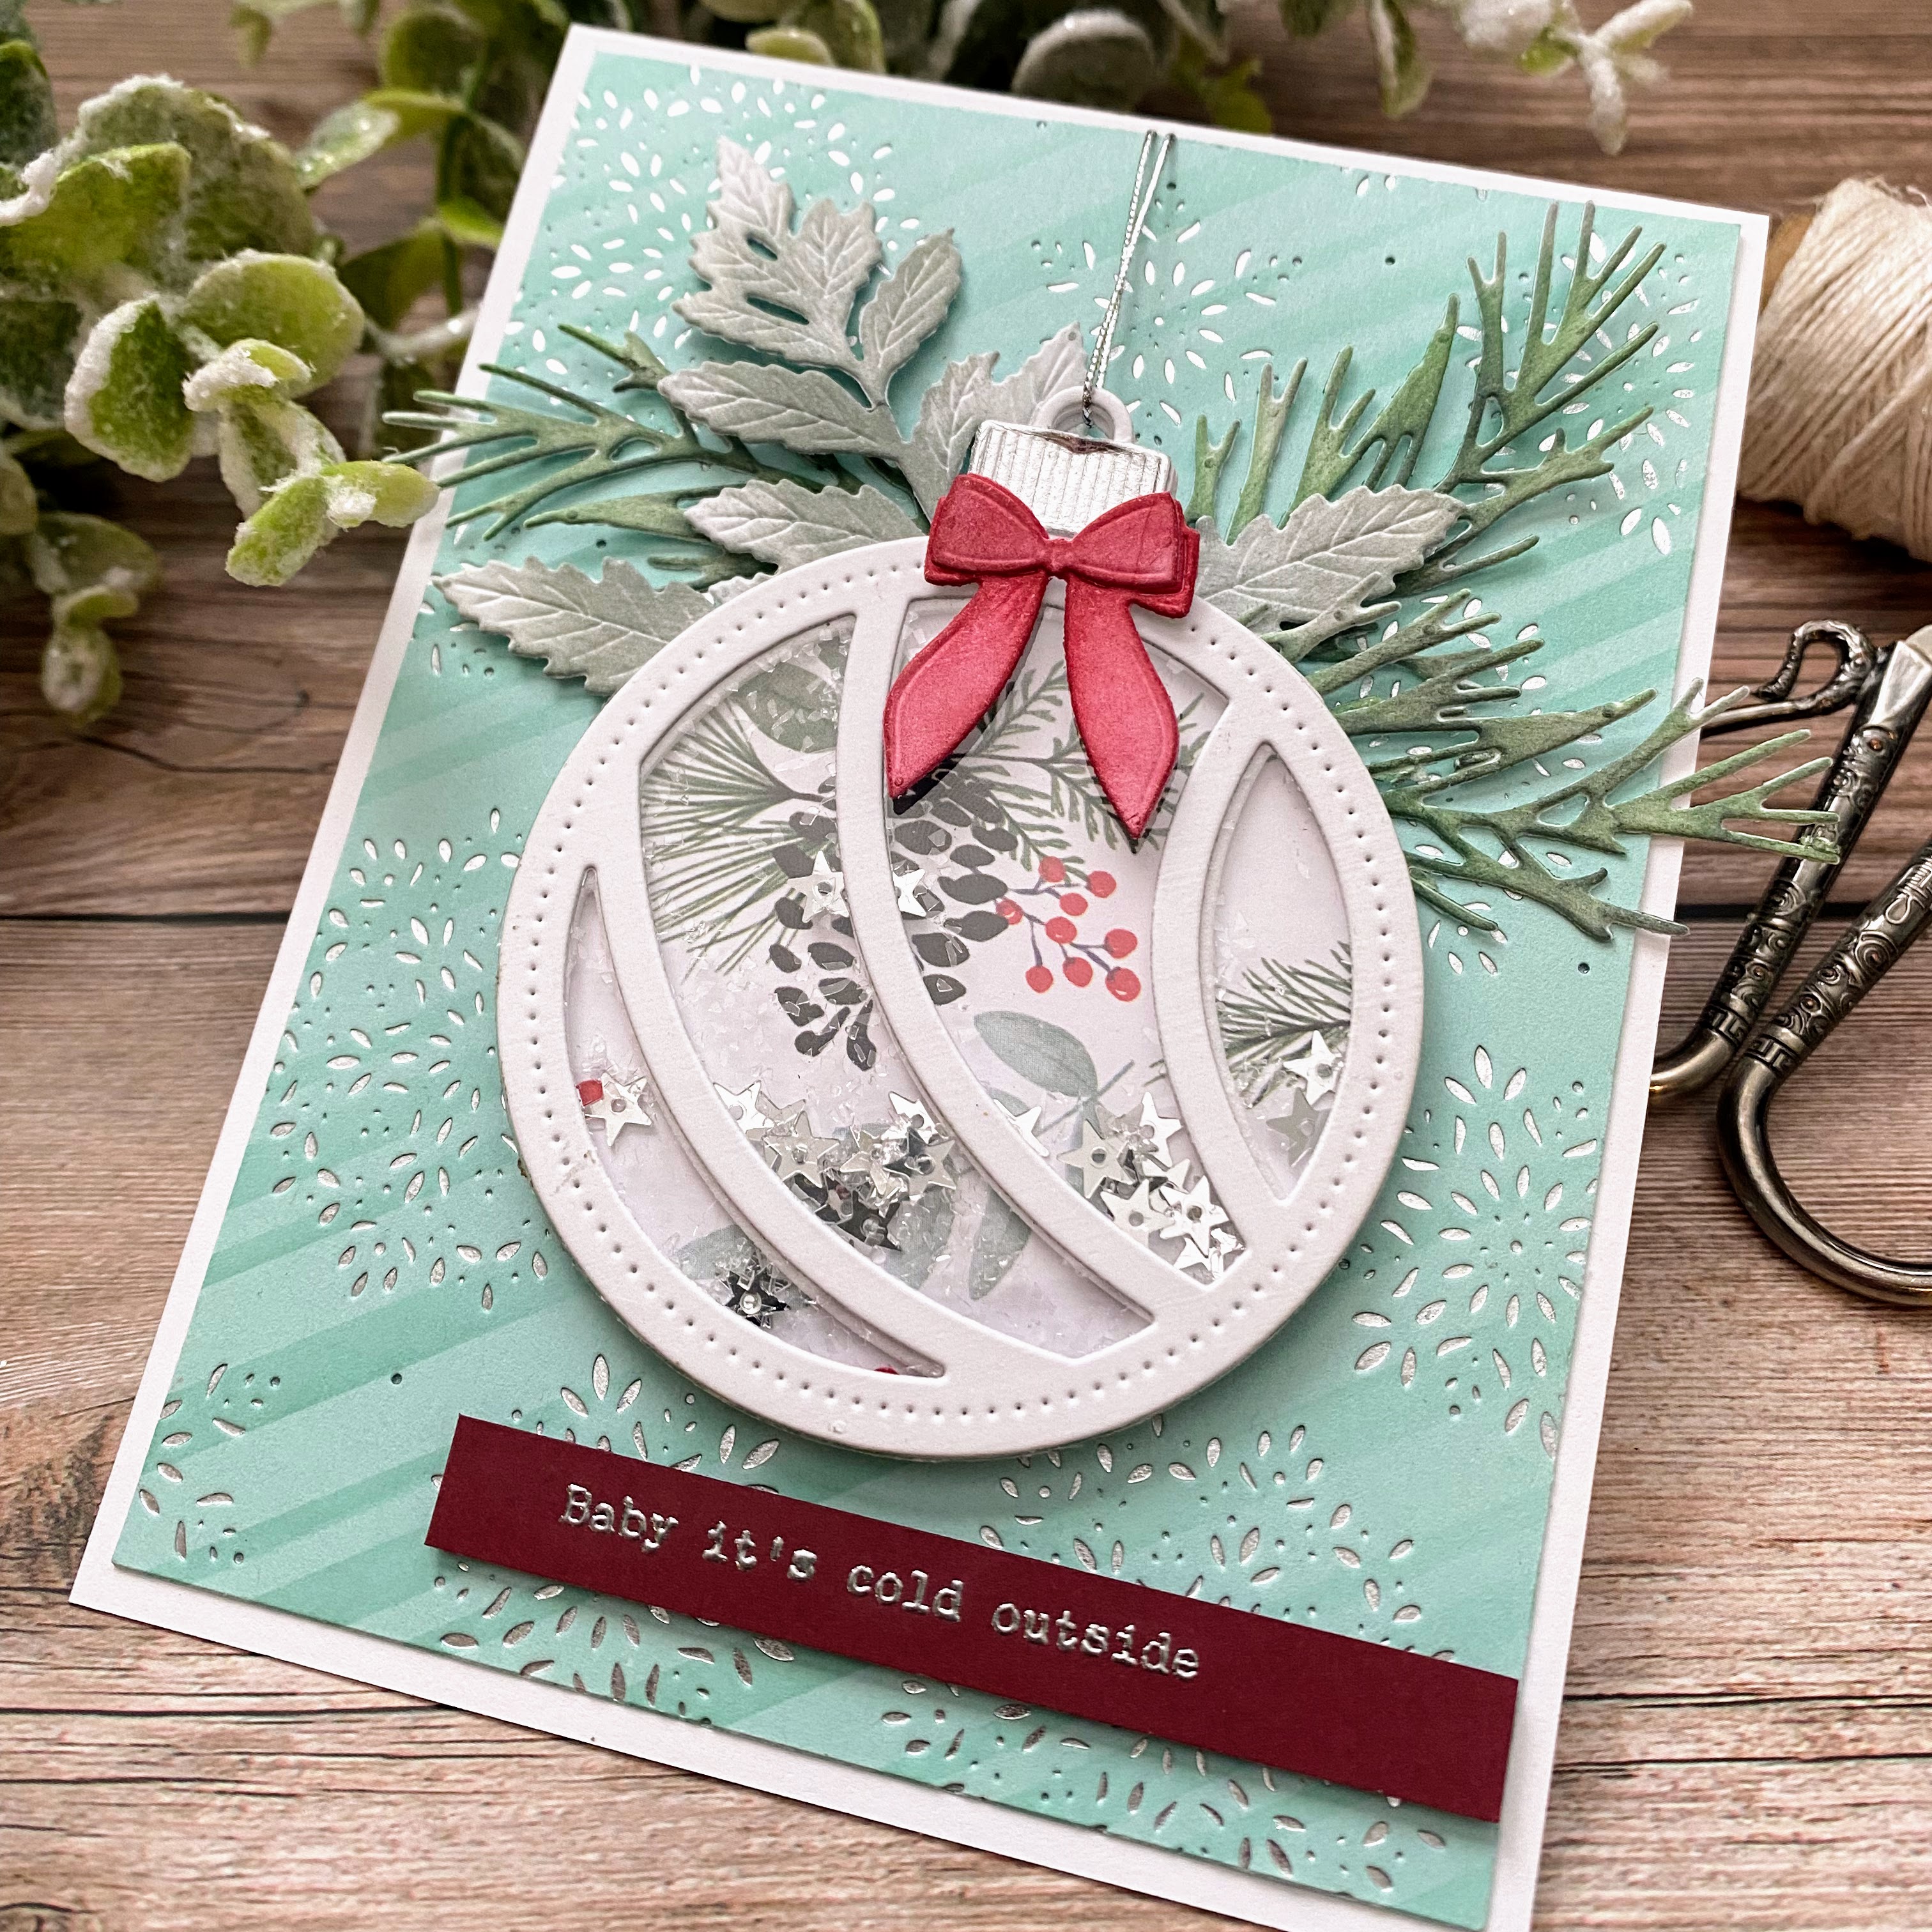
My next card uses the new Christmas Shaker Dies; if you've been around awhile then you know that I'm not much of a shaker card kind of gal.(I seriously struggle) With these new dies it is SUPER easy; there is a bell shape, tree shape, and the ornament that I chose to use today.

For my shaker element, I die cut the backer portion three times; once from acetate, once from pattern paper, and once from white cardstock. For the detail portion on top, I die cut it twice; once from fun foam and once from white cardstock. I also die cut the cute topper out of metallic silver cardstock for realism.

I chose some sprinkles and sequins from the retired Shakers and Sprinkles set to fill up my ornament.

The background was created by stenciling an Aqua Mist panel of cardstock using the new Show Your Stripes stencil set. I also added the foiled  Fanciful Snowflakes Background because I'm obsessed!

I chose some leaf dies that went well with the foliage on the pattern paper I used in the shaker. I tucked them behind the ornament.

I looped some silver cord at the top of the ornament and secured it on the back of the focal panel using tape. I also added a bow from the Bows Galore die set for added detail. The sentiment, which is from the new Just Sentiments: Winter Wonderland, is heat embossed in silver on a strip of Scarlet Jewel cardstock. Tomorrow night is release night at 10 PM ET. Thanks for fluttering by!


Tuesday, November 15, 2022

Papertrey Ink November Release Countdown Day 3

It's day 3 of the Papertrey Ink November release countdown! I have a big post today featuring 3 cards using the new Christmastime stamp/die set and one card using the new Gingerbread House Dies. My first card for today uses the cute new wooden horses from the Christmastime stamp set and a few of the gifts that are included and one of the little trees. 

The images that are included in this set are so absolutely adorable and I had so much fun working on the three cards using this set. My second card uses ALL of the images so you can get a feel for the entire set. 

To begin this card, I die cut everything I needed to make the wreath and bow using the Rustic Wood Star dies. I die cut them from white cardstock and then colored the wreath using Prairie Grass, Olive Twist, and Pinefeather ink. The bow is colored using Fine Linen and Saffron Spice ink. I glued the wreath together using liquid glue and assembled the wreath using both foam squares and liquid glue.

I die cut the two horses, the gifts, tree, and NOEL letters using the Christmastime dies and stamped them using the Christmastime stamp set. I chose a neutral color palette for a warm and cozy Christmas feel. I set the wreath and stamped images aside and got to work on the background. I stamped a Vintage Cream panel using the Weathered Wood Background Stamp using Classic Kraft ink. I die cut it using the new Love to Layer: Rectangles dies and then added some ink blending around the edges. Actually, I layered it over a slightly larger piece of Vintage Cream cardstock adhering it using ScorTape; my plates are super warped and make some of my larger die cut pieces warp as well. I layered them together so it would be flat (hopefully that makes sense).

I cut an A2 panel of Cocoa Bean cardstock and foiled it using silver foil and the Fanciful Snowflake Background Hot Foil Plate. I added the rectangle over the top and then built the scene. I also added a few accents by the NOEL sentiment using images from the Deliver By the 2th stamp set that was showcased yesterday. I added some glitter here and there to finish it off. I added it to a top folding A2 card base using liquid glue.

My second card uses ALL the images and the included sentiment. I used the stamp guide for all of the color choices on this card. I love this set; so whimsical and reminiscent of days gone by!

My first card featured the die cut letters, but you can see that I stamped them directly to the wooden sign for a hand painted look.

I hot foiled (yes, again) a Soft Stone piece of cardstock and silver foil and then die cut it using the new Love to Layer: Rectangles dies. I love that beautiful detail around the edges.

I created a tone-on-tone background by die cutting a panel using the Cover Plate: Ornate Die and glued it to an A2 size panel of Ocean Tides cardstock. I thought this would look like some beautiful mill work that you might find in a vintage home to help enhance the feel!

Because I hot foiled the background rectangle, it made it impossible to stamp the sentiment so I opted to stamp it on a square that was die cut using the Love to Layer: Squares die and added it using foam squares.

I added some glitter for some sparkle and shine. The entire panel is added to a top folding A2 card base using liquid glue.

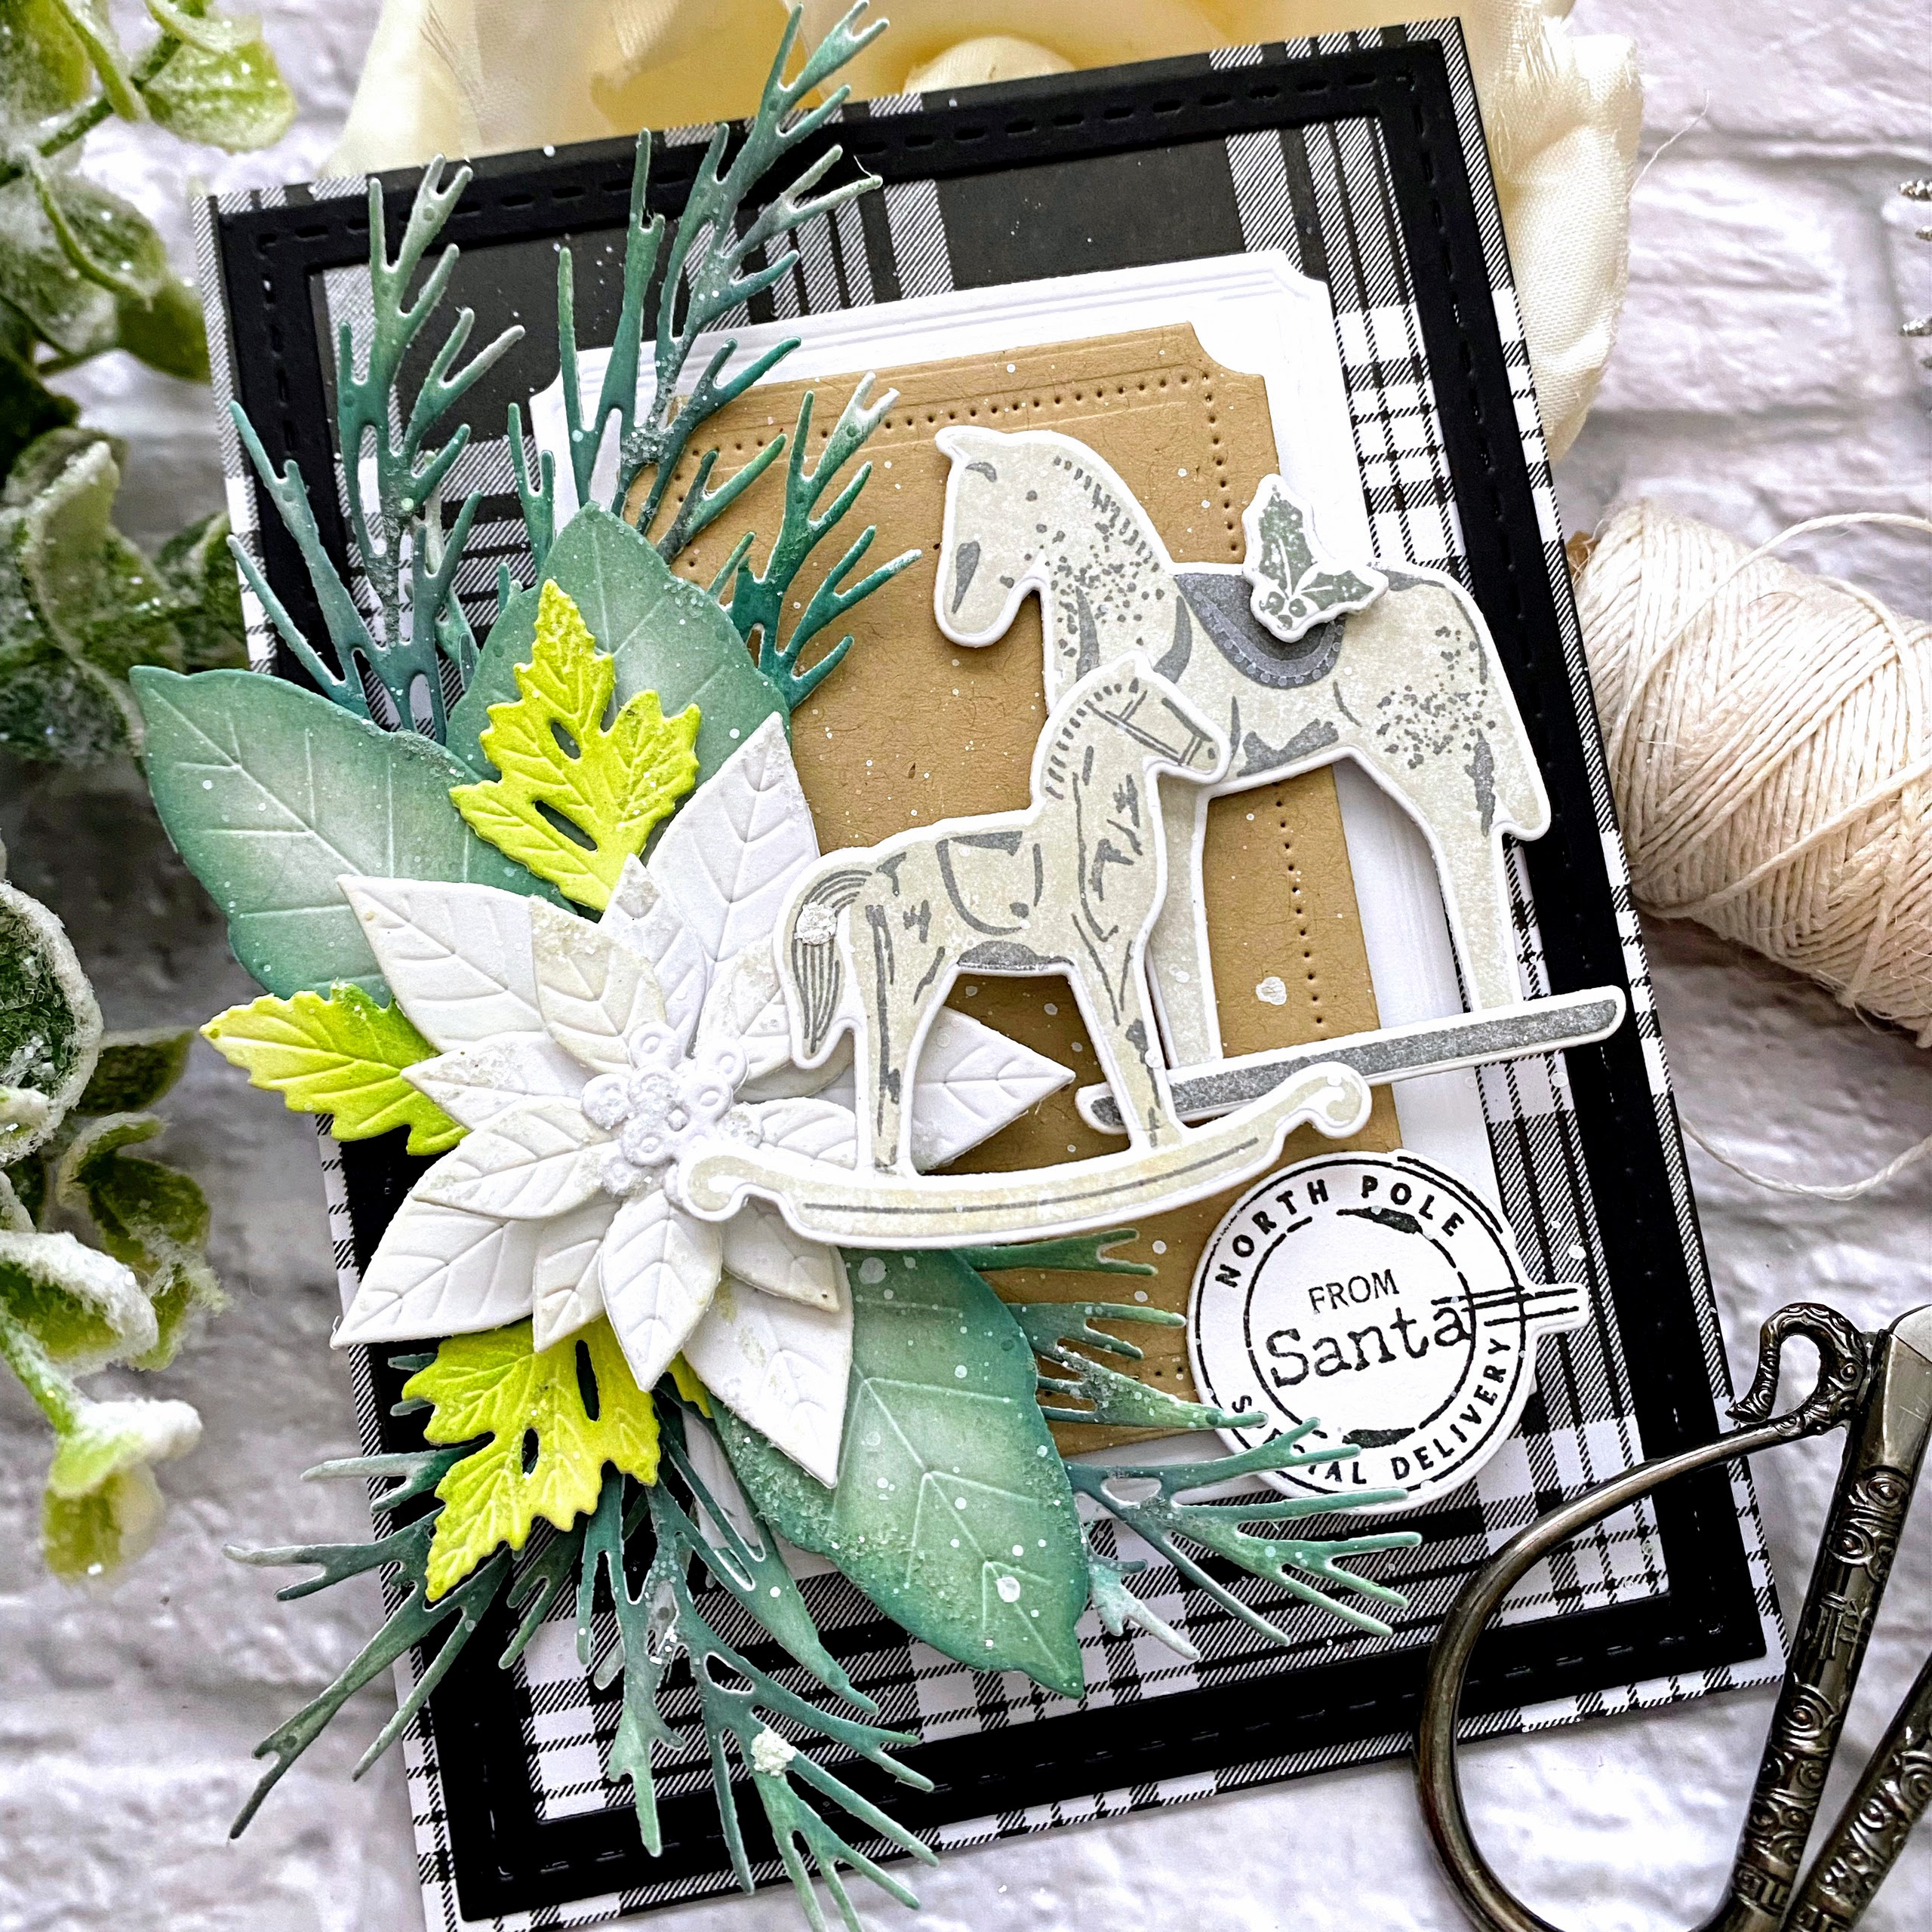
My third card using the Christmastime stamp/die set is also on the neutral side! I chose to use just the two horses for this card and a label indicating they are a gift sent from Santa!

To begin, I die cut the pine and leaves and colored them using Distress Oxide inks. I also die cut the poinsettia and added a hint of Antique Linen ink (really hard to see in the photos).

I cut an A2 panel of plaid pattern paper and layered it onto a top folding A2 card base. The stitched frame is added over the top using liquid glue for definition. The frame was actually an afterthought; once I'd photographed the card, it looked a little "lost", so I added the frame to ground it!

The white rectangle is the middle size included in the new Love to Layer: Rectangles die set and the Kraft piece is from the new Iconic Christmas die that was showcased yesterday. I layered the greenery in the left corner using both liquid glue and foam squares, tucking things here and there until I was happy with the arrangement.

I added the poinsettia over the top of the greenery and then layered the horses and the "From Santa" image using foam squares.

I gave everything a splattering of white paint and a sprinkling of glitter to finish it off!

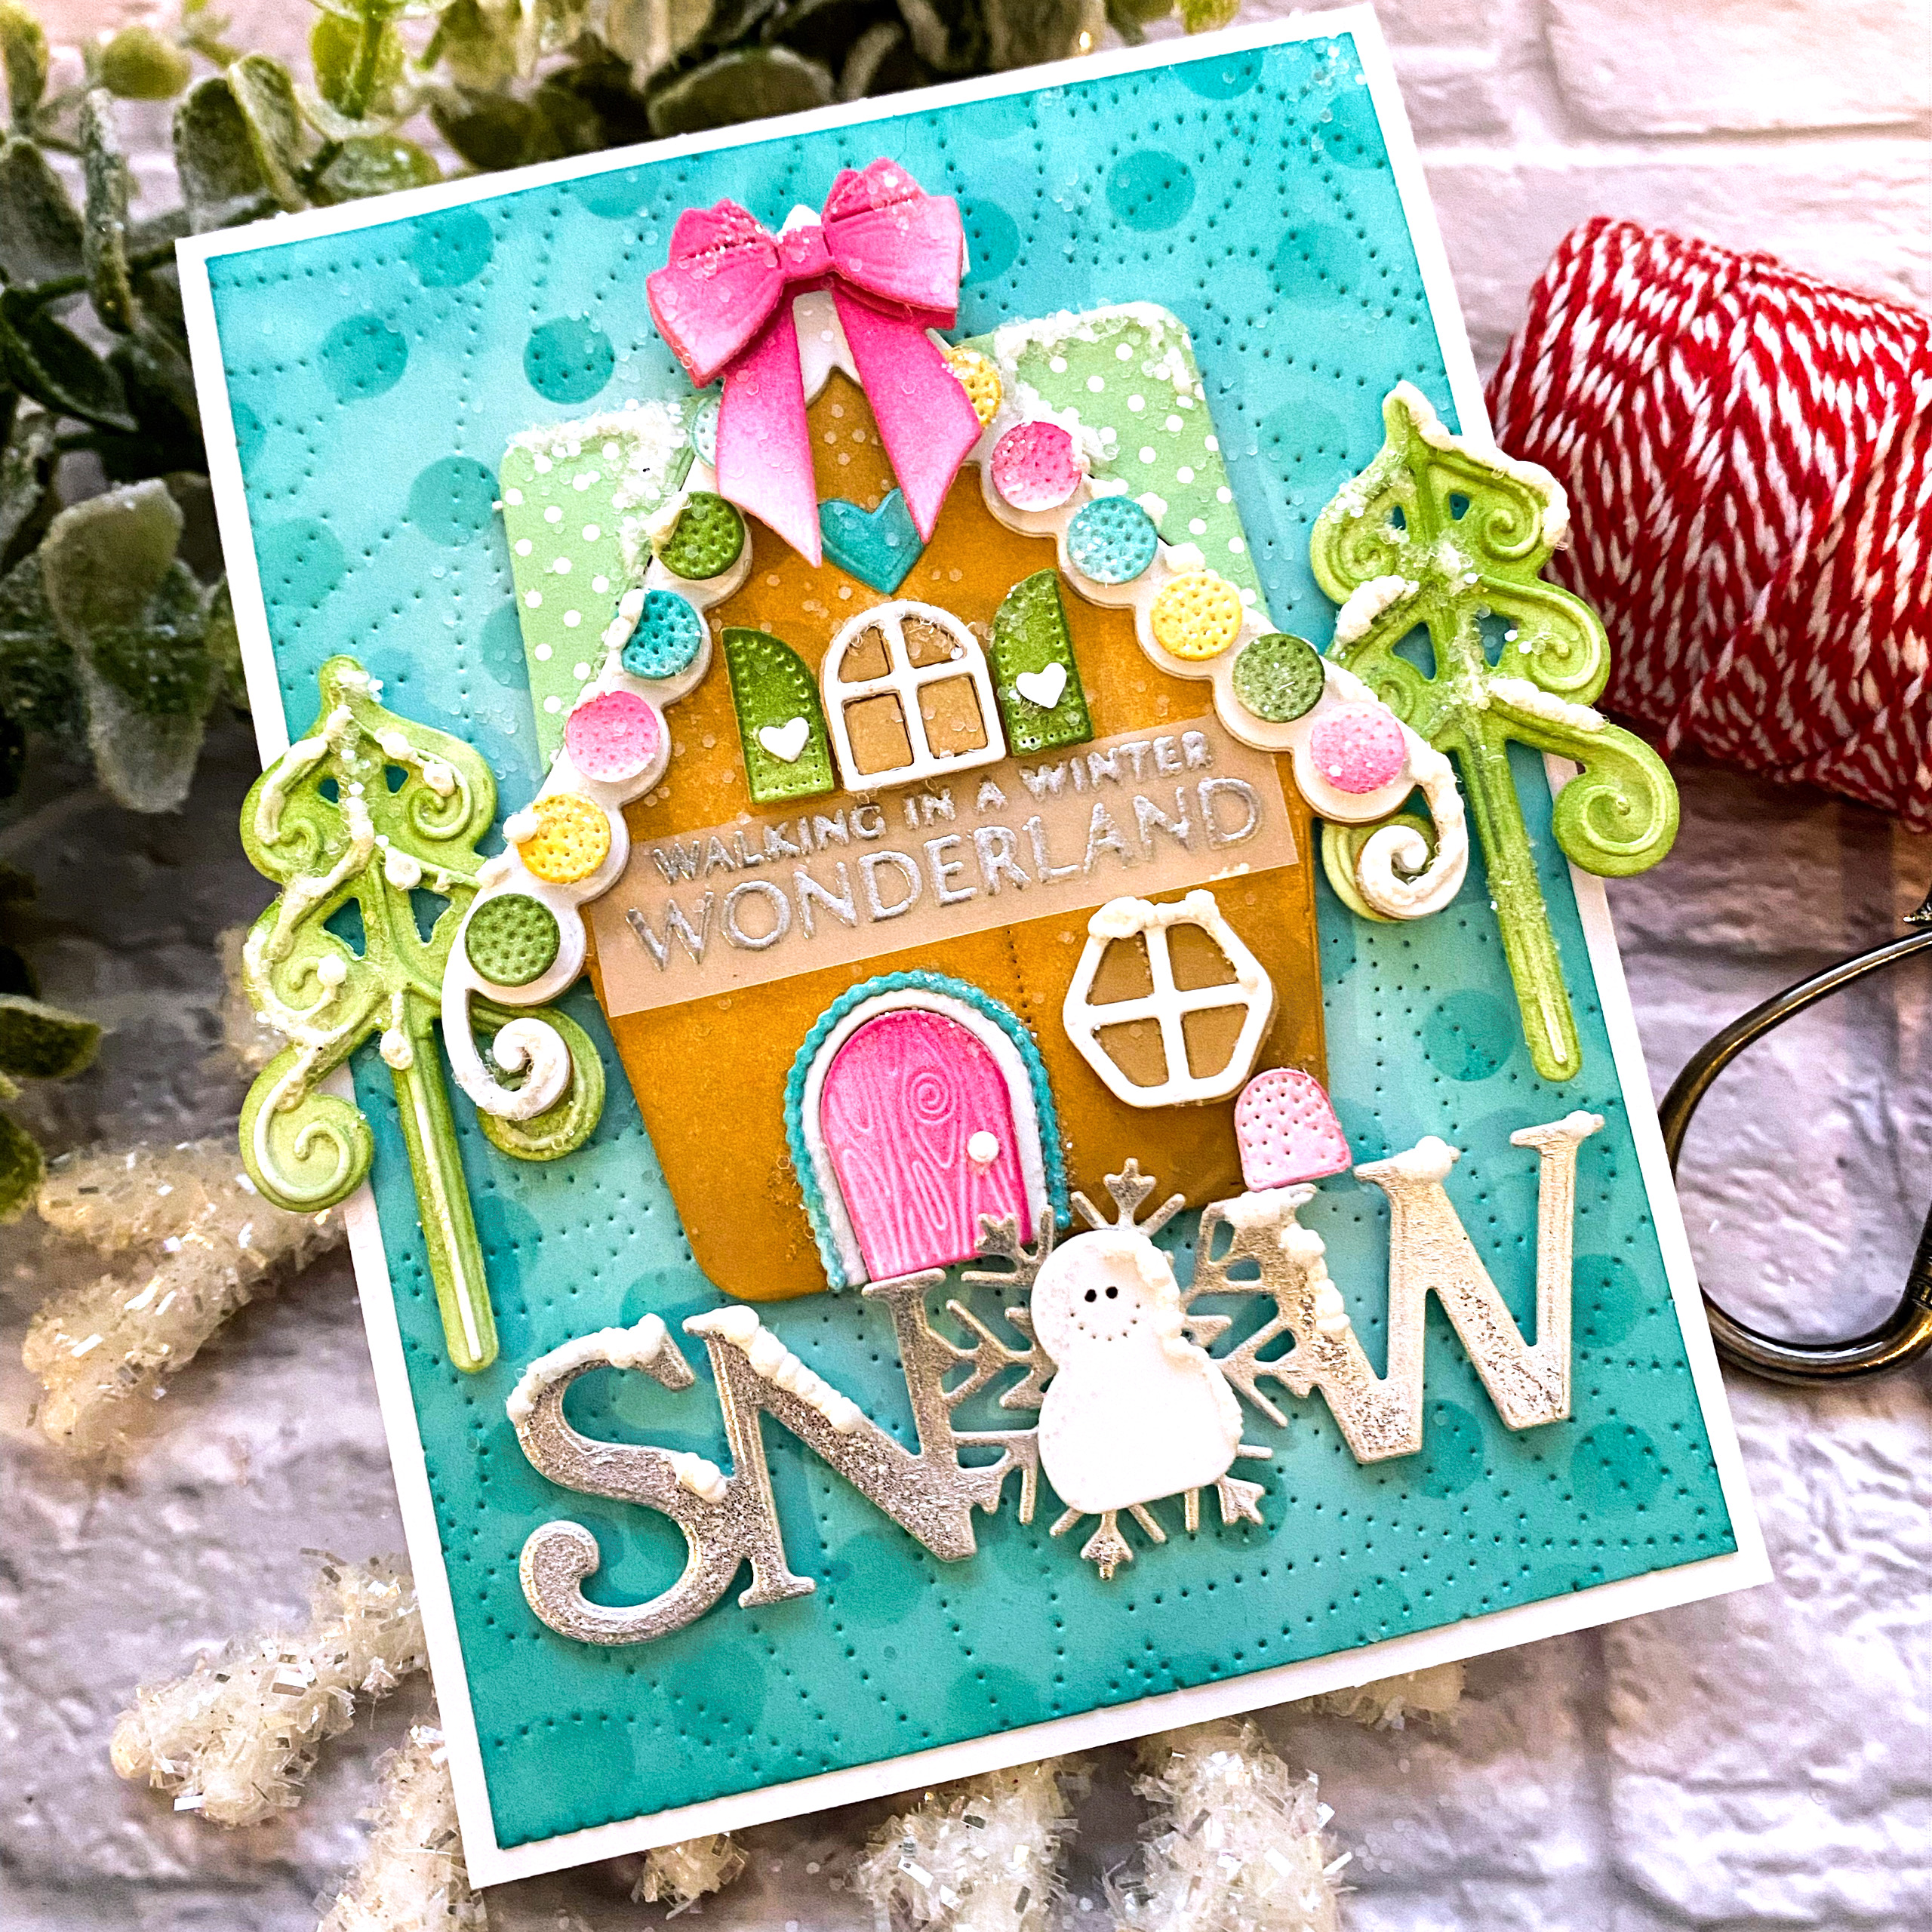
Move aside, neutrals, it's time for some COLOR!!! My 4th and final card for today features the new Gingerbread House dies. A few designers are also showcasing the adorable new Gingerbread Camper that I can't wait to use!

I die cut all of the pieces from white cardstock and then colored them with mini blending brushes and ink pads. I added a bow from the Bows Galore die set on the top of the roof for added whimsy!

The background was created by cutting a 4 by 5 1/ 4inch piece of Aqua Mist cardstock and die cutting it using the new Stitched Floral background. I also added the dots using Tropic Teal ink and the new dots stencils that were showcased on day 1. I added some ink around the edges as well to give it some definition. I added the SNOW sentiment that was die cut using the Larger than Life: Snow die. I added liquid applique to the house, the trees, the letters, and the snowman.
The "Walking in a Winter Wonderland" sentiment is from a stamp set being showcased tomorrow. This was such a fun card to make! Thanks for fluttering by!


Monday, November 14, 2022

Papertrey Ink November Release Countdown Day 2


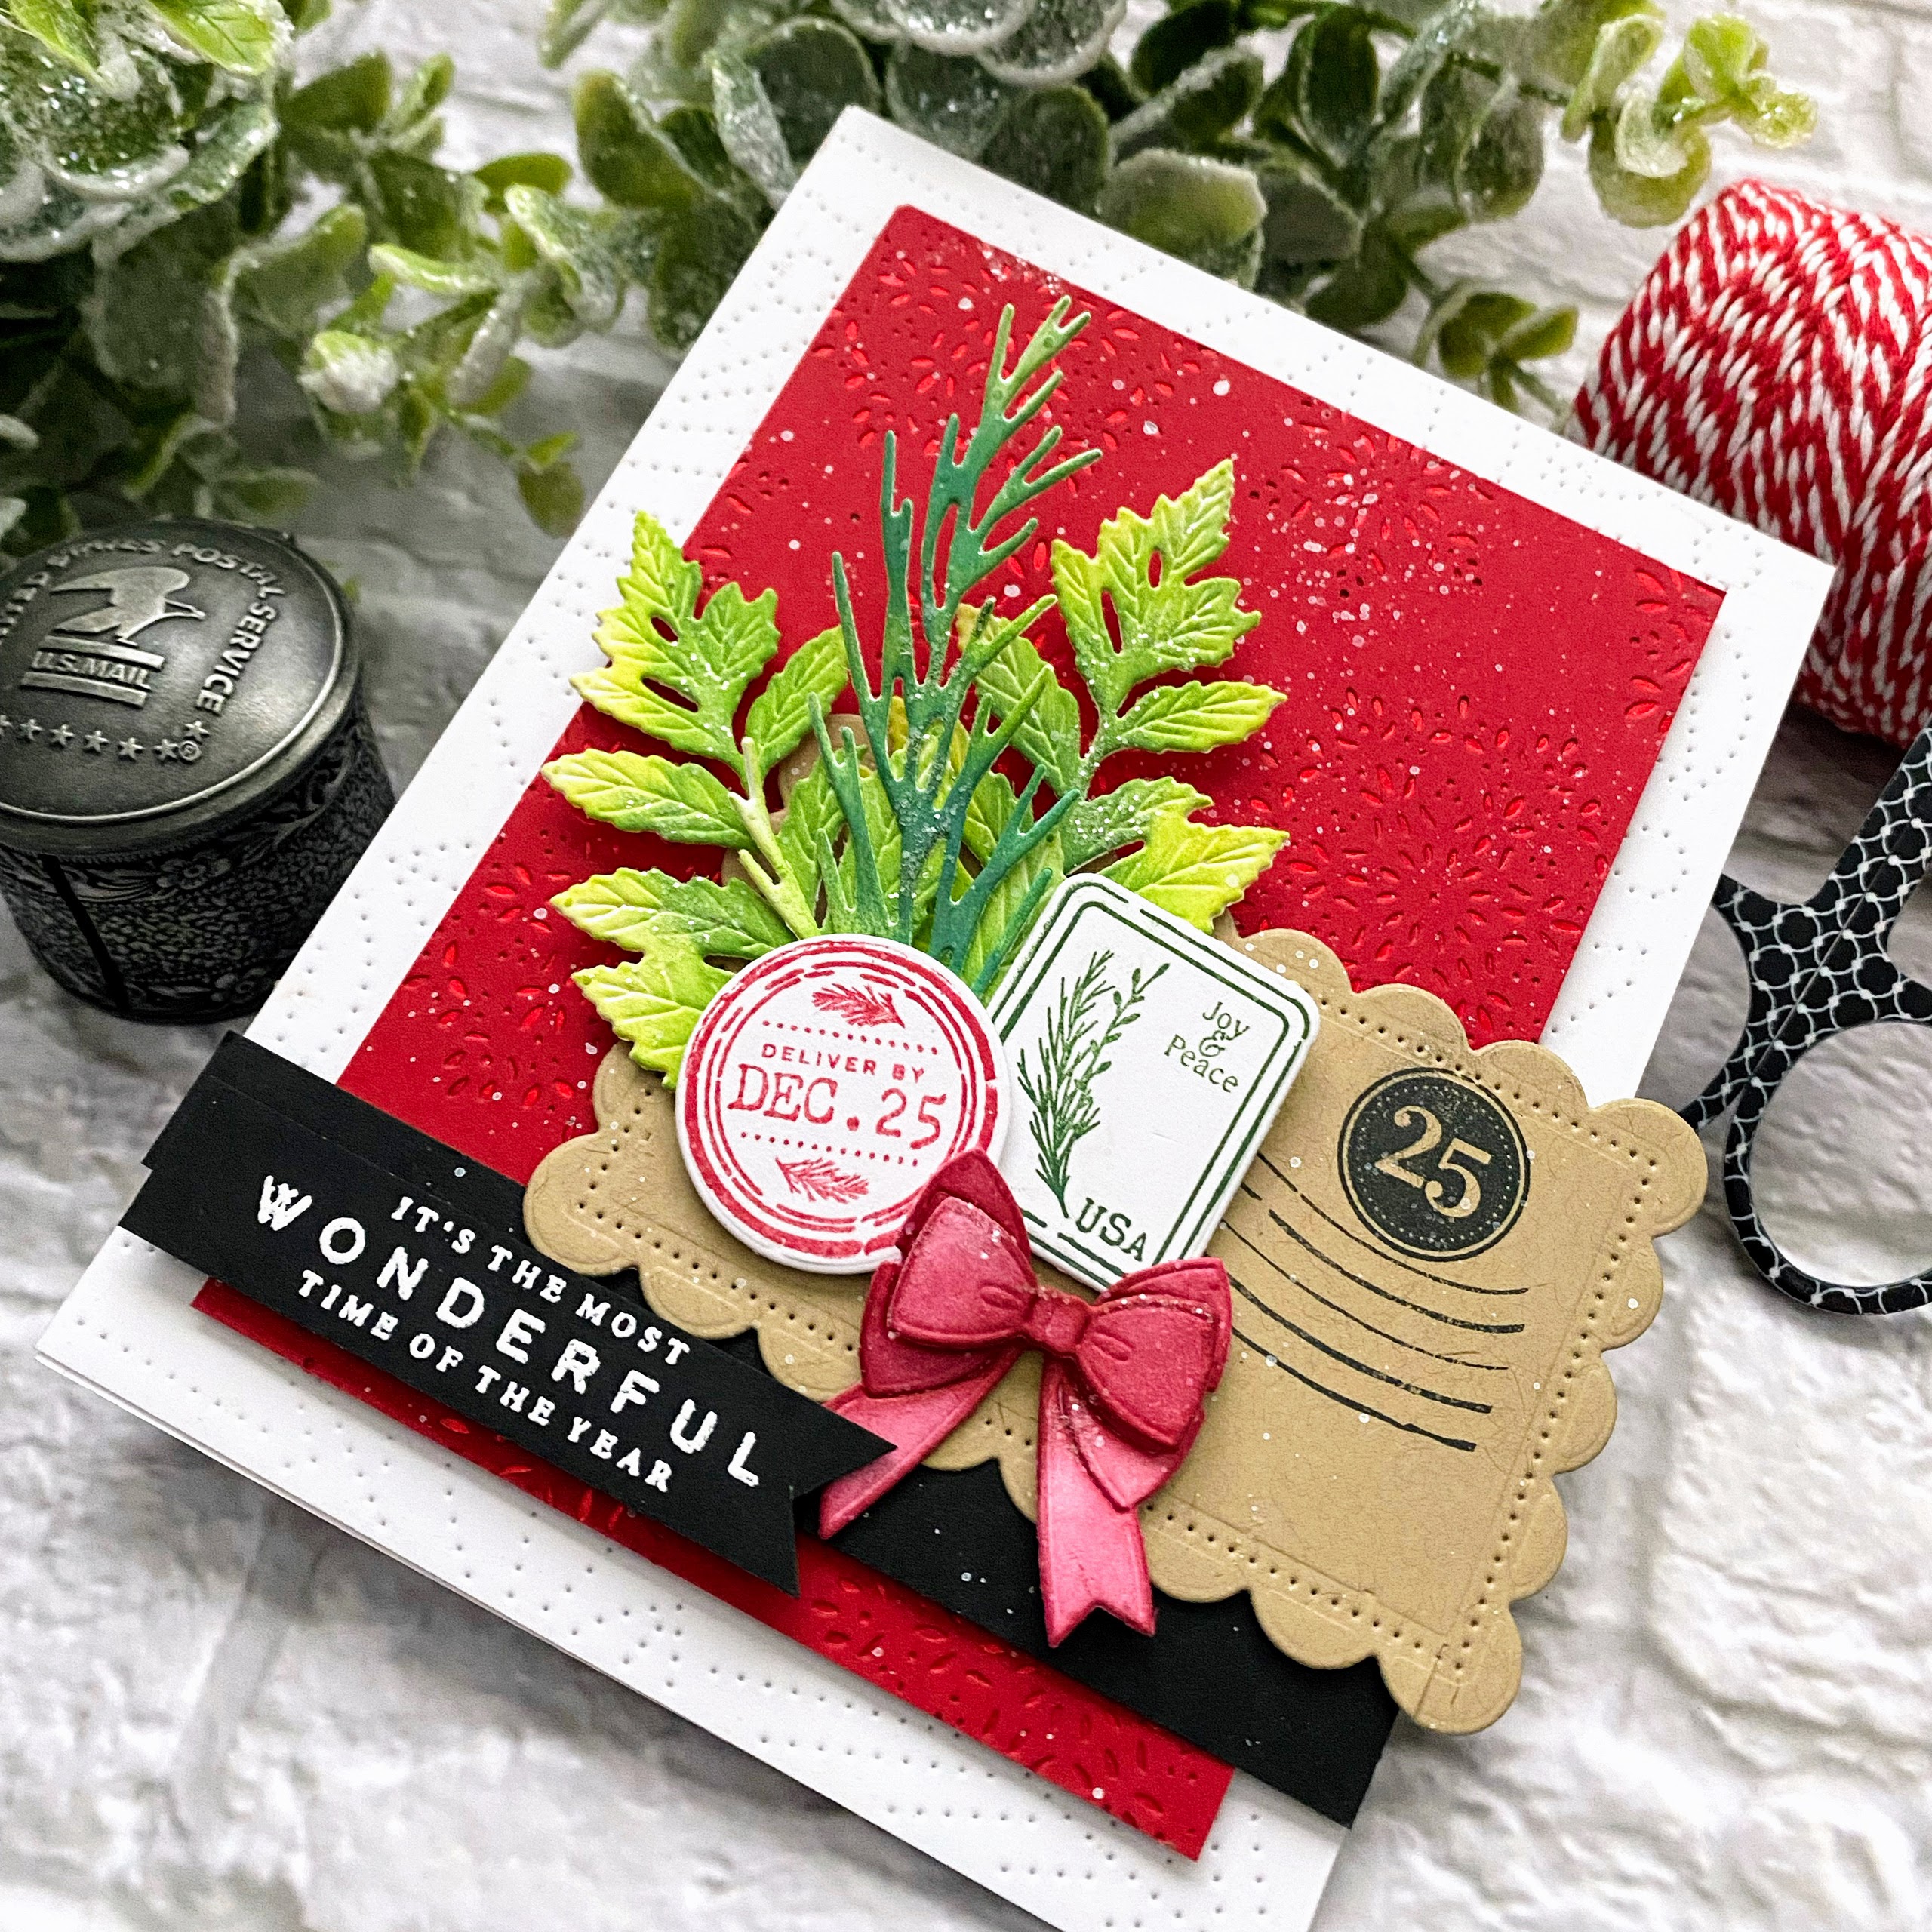
Welcome to day 2 of the Papertrey Ink November release countdown! I'm sharing two cards today using some super fun new products that you're sure to love! My first card uses two fun new stamp sets: Deliver By December 25th and Iconic Christmas! I just love how the two play so well together to create the Christmas postal feel that I love so much!


To begin, I die cut the two postal images; stamping one in Pure Poppy and the other in Rustic Wilderness Distress Oxide ink. I also die cut a few pieces of foliage using the Into the Blooms: Pine die and the Into the Blooms: Dahlia die. I colored them using an assortment of Distress Oxide inks and set them aside.


I die cut one of the cute labels from the new Iconic Christmas die collection and stamped the "canceled" curved line image using black ink. I also stamped the bold 25 image using black ink as well. From there, I was able to attach the greenery and the die cut postage stamp and seal image using liquid glue and foam squares.


The background was created by die cutting an A2 panel using the new Cover Plate: Stitched Florals from white cardstock. I used the Fanciful Snowflakes hot foil plate and red foil for the red panel. I attached it over the top of the white panel using foam squares. I added the black strip of cardstock near the bottom and then added the Kraft label piece.
I added some white paint splatter and glitter to give it some added detail. I heat embossed a sentiment  from a set that will be released on day 4, but I loved it so much for this card, I gave you an early sneak peek. 
My second card for today uses the new Into the Blooms: Cactus dies paired with the new Inside Greetings: Winter Wonderland stamp set. To begin, I die cut all of the pieces for the cactus from white cardstock and colored them using Distress Oxide inks.

I also added some polka dots to the pot using the new Playful Dots stencils that were showcased yesterday. I added some white paint splatter and then stamped the sentiment in black over the top.

Once that was done, I was ready to begin assembling my CAS card. The background was created by using the Fanciful Snowflake Hot Foil Plate (can you believe I've used it for EVERY card for this release?....I love it) with silver foil on an A2 panel of New Leaf cardstock. I also die cut the white panel using the new Cover Plate: Stitched Florals and then added some green ink blending to the middle.

I layered the pot and the cactus pieces over the top using foam squares for dimension. I added a few pine sprigs from the Into the Blooms: Pine die.

This isn't your typical Christmas card, but I have a friend who just mentioned on Facebook that her Christmas cactus is starting to bloom, so this one is for her! Thanks for fluttering by!


Sunday, November 13, 2022

Papertrey Ink November Release Countdown Day 1

Hello and welcome to day one of the Papertrey Ink November release countdown! I have two winter/holiday cards to share with you today using so many fun products from this month's release! I was tempted to play a little Christmas music while working on these cards, but decided to wait just a little bit longer! How about you...have you started listening to Christmas music yet? 

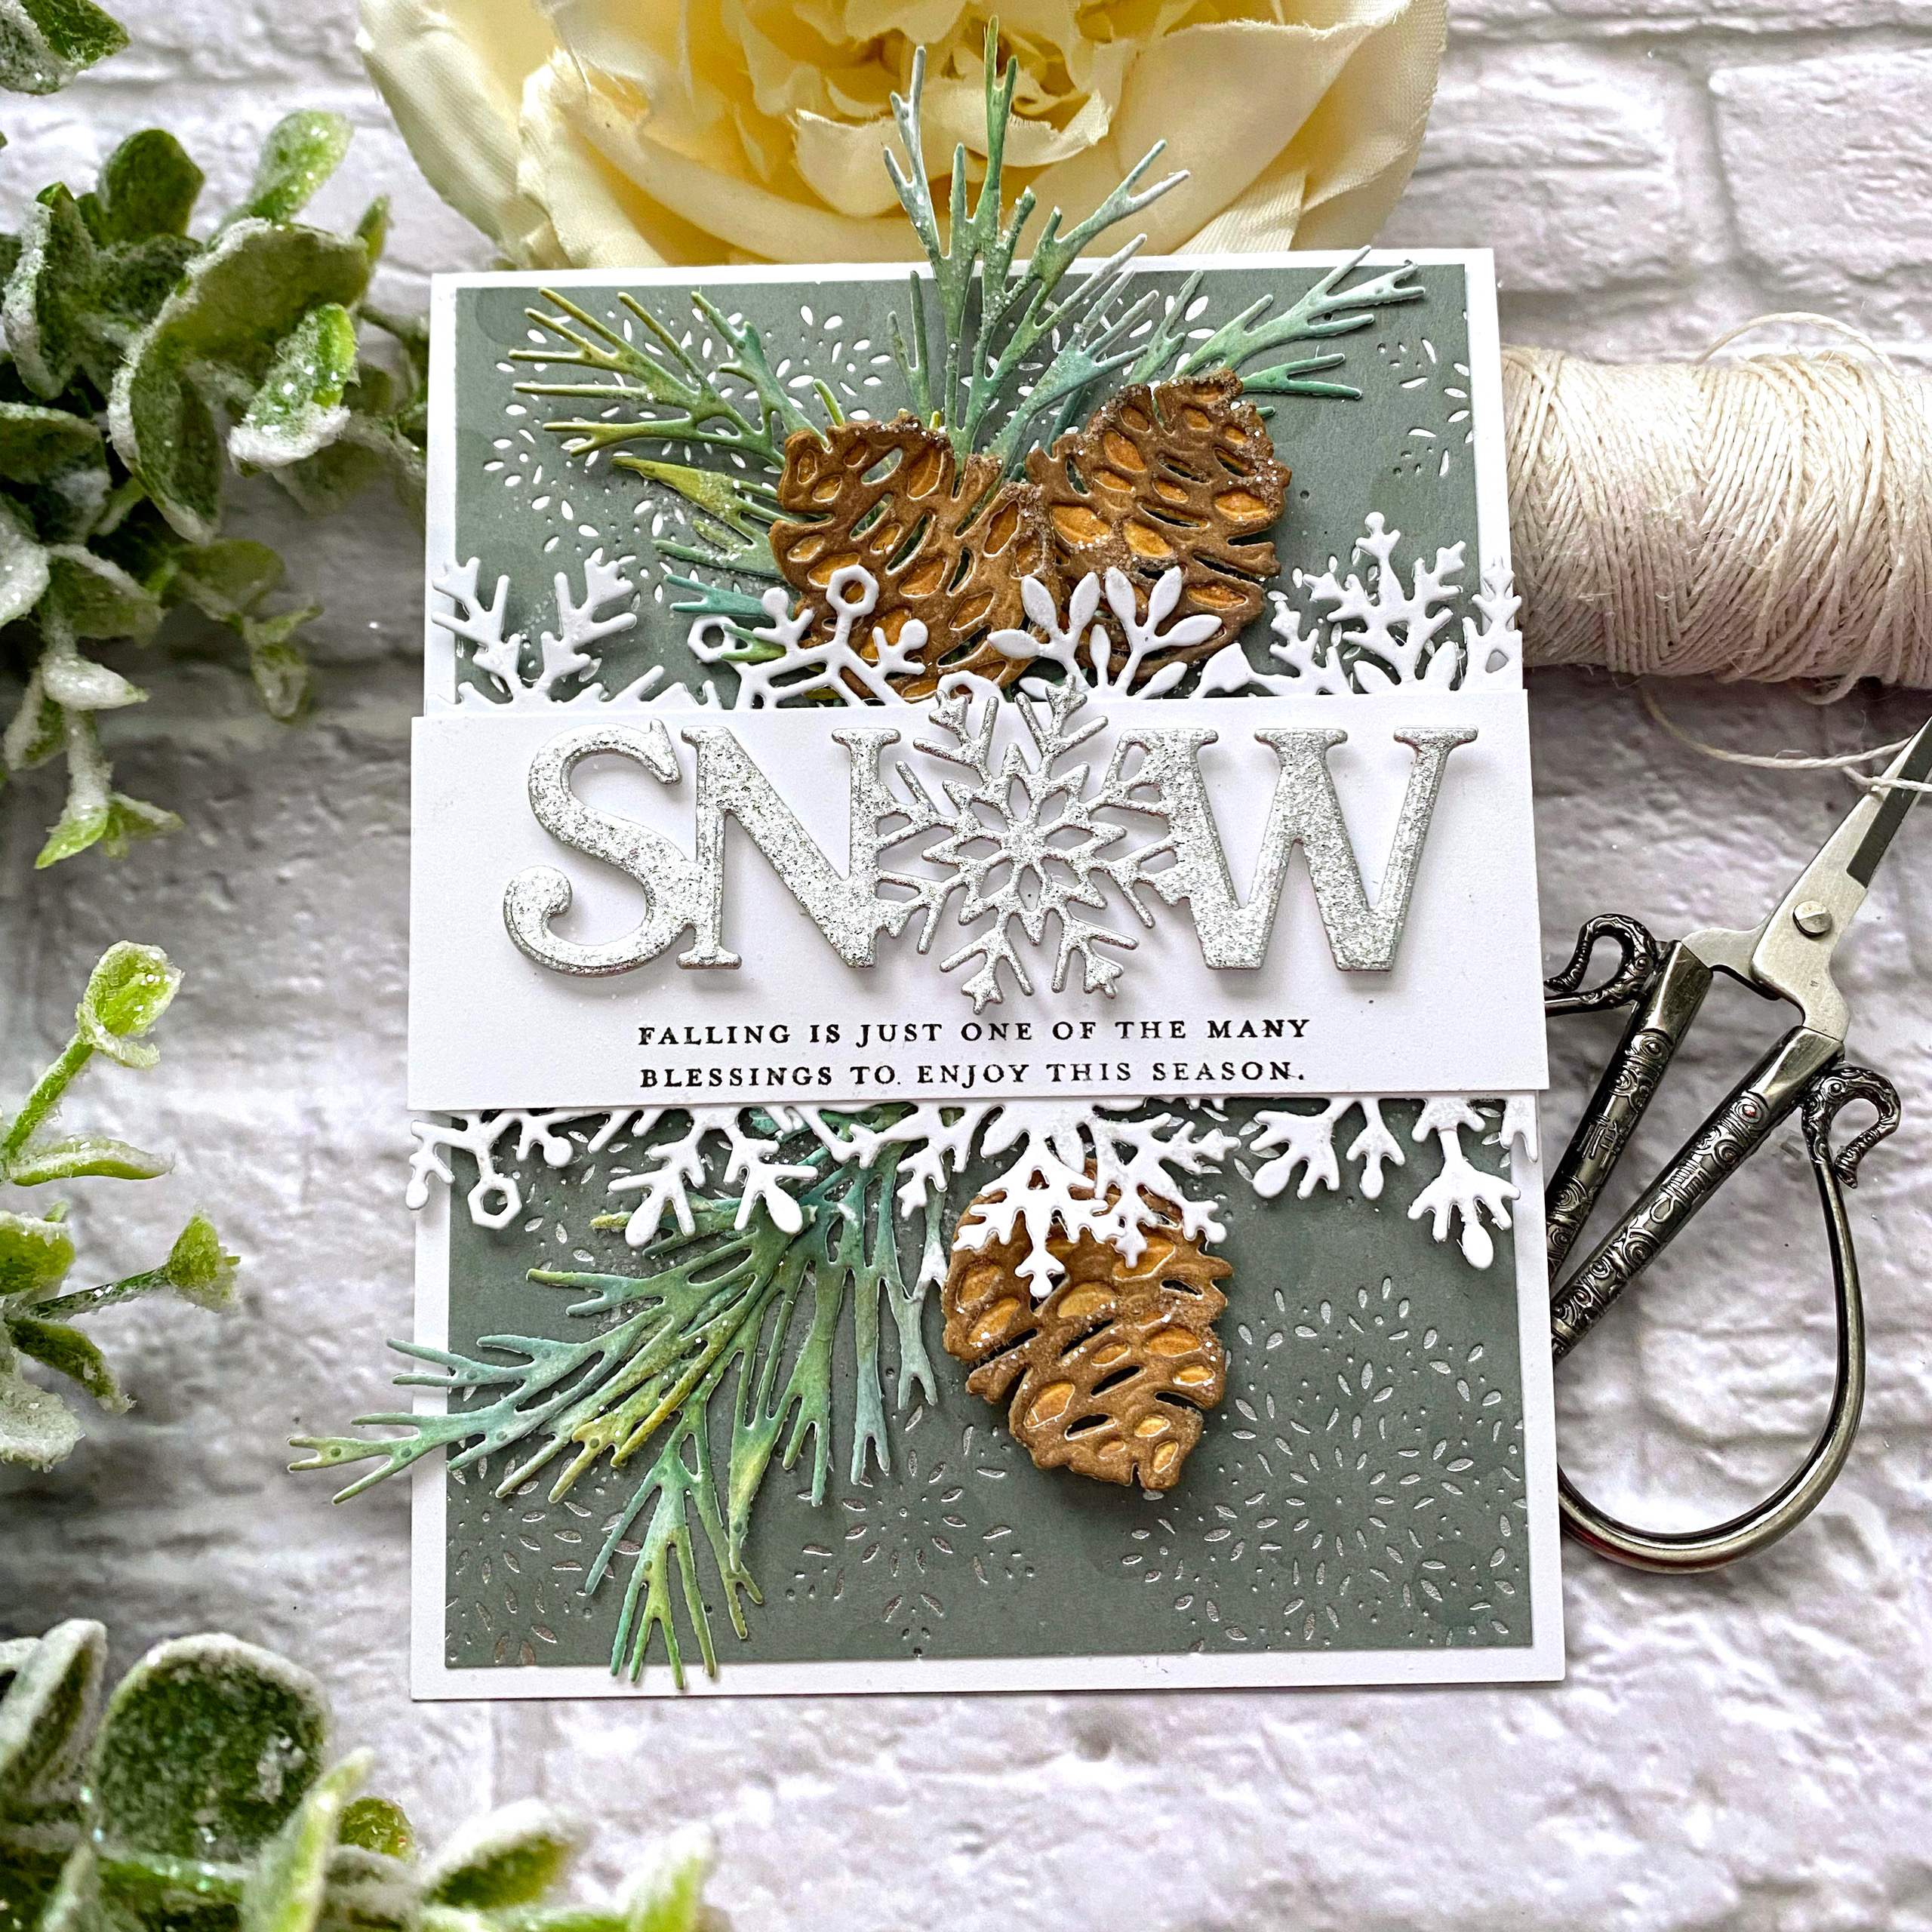
My first card for today was such a fun one to create; I used the beautiful new Larger Thank Life: Snow die paired with the new Larger Than Life: Snow Sentiments mini stamp set. My card also features a beautiful new set of dies called Snowflake Banners; I chose to use the smaller of the 3 sizes because it fits nicely across the front of a top folding A2 card base. The other two dies in the set would work well for a horizontal card. 

To begin this card, I cut a 4 by 5 1/4 inch piece of Stormy Sea cardstock and stenciled it using the new Playful Dots stencil set using Stormy Sea ink. Once that was done, I foiled it using the previously released Fanciful Snowflakes Hot Foil Plate (can I just say I am absolutely SHOCKED this has not sold out?). The dot pattern is subtle in the picture, but in real life you can see it better. 

I die cut the SNOW word using both white cardstock and silver glitter cardstock and glued them together using liquid glue. I also die cut the Snowflake Banner from white cardstock and then added another strip of cardstock over the top. I wanted to use this particular sentiment, but the Snowflake Banner die was slightly too small to have it look good. Doing it this way allowed me the extra room I needed to stamp the sentiment (from the Larger Than Life: Snow Sentiments mini stamp set) AND have the large SNOW die above.

I added the entire banner onto the background panel using foam squares so I could tuck the greenery behind it easily. I die cut the pinecones and pine branches using the Into the Blooms: Pine dies and colored them with assorted Distress Oxide inks.

I tucked them here and there using liquid glue for the branches and foam squares for the pinecones.

I added glitter to the pine branches, pinecones, and the edges of the Snowflake Banner.


I added the entire background panel to a top folding A2 card base using liquid glue.


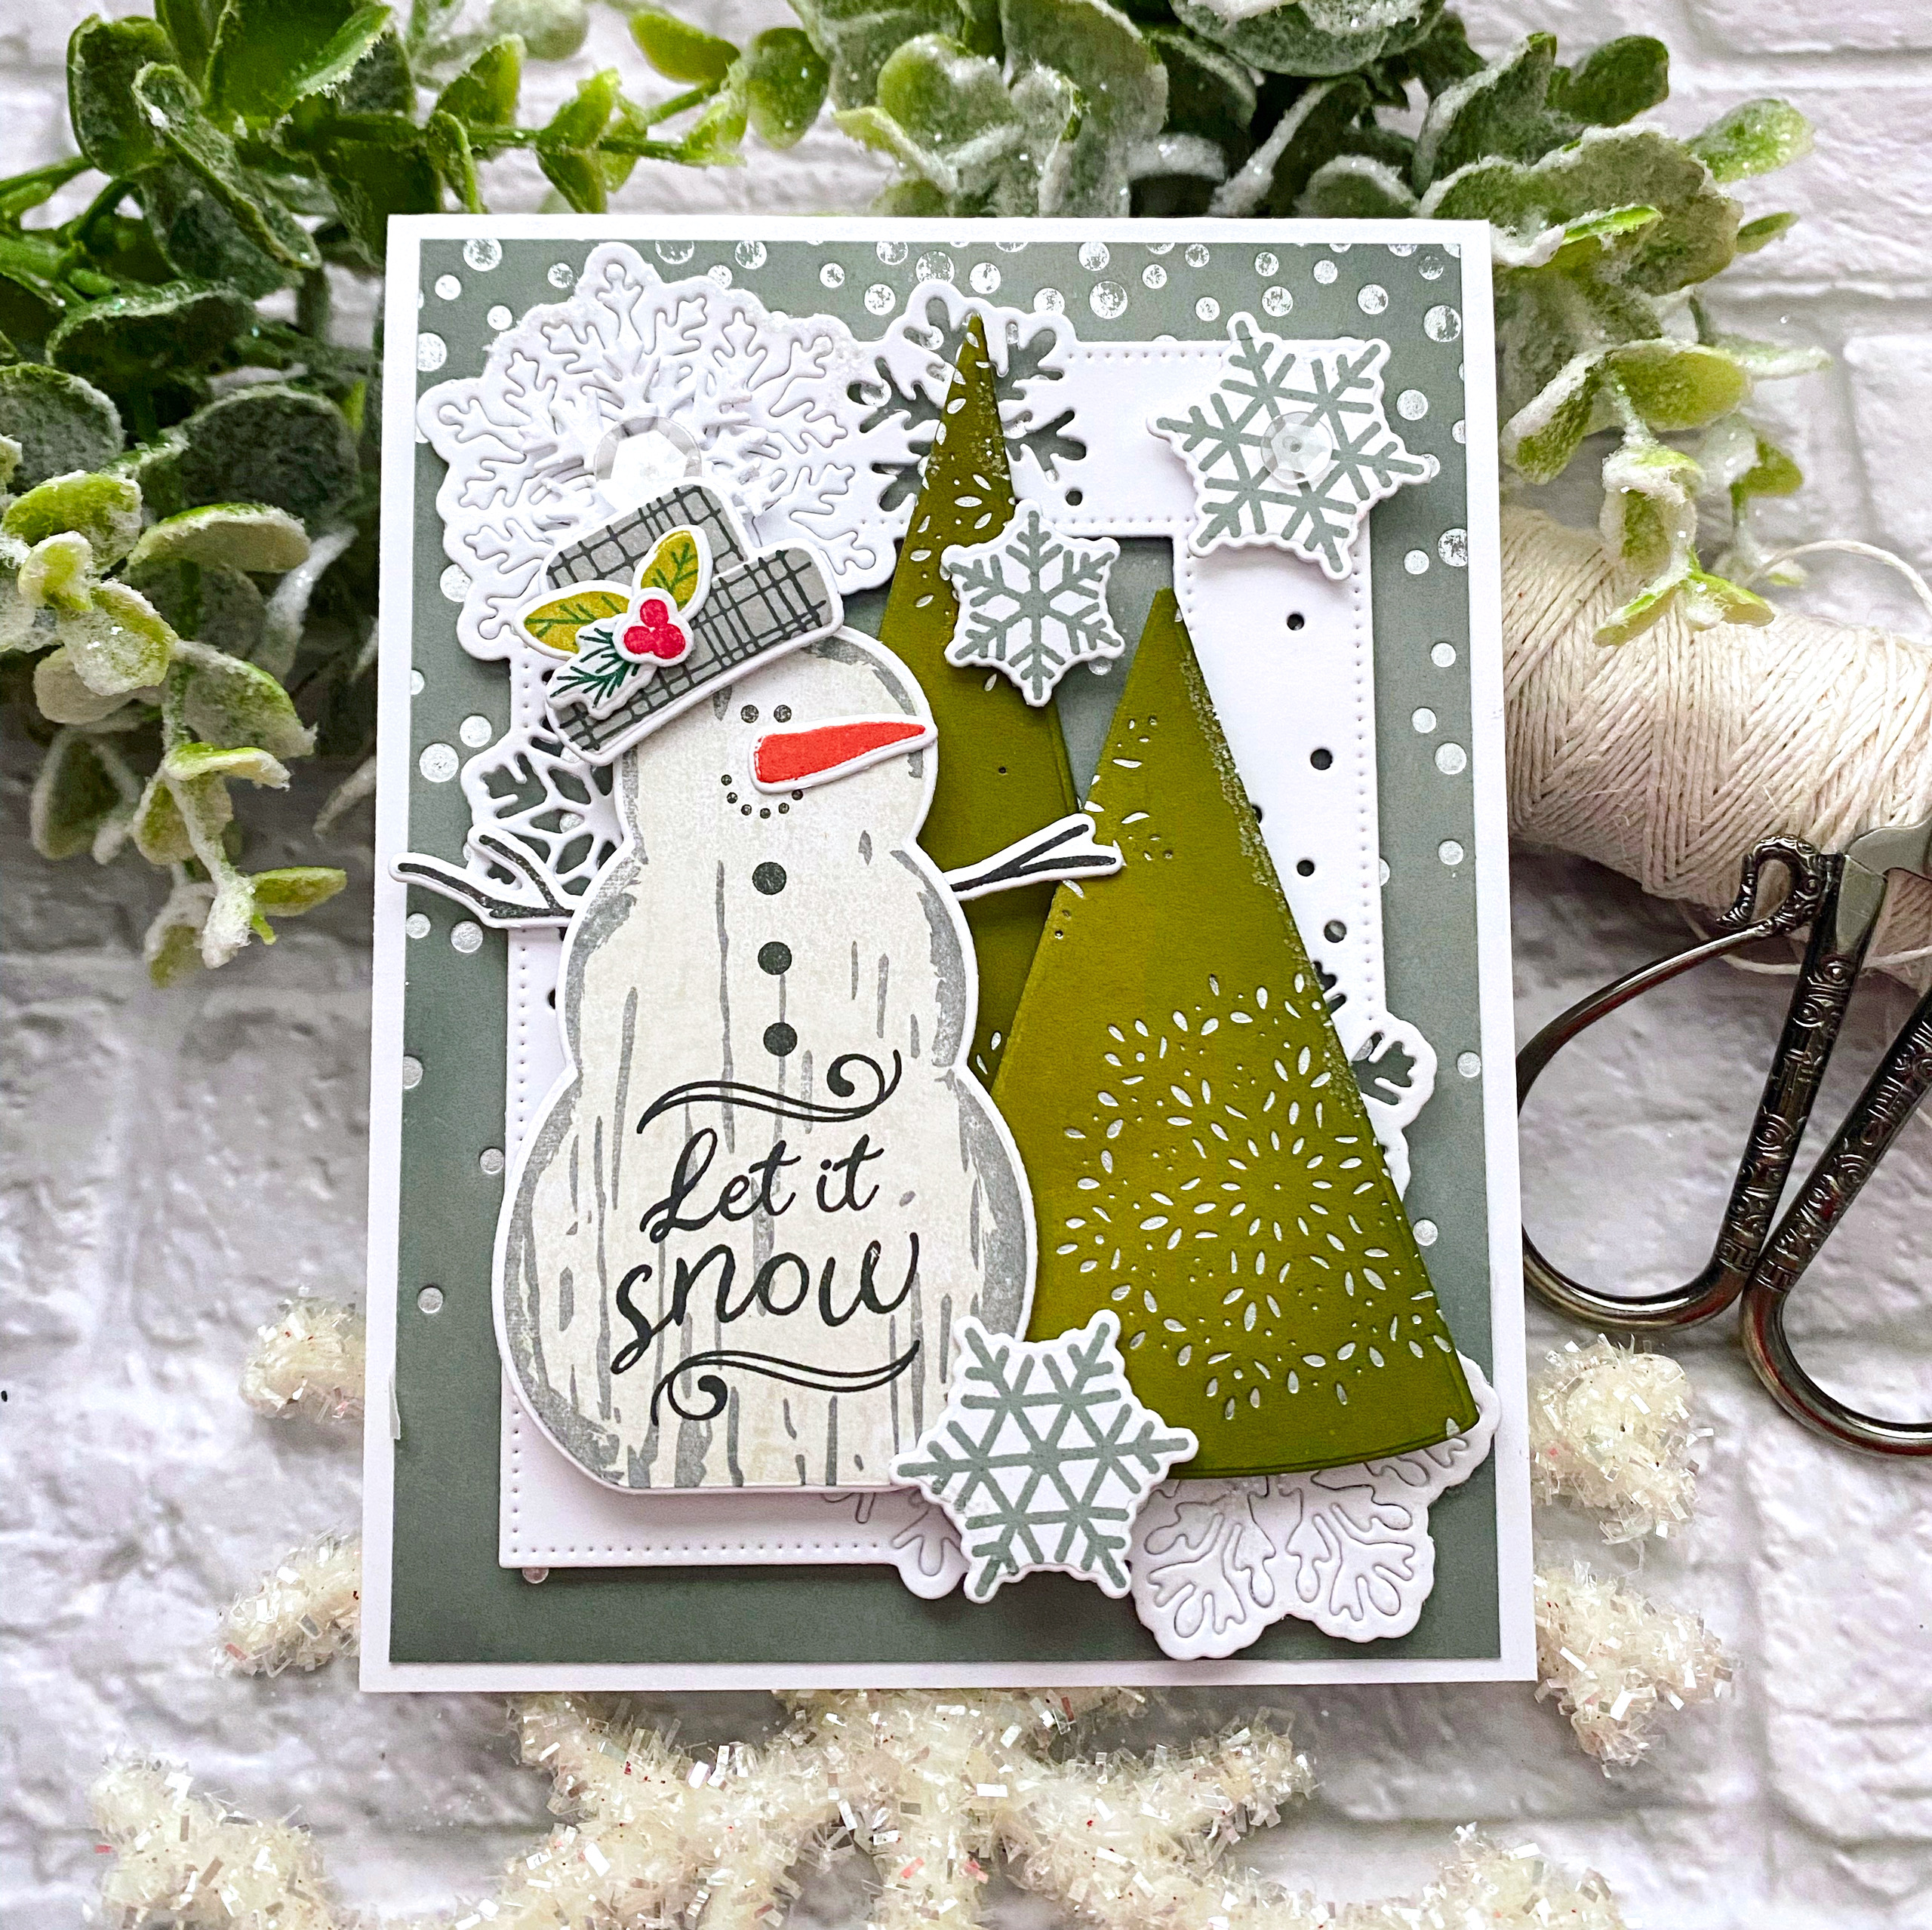
Next up is something a little bit playful; this card uses the new Simply Snowmen paired with the new Simple Trees dies and the new Snowflake Fun frame die.

The Simply Snowmen stamp/die set includes two different sizes of snowmen; this one features the larger size. I ended up stamping 4 snowmen total; two little and two of this larger size. In the end, my card only looked good with one, so I have a few more to use on future projects. I dressed him up by stamping the "Let it Snow" sentiment; one of three included sentiments. I also added his carrot nose, twig arms, buttons, and finally, his hat with foliage and berries.

I hot foiled an A2 panel of Ripe Avocado cardstock using the Fanciful Snowflakes Hot Foil Plate (linked in my first card) and then I used the new Simple Trees die set to cut out the trees. I just love the detail it adds to these sweet trees! I also added a bit of Olive Twist ink to the outer edges of the trees to give a bit more dimension.

I die cut the Snowflake Fun frame from white cardstock, selectively punching out some of the snowflakes and leaving others intact. I wanted to keep the card grounded and felt that leaving some intact would help. I also added a few of the snowflakes that are included in the Simply Snowmen stamp set. The background was created using the new Cascading Dots Hot Foil Plate; silver foil on Stormy Sea cardstock. 
Thanks for joining me for day 1 of the November countdown! Thanks for fluttering by!