Monday, October 18, 2021

Papertrey Ink Flash Sale {Wishing You a Joyous Christmas}

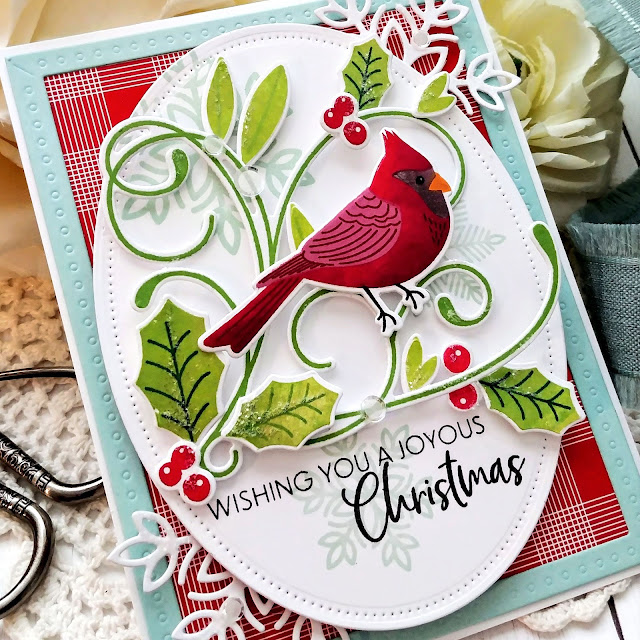
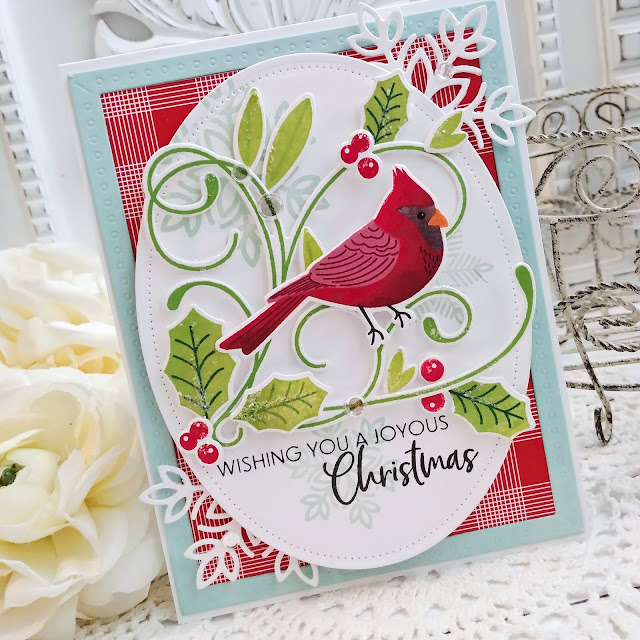
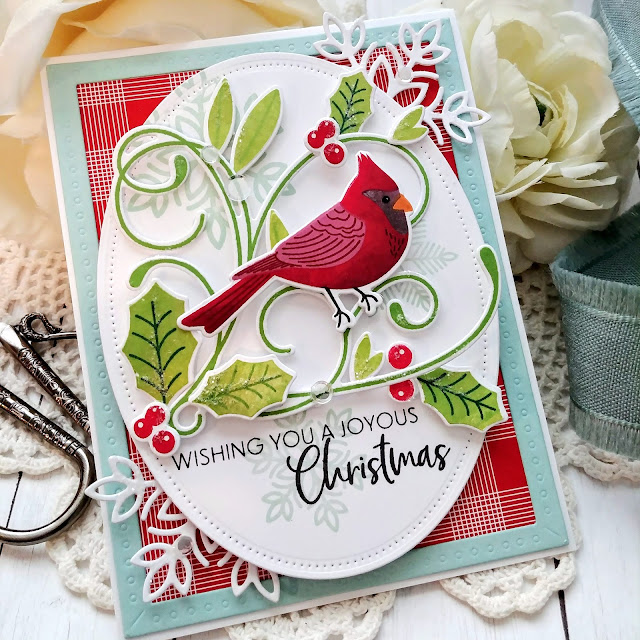
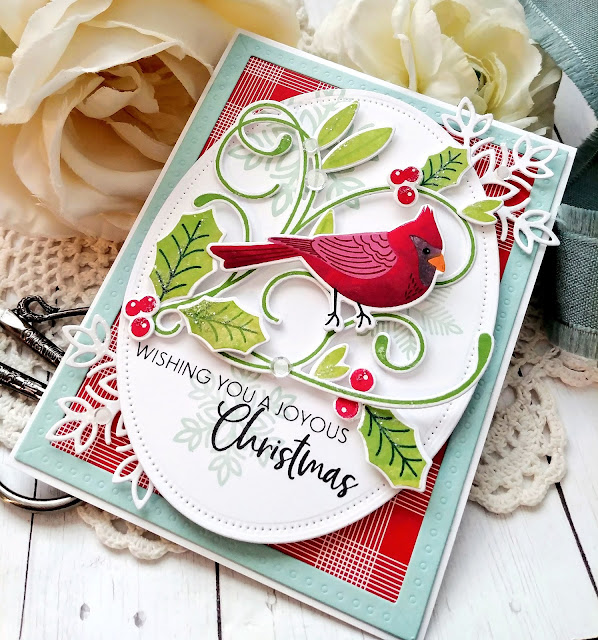
It's time again for my Flash Sale for Papertrey Ink! I chose quite a few fun products for this week's sale that I think you will enjoy! If you haven't gotten started on your Christmas cards, these beautiful stamps/dies are sure to get you headed in the right direction! I had so much fun creating my card for this week's sale! I always love adding cardinals to my holiday designs so I started off by stamping this cutie from the Feathered Friends 6 mini stamp set. I used Pure Poppy ink for the main body, with a touch of Scarlet Jewel ink around his belly for some shading and dimension.

The rest of the bird is stamped in Autumn Rose, Smokey Shadow, and True Black ink, with a Canyon Clay beak. Once the bird was finished, I set him aside to get to work on the rest of the design elements. I die cut all of the pieces for the foliage using the Corner It: Holly die set and then used the Corner It: Holly stamp set to stamp all of the images that I planned on using.

I wanted to create more depth on the main focal panel, so I stamped a trio of snowflakes from the Splendid Snowflakes stamp set using Aqua Mist ink for a light pattern. I didn't want anything too heavy to distract from the foliage and bird. I really like how it turned out and it gave it just the right amount of extra dimension I was hoping for. I also stamped the sentiment in black on bottom of the oval using black ink for a nice contrast.

Once that was done, I was ready to start assembling the foliage! I added holly leaves and berries here and there and then popped the bird up on one of the leafy branches. The entire focal panel is adhered to a top folding A2 card base that has a piece of Bitty Big: Pure Poppy pattern paper with an Aqua Mist frame.

I tucked a few of the dies from the Splendid Snowflakes Die set in the top and bottom corners for even more depth. I just love the added holiday detail they add! I used some of the new Moonshine sequins and glitter to finish off this holiday card! Thanks for fluttering by!

P.S. make sure to look at the Papertrey Ink Newsletter that should arrive in your inbox this evening to see all that is included in the sale!


Wednesday, October 13, 2021

Papertrey Ink Flash Sale {Folky Holiday}

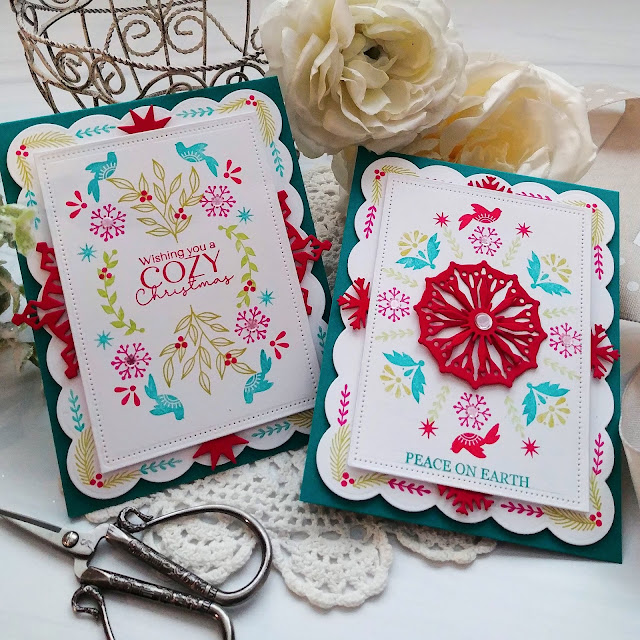
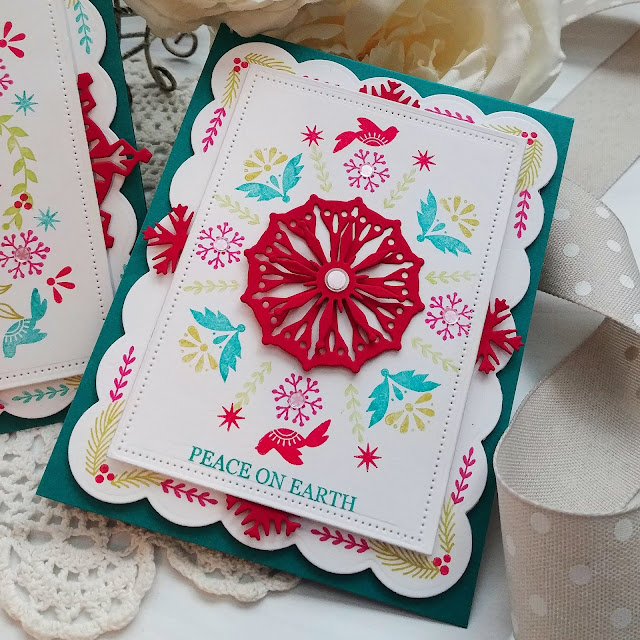
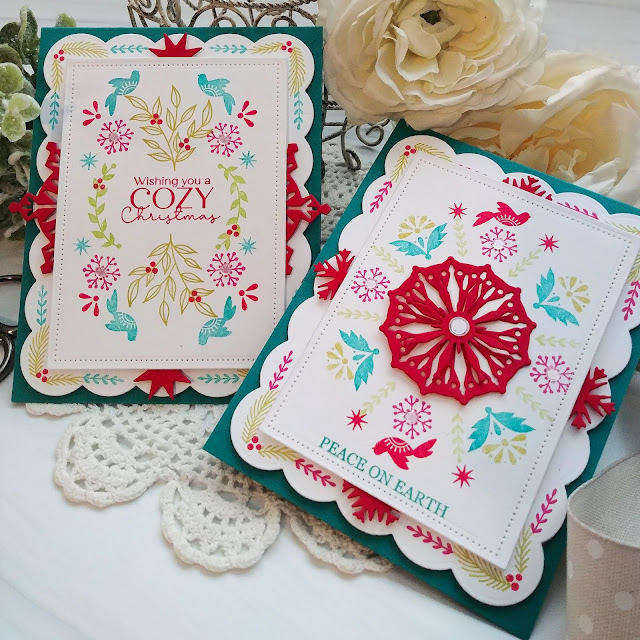
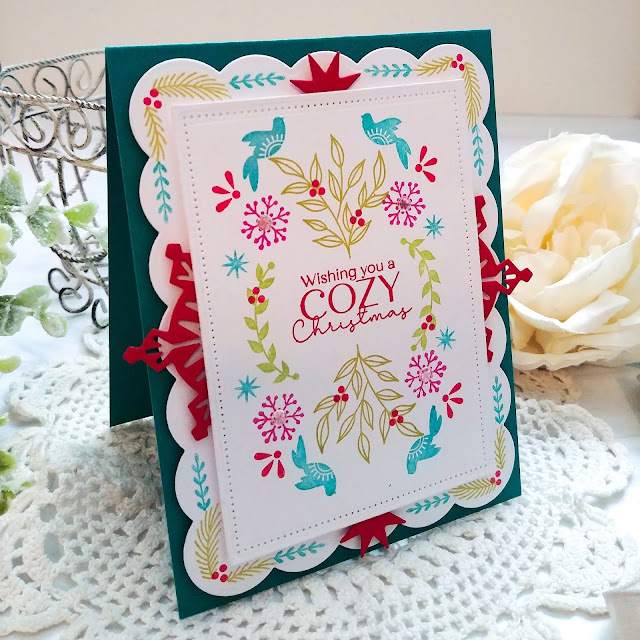
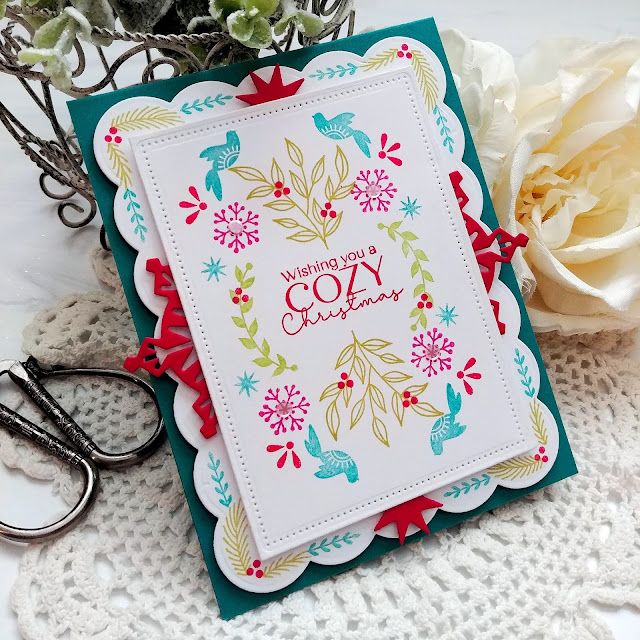
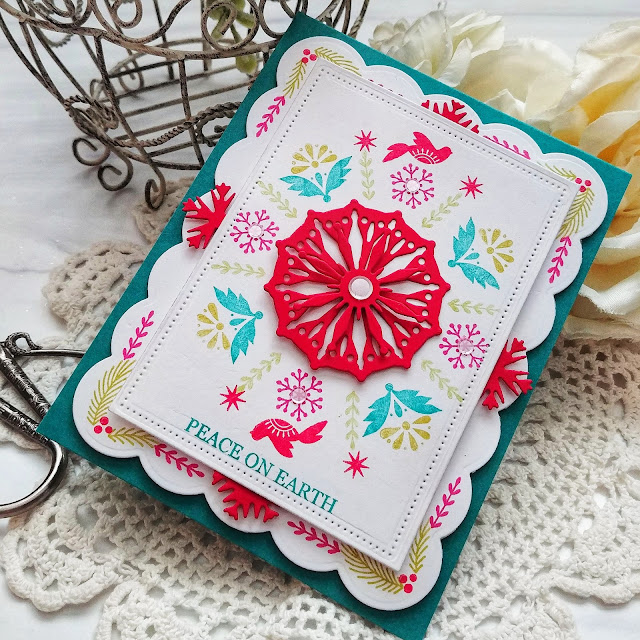
 I thought I'd share the cards I made for this week's Papertrey Ink Flash Sale! I chose to use the Folky Holiday stamp set that was released last year to create this week's cards! I tried to use it in all of its "folky glory" and build up some pretty panels using the cute images!

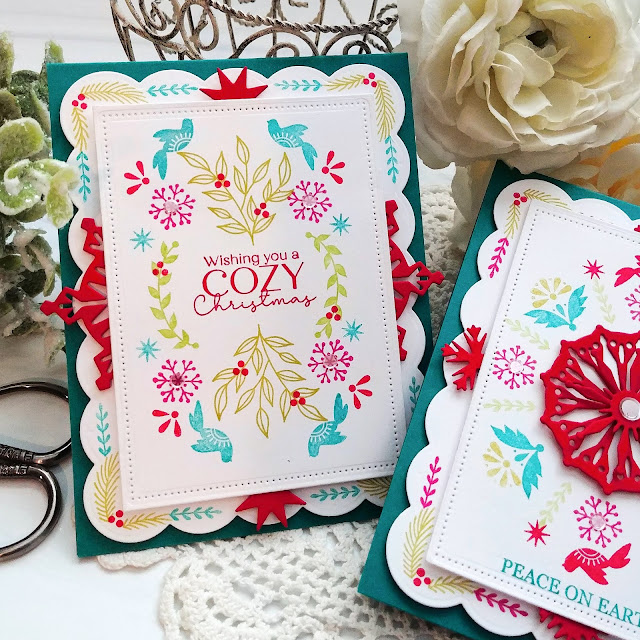
For this first card, I chose to use the sentiment, which is from the Just Sentiments: Warmth, as the center of the design and then build from there. I like this particular sentiment because it is stacked into a nice tidy image that was easy to work around. I didn't measure the placement, but if you feel worried about getting things symmetrical, just add some pencil guide lines to help.

For this card,  I chose to use one of the larger "flakes" from the Starflakes die collection and build from there. I actually layered two of the dies together to create this dimensional snowflake. Once the center image was placed for both cards, I went ahead and stamped different images going around the entire perimeter of the panel, in most cases. Some of the images I only stamped twice because of space and what would be pleasing to the eye.

I was amazed at how quickly and easily the panels came together. I chose Raspberry Fizz, Tropical Teal, Green Parakeet, Simply Chartreuse, and Pure Poppy ink to give these cards a playful Christmas feeling! You could definitely opt for more traditional colors or even use autumn colors to create Thanksgiving cards!

On this particular card, I chose to use the two large images directly above and beneath the sentiment and then use the curved images for the sides. I really like how this one turned out! The panels were die cut using the Nesting Basics: Pierced Rectangles to give them some added detail! I set the panels aside and cut two of the Scallop Stackers: Medium outer piece. I didn't add the insert that will give you open areas. I wanted to be able to add even more stamped images around the border and these scallops were the perfect thing.

I sandwiched a few additional Starflake die cuts on the top, bottom, and sides and then adhered the two panels together using foam squares. I then added them to top folding A2 Tropical Teal card bases using additional foam squares.

I stamped the Peach on Earth sentiment, which is from the Be Merry stamp set, directly on the bottom of the top panel in Tropical Teal ink. I added a few Moonshine sequins to each of the cards for some sparkle and shine! Thanks for fluttering by!


Tuesday, October 12, 2021

Grateful to Have You In My Life

Hello friends! I'm popping in today to share a couple of cards I made a few weeks ago for the Papertrey Ink newsletter. I posted them to Instagram, but wanted to post them here as well. I think it's common for us to put away our floral sets once the season changes from summer to autumn, but I've been enjoying creating autumn bouquets using my floral sets, like I did on these two cards. I had originally planned on saving them until Thanksgiving time, but they looked so cute next to my loaves of pumpkin bread that I had gussied up, that they went out the door with those! That being said, these WOULD make wonderful Thanksgiving cards to give to your  host, or send to family and friends!

I set out to use this sweet bird from the Feathered Friends 4 stamp set which inspired the entire design! I used the same colors for the flowers as I did for the birds’ feathers. To begin, I die cut quite a few of each leaf and flower so I could build my bouquets as full as I wanted. In the end, it gave me enough to make 3 cards, so that was nice. I find that it's just as easy to make more than one, especially if you're using a stamp positioner. 

I used the Effortless Beauties stamp set for all of the leaves and flowers. This is hands-down one of my favorite floral sets; I love the variety of leaves and berry sprigs, the different flower shapes, and the ease of use! I chose some unexpected color combinations for the flowers and leaves, but that really enhanced the "autumn bouquet" vibe! The main colors I chose are: Honey Nut, Saffron Spice, Melon Berry, Americana, Autumn Rose,Dark Chocolate, Sweet Blush, Scarlet Jewel, Stormy Sea, and Soft Stone.

I added some extra color to the portion of the bird where the bottom feathers meet up with the breast and used a blender brush to tap out the harsh edges. I love the realistic look it gives the bird. I wish I would have done that on the top of the bird as well, but I can try that another time!

I chose to use the "Blessed to have you in my life" and "Grateful to have you in my life" sentiment which are from the Perfect Pairs: Commodities stamp set. I chose this particular stamp set because I knew it would have a bold impact on the design, AND because I knew I could "float" the sentiment above the flowers if I needed, and I did! ha ha!

I chose to use the largest plaid  from the Bitty Big: Soft Stone patterned paper  collection as the background. I thought it gave the card some added depth and interest. The postage frame was cut using the Border Bling: Skinny Postage Frame; one in Stormy Sea set on a Saffron Spice card base, and the other cut from Saffron Spice cardstock on a Stormy Sea base. I added a few of the new Moonshine sequins. These don't have any holes in the middle or the traditional beveled edge that a sequin has, but rather a smooth surface with the ends slightly upturned to catch the light. Thanks for fluttering by!


Thursday, October 7, 2021

The Greetery Christmas Time Collection Release Day {It's the Most Wonderful Time of the Year!}

Hello friends! Today is the day you've all been waiting for...it's release day for the Christmas Time collection at The Greetery!! I couldn't resist creating a bonus card to share with you today! I have so many leftover bits and pieces that are just begging to be used on projects! I approached this release a little bit differently than I normally do. Rather than just selectively using different pieces from stamp/die sets, I decided to die cut and stamp EVERYTHING! This gave me the opportunity to really get a feel for each stamp/die set and it gave me a ton of options to choose from as I was creating! Now, the fun part will be to just use up all of those pieces on tags, cards, treat boxes, and more!


The collection will go live in The Greetery Shop at 10 AM ET! 

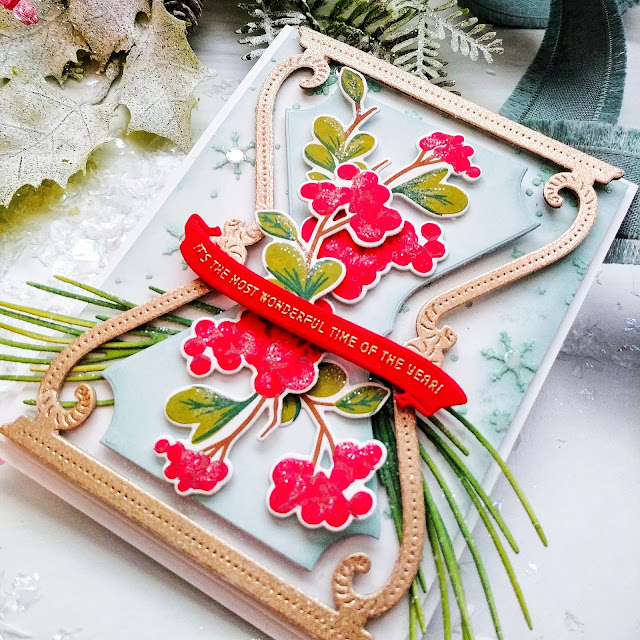
For today's bonus card, I chose to use some leftover bits and pieces from the Winterberry Bouquet stamp set. The main bouquet is quite large and I ended up using both of the two that I stenciled, stamped and cut on my release projects, so that left me with all of these cute sprigs and sprays that ended up being PERFECT for this card. I also thought that the middle die from the Hourglass Frame die set didn't get enough love during the release, so I wanted to show you how nicely it works for a card like this.

To begin this card, I die cut the Hourglass Frame three times; once from gold specialty cardstock and twice from Kraft cardstock. I glued them together using liquid glue and set them aside to dry. I die cut the center portion of the Hourglass Frame and then added some Speckled Egg Distress Oxide ink around the edges. I temporarily came up with an arrangement for how I liked the berries and foliage and decided to use one of the banner sentiments from the Christmas Time Sentiments stamp set.

I wanted this card to have a light and airy feel, so I opted to keep the background light, but added some detail by using the previously released Frosty Flakes Stencil with some ink and Nuvo Moonstone Glimmer Paste. I love the dimension and snowy sparkle it adds to the background!  I set that aside to dry and cleaned up the stencil and my putty knife. Once it was dry, I was able to assemble the card. I went back and forth on whether or not to add the Pine Wisps to the sides. While I love the holiday touches it adds, I wondered if it made the card too heavy. Either way, I can simply pull them out if I change my mind. I added a lot of glitter to the berries and leaves. I added some Moonshine Sequins to the centers of a few of the stenciled snowflakes for added sparkle and shine!

This card was an absolute joy to create and I could really see this being a design that you could use as "THE" Christmas card for the year! It's easy, yet beautiful and unique! I also stamped the "Christmas Time" sentiment on the inside with another one of the banner sentiments accented with a trio of snowflakes from the same set. I like to add something extra to the inside of my Christmas cards so that they seem a little bit more "finished" and I also don't have to write as much! LOL! You know how crazy life is! Sometimes I'm happy just to get them out the door! ha ha! Thanks for fluttering by! 


Wednesday, October 6, 2021

The Greetery Christmas Time Collection Day 3

Well friends, it's the 3rd and final day of reveals for the Christmas Time Collection from The Greetery and I think you're going to fall head-over-heels in love! Aren't these oven treat containers just the cutest thing ever? I honestly don't know how Betsy knocks it out of the park year after year! You'll definitely want to head over to The Greetery Blog to read all about today's new products! Make sure to leave a comment here for a chance to win one of 2 $50 gift certificates!

I made 4 ovens in total; two from Mint Julep cardstock and two from Pure Poppy cardstock! These two colors together are some of my favorites at Christmas, especially for that vintage look that I love so much! I did ALL of the die cutting and stamping for each of the 4 ovens and then assembled them quickly and easily.

My favorite part of these treat containers is the cookie sheet filled with sweet treats. These tiny delights are part of a new mix that will be available for purchase tomorrow with the rest of the Christmas Time collection. Now, if you want to make your own little treats, the die collection comes with quite an assortment so you can die cut them quickly and easily.

The burners and knobs, handle and decorative detail at the bottom are all die cut and glued on using liquid glue. I did some of the detail stamping before they were assembled, using my MISTI for precision and ease.

I chose 4 of the different sentiments that are included in the Bake Someone Happy Sentiment set. I wasn't sure if I would actually put something "baked" in there, so I opted to use the generic sentiments.

I love the sweet little oven mitt and hot pad that are included in the die set to give those cute extra touches! The cookie sheets are actually adhered to the burner so that they won't fall off during delivery! 

My next project is a card featuring the cute new Bake It Merry stamp/die set! Making sugar cookies on Christmas Eve is a tradition at our house, so turning these die cuts into little edible looking delights was fun! This set comes with oven mitts, hot pads, a cookie sheet, tiny cookies, utensils, and more!

I die cut everything from white cardstock, with the exception of the cookie sheet and spatula, and either stamped it or added color using Distress Oxide ink. I also added a Winterberry clusters and Pine Wisps.

I had so much fun making a tartan background on day 1, I thought it would be fun to add a hint of plaid behind these baking details. Of course I just HAD to add some glitter for some sugary sweet detail! I had extra die cuts and cookies so I quickly whipped up some tags, but didn't end up photographing them! I ordered the tiny whisks that are in today's photos and plan on adding them to some holiday goodies with tags made using this set! I'll definitely share them here when they are all done!

This concludes my projects for today! Everything will be available for purchase tomorrow at 10 AM ET! Make sure to head to the other designers' blogs to see what they've "baked" up!
Kelly Lunceford (you are here)


Tuesday, October 5, 2021

The Greetery Christmas Time Collection Day 2

Welcome to day 2 of full reveals for the Christmas Time collection from The Greetery! I have to admit that I DID turn on a little Christmas music while creating for this release! I used to listen to it year-round when I used to do my Keeping Christmas series, but haven't wanted to until NOW! ha ha! This release has been so much fun and I know you're going to fall in love with the new products being featured today! You can see the full "meet and greet" for the products on The Greetery Blog and don't forget to leave a comment here for a chance to win one of two $50 gift certificates to the shop!

I'm obsessed with this new Hourglass Frame Die and coordinating Hourglass Insert die! I chose to use the "Christmas Time in the Country" stamp/die set to fill my hourglass, but there is also a Christmas Time in the City stamp/die set as well! I used that on my second project, so you can see some additional options for that as well.

I created a "stand-alone" shaker card to highlight this sweet manger scene. I always love to choose images and dies to highlight the true meaning of Christmas, which is the birth of our Savior! I especially love this gold embossed sentiment that reinforces the theme!
 I'm not the best at shaker cards, but I really like how this turned out, even if there were some bumps along the way! ha ha! My first tip is to make sure you don't have glue on your fingers when you touch the acetate! Yes, I did that and had to rip the top layer off and start again! Boo!

To begin this "stand-alone" shaker card, I die cut two of the hourglass frames in gold, and two in Kraft. Since I knew it would be standing on its own, I wanted to reinforce the frames by gluing the gold frame on top of the Kraft. I set those aside and got to work on the actual hourglass and the background. I die cut quite a few of the inserts with the wire still intact to create the frame portion. I didn't use foam with this shaker, but opted to simply "build it up" using multiple frames glued together. In the end, this was the smartest choice since I ended up needing to switch out the acetate. 


Once I had the frames cut and glued, I snipped the dies so I would have the large piece for the backer. This is where I did the stamping/inkblending/scene building. I sponged some ink around the edges and then stamped the star rays using gold metallic ink. I glued the star in theh middle and then added the "Bethlehem" sand, stable and manger. I carefully poured some of the snowflake confetti that is part of this release in the center and then glued the acetate portion over the top! I carefully added the framer portion using a thin foam strip to both the front and back. I also added another plain white backer, but turned around, onto the back of the hourglass piece so I would have a place to write a greeting. Once that was done, I simple added the heat embossed sentiment, which is from the Christmas Time Sentiments set, onto the banner, which is from the Christmas Time Sentiments die set. A few Pine Wisps, tiny stars, and snowflakes finish off this card!

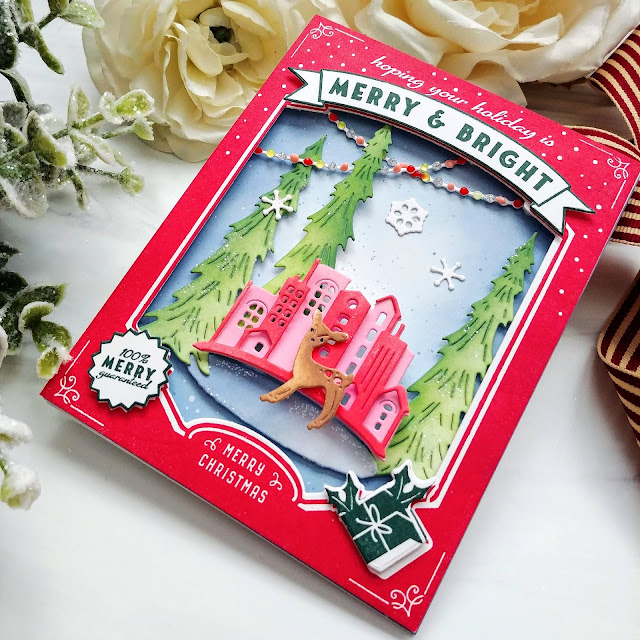
Up next is a card featuring the FABULOUS new Ornament Box Vertical stamp! There is also a Horizontal version to give you a lot of options! Now, you will most likely see quite a few cards today using this stamp with the AMAZING new vintage ornaments, but I wanted to give you another option by using this box top as a shadow box to house all kinds of sweet holiday scenes.

I chose to use the "Christmas Time in the City" dies to create this sweet scene! I also added the deer, which is part of the Vintage Ornament die set.

To begin, I stamped the ornament box in both red and green. I used the coordinating dies to cut out the window and the "Merry and Bright", 100 % Merry guaranteed, and the gift. I used foam squares to add them to the top of the red panel.

The string of lights was created by simply adding an assortment of Nuvo drops carefully to the white die cut. I set them aside to dry while I assembled the city scene. I colored all of the images using Distress Oxide ink and then added them using foam squares.

I had a lot of fun putting this city scene together. You could make this same card, but turn it into a shaker by simply adding a panel of acetate to the window opening. This would be a really easy shaker! ha ha!

I had a lot of fun creating this card, but rest assured, I WILL be using those ornaments STAT! lol! Don't forget to head to the other designers' blogs to see what gorgeous creations they've made! Thanks for fluttering by!
Kelly Lunceford (you are here)
 

Monday, October 4, 2021

The Greetery Christmas Time Collection Day 1

Christmas time is here, Happiness and cheer! Hello and welcome to day 1 of the Christmas Time collection from The Greetery! You can guarantee that Christmas at The Greetery is going to be fabulous, and this year is no exception! I know you will love these new products as much as I do! My mind is still whirling with tons of ideas to use these beautiful stamps and dies! Make sure to head to The Greetery Blog for all of the official "Meet and Greet" information for each new product being featured today! As always, there will be a chance to win one of TWO $50 gift certificates; simply leave a comment here and on the other designers' blogs as the winners will be picked from the comments.

My first card for today uses the beautiful and versatile "Cathedral Window" die paired with the new Opposites Attract: Holiday stamp set and the gorgeous new Winterberry stamp/stencil/die suite of products. The finishing touch is a few sprigs of the new Pine Wisps dies! These will be used A LOT over the next three days because I love them THAT much!

The Cathedral Window stencil allows you to create different stained glass window options, but for today's card, I chose to keep it simple with a lit up window inked up in different shades of yellow and mustard to give it that realistic look!

I built the frame part of the window up so that I could add quite a bit of glitter into the frame pieces to give it a look of snow on the windowpanes. I love how it turned out. Before I adhered all of the different elements to the card base, I used the previously released Brick Layer Die to give some subtle detail to the corners of the cathedral windows in both the upper right corner and lower left corner. I ended up shifting the window a bit in the end, so if I did it again, I would place the brick detail a little differently, but I really like how it turned out.

This gorgeous Winterberry cluster was created by using both the stencil and stamp set to add in the details. I also stamped out the smaller pieces included in the set and have fun tucking them here and there on other projects, so stay tuned for those!

The Pine Wisps are die cut from white cardstock and then inked up using an assortment of Distress Oxide inks. I also added some Alene's Glitter Snow to the branches and good dusting of tinsel glitter! The Opposites Attract: Holiday stamp set is the perfect finishing touch for this simple design. I added a bit of darker ink the top portion of the "noel" stamp and then glued the "joyeux" portion directly to the leaf hanging down!

My second card for today used that gorgeous Winterberry cluster again, but this time I accented it with the beautiful new "JOY" die. It is also available as a Hot Foil plate, which is so much fun, but in the end, this die cut gold and red piece was the perfect choice for this card.

Christmas and plaid go hand-in-hand, so I stenciled a panel of linen cardstock using the Tartan Builder Diagonal Stencil in the same ink colors that I used on the Winterberry cluster, but I used a lighter hand.

I cut the panel to 3 3/4 inches by 5 inches and layered it onto an A2 Pine Feather cardbase using foam squares. I layered the largest circle from the Nordic Circles on top and then added the winterberry cluster. 


The JOY was die cut from gold cardstock and the base was cut from Pure Poppy cardstock and then glued together using liquid glue. I layered it directly on top of the winterberry cluster using foam squares.

I chose to use the script portion from the Opposites Attract: Holiday stamp set to accent the large JOY word. Of course the berries and leaves got a nice dusting of glitter for some holiday sparkle and shine!

Well, this is all for today, but make sure to join me tomorrow for day 2 of full reveals! You're going to love it! Don't forget to head to the other designers' blogs to see how they've used these beautiful new Christmas products! Thanks for fluttering by!