Paper creations made by me! I love making cards, 3-D projects and more! I love sharing my passion for creativity!
Sunday, May 16, 2021
Hello Bluebird {Hello Sunshine}
Happy Sunday, friends! I've had a whirlwind few days taking my cute daughter graduation dress (and other end of year occasions) shopping and then we took Senior Pictures! It's so fun seeing her blossom into such a fabulous young lady!
Despite my whirlwind, it was so fun to sit down and create this cute springtime scene using these cute critters from the latest Hello Bluebird release!
This particular set is called Bloom and Grow and has so many cute and fun images to create fun springtime scenes! I stamped them all out and then had fun coloring them with an assortment of Copic markers. I used the coordinating Bloom and Grow dies to die cut the images.
The background was created using Distress Oxide inks and regular Distress inks. I used brown at the bottom because I just HAD to have Mr. Mole poking up from the dirt. Isn't he the cutest?
I love the little bunny planting his/her pots for the season and watching them grow! I seriously love this new set and can't wait to use even more from the new release over the next week or so! Thanks for fluttering by!
Friday, May 14, 2021
Ink to Paper May Release Countdown Day 4
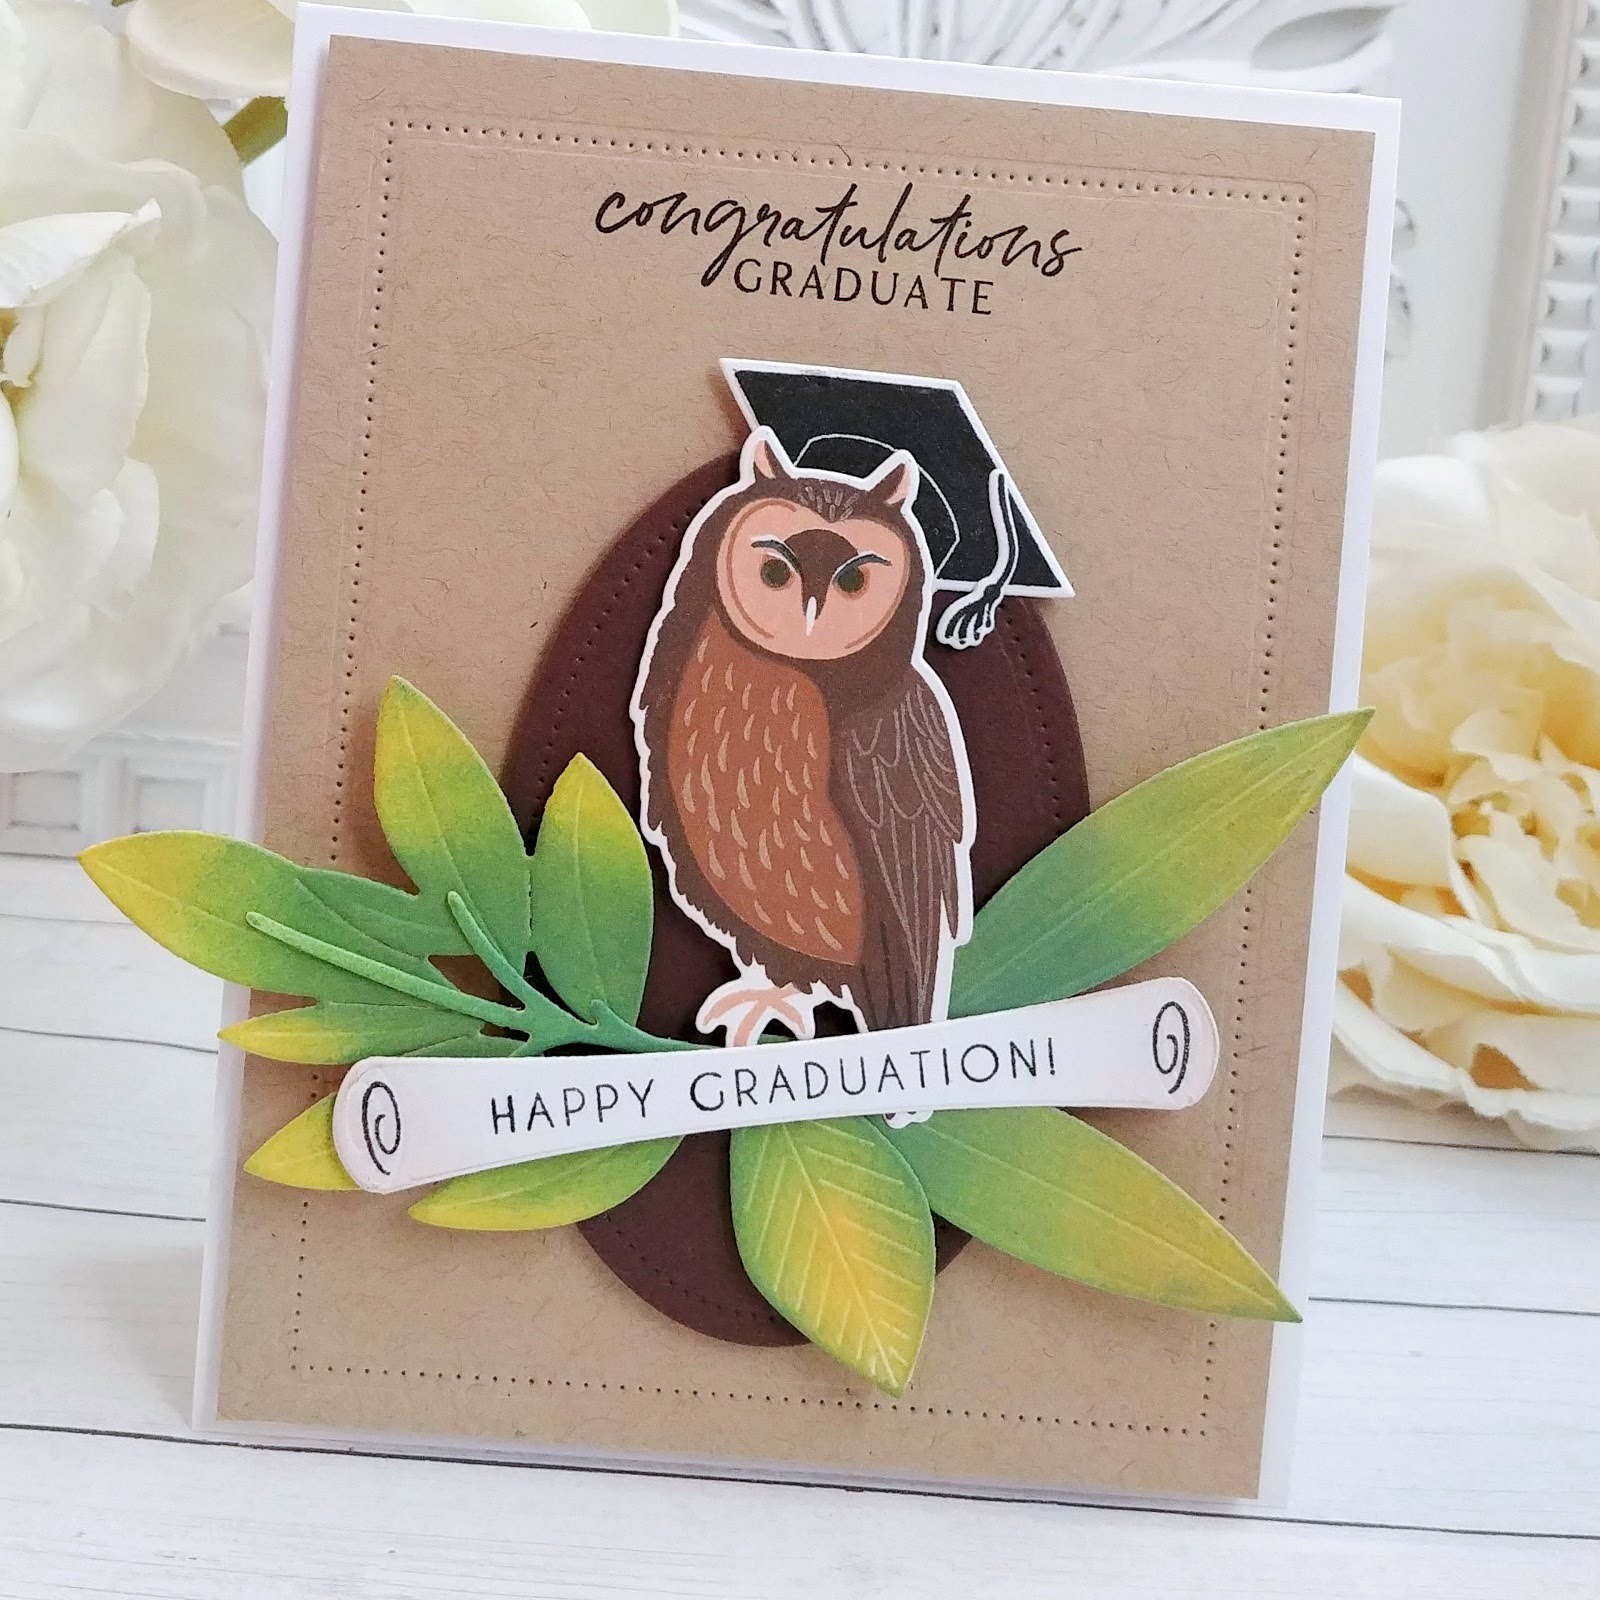
Welcome to the 4th and final day of the Ink to Paper May release countdown! Everything will be available for purchase tomorrow, May 15th, at 10 PM ET! I have two cards to share with you today and first up is this graduation card using the new Feathered Friends 12 stamp/die set. I mentioned the other day how I really wanted to put a graduation cap on the owl, and today I did! ha ha!
Confession time: I was SUPER intimidated by this little owl because he/she has quite a few steps, but I was thrilled to discover how easily everything lines up! In fact, this particular bird ended up being one of the easiest in the series and I love how it turned out!
As you can see, I used the leaves from the new Into the Blooms leaves that were showcased on Wednesday! I'm seriously obsessed and I just can't seem to stop using them! They are the perfect perch for this little owl clutching his diploma, which is from the Go-To Gift Card Holder: Congratulations Graduate die.
The cap and tassel are from the Hats Off stamp set. I chose this hat in particular because it is just the right scale for this wise owl! The sentiment at the top is from the new Say It Essentials stamp set.
My daughter is graduating this year so she has a lot of friends who she will be congratulating and this one will be perfect for one of her male friends!
My last card for today and for the release uses the new Perfect Pair: Essentials stamp/die set. This one is similar to the Commodities set that was showcased on Wednesday, but this one is a little bit more "handwritten" and the other one is more of a script. They are both so much fun!
I chose a playful design to highlight the font of the sentiment using the new Summer Seashells dies that were showcased on Tuesday! This card is very similar to the one I made using the shells on Monday, but I had so much fun with the inky background!
The shells are inked up using Distress Oxide inks as well as the backgrounds!
I added some dew drops to give it some watery detail! Thanks for fluttering by!
Thursday, May 13, 2021
Ink to Paper May Release Countdown Day 3
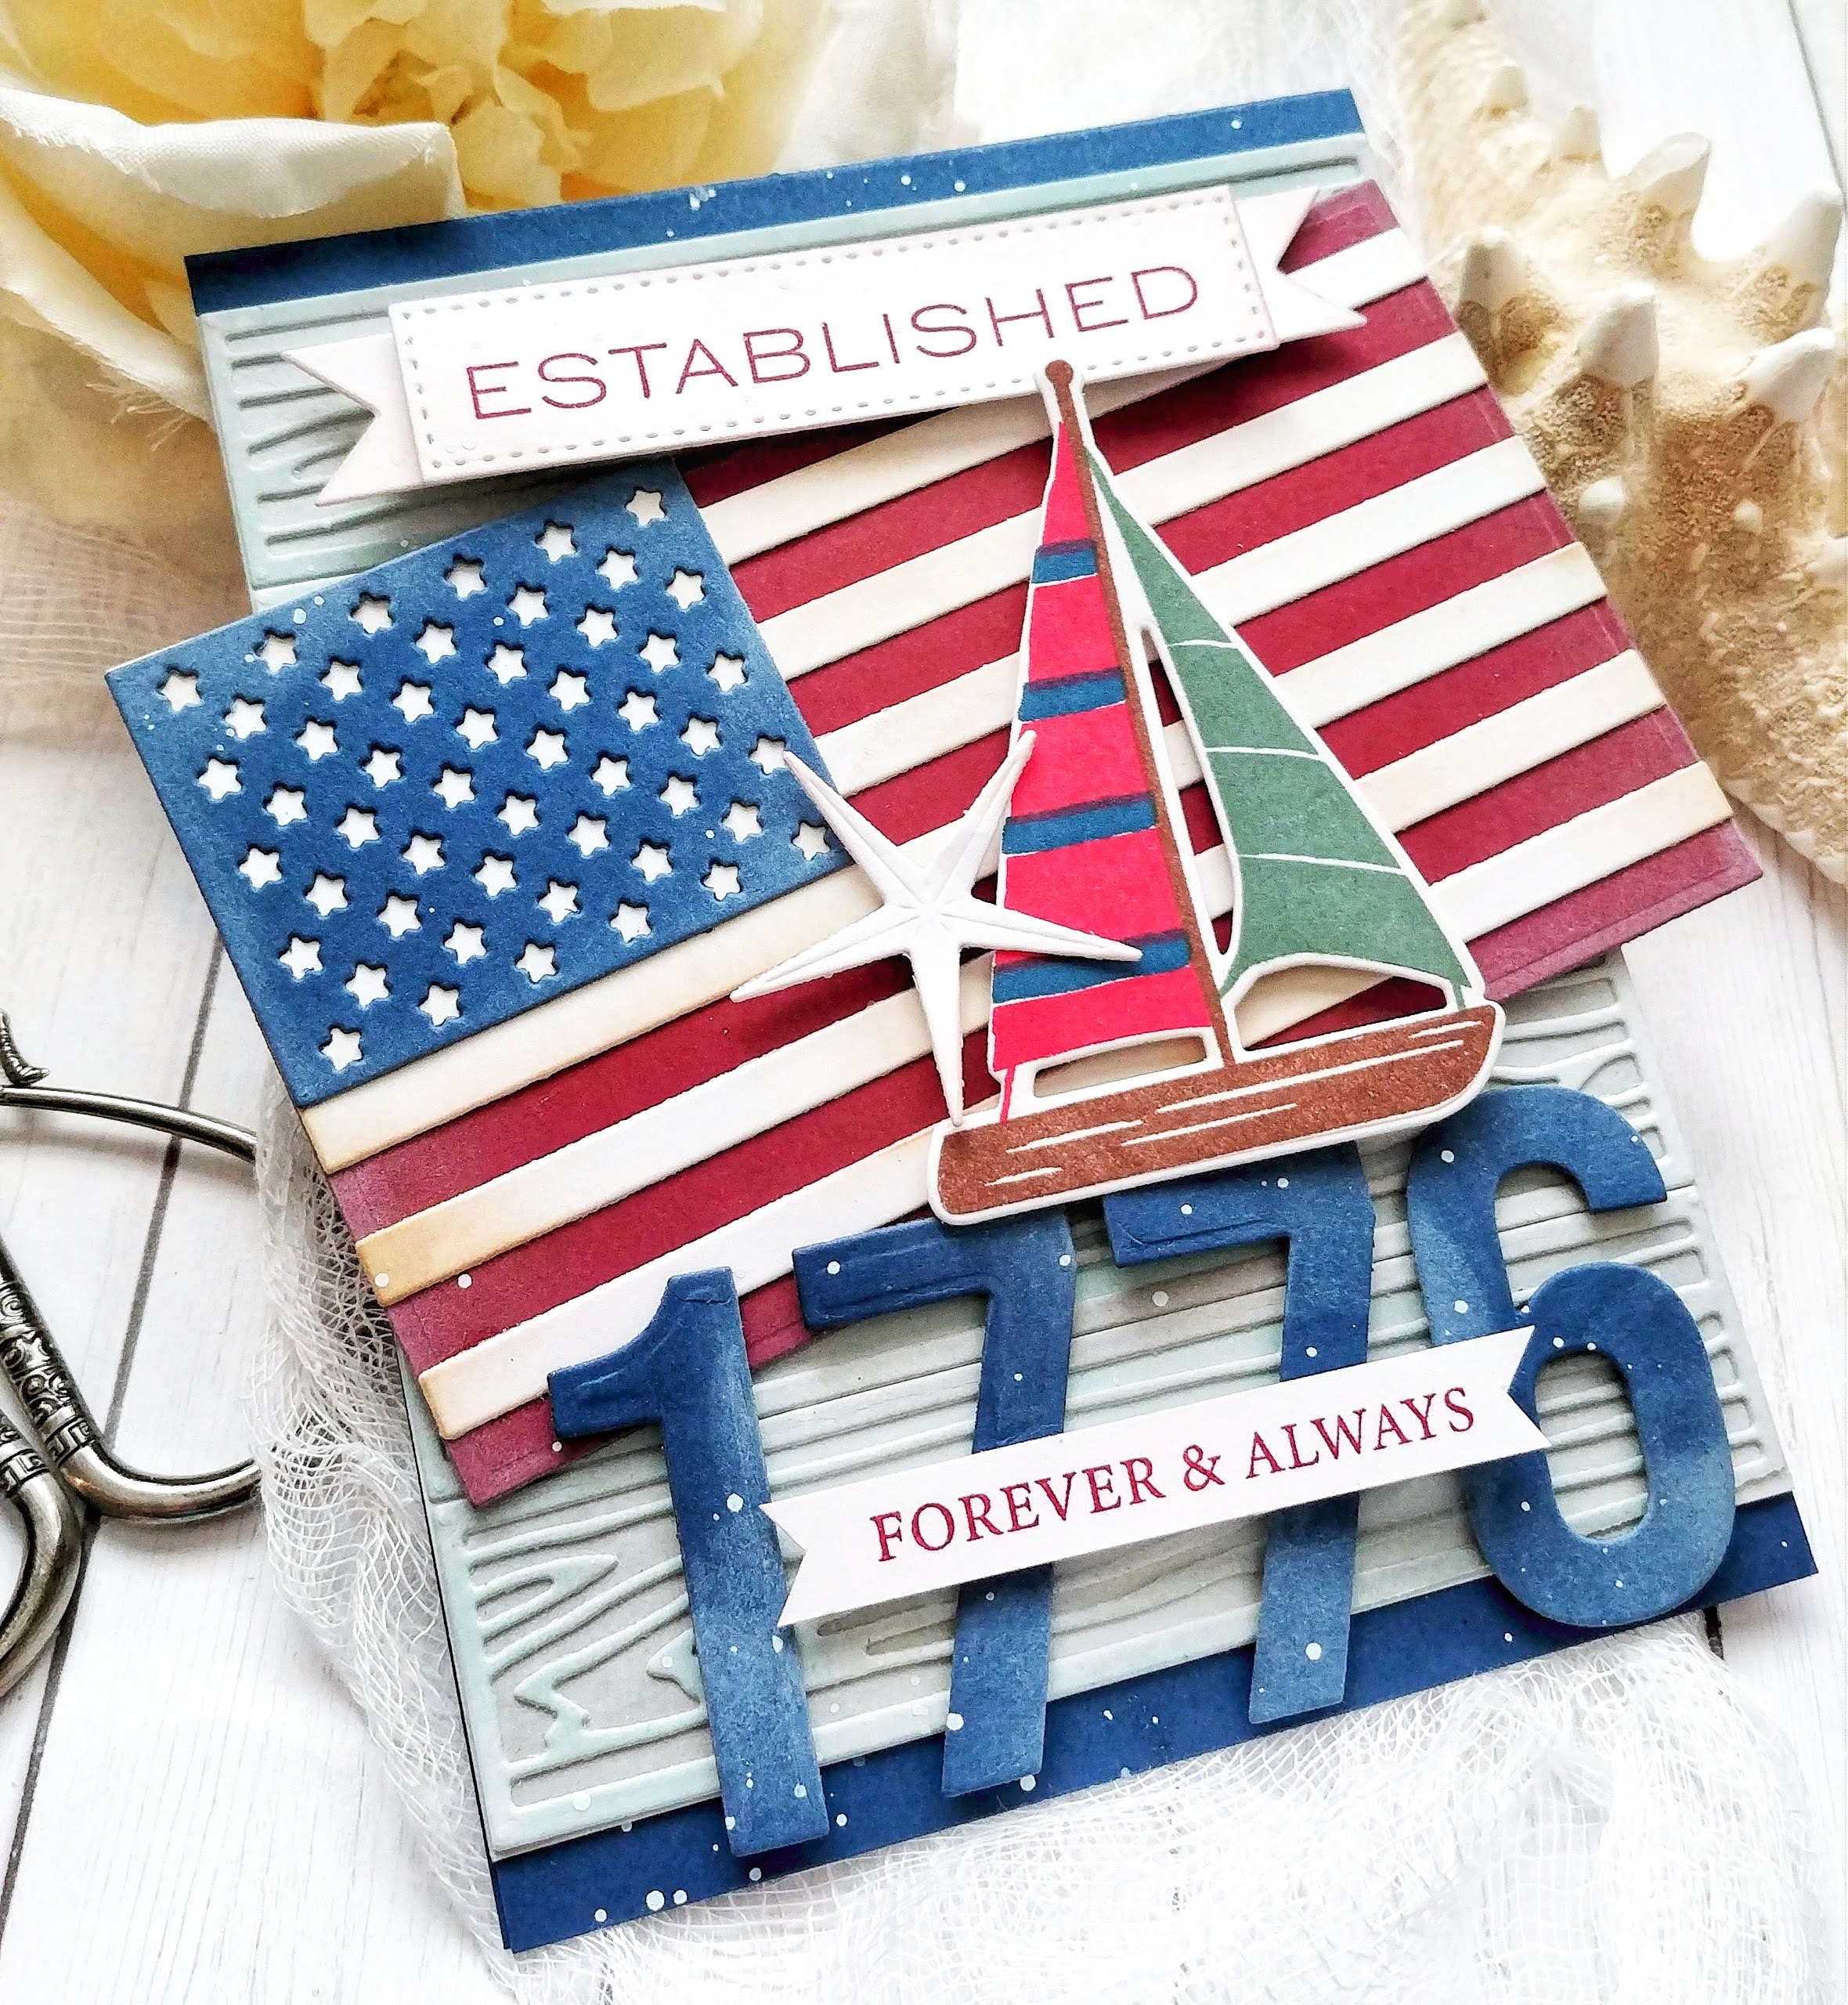
Three Cheers for the Red, White, and Blue! Welcome to day 3 of the Ink to Paper May release countdown! I'm sharing two cards with you today using some fun new patriotic products to celebrate our freedom and those fun summer holidays! We're lucky in Utah that we celebrate two holidays in July both using the American flag and red, white, and blue! I've packed a lot of product onto this first card, but I was just having so much fun I couldn't resist!
My goal as I set out to create this card was to make something "Nautical Americana". I also wanted to create weathered and vintage pieces to capture the look I was going for. To begin, I created a 4 1/4 by 11 inch panel using assorted Distress Oxide inks to get the weathered wood look. Once the panel was complete, I die cut the wood pieces using the Woodwork Die. I cut the rest of the panel to measure 4 1/4 by the length of the 5 boards. I layered the wood pieces onto the panel using liquid glue.
I used the fabulous new Love to Layer: American Flag Dies to create the flag piece. I die cut the pieces using white, Scarlet Jewel, and Enchanted Evening cardstock. I added some Fresh Snow ink and a blender brush to the red and blue portions and some brown ink to the white portions for that true Vintage Americana look.
I don't think I could have been more pleased that I had the option to add the fabulous "Established" sentiment to the card using the previously released Just Sentiments: Established Mini stamp set. I die cut the numbers using the Numbers Die to create the year 1776 portion of the card. The "forever and always" is from the new Perfect Pair: Commodities stamp set that was showcased yesterday! I had a sailboat left over from the release last month that was the perfect accent for this card. It is from the Seas of Life stamp set. This is the boat I was talking about on Monday that would look so cute with the Message in a Bottle dies! I finished it off with one of the new seashells and a bit of white paint splatter!
My second and final card for today uses the new To Die For Sentiments: God Bless America. I went for a less "in your face patriotic" feel for today's card, but I just love how it turned out!
As you can see, I just can't seem to get enough of these blooms and used them to accent this summery card.
I love this bloom in particular because the colored pencil fits perfectly into the built in grooves of the petals so you can add additional pencil details effortlessly.
I die cut the "God Bless America" piece twice: once from textured gold cardstock and once from white and then glued them together to create a sturdier piece. I layered it across the frame that I created using the Border Bling: Twinkle die. I added the flowers and leaves around the frame here and there and then finished it off with another "forever and always" sentiment that has been heat embossed and some glitter!
This finishes up the countdown for day 3! Join me again tomorrow for the fourth and final day of the countdown with all products going on sale on the 15th at 10 PM ET. Thanks for fluttering by!
Wednesday, May 12, 2021
Ink to Paper May Release Countdown Day 2
Welcome to day 2 of the Ink to Paper May release countdown! As mentioned yesterday, I have A LOT to share with you today using some of my very favorite products from the May release! I have three projects to share with you using the new Into the Blooms II dies! It's no secret how much I love the previously released Into the Blooms dies, so you can only imagine how giddy I am with these new beautiful dies!
My first card uses two of the different blooms with one of the leaf options. I paired it with the AMAZING new sentiment set called Perfect Pair: Commodities with its coordinating dies. Since this is a graduation card, I also added in the year that I die cut using the Numbers Die that was released a few months ago. I die cut the numbers from a textured gold cardstock that I picked up at Michael's last month.
I die cut the flowers and leaves from white cardstock and then used a variety of Distress Oxide inks to do all of the coloring on the flowers. I find that I can get the most realistic looking blooms with the oxide inks. I also added some colored pencil details to the flowers as well as some color spritzing and glitter!
I also rounded the petals upward for more realistic looking flowers as well. I've had so much fun creating all of the different flowers I've used on today's projects and even some later on in the release!
I die cut the "happy" portion of the sentiment and then heat embossed it in gold for a seamless look against the black background. I also heat embossed the coordinating "graduation day" sentiment in gold as well.
My second project for today is a series of tags that I put together to accent some Mother's Day gifts. Since Mother's Day is past, you could just switch out the sentiment for any occasion!
I made 5 tags in total using each of the three different flower options.
I created these flowers the same as I did for the previous card.
I really like die cutting everything from white cardstock and then just coloring them as I go along deciding which colors I want for my project!
My third card using these beautiful blooms also uses the new Feathered Friends 11 die. I think this owl is so cute and you could color it in any color you can imagine!
I went for a traditional owl look, but you could definitely let your imagination take hold and make it as colorful as you like!
I added some Nuvo Crystal Glaze over the top of the eyes and the beak for some realistic shine.
I used another one of the new Just Sentiments: Summer sentiments for this card. I mentioned yesterday that I needed to make some summer cards for my boys' teachers, so this will be one. I really wanted to try putting a graduation cap on this little owl, but that will have to wait until another day! ha ha!
My 4th and final card for today uses the Perfect Pair: Commodities stamp set again paired with the new Vase Collection. I love the built in texture on the vase die!
This beautiful flower bunch is from the previously released Sprigs and Sprays stamp set and it's just perfect for this new vase.
This vase is perfectly sized to coordinating with many of the previously released flower/branch sets that you may already own! I can't wait use more flowers to fill up this cute vase!
I'm really in love with these new sentiments and adore the fact that they have coordinating dies for the scripty words! They're so delicate that they look so nice stretched across any design! Well, that finishes up my projects for day 2! Join me again for even more summer inspiration tomorrow! Thanks for fluttering by!
Tuesday, May 11, 2021
Ink to Paper May Release Countdown Day 1
Hello and welcome to day 1 of the Ink to Paper May release countdown! I've been having so much fun creating with this amazing release and I know you're going to love it too! My first card for today uses the new Just Sentiments: Summer stamp set paired with the fabulous new seashell dies!
I didn't do as much as I normally do for my boys' teachers for Teacher Appreciation Week, so I plan on putting some "summer" inspired gifts together to give to them on the last day of school and this card will got with one of the gifts! I think EVERY teacher is searching for "endless summer vibes"! LOL! To begin this card, I die cut almost everything from Fresh Snow Linen Cardstock except the seashells. I cut those out of regular white cardstock and then applied the ink using finger daubers.
To begin, I die cut the focal panel using the Love to Layer: Notched Die and then added some ink around the bottom using the new Salvaged Patina Distress Ink. I also used the new Salvaged Patina spray stain to give the panel a watery vibe! I set that aside to dry and got to work on the shells. I love the detail on the shells...all you need to do is add some ink and you're done!
The shell set also comes with these two sprigs of aquatic plant life which I love! I stamped the sentiment at the top of the panel once it was dry using black ink and then arranged the plants and shells.
I used the Cover Plate: Ornate die for the background. I layered it over the top of an A2 panel with the same ink and spray as the focal panel. I added the Skinny Dotted Frame around the background panel using liquid glue. I really like this particular frame with this card because the dots look like the detailing on the star fish! I layered the focal panel on top of the background using foam squares. I added glitter to the shells and some dew drop embellishments here and there for some watery detail!
My second card for today uses the super fun new "Message in a Bottle" stamp/die set! My mind is reeling with all of the fun possibilities for this cute bottle! Do you remember the sailboat from last month's release? Wouldn't it be super cute in the window of the bottle? I know it's a little bit big to be a "ship in the bottle", but you could definitely try to go for that same vibe!
I created a pink bottle and tucked the flower that is included in the die set down in the bottle along with the "I'd be lost without you" message! There are quite a few fun sentiments that you can add to the bottle!
I added a few more of the new shells around this bottle for some seaside charm!
The bottle also comes with a cork so you can add that if you'd like and it allows you to be able to pull the message out of the bottle if you choose to! Join me again tomorrow for day 2 of the countdown where I will be sharing quite a few projects using some AMAZING new products! I can't wait! Thanks for fluttering by!
Labels:
Ink to Paper,
Papertrey Ink,
Papertrey Ink Dies,
summer cards
Saturday, May 8, 2021
Reverse Confetti May Release Blog Hop
Hello friends and welcome to the Reverse Confetti May release blog hop! I've got two projects to share with you today using some fabulous new products! All of the new products are available for purchase now in the shop {link above}! Up first is a fun birthday/celebration card using this cute new balloon set! I love the two sentiments that are included; I chose to use the "let's celebrate you" sentiment for today, which could be used for many different occasions!
To begin this card, I stamped the outline images using black ink. I actually set them aside to dry overnight so that I wouldn't have any black smudges. If you don't have problems with your black ink, then go ahead and get started coloring! There's nothing worse than having a black smudge after you've done the majority of the coloring!
I chose warm tones for this celebratory card with pops of red to keep it bright!
The background is die cut using the Stitched Burst Cover Panel and then I layered the peach striped paper from the Sweet Stripes 6 by 6 paper pad. From there I was able to use the large oval from the new Cover panel (not sure of the name) to anchor the balloons. I added two of the floral clusters and the heat embossed sentiment to finish it off!
My second card for today uses the new cup of Friendship set and is so cute! I was going for a Mary Engelbreit feel, which I love! I stamped the images (letting them dry overnight) and then colored them using alcohol markers. The cup got a bit of Nuvo Crystal Glaze over the top. I actually outlined the cup with the glaze and then took a dry paint brush to drag the glaze downward from the top and upward from the bottom to give it a fun texture. It's hard to see in the photos, but I really like how it turned out.
Remember the oval from the first card? This is the Cover Panel that cuts it so you can get some different uses from the one die. It creates the perfect cut-out for this cute cup of flowers!
The sentiment is stamped on the cute polka dot paper, which is from the Cue the Confetti 6 by 6 paper pad, and then I layered the black piece over the top. I do need to mention, however, that I added the white paint splatter before I added it to the card.
I added a few sequins to finish it off! There is another really cute image included in this set that I can't wait to use! Head to the other designers' blogs to see how they've used these cute new products! Thanks for fluttering by!
Reverse Confetti Blog
Labels:
birthday,
copic markers,
floral cards,
Reverse Confetti
Subscribe to:
Posts (Atom)