Monday, September 14, 2020

Flash Sale {Peaceful Forest}


It's a busy day on the blog, but I wanted to share my projects for this week's Papertrey Ink/Ink to Paper Flash Sale! I've come up with some beautiful, yet unexpected colors for these holiday designs! I chose the fabulous Peaceful Forest stamp set to showcase this week, which will be part of this week's sale!
INK: Soft Stone, Lilac Grace, Winter Wisteria, Pinefeather, Ocean Tides, Stormy Sea
CARDSTOCK:  Lilac Grace, Pinefeather, Ocean Tides, Stormy Sea, vellum

Both cards are identical in layout and design, but I just switched up the background colors to create two very different feeling cards!

I chose Lilac Grace cardstock for the background of this card and added some Winter Wisteria snowflakes and ink blending around the edges using a blender brush.


I die cut the large cluster of trees and used my MISTI to stamp both clusters quickly. The ink going from left to right is: Soft Stone, Lilac Grace, Winter Wisteria, Pinefeather, Ocean Tides, Stormy Sea, and then Winter Wisteria again.

Both sentiments are heat embossed in silver onto strips of vellum and wrapped around the panels and secured using clear tape. The stars are die cut from silver glitter cardstock and added to the top of the tree using foam squares.


The green card has a Pinefeather background and the snowflakes are stamped in black. I added Pinefeather ink around the edges, but in hindsight, I probably should have used black here as well.


Before I added the vellum, I added some white paint splatter over the top using a fine paint brush and white acrylic paint. I added a few sequins and then layered them onto Stormy Sea top folding card bases using additional foam squares! I love how these unexpected holiday cards turned out! My Christmas card stash is GROWING! How about you? Have you started your holiday/seasonal crafting yet? Leave me a comment and let me know how it's going! Thanks for fluttering by!


Ink to Paper September Release Countdown Day 4


It's the 4th and final day of the Ink to Paper September release coundown! All products will be available for purchase staring tomorrow night at 10 PM EDT! I had so much fun all week using these fabulous new products! What are some of your favorites? 

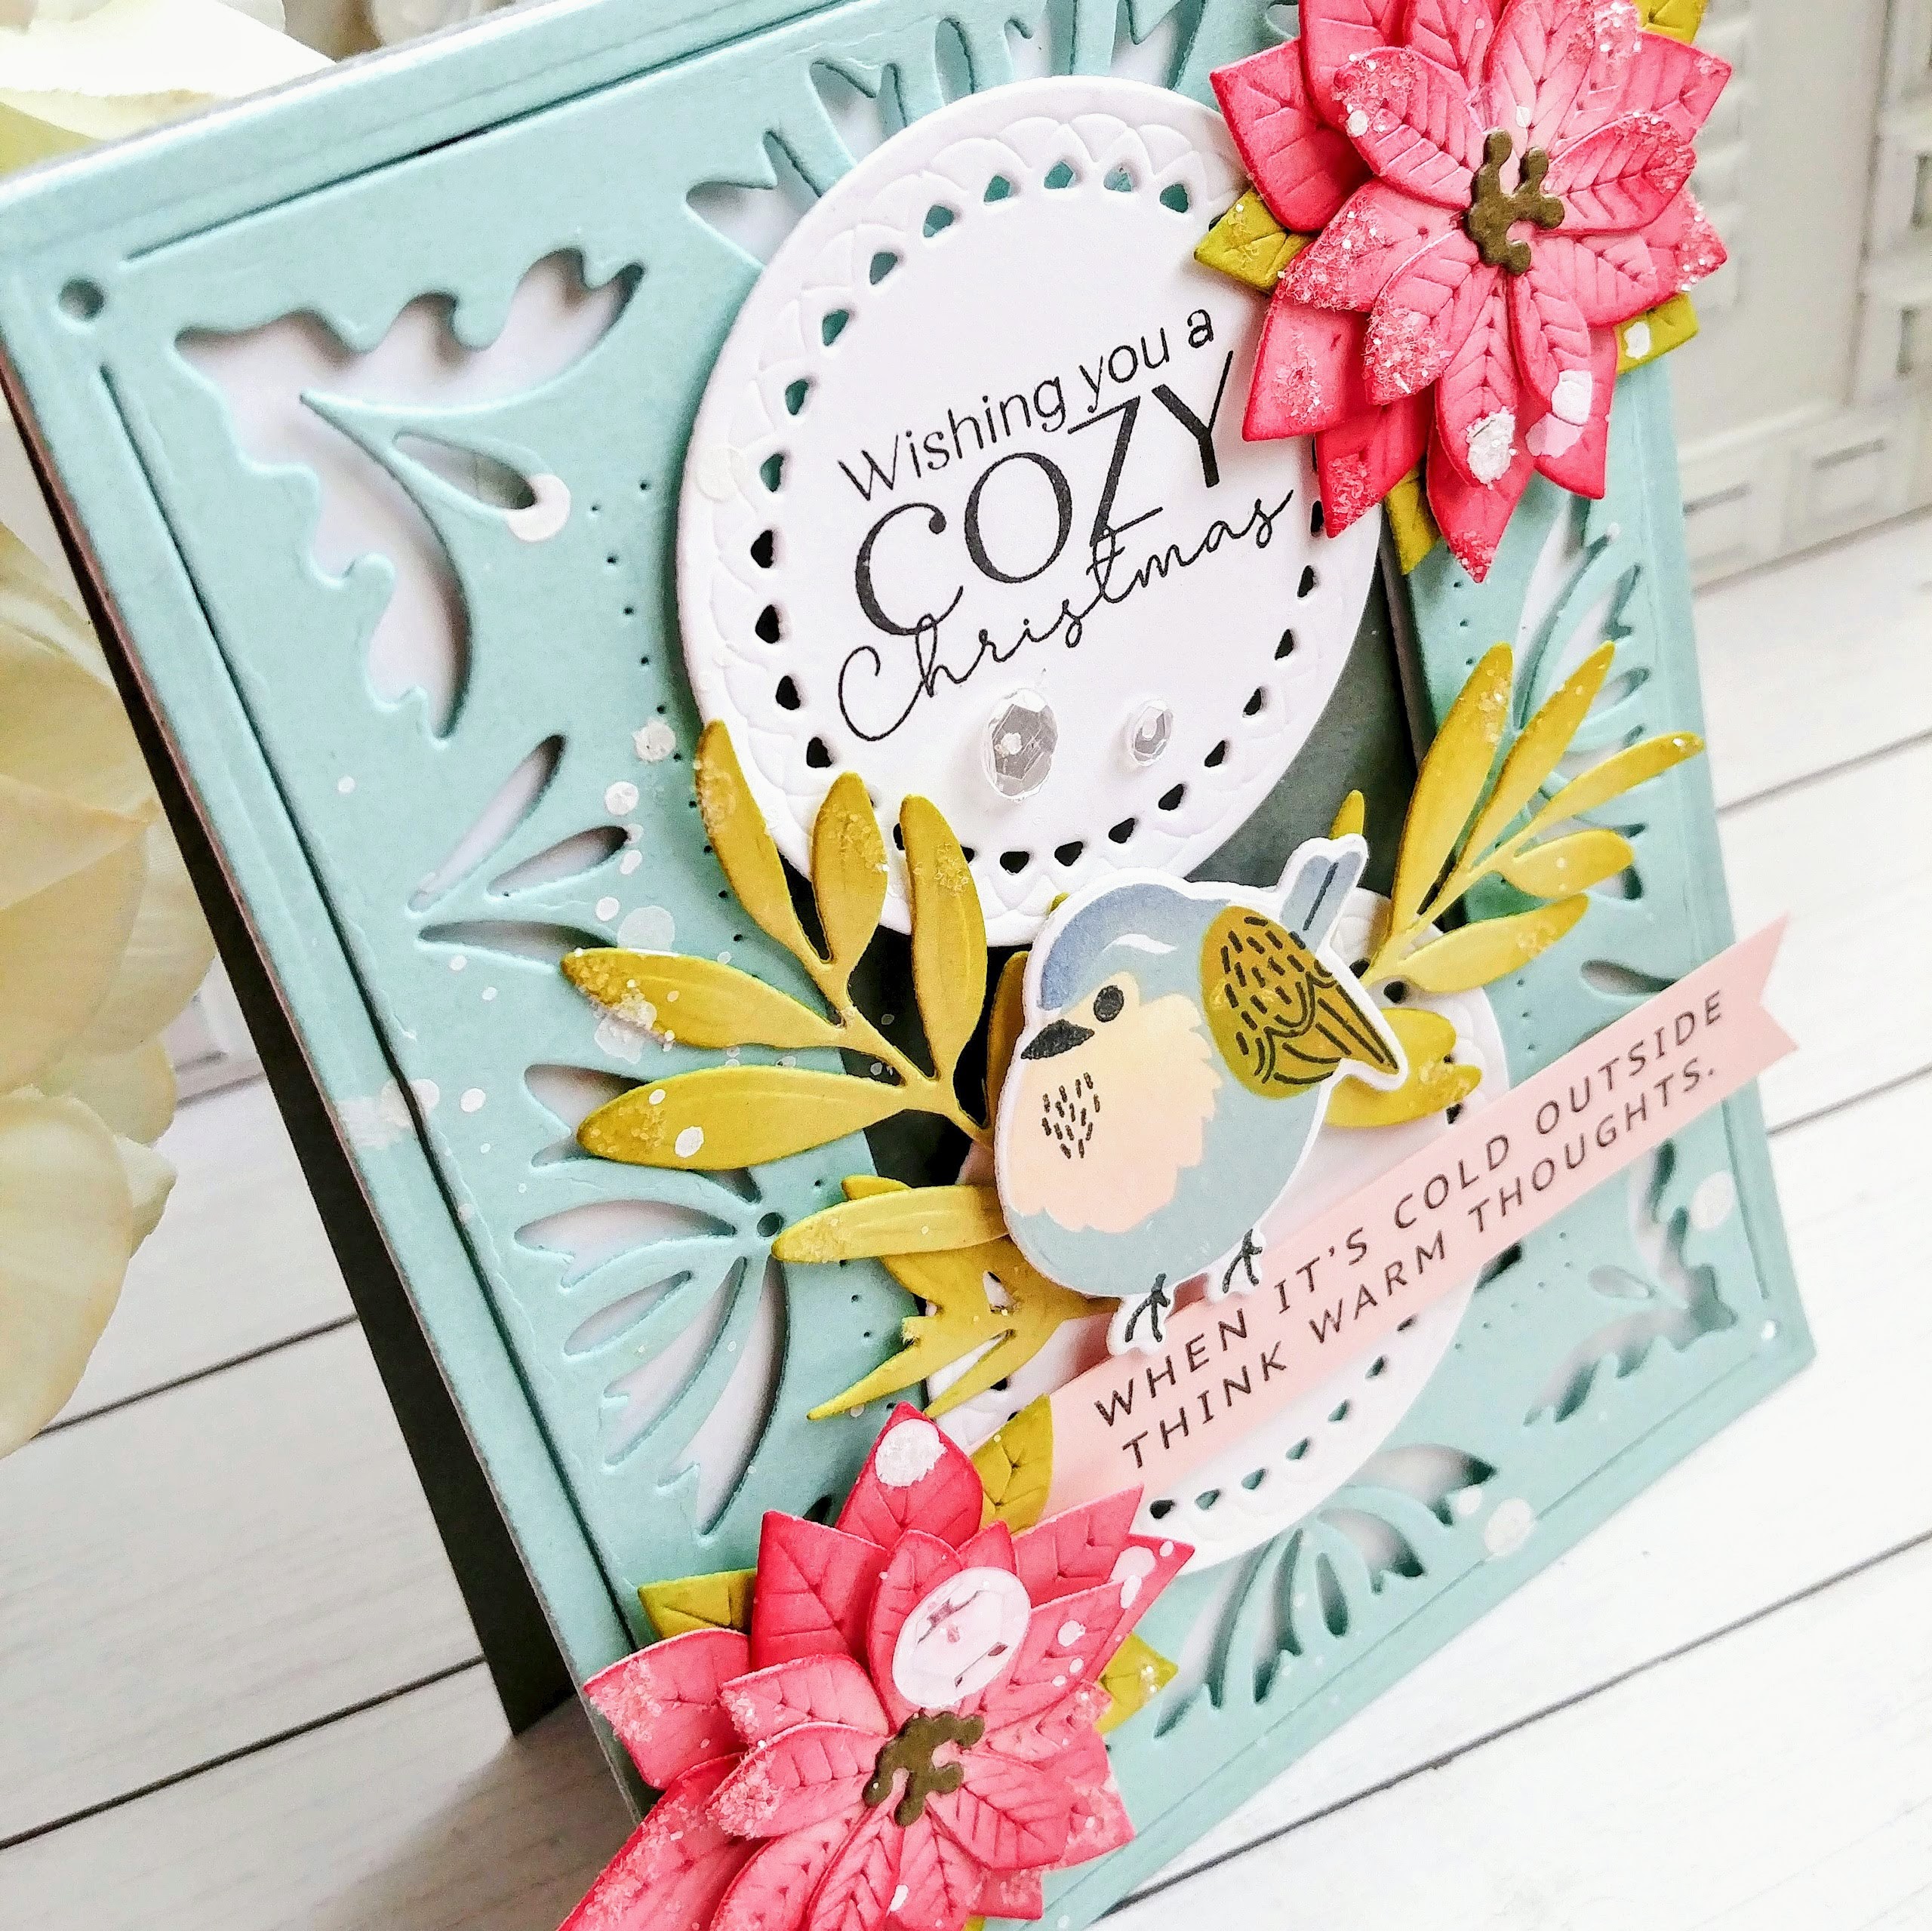
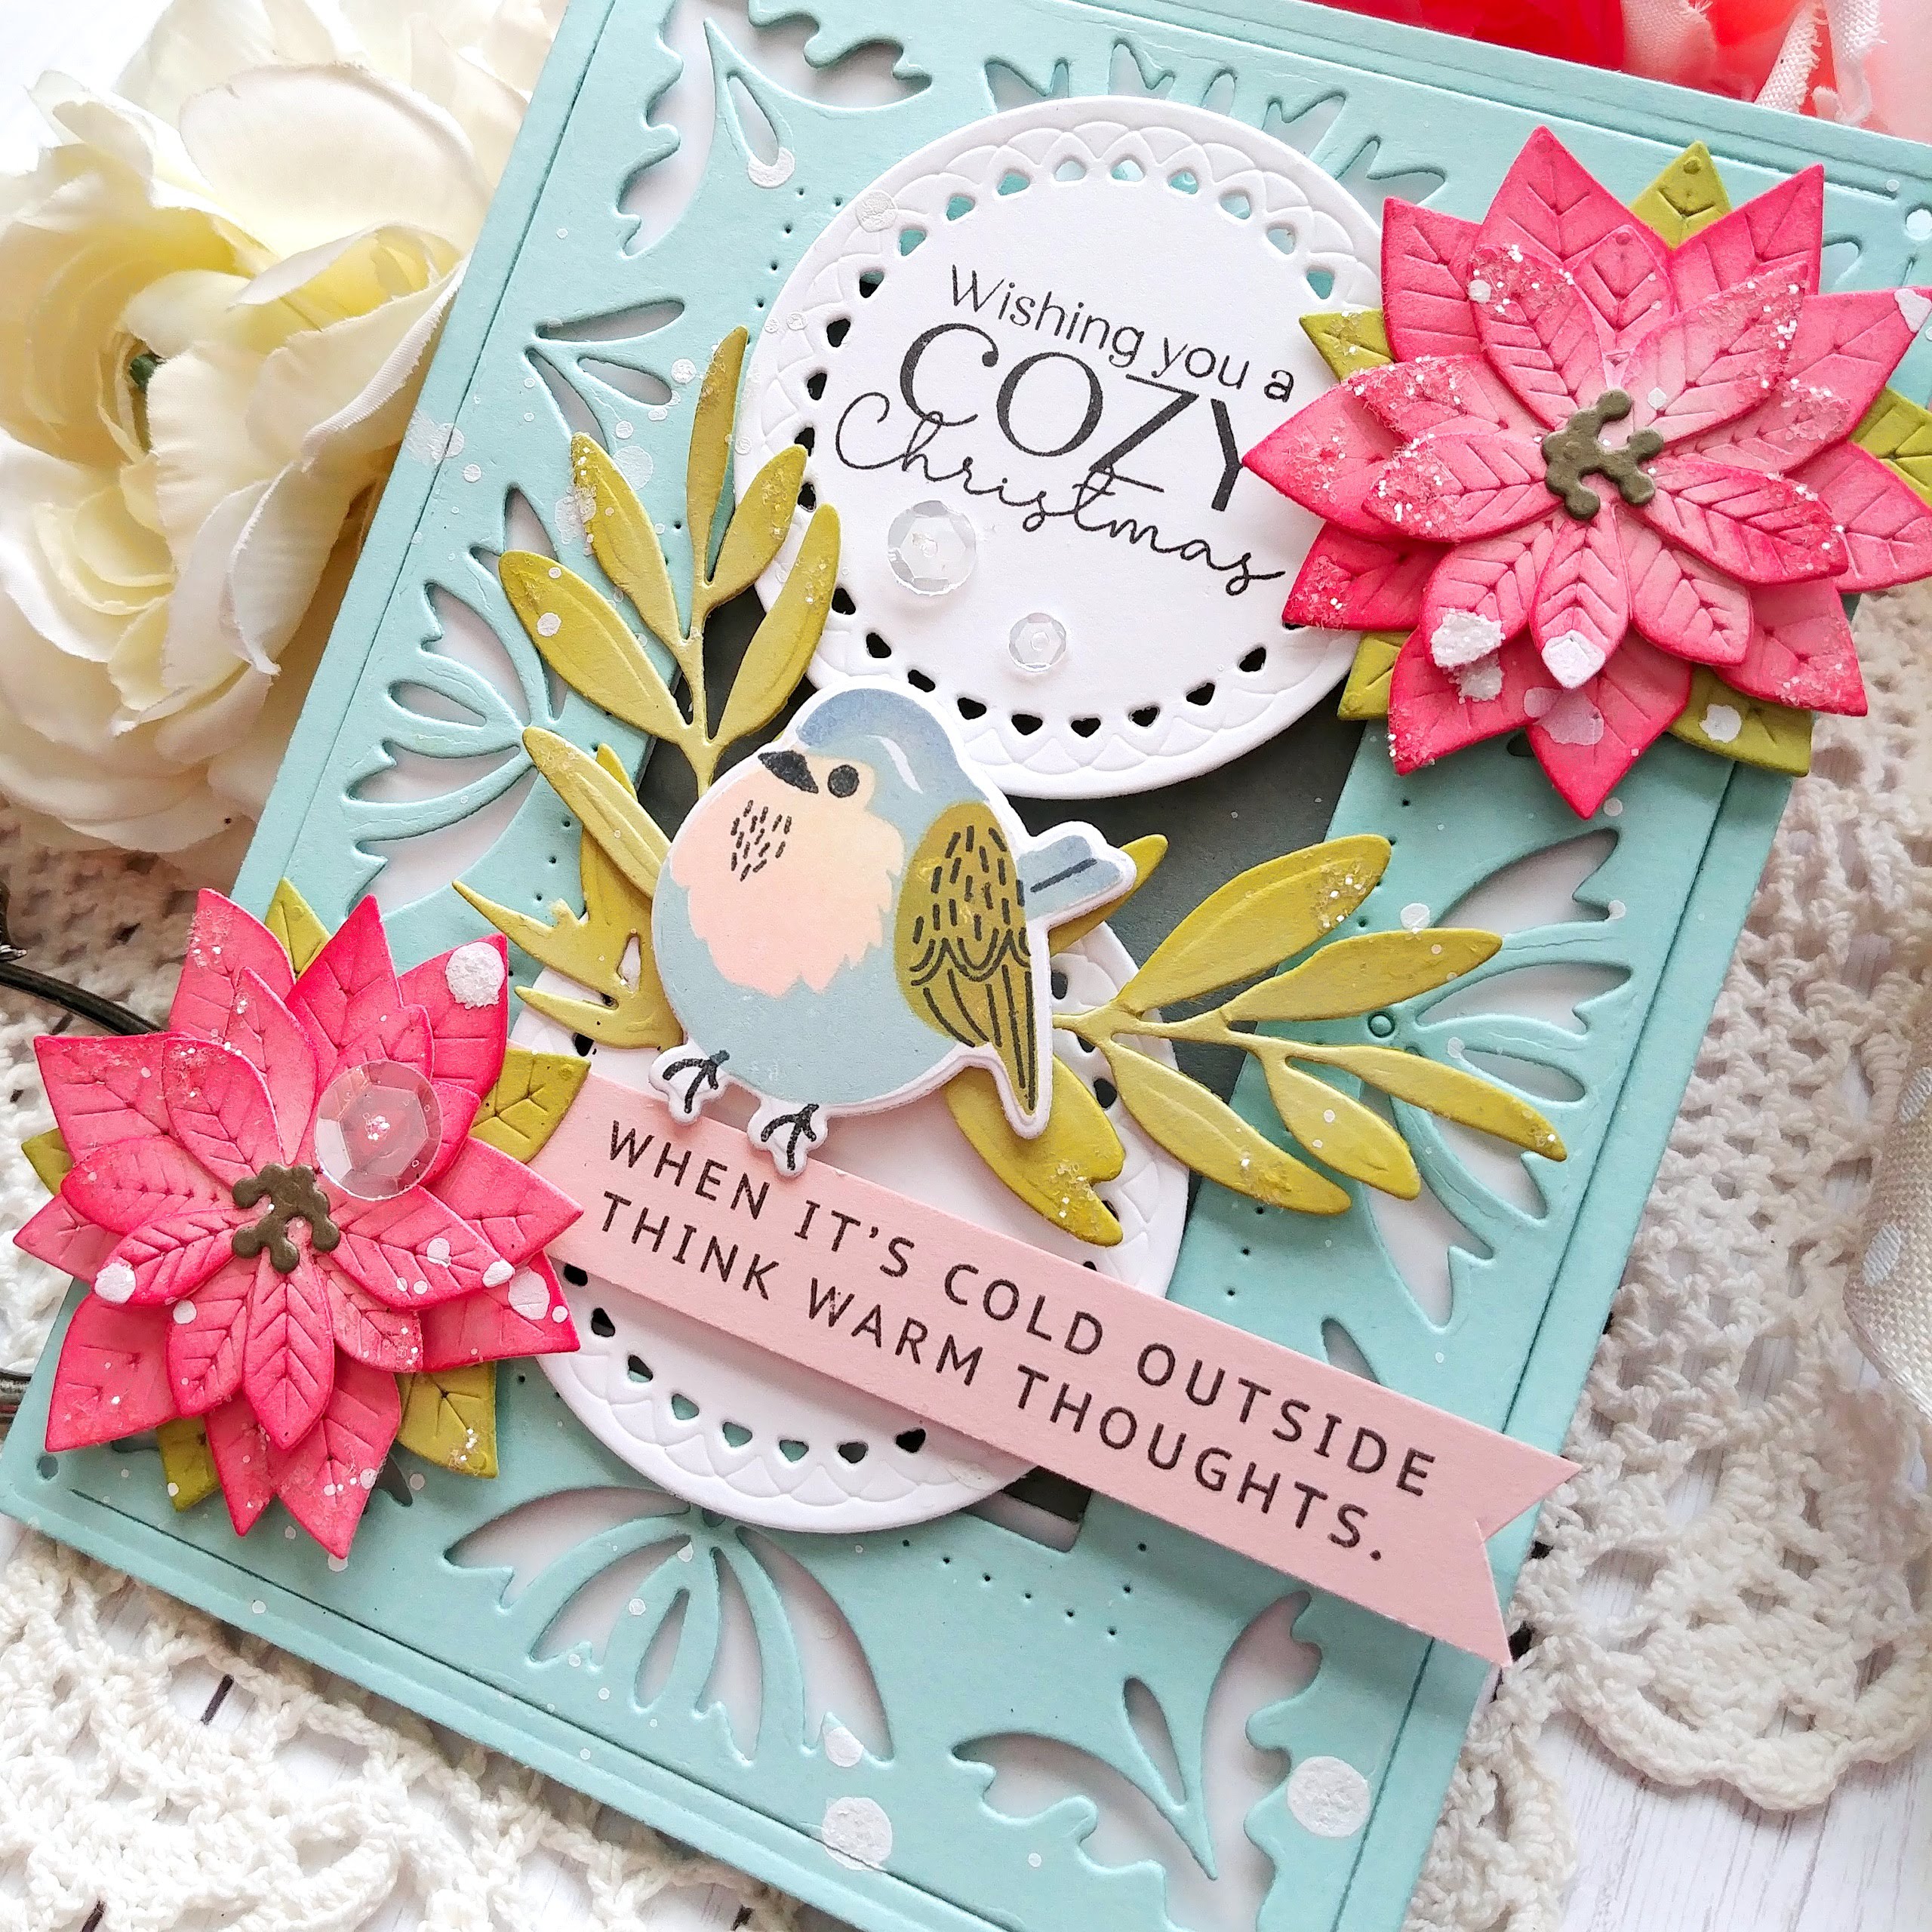
As promised, here is the new Border Bling: Joy die used as a frame! I cut it using Aqua Mist cardstock and then layered it over another frame die cut from White cardstock using foam squares for depth and dimenison.

This card uses the new Feathered Friends 4 stamp set. I love the sentiments that are included, but I wanted to keep with the Christmas theme, so I added one of the new (and my favorite) sentiments from the Just Sentiments: Warmth stamp set. I paired it with one of the new Inside Greetings: Warmth sentiments stamped on Sweet Blush cardstock  using black ink.

The Love to Layer Scallop Circle dies worked so nicely to highlight both sentiments and the sweet little bird. I used Distress Oxide inks to stamp the bird in these coordinating colors. I also added the poinsettias and foliage that were cut using the Tag Creations: Modern Gift die collection. I just love the traditional Christmas touches, but in non-traditional colors!

I added quite a bit of white paint splatter for a more dramatic snowy look! I also added some coarse crystal glitter to both the leaves and poinsettias for sparkle and holiday shine!

The colors that I used for this card are: Aqua Mist, Stormy Sea, Sweet Blush...the poinsettias are die cut from Sweet Blush with Pure Poppy ink blended over the top, Olive Twist,and Spring Moss!

I'm excited to try dry embossing this new Border Bling: Joy frame. I think it will be beautiful!

This card was a lot of fun to make and now I want pink poinsettias on EVERYTHING! ha ha!


My next two cards use the super cute new Storybook Christmas stamps/dies! This card uses the books in a more traditional way, but my next card shows them in a fun, Christmas-y way that the stamp designer intended! It's quite simple, but it showcases this fun set so well!
The layout of this card is EXACTLY like my deer/joy card from yesterday, but this time with the books! I don't normally do that, but I really liked how nicely it showcased these cute books!

The stamp set comes with all of the books you see here and the cute little narrow book/shelf and book end star!

What's your favorite Christmas book? I'd love for you to leave a comment and let me know! I think we focus a lot on our favorite Christmas "movies", but I like the idea of a favorite Christmas book!

Here is my last card for today using the Storybook Christmas set all stacked up to look like a tree! Isn't this such a fun idea? I love it!

The books all stack up perfectly in size and scale to get this fun and whimsical tree!

I stamped two of everything while I had them all lined up in my MISTI! It makes it so much easier to mass stamp!

Thanks for joining me today and this week for the countdown! Just a reminder that everything will be available for purchase tomorrow night at 10 PM EDT! Thanks for fluttering by!


Sunday, September 13, 2020

Ink to Paper September Release Countdown Day 3


Hello friends! I'm back with a few more projects to share with you for day 3 of the Ink to Paper
September release countdown! Thanks for all of your sweet comments the last two days! You know how to make a girl's day! 

My first card for today uses quite a few new products as well as a few old because I just love them so much! ha ha! Let's talk about this amazing new Border Bling: Joy die! I am in love with the beautiful detail around the edges and the font of the "JOY" word, that is included with the border die. I am showing it as just a panel on this card, but you can see it as an actual frame on one of the cards I'm sharing tomorrow. I also added a bit more depth and detail by adding a Skinny Stitched Frame around the edge using ScorTape.

The "O' Night Divine" sentiment is actually part of a large stamp with more of the lyrics of "O" Holy Night"...it is such a fun stamp and I can't wait to use the whole thing soon! For today I simply used a portion of the stamp to accent this traditional design!

The sweet little reindeer is part of a fabulous new set called Winter Wonder. This is another one that will be needing some immediate attention from me after the release! ha ha! It's such a fun, rustic looking set that will make fabulous holiday AND winter cards all season long!

As you can see, this card got a few sprigs of berries from the Floral Christmas stamp set that I've been using on a lot of my projects. I also used a few of the cute dies from the beloved Tag Creations: Modern Gift die collection. I added some glitter for extra holiday shine!

My next project uses another fun combination of products! First up is the FABULOUS new Scallop Top Gift Bag die! You all know how much I love fun packaging and this one is super cute! My large bow is covering up the scallop detail, but it is there and is super cute!

I mentioned yesterday that I wanted to use more of the images and dies from the Tree Essentials stamp set and this was the perfect opportunity! The branches are die cut from Aqua Mist cardstock and then heat embossed using white powder for an icy look!

These ornaments are super cute and I love the striped detail that you can add using stamps or dies. I chose to die cut them using silver glitter cardstock. The blue one is very reminiscent of a set of ornaments we had on my childhood tree and it's giving me all the feels!

The fun sentiments are from the new Joy Everyday stamp set, which is perfect for Christmas, but just like the name suggests...it works for so many non-holiday occassions!

I chose to heat emboss the JOY portion using silver powder to keep with the cool, icy colors! The "to the world" portion is stamped underneath in black. I kept my box flat until I had all of the stamps and dies attached for ease.

I added some Tinsel glitter to the branches to enhance the icy feel! I also tied some silver cord around the silver hanging portion of the ornaments for added texture and detail! Of course, you know I just HAD to add some sequins as well! A year or so ago, Ellen Hutson asked on her Instagram page what trend people would like to go bye-bye. Someone said sequins.....ummm....NO! I just love adding them to my projects! LOL! 
This concludes day 3 of the countdown! I'm excited for tomorrow's sneak peeks as well, so make sure to stop by! Thanks for fluttering by!


Saturday, September 12, 2020

Ink to Paper September Release Countdown Day 2

Hello friends! Welcome to day 2 of the Ink to Paper September Release countdown! I have so much to share with you today for both fall, winter, Christmas and more! First up is one of my favorite stamp/die sets of the entire release! I'm obsessed with dried oranges in holiday decorating, oranges in the toes of Christmas stockings, and oranges for holiday baking, so this new Sweet Orange Holidays stamp set is right up my alley!

I also paired it with the new On the Border: Fir die, which I dry embossed, and another fabulous new stamp set called Tree Essentials. I'll be sharing more with the Tree Essentials set tomorrow because it is just so darn cute!

The sentiments are both from the new Just Sentiments: Warmth and they work so nicely with this citrus design! I also tucked in some sprigs, berries, and pinecones from my stash I created the other day using the Floral Christmas. They've come in so handy to tuck here and there on so many of my designs!

I stamped the oranges with Orange Zest, Canyon Clay, and Terracotta Tile inks for the three step image. I also added some coarse crystal glitter over the oranges and foliage!

The sentiment is stamped on the smallest of the Notched Dies. I just love the added detail it gives it around the edges! The "sending you" portion of the sentiment is heat embossed in white onto the banner made using Pinefeather cardstock.

As I mentioned earlier, I dry embossed the fir border, but it looks so good die cut as well! I'm sure it will make an appearance on many of my holiday designs!

My next three projects use a fun collection of products called "Take Your Place"! It is perfect for creating the perfectly appointed holiday table scape!

I used the pinecone, pumpkin, and acorn dies to create these napkin holders. I also adorned them with a few snippets from the Floral Christmas set and the Sweet Orange Holiday!

I stamped them on Kraft cardstock for a warm look and then stamped the cute sentiments using black ink for contrast!


I made 2 pumpkins, three acorns, and two pinecones for each of the members of my family! These will look so cute to decorate the Thanksgiving or any autumn supper! 

My next project uses the newest addition to the In Stitches family....the pumpkin! I die cut it using the Bitty Big Canyon Clay pattern paper and then stitched around it using DMC floss!

I added it to a Large Kraft Coffee Bag using foam squares. I also added the "Happy Fall" piece that was die cut using the Take Your Place dies and then stamped using one of the sentiments.

I accented the pumpkin with some flowers that are die cut using the Into the Blooms Dies and then colored using blender brushes and ink.

A bit of glitter and ribbon finish off this treat sack!

My last project for the day uses the Take Your Place kit again, but this time to create place card holders rather than napkin holders. You COULD use this same design for napkin rings, though, if you wanted!

I found these fun pumpkin place card holders that work perfectly for these place cards!

I love these Aqua Mist and Ocean Tides pumpkins adorned with some added foliage!

And a blue acorn? yes please! I love how it turned out!

This concludes my projects for Day 2! Join me again tomorrow for Day 3 of the release! Thanks for fluttering by!