Saturday, June 20, 2020

June birthdays are the most fun!

Happy summer, friends!  I wanted to share a few more summer birthday cards I've been working on! I've written out my birthday card list for the month and knew I wanted to include a few using the Birthday Classics: June Mini stamp set. I made a total of 3 of this particular design so I used all of my usual mass producing steps to make it easier!

To begin these summer cards, I die cut the flowers that I planned on incorporating into the design using the Seasonal Borders: Summer die collection and then used my MISTI to get them all stamped using the Seasonal Borders stamp set. Once those were done, I set them aside to begin working on the background.

I cut the panels out of Aqua Mist cardstock measuring 4 by 5 1/4 inches and then stamped them using the Barnwood Background stamp. I also added a little bit of ink to each corner using a blender brush for some added defintion.
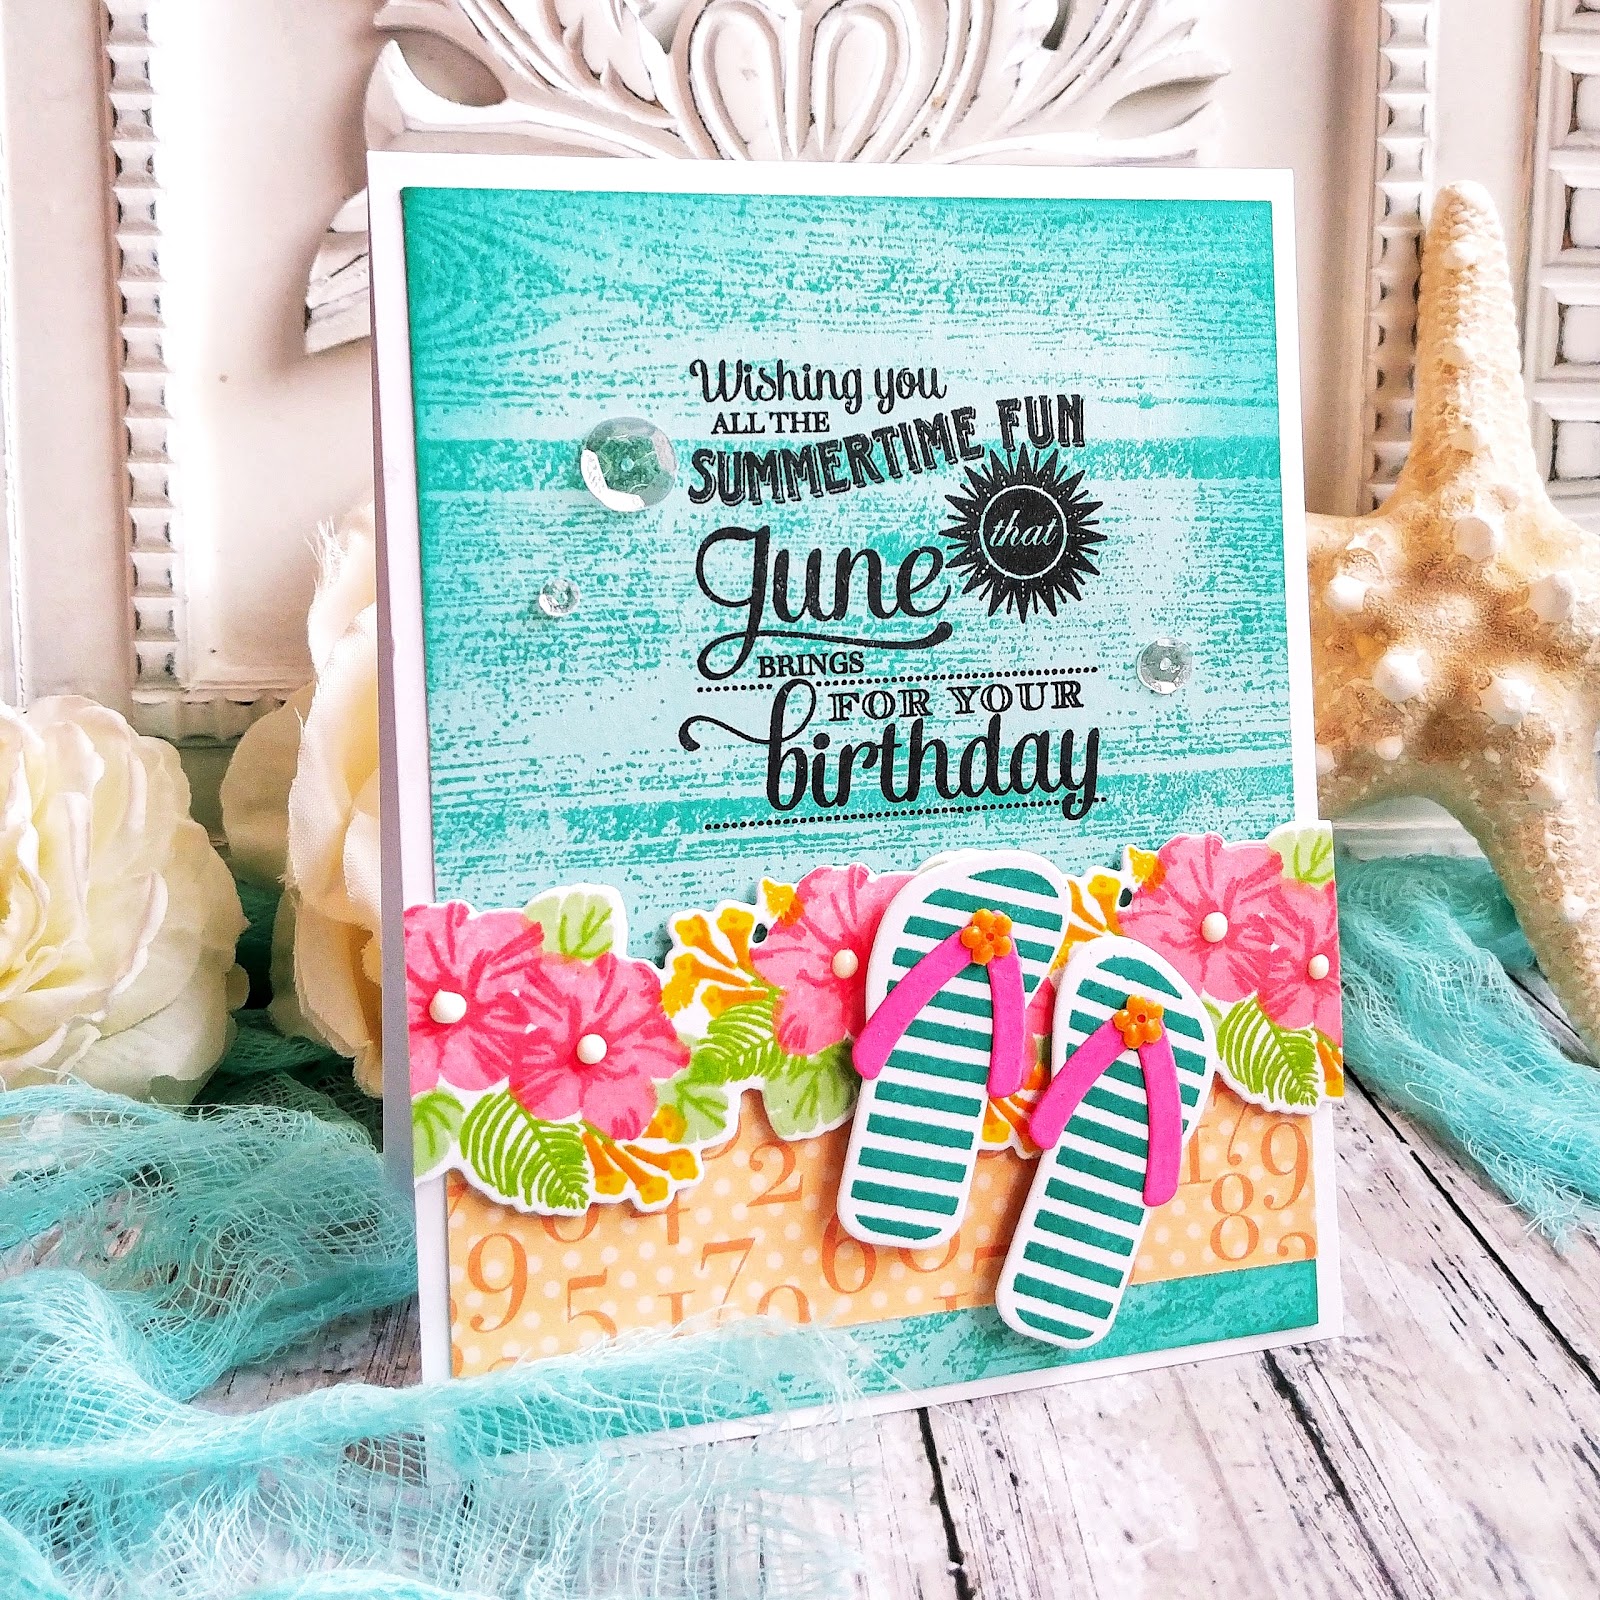
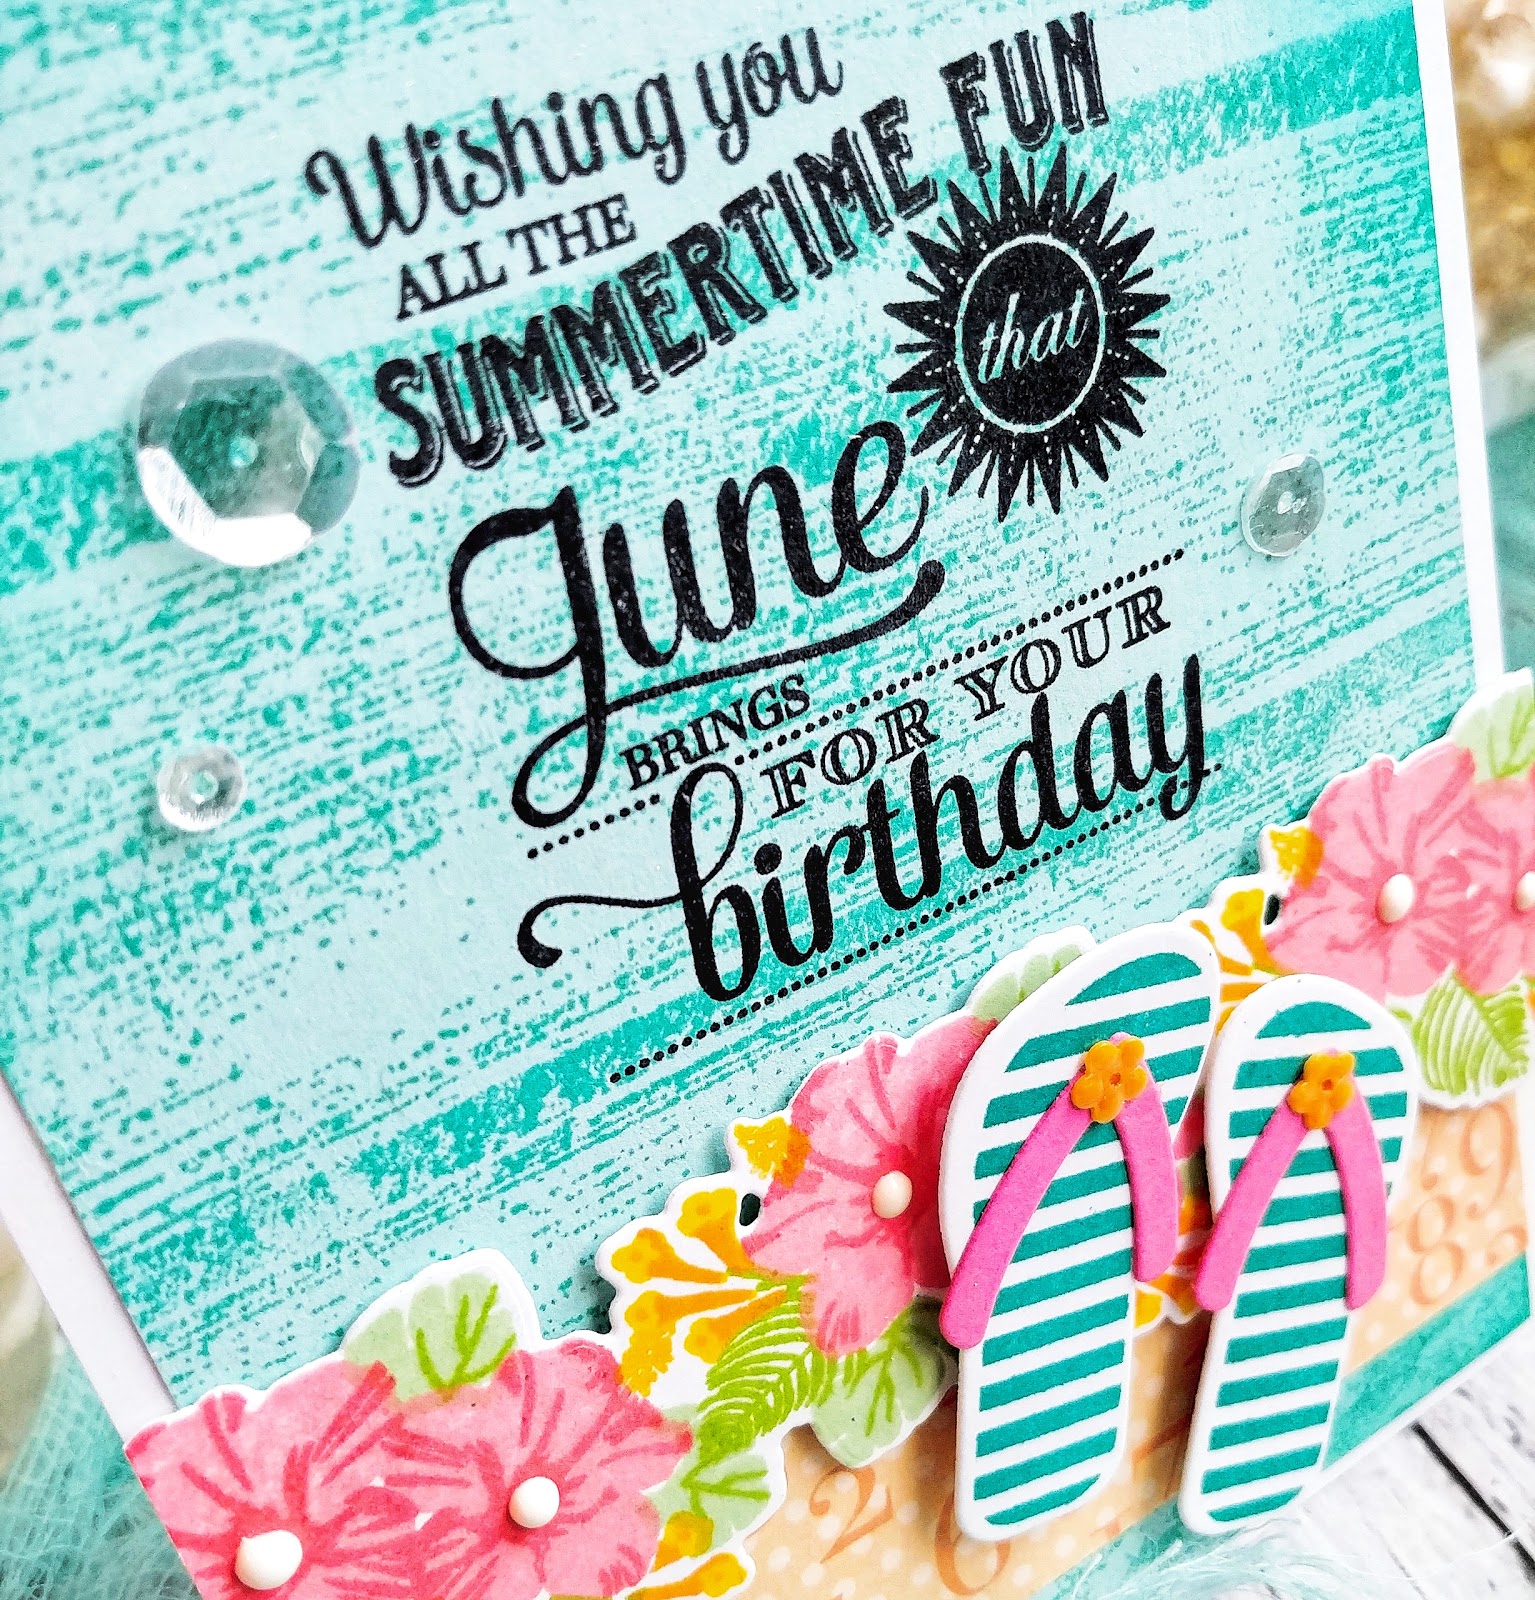
After the backgrounds were stamped, I used my mini MISTI to stamp the large sentiment in black for some contrast. I toyed around with heat embossing it in gold, but in the end, the crisp black won! I also added a strip of paper to the bottom, which is from the By the Numbers Patterned Paper, using a tape runner. I added the seasonal border using foam squares for dimension. At this point, I used my paper trimmer to cut off the extra portion of the border that was hanging over. It kills me to waste my hard work (ha ha) but I didn't want a horizontal card, so it had to be done!

I'm still on a flip-flop kick after I made THESE cards, so I decided to add a pair to each of the three cards. I die cut three of the foot part and three of the strap portion using the Flipping Out die collection. Once that was done, I stamped them using the Flipping Out stamp set. I also added a tiny flower sequin to each flip flop using liquid glue. The die collection comes with a flower die, but I thought these sequins were cute and added a different visual element other than paper.
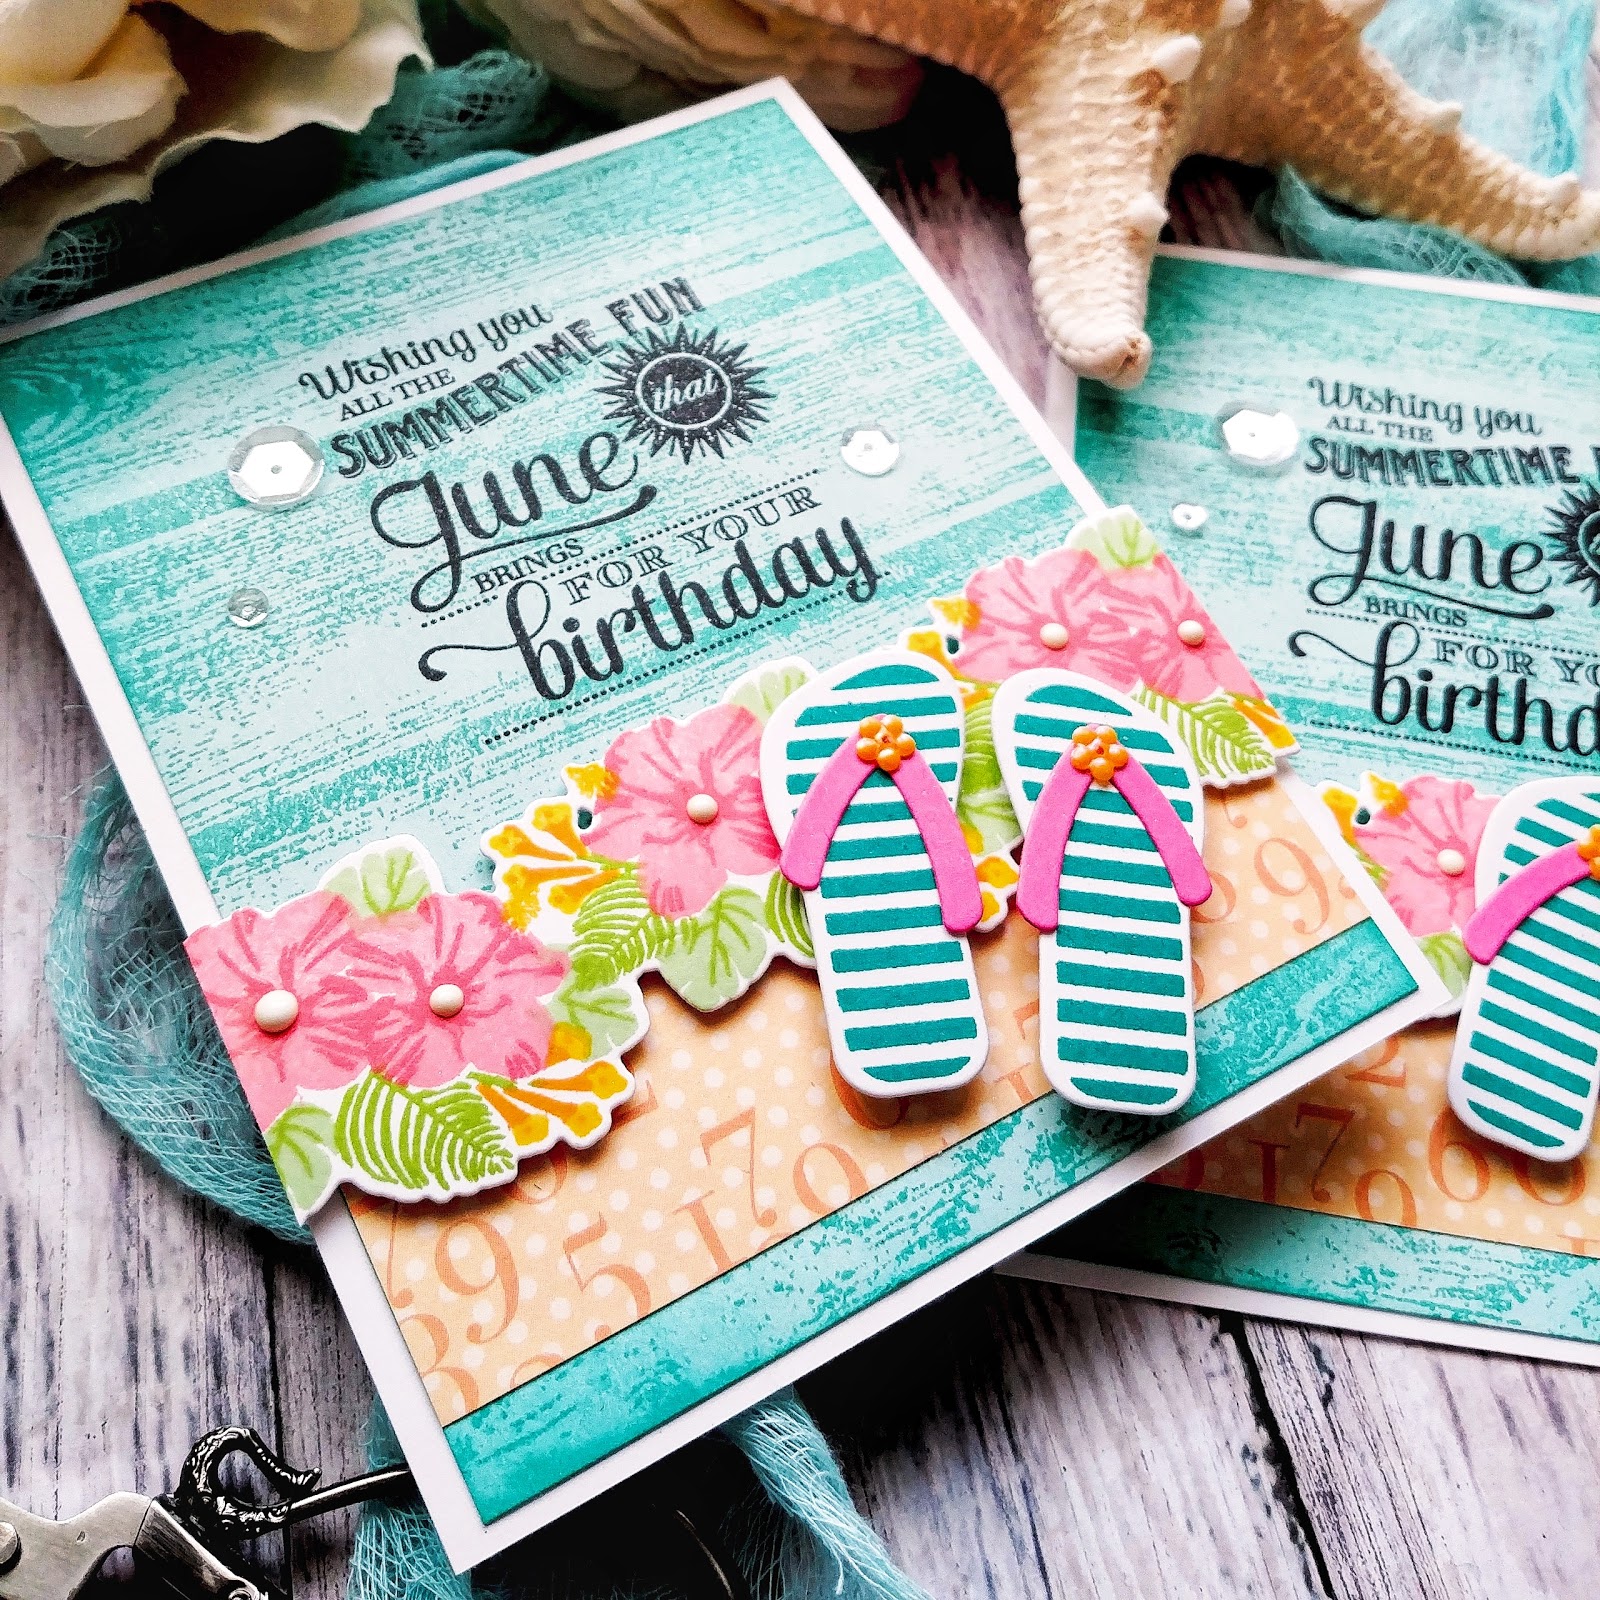
I added the flip flops to the card using foam squares. I also added some white Nuvo drops to the center of the hibiscus blooms for added detail. A few sparkling clear sequins frame the sentiment as well.

I added another sentiment to the inside along with another cluster of flowers I stamped in the beginning. I didn't quite know where they would be used, but they ended up being perfect to decorate the inside of the card. Two of these cards are already on their way to the recipients and I hope they enjoy them!  Thanks for fluttering by!

Friday, June 19, 2020

"Orange" you glad it's your birthday?

Do you like my pun? LOL! Today's cards were inspired by the clementine packaging from my last grocery order. I do most of my grocery shopping online, so I never know exactly what type of produce I will get, but in this case, it was super adorable! ha ha! I'm not sure if it would have made as much of an impact on me had Pinkfresh Studio not just released the fabulous Pop Out Hexagons cling stamp and coordinating Simply Hexagons die. I wish I would have saved the packaging so I could have referenced a brand or something. It had a cute bee on it with blue hexagons and oranges.

I knew that the Lemon Blossom stamp set would be the perfect complement to these two birthday designs! To begin these two cards, I die cut two white panels using the Simply Hexagons die and carefully removed the inside pieces so I could easily put them back into place after I colored them.

I used liquid glue to adhere the frame portion to two top folding A2 card bases and set them aside to dry. I used a blender brush to add Storm ink to each of the die cut hexagon pieces. Once that was done, I used the detail images from the Hexagon stamp set to stamp different pieces using Stargazer ink. Each card has a different arrangement of designs, which led to the placement of each of the sentiments, which I will talk about a little later on.

I popped each piece back into place and secured them with liquid glue. Once that was done, I set them aside so that I could work on the flowers and fruit pieces. 

I Googled what Orange blossoms look like and they are white, which is always tricky when stamping. I decided to go ahead and make them yellow to fit with the colors I was using anyway. I die cut the pieces using the Lemon Blossom die and then stamped them using my mini MISTI. I made some of the oranges lighter in color for interest and variation. I also used a lemon on the other card because I already had a few left over from THIS project.

Once I had all of the stamped images done, I set them aside to work on the birthday sentiment. I didn't really plan this part out ahead of time, so I had to find a blank hexagon on each of the two panels so I could stamp the "happy" and "birthday" sentiments. I lucked out and there was one on each side of the panel, right where I might normally place the sentiment.

I stamped the "summer" portion onto white cardstock and then die cut them using the Sentiment Suite Basics die. It fit nicely into the middle of the two other stamped sentiments. I added it using foam squares for dimension.

This set the stage for me to add in the stamped fruit and flowers. I added a few extra leaves behind the fruit for some extra interest. I was lucky that I had a few left over from the project I linked above. 

Once everything was adhered using foam squares, I added a few sparkling clear sequins here and there for some sparkle and shine.

I also spritzed each card with a generous amount of shimmer spray because it is so much fun! It is just perfect for these summer birthday cards! I also added some clear Nuvo drops for some juicy accents on the fruit slices. I'm getting thirsty just typing this! I think I'll head out onto the porch to enjoy this beautiful day with something cold and refreshing to drink! ha ha! Thanks for fluttering by!

Wednesday, June 17, 2020

Totally Stoked {Celebrate your Day}

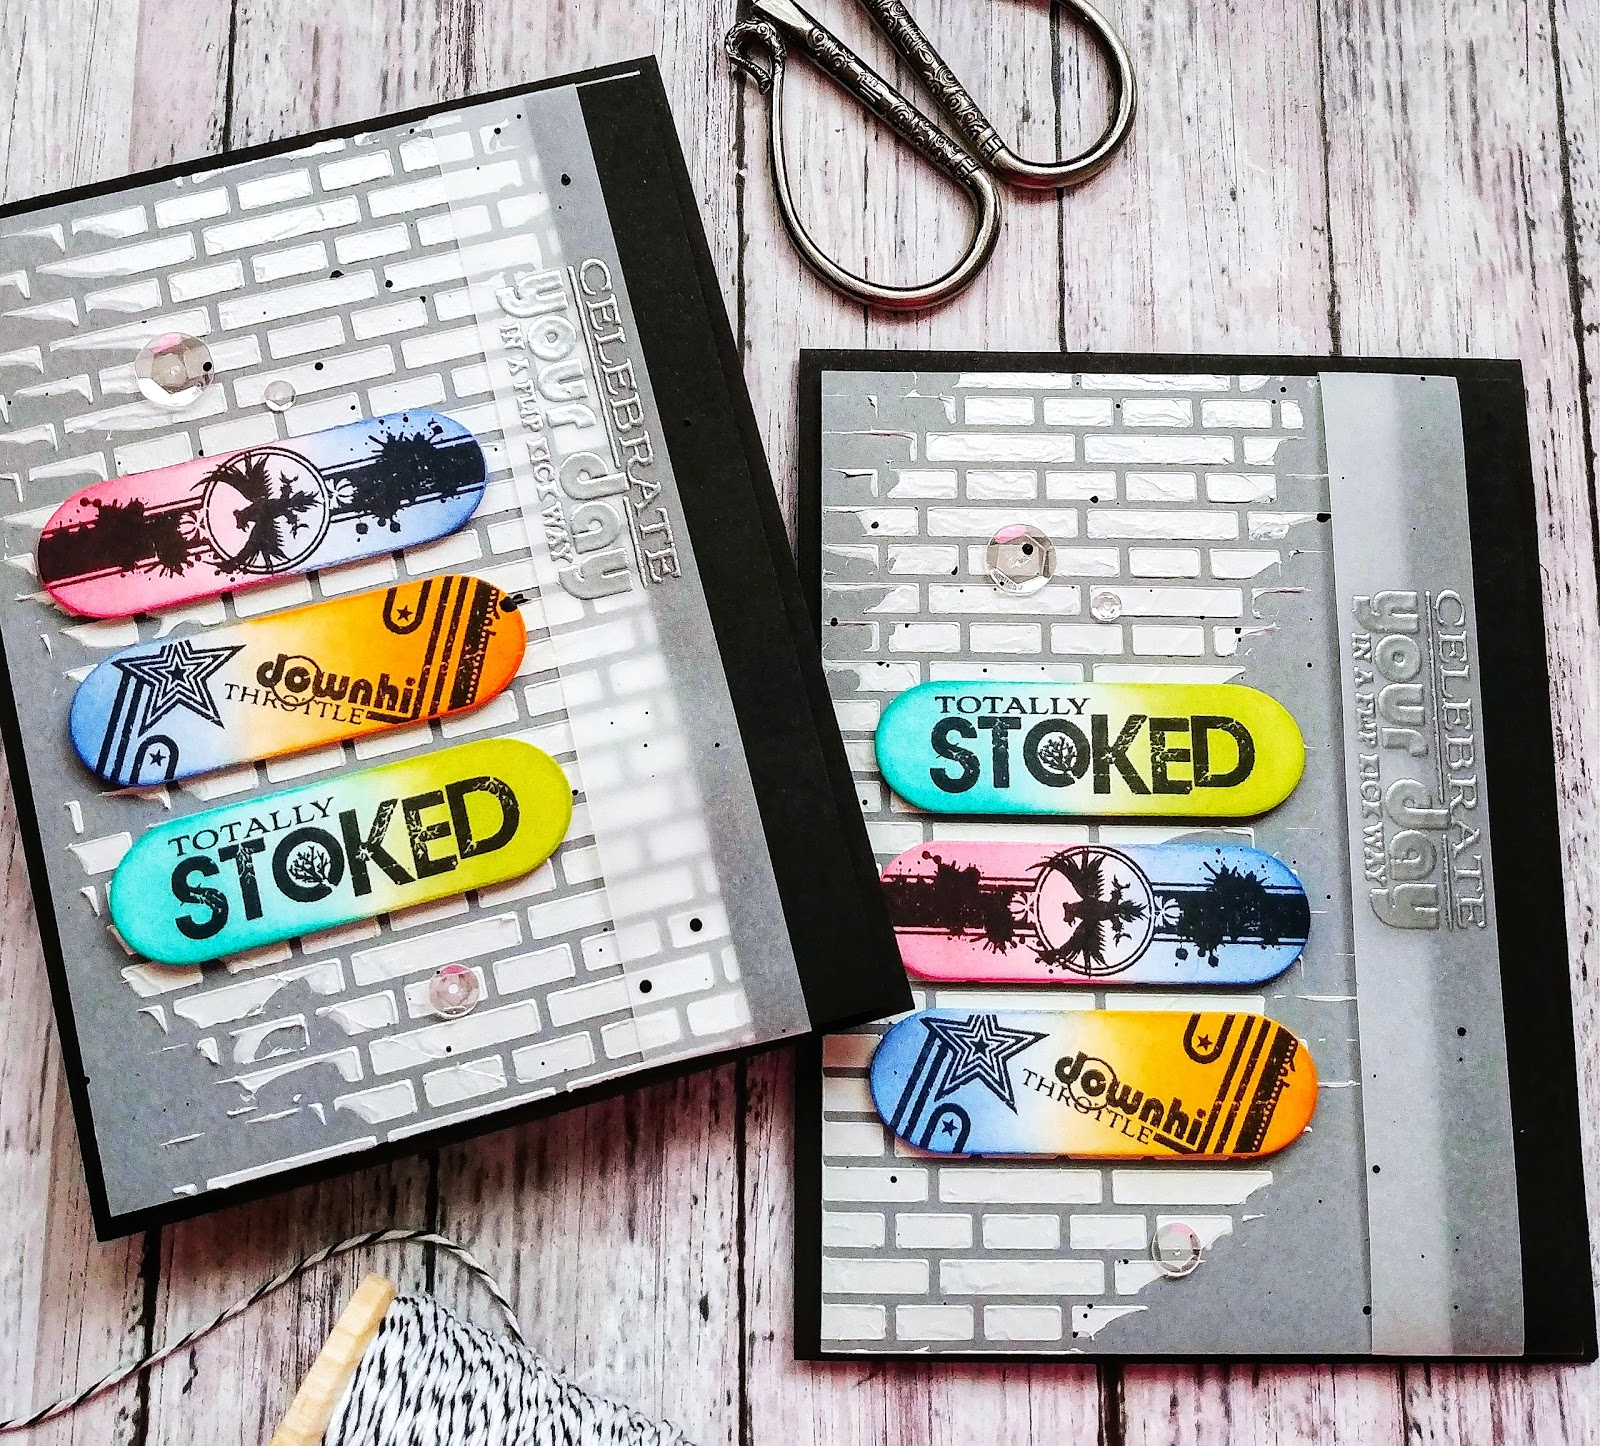
It's always a fun day when I get to pull out some older (and neglected) stamps and dies to make some fun new designs! I'm still in need of birthday cards to give to the sweet kiddos from church! I'm not sure when we'll be able to get together again with the children's group! Boo! I have two boy birthdays coming up in the next few weeks, so I did some Instagram/Facebook perusing (not in a creepy way LOL!) to see what these two boys are currently interested in! One of the boys seemed to like Superheroes quite a bit and one just got a new pair of Vans for an early birthday gift! I'm pretty sure the Superhero loving boy also likes Vans, so I decided on using the retired Boy Basics: Skater Dude stamp set from Papertrey Ink

To begin these two designs, I die cut two Weathervane panels measuring 4 by 5 1/4 inches. I used the fabulous English Bond Brick Wall stencil and some  White Pearl deco foil Metallix gel . I always prep my stencils with Pixie Spray so that the stencil will stay in place while I apply the medium I am using. I like the wonky pattern of the brick on this particular panel the best, but the other one is okay, too! I wanted a partial and rough-edged look, so this one was perfect!

I set the two panels aside to dry and then die cut the skateboards using the Skater Dude die. I wanted 3 per card for a total of 6. I stamped each one using black ink and my mini MISTI and then added the different colors using Blender Brushes. This is the easiest way to get fun and interesting skateboard decks without any hassle!

I heat embossed the "celebrate your day in a flip kick way" sentiment with silver embossing powder onto strips of vellum.  Once all of the card elements were ready, I got to work putting the cards together. I decided that each card needed a strip of black along the edge, but that was AFTER I adhered the brick panel. In hindsight, I would have just trimmed the grey panels slightly smaller and thenadhered them onto the black card base. Instead, I just added the black strip using ScorTape. I actually had experimented with adding a double row of machine stitching to mimic the look of the stitching on Vans sneakers, but in the end, I opted to leave them plain.

The vellum strip is wrapped around the panel and secured on the back with clear tape. Once that was done, I adhered them to a top folding black card base. I teetered with the decision to add sequins, but in the end decided that they looked okay, so each card has a trio of sparkling clear sequins in three different sizes. I also decided that I wanted to continue with some black paint splatter like one of the skateboard designs, so I covered up the sentiment and the three skateboards with Post-It notes and added some splatter.
 I heat embossed one of my favorite birthday sentiments from the Inside Greetings: Endearing Birthday with silver embossing powder inside each of the two cards. It just gives them that little something extra! It's such a sweet sentiment, too! I really like how these two cards turned out and I hope the two boys will like them as well! Thanks for fluttering by!

Monday, June 15, 2020

Serve and Protect {so grateful for you}

I was so thrilled when my package from Simon Says Stamp arrived with the new First Responders stamp set and coordinating dies! I wanted to make a few thank you cards for some deserving recipients. One is going to a friend of ours in the neighborhood who is a Police officer and the other  is going to the entire Police Department for our city. I've also made a coordinating tag that you can see at the bottom of today's post. We put together a package of treats to send over to them as part of a community event.

I used quite a mash-up of products from some of my favorite companies to bring these cards to life. To begin, I die cut 3 pockets and flaps using the new In Stitches Back Pocket Die out of Enchanted Evening cardstock. Once that was done, I added some Dark Indigo ink around the edges of each piece for some added definition and contrast.

I used my mini MISTI to align the "You are my Hero" sentiment and then stamped it in Versarmark ink and heat embossed it with Silver embossing powder from Imagine Crafts. I adhered the flap to the pocket portion using foam squares for dimension. I set those aside and got to work on the police badge pieces.

I heat embossed 5 in total and cut them out using the SSS First Responders dies. I just love how crisp the silver embossing looks against the blue cardstock! I also stamped the "thank you" portion using the same Dark Indigo Ink onto Spring Rain cardstock. There is also a die to cut this little piece out, which I love! I am a die loving girl through and through! 

I cut two pieces of Enchanted Evening cardstock measuring 4 by 5 1/4 inches and stamped the Pinkfresh Studio Diamond Tiles Cling Rubber Background stamp using Sapphire ink. I positioned the stamp so that it wouldn't stamp all the way to the bottom of the panel so that I would have some blank space for the heat embossed "for your selfless service" sentiment. 

The reason why I switched to Sapphire ink was that the other ink I was using needed to be refilled and I don't have the reinker! Ack! This ink is gorgeous and works nicely with this card. From there, I continued using it to add some ink blending around the edges of the stamped panel. Once this was done, I was ready to put all of the pieces in place to create this fun design! I used additional foam squares to add the pocket to the stamped panel. I adhered it to a top folding A2 Spring Rain card base using additional foam squares.

I knew that in addition to the treats we were dropping off, I wanted to add some gift cards to both of the cards. It might be a little cliche, but we decided on Krispy Kreme for the local Police Department! LOL! I think everyone pretty much loves donuts, cops or not! ha ha! I used the AMAZING Gift Card Pop Up die to create this fun addition to the inside of the card.

As you can see, this card has a pizza gift card; this one is going to our friend in the neighborhood. I used my mini MISTI to get the "so grateful for you" sentiment stamped and then heat embossed in silver as well. I like to use ScorTape to secure these to the inside of my cards for security. I used two 
 of the shield/badge pieces that I created earlier to decorate the inside as well.

Here is the gift tag that I made to add on to the package of treats. I used a wooden type basket to package up some Pepperidge Farms cookies, mixed nuts, Raisinets, and Beef Jerky. I placed it in a large cello bag and then tied it up with ribbon and this tag.

Easy, peasy! I just used all of the same elements as the card, but added the "so grateful for you" sentiment to the bottom of the popped up "thank you" sentiment. I used my Crop-a-dile to punch the large hole in the corner so that I could thread it through the ribbon. I used quite a thick ribbon so a large hole was necessary! I had so much fun creating these cards and tag! Thanks for fluttering by!

Sunday, June 14, 2020

Ink to Paper June Release Countdown Day 4


Well friends, it's the 4th and final day of the Ink to Paper June release countdown! I've got two cards to share with you today and then everything will be available for purchase starting on the 15th at 10 PM ET. 
This card features the new Love to Layer: Scalloped Circle dies (which are must-haves in my book) and the new To Die For Sentiments: Brighten My Life. Of course I couldn't resist using the Border Bling Postage Frames again! I actually created this background exactly like one of my bird cards from yesterday.

I die cut the sentiment 3 times from white cardstock and once from gold glitter specialty cardstock and glued them all together using liquid glue. I love a nice stacked piece like this! I layered it onto some Bitty Big: Hawaiian Shores pattern paper that was die cut using a circle die. I also stamped the "My Dear Friend" sentiment in black for additional detail.

I layered the circle onto the largest of the Love to Layer Scalloped Circle dies using foam squares. I tucked a glittery Sunray behind the circle using liquid glue.

The finishing touch is a few yellow flowers from the Birthday Bouquet stamp set with some sparkling clear sequins placed here and there!
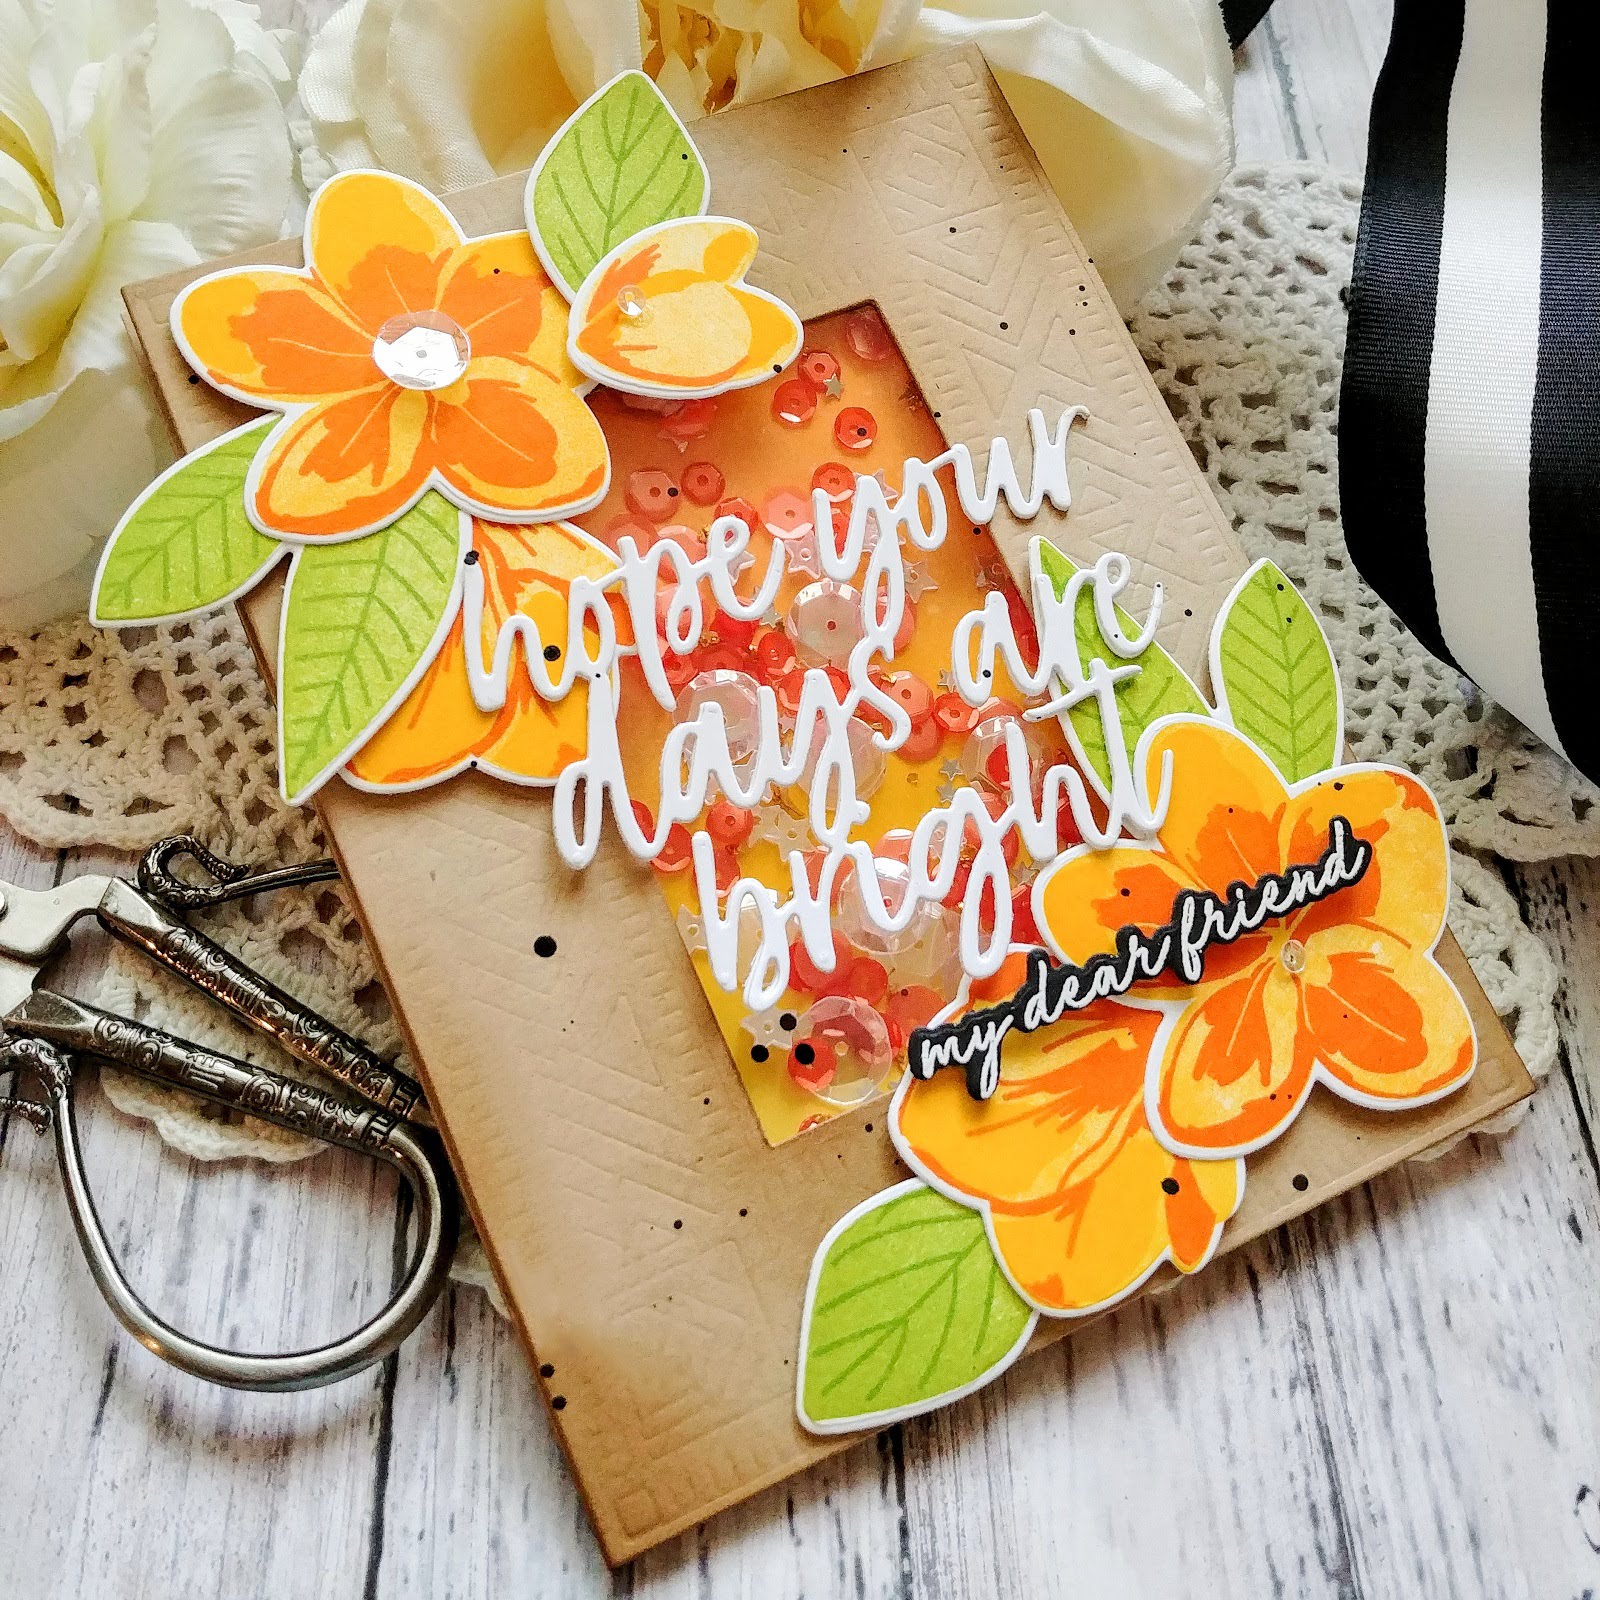
My final card for today and for the release is a shaker card using the new Border Bling: Tribal frames die! I wanted to create something sunny, bright and tropical to enhance the tribal feel!

I haven't made a shaker card in a while, so I thought it would be fun for this design! To begin, I die cut the frame from Kraft cardstock and then added some Cocoa Bean ink around the edges. I also created an ink blended background using Distress Oxide inks and adhered that onto a top folding A2 card base. I adhered a piece of acetate to the backside of the frame using Scortape and then added the foam strips and sequins to create the shaker!

Once the shaker portion was done, I got to work adding the Flourishing Florals images that were showcased a few days ago. I added these to the frame using foam squares. The die cut sentiment is from the new To Die For Sentiments: Bright Days and is die cut twice and glued together.
The "my dear friend" sentiment, which is from the new Dear Friend stamp set, is heat embossed in white onto a black piece of cardstock and then die cut. The finishing touch is some black ink splatter and some sequins! Don't forget, everything will be available for purchase at 10 pm ET on June 15th! Thanks for fluttering by!


Saturday, June 13, 2020

Ink to Paper June Release Countdown Day 3

I can't believe we're halfway through the June Ink to Paper release countdown! I'm sharing quite a few projects with you today using some super fun products that you're sure to fall in love with! 

This first card features some of my favorites of the entire release. There is a fabulous new stamp set with a coordinating sentiment set called Vintage Postage and Vintage Postage Sentiments! I know this one will be used again and again! I can't wait to create some Christmas cards with it! I also used the new Border Bling: Postage Frames, which you will be seeing a lot more of! 

The bird is from a new die set called Feathered Friends 1 die. This was so fun and easy to create. I die cut it out of white cardstock and then used Distress Oxide inks to add some inkblending to the pieces. I also added a bead of Nuvo Crystal Glaze on the eye for some realistic shine and dimension.

I also used some foam squares on the head piece as well as the wing portion to give the bird some added depth. The other pieces, like the belly piece and the beak and feet, are adhered using liquid glue.

I colored the eye using a black Sharpie marker and then added a white dot using a gel pen. Once that was done, I added the Crystal Glaze and let it dry.

The Postage Frame is die cut from Weathervane cardstock and adhered to a top folding A2 card base using a tape runner. The actual postage image is stamped in Faded Jeans Distress Oxide ink to match the bird. I love the crisp impression I get with this type of ink.

I had a few flowers left over from my next card I'll be showing you, so I added them around the bird to set the scene! Honestly, it looked good without the flowers, too, if you're needing something quick. The "Sending" and "a Hello" sentiments are included in the Vintage Postage Sentiments.
My next card uses another sweet little bird and sentiment! These are both from the new Feathered Friends 1 Mini stamp set. This bird was just begging to perch on these Blossoming Branches

This card also features the new Border Bling Postage frame, but this time I used it as an actual frame. I added some Hawaiian Shores ink around the edges and added some ink splatter as well.

I stamped the "thank you " sentiment in black directly onto the frame for visual movement.

The birds are squawking at each other like crazy lately. I think the babies have been born and they're all a little on edge! LOL! I had the window open while I was creating this card and I was definitely feeling the bird vibes! ha ha!

Next up is something a little more masculine feeling! I chose to use two of the birds for the focal point to make a bigger impact.

I layered them onto a heart that is die cut using the Limitless Layers Hearts that has been stamped with the Background Basics: Birch Stamp Set. I layered that onto a panel that was die cut using the new Border Bling: Skinny Postage dies. There are 3 sizes and these cut both the outline and the center portion.

I stamped it with the fabulous Nifty Plaid Stamp Set in Fresh Snow ink. I added the white frame around it for contrast.

The Hello there sentiment is also from the new Feather Friends stamp set and is arced to fit inside the banner. I only used one banner this entire release...are you proud of me? LOL!

I added some white paint splatter for additional detail. I covered up the birds using a post-it note, but didn't cover the sentiment like I usually do...well...that was a huge mistake! The white paint was like a magnet to it and looked like the birds had been perched there for some time, if you know what I mean! LOL! I ended up having to fix the sentiment, but it was an easy fix! I thought you all might like a little chuckle today!

I'm sharing one last card using the Vintage Postage  stamp set, this time for a fun birthday design. I stamped it in Berry Sorbet ink to coordinate with the die cut pieces from the fun Sweet Celebration Die set. I also used the coordinating Sweet Celebrations Mini stamp set to heat emboss the candle image.

I die cut all of the pieces out of white cardstock and then did some inkblending on each piece to get the varied shades of color. As I am looking at this photo, I'm noticing the shocking lack of crystal glitter! Woops! I guess I forgot to add it! That will DEFINITELY need to be done before it heads to its recipient! ha ha!
I did, however, die cut the cupcake liner from Bitty Big: Harvest Gold pattern paper and added some shading around the edges.

I used the Vintage Postage sentiments for the Happy Birthday sentiment stamped in black. This was such a fun card to make and will be headed to a special birthday girl very soon! I hope you've enjoyed today's countdown! Thanks for fluttering by!