Sunday, April 19, 2020

Hello {You're the ZEST!}

I hope you've all had a great weekend! For me, the weekends feel very similar to the weekdays lately, except that the kids do their online school during the week! I've actually been enjoying having the kids do school at home (insert shocked face), because I get a lot more one on one time with them and I know what they are learning so we can talk about it more throughout the day! 
I'm sharing 2 lemon cards today; I've had lemons on the brain for a while and wanted to create 2 cards for two gifts I'm working on. I've also got May Day on the brain, which is sneaking right up! I think this is the perfect year for us all to do some sneaky May Day deliveries, what do you think? I've been spending WAY  too much time on Amazon lately, but I was able to snag some fun basket fillers that will be arriving before May 1st! It is also the perfect excuse to pull out the floral sets that we always HAVE to have, am I right? Hopefully I'll be able to share my May Day creations with you before the fun day arrives!

For today's cards, I've uses some of the new supplies from The Greetery paired with some older products. To begin these two cards, I die cut the two background panels using the Crimped Frame Die. I then stamped the Windowpane Plaid Background in Sweet Mustard ink and added some inkblending around the edges to give it added dimension. I also die cut the smallest rectangle to use as the focal panel for the "HELLO" letters.

I die cut the "HELLO" letters out of gold cardstock using the Slim Alphabet Die. I also die cut the white portion using the Alphabuds Slim Backers Die and then stamped the flowers from the Alphabuds Slim Stamp Set. I layered the letters onto the rectangle using mini foam squares. I stamped the "You're the zest" sentiment, which is from the Lemon Blossom Stamp Set, in black and then added the "HELLO" rectangle using foam squares.


I die cut a lot of all of the images from the Lemon Blossom Stamp Set so I could add them here and there as I like.

I used foam squares to get the dimension of each piece like I wanted. The two cards are arranged on opposite corners for variety. I can['t decided which one I like better!

I bought quite a few lemonade mixes, both pink and regular so I can start sticking them in the cards I'm mailing out! I think they'll be perfect tucked inside these two cards!

I added both sequins and Nuvo drops, which I have a tendency of going overboard with (eek), but they're just so much fun to squeeze out! LOL!  I also spritzed both cards with a GENEROUS layer of Shimmer Spray for even more shine! I had so much fun on both of these! I hope you get a chance to get some crafting done! Thanks for fluttering by!


Wednesday, April 15, 2020

Spellbinders April Stamp of the Month {Beautiful}

I hope you all had a wonderful Easter weekend! We did despite not being able to be with extended family! We made the most of it and tried to make it as special for the kids as possible! Today I'm sharing 3 cards using this month's Spellbinders Stamp of the Month! I had so much fun playing around with the different floral and leafy images that are included in the set, as well as the "Beautiful" sentiment!

This particular set comes with the rectangle outline that you can see on the card on the right. The "Beautiful" sentiment is separate so you can use it with the rectangle or separately like I did on the card on the left.

The sentiments are all embossed in gold and then I added some Crystal Glaze over the top of each letter to give it some added detail and shine.

To begin each card, I stamped the different floral and leaf images using my mini MISTI except with the card with the circle. I just did some free hand stamping to get the wreath look exactly how I wanted it!

I colored the images using an assortment of alcohol markers. This particular panel is trimmed down and then added on a top folding a2 card base with a strip of black and white striped paper adhered at the bottom. I used foam squares on the floral panel to give it extra dimension.

On this card, I added some black paint splatter to the floral panel and then adhered the striped paper in the center!

Each card also has a trio of sparkling clear sequins for some added shine and dimension!

I used the Nestabilities Standard Circles die collection for this card. I heat embossed the sentiment first and then die cut it to get it centered just right! These are my go-to circle dies and have been for years! As I mentioned earlier, I stamped the different images to create a wreath and then colored the images with alcohol markers! This card also has some paint splatter and a tiny strip of pattern paper at the bottom! These cards were so much fun to make and will get popped in the mail ASAP! Thanks for fluttering by!

Thursday, April 9, 2020

Happy Easter {Tags for Easter Treats}

Easter is sneaking up on us and will be here before we know it!  When I made THESE, I had promised to share the tags that I made to attach to the egg cartons that I bought to package up Easter gifts and goodies! I sat down last night and got to work creating 5 tags using the Best Bunnies stamp set and coordinating Best Bunnies die collection.

I wish I could say that I made these the smart way, which is assembly line style, but I didn't! So...instead of telling you how I DID make them, I will tell you a better way to do it! LOL! As I mentioned before, I ended up making 5 tags in total, but I like them so much, I plan on making a few more tonight! I bought the clear egg cartons on Amazon a while back and I have quite a few, so I think I'll just get them all put together and drop them off on people's porches for Easter. The three packages that I'm sharing today are headed to a different home as they are for orders from my son's Speech teacher at school. She had already paid me before life got crazy and I didn't want to let her down!

To begin, start by die cutting the Spring Pastels pattern paper using the largest die from the Charming Tags 1 die. I chose to use 5 of the 6 patterns, but you could use whatever paper you want. I just love the scale of the patterns I chose and the light designs so they don't over power the bunny image.
Once they are die cut, you can go ahead and add the stamped sentiment to the bottom. It is from the Just Sentiments: Easter mini stamp set. It has some of the sweetest Easter sentiments that are perfect to tuck here and there on your Easter projects!
 I also die cut the sentiment banners using the Banner Builder Basics die collection; it is the perfect shape for the Happy Easter sentiment which is stamped in black. I die cut each banner piece twice per tag; once out of pattern paper and once out of white cardstock for stability since the pattern paper isn't very thick. I used liquid glue to adhere them together,but used foam squares to attach the end pieces for added dimension.
The bunnies are stamped using black ink and then die cut I also attached them to another white die cut to give them extra durability. The bows are also die cut and glued together using liquid glue. These are much easier to assemble with the thinner paper. I stuck my quilling tool into the loops to plump them back up after the gluing process.
The eggs are stamped in the five colors of the pattern paper; Aqua Mist, Lilac Grace, Sweet Blush, Spring Moss, and Lemon Tart. I also added a bow which is included in the stamp set. All of this is layered up onto a smaller white tag that is from the Tagged and Labeled stamp set. I put some Easter shred in the bottom of the egg cartons, added a small hand sanitizer (worth its weight in gold these days), an EOS lip balm, a plastic egg filled with treats and then other slots are filled with Easter candy. I kept these 3 simple since I am using a budget (I hate the B word) LOL! When I put others together, they will have additional items. Once they were filled, I wrapped a 3 1/2 inch wide piece of Happy Spots Pattern Paper around the top and sides of the carton. I tied a length of Stitched Ribbon in 3 different colors and attached the tags! I love how they turned out! Thanks for fluttering by!

Wednesday, April 8, 2020

Ink to Paper Project: Reach Out {Sending Hugs with Rainbow Cheer}

Hello, my wonderful crafty friends! It's so good to be here today with a new Ink to Paper Project: Reach Out post! I've created 2 cards for today's "Sending Hugs with Rainbow Cheer" theme and I hope you feel inspired to play/craft along! If you join me regularly, then you will know that I have been mailing out MANY cards to friends, neighbors, family, etc. I think we are all thinking of ways to bring happiness and cheer to those around us during these crazy, uncertain times! I'm so grateful for this card making industry/hobby that allows me to use my talents to bless the lives of others! How about you? Are you getting some crafty time to make some cards to pop in the mail? I sure hope so! If not, please take some time to join this week's challenge!
I chose to use a rainbow theme for today's cards because I think rainbows are such a universal symbol of hope and of happiness, especially when paired with hearts and sunshine!

Funny story: My daughter went to get the mail yesterday because she had a package coming that she was excited for. She brought in an extra package and told me that it was "my stamps". I was confused since I hadn't ordered any stamps, nor had any DT packages coming. I told her that I didn't order any stamps so they couldn't be stamps! She rips open the package to reveal my LARGE order of postage stamps! LOL! Oh.....THOSE stamps! Ha ha! My mailing of cards had come to a stand still when I ran out of postage stamps (besides  some Christmas ones that I didn't want to use! LOL! Anyway, I'm back in business and hope to get some popped in the mail TODAY!

My first card uses some simple strips of cardstock scraps in some of my favorite cardstock colors: Raspberry Fizz, Hibiscus Burst, Harvest Gold, Green Parakeet, Aqua Mist, and Lilac Grace; I simply adore a pastel rainbow! All of these strips are adhered to a base of white cardstock using ScorTape for security. I layered that onto a panel of white cardstock that is dry embossed using the fabulous Sunburst Frame Die with Harvest Gold ink blending around the perimeter. 

This set the stage for the rest of the design elements. I stamped the hearts and colored them using Copic markers. All of the images and sentiments are from the Simply Sweet: Sending stamp set. I also stamped the cute little sun and heat embossed the "sunshine and rainbows" portion of the sentiment. 

I die cut a banner using the Banner Builder Basics die collection and then stamped the alphabet blocks in coordinating ink colors as the paper. I used quite a few foam squares for this particular card, but I really wanted to give it the depth and dimension for a nice impact!

One of my favorite accents on my rainbow cards is to use some rainbow gems in matching colors!

My second card is simpler in design, but I was dying to use the cute arms from the new Hats Off stamp set. Ashley had suggested it and I just love how these two arms look like they are wrapped around like a hug! They go perfectly with the "sending handmade hugs" sentiment as well! This card uses the same supplies, but this time I simply dry embossed the panel from a piece of Harvest Gold cardstock. I used the Love to Layer: Notched die collection for the focal layer. The smallest die in the collection was the perfect size for these cute little arms to be hugging!

I added the hearts underneath the focal panel, using two to create a circle. I added some jewels to this design as well! I had so much fun creating these two designs! I hope you get a chance to join us this week to "Send hugs with Rainbow Cheer"! Thanks for fluttering by!


Tuesday, April 7, 2020

Pinkfresh Studio {Playing Tag}

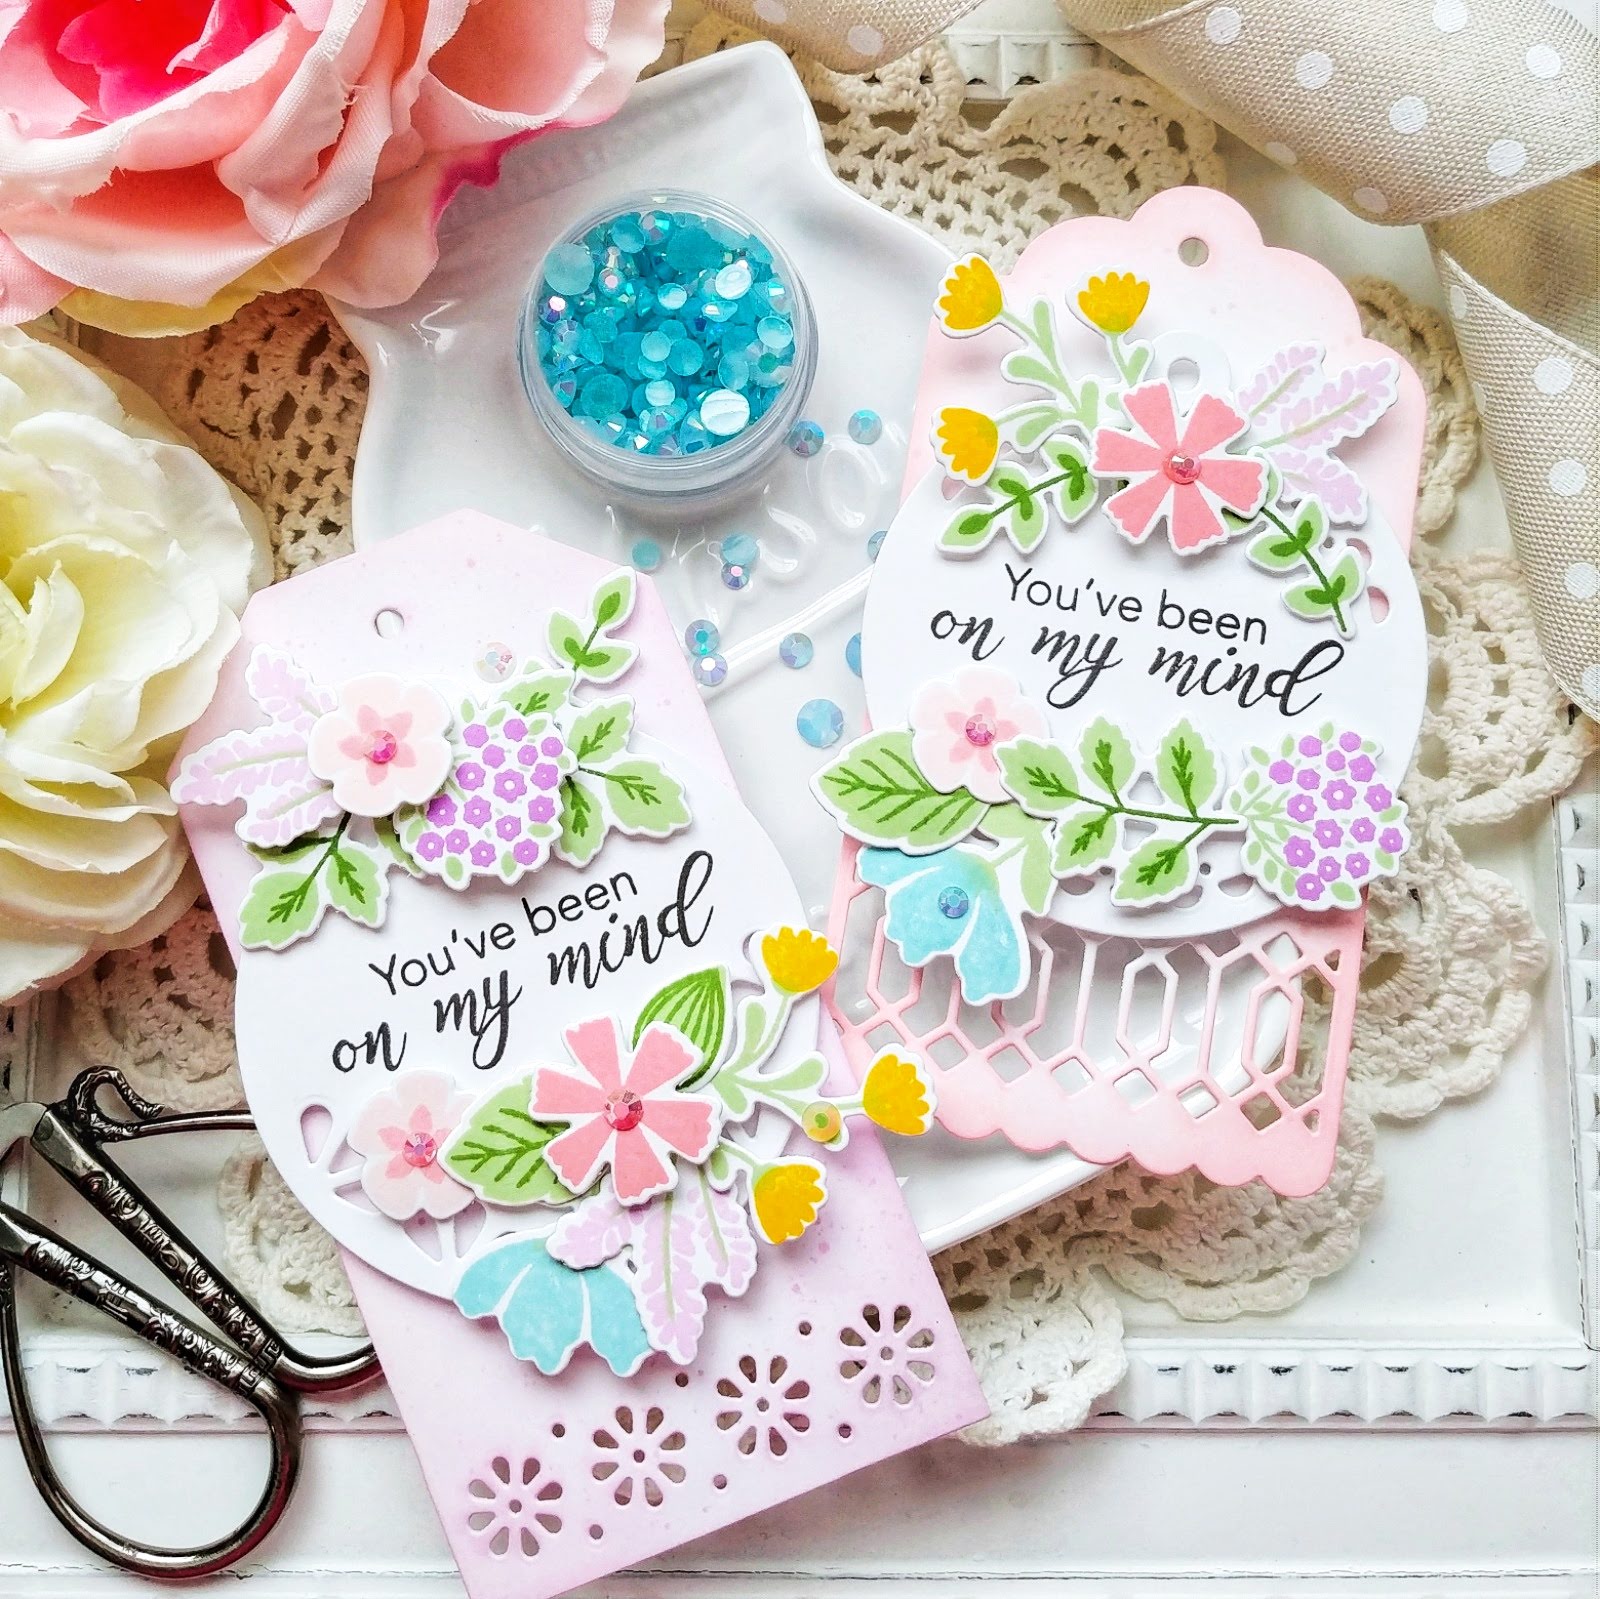
Welcome friends! I'm sharing a few projects over on the Pinkfresh Studio blog today, but wanted to share them here as well! With all of the craziness going on right now, I wanted to create a few tags to attach to some "doorstep" gifts for a few ladies in the neighborhood! I'll share with you today how I created these tags. If tags aren't your thing, then I'm also sharing this card that uses the same tags but as the focal point!

I used the beautiful Classic Tags with fillable elements to create these two tags as well as the one on the card. Each one uses a different "fillable element" because they are just so fun to use! I love how soft and delicate they look; just perfect for springtime projects! Each tag uses both a circle tag and the larger tag; I'm calling this "tag team"! ha ha!

Once the tags were all cut, I used INK to add blending around the edges and some splatter. It's hard to see in the photos, but they ended up looking like speckled eggs! I added the circle tags over the top of the larger tags using foam squares. They have been stamped with one of the sentiments from the Layered Bouquet stamp set in black ink.

Each tag is adorned with lots of flowers from the charming Lovely Blossoms stamp set tucked here and there. The leaves are stamped in Fresh Pear and Olive ink. The flowers are stamped in Lavender, Soft Lilac, Ocean Breeze, Ballet Slipper, Coral Reef, Passion fruit, Sweet Mustard.

The background for the card is created by stamping the beautiful Enchanted Blooms Background Stamp in Soft Lilac ink onto a panel of lilac cardstock. I die cut it using the Diagonal Stitched Rectangle die set. I added it to a top folding white card base using ScorTape.

I added the Ornate Oval Frame using foam squares, laying it sideways for something a little different. Once that was done, I was able to add the tag, which was created in the same way as the previous two, using additional foam squares.

I tucked a few more flowers here and there to fill in around the frame. I stamped all of the flowers assembly line style and had fun letting them come to life in all of the beautiful new ink colors from Pinkfresh Studio. I have actually been using these inks for most of my projects recently because I love them so much!

I added a few Essentials Jewels here and there to both the card and the tags in matching colors for some added detail and shine! Thanks for fluttering by!

Monday, April 6, 2020

Pinkfresh Studio 6th Anniversary Instagram Hop


Happy Monday, friends! There's a fun Instagram Hop going on to celebrate the 6th anniversary of Pinkfresh Studio! With all that is going on in the world right now, we will be postponing the bigger celebration until things calm down a little, but in the meantime, we're celebrating with a fun Instagram Hop! I decided to post my 2 cards here as well so that I could tell you a little bit about how I made them and what supplies I used if you are interested!

With the introduction of the Essentials Slim dies, my outlook has changed on some of the previously released stamps and dies. The Floral Vase stamp set has been one of my favorites; you can see a previous project HERE. I love how you can have the bouquet by itself, tied with a bow, or placed in the vase. I have shown both options on today's cards. It is such a tall image so I knew it would be perfect to use with some of the new slim dies!

I think for many of us, the types of cards we are making right now are ones of cheer and comfort. While I was making this card, I got news that a neighbor was in the hospital with the possibility of a positive COVID-19 test! I had been making it to be just one of comfort, but with the addition of the "feel better soon" sentiment, it turned out to be perfect to get sent off right away!
To begin both cards, I stamped the flora cluster twice, the vase once, and the bow once. The "sending" sentiment was die cut twice and stamped in black. I colored the outline images with an assortment of Copic markers and set those aside. I haven't had a chance to use the Slim Edgers Die set, but knew it would be perfect to use with these flowers. The stitched lines on this particular edge inspired me to use the Slim Stitched Rectangle die set to keep the edges the same. I die cut the large one out of Aqua cardstock and then stamped the Diamond Tiles Background using Ocean Breeze ink at the top. 

I used a blender brush and Sweet Mustard Ink to add around the perimeter of the yellow piece. I layered the yellow portion onto the white panel that is stamped with the "feel better soon" sentiment using foam squares. I added the vase and flowers attaching the "sending" sentiment to the vase and then wrapped the heat embossed sentiment around the panel securing it in the back with tape. All of this is mounted onto the Aqua panel using additional foam squares. A few Jewels and sequins finish off this floral design. I mailed it in a standard security envelope using 2 stamps because it is heavy!

For this second card, I just used the bouquet with the bow. I used the Slim Diagonal Stitched Rectangles dies for both the smaller and the larger panel, adding some stamping and ink blending like I did on the first card.

I stamped the "comfort for today, hope for tomorrow" sentiment directly on the white panel, but popped up the die cut "sending" sentiment at the top! I love how both of these turned out! I'm on the hunt for some pretty slim line envelopes, but Amazon isn't shipping envelopes at a quick pace these days. Any resources for me to try? I'd love to know where you get yours! Thanks for fluttering by!
P.S. Don't forget to join me on the hop at @kellylunceford! There are prizes involved (wink, wink)

Friday, April 3, 2020

The Greetery T.G.I.F. {Sending Sunshine}

Hello friends! It's my turn for this week's TGIF {The Greetery Inspiration Friday} feature for The Greetery! I'm sharing these designs on The Greetery Blog, but wanted to share them here as well!  If you saw my projects from the latest release, then you will know that I've really been enjoying adding some "postal" details to many of my designs! I just can't seem to stop, so you will see that continue with today's cards! I used the Pretty Postmarks  stamps and dies

I think many of us wish we were headed away somewhere fun and exciting, or maybe some of you have had some cancelled plans. I decided to bring a little joy and sunshine into my cards today with sunny yellows, cheery sentiments, and tropical flowers!


Just because you may not be going anywhere tropical doesn't mean that you can't send some warming cheer to a friend or loved one! That is what I was imagining as I created my first design using the  BotaniCuts Lily. These flowers are so much fun to create; each one its own little masterpiece.  When I first used these BotaniCuts, I had Easter in mind, but couldn't wait to expand their usefulness by adding them to cards like I'm sharing today! I like to die cut each piece out of white cardstock (I kept my dies connected so I can easily send them through my machine in one pass). Once that was done, I used ink and blender brushes to add the different colors. I also added the black splatter by using a Color Spritzing tool and a black marker. I also spritzed each bloom with some Shimmer Spray.  I used some of the different splatter pattern as a guide for placement of the Crystal Glaze. It helped me achieve a more organic feel to the droplets. 


The background was created by stamping the  beautiful new Fresh Floral Background Stamp in a cheery yellow which is the perfect backdrop to add the flowers, leaves, and foliage.  I stamped the sentiment, which is from the Fresh Air Stamp Set, in black at the bottom.  I gave the BotaniCuts Palm die cuts the same treatment as the lilies, but omitting the splatter.
I really love arranging the flowers and leaves on my floral designs, tucking things here and there until I get the arrangement that I like. I used a mixture of foam squares and liquid glue to achieve the dimension I was seeking. A few postal images stamped here and there finish off this tropical design.


My second card is a little more simple in design, but I love the sweet details that Betsy's stamps allow me to add. I am BEYOND smitten with the Print Shop: Fresh Floral Stamp & Stencil. Once you have created one of these beautiful backgrounds, you will want to make a million more, and not to mention sit and stare at your background once you're done! LOL! It's embarrassing, but SO true! This darling kit makes the most beautiful backgrounds; the color combinations are limitless! I used the Crimped Frame Die to cut the background so that I could give it the little border of yellow around the edges. 


I chose to use a color combination that would accent the first card I made so I chose yellows, corals, and pinks to bring the background to life. I chose the smallest crimped frame to add some extra details so as to not cover up too much of the background.
I used the "hello" and the "just a note to say" sentiments from the Written In Ribbons stamp set set as well as a few postal touches (surprise, surprise) to finish off this cheery design. These two designs will be popped in the mail ASAP so they can bring someone a little cheer! Thanks for joining me today and I hope you get a chance to create some cards to send out to those who could use some joy and happiness! Thanks for fluttering by!