Tuesday, April 3, 2012

Special Delivery: Baby Boy


Ever since I saw the film "Red Tails" I have been wanting to use this little airplane set. I didn't really have a reason, so I kept putting it aside. Since I have gotten back into blogging, I have been visiting some of my favorite stampers. I have sadly realized that while I have been away, so have others. In fact, some of them are just gone. But, I did visit Julee Tilman's blog to discover that she recently had twin boys! How exciting! So...I decided to make a card to send to her darling little twins. She had hoped for some to decorate their NICU walls. I decided that while I was making one, I may as well make two so that I could have one on hand. I think this is a practice that I will keep up on!
Of course that meant that I could use this darling little airplane from PTI. In fact, all of the stamps I used are from PTI. I used quite a few sets to assemble these two cards. Some of them are sets that I have hardly inked, so that felt good. I also used quite a few dies as well. All of them are from PTI except for the circle piece; it is a nestibilities die.


To begin with, I chose my papers which are Authentique and I picked them up at Ellen Hutson's online store. You can see the link on my sidebar under "Places I love to shop". She ships things super fast and she has a great selection of popular items. I love these papers and thought they worked nicely for a baby boy, or two! LOL! Oh....I almost forgot....the sketch is one of the Verve sketches. I saw it while I was on Julee's blog reading about the twins and thought it would be perfect with the set I wanted to use. Now....if you know me, you know that I seem to have a slight problem sticking to sketches, but I think I did pretty good considering.
After I picked my papers, I got to work die-cutting the circle pieces. I stamped onto the Kraft cardstock using Palette Noir ink. I paper pieced the body of the plane using some of the coordinating papers. Once I had it glued in place, I colored in the rest of the plane using copic markers. Once that was all done, I added glossy accents to the body of the plane, the circle on the tail and the nose. I wish that you could see how cute it all looks from the photos.


I set those pieces aside so that they could dry and got to work cutting out the banner pieces. I realize that the alphabet I used was a little large, but I think it looks okay. I also took the time to die-cut a few buttons since I knew that they would need some time to dry as well. Once that was all done, I got to work on the ticket pieces. I used quite a few stamps on these, but I think they turned out quite nicely. I actually hadn't intended to use this stamp set, but while I was rummaging for the ticket set, I stumbled across this neglected set. I thought it would be perfect since I was using the airplane image.


Once every last detail was dry or stamped, I got to work assembling the cards. I needed to machine stitch the felt rick rack border to the left panel. There is something really gratifying about machine stitching on felt, but I think I have already mentioned that. If you haven't tried it, I suggest you do. I also wanted the linen twine "ties" for the banner to actually be tied to the card, so I used a needle and thread to get it through the cardstock. I don't think it should be going anywhere now. Once I got everything done, I thought that the right side looked a little light since the left side was so heavy with detail. I added a quick piece of dark coordinating pattern paper to fold over the edge and added a quick line of zig-zag stitching. I thought it did it's job nicely to balance things out. Thanks for fluttering by!

Sunday, April 1, 2012

Celebrate Today and Everyday

My friend celebrated her birthday at the beginning of March, but I didn't get her gift to her until last week! Shame on me! I did, however, have a lot of fun getting her gift together. I was going for a "sewing" theme, so I had to use this cute button stamp set from PTI. I haven't really had a chance to sit and fiddle with all of the button die-cuts and stamps until now.

I decided on all of my papers first and then worked on the cute buttons. The tiny circle ones were die-cut and then stamped using the stamps that come in the set. The larger scalloped buttons were die-cut out of pattern paper. I added some glossy accent stuff to all of them and then let them dry.

While I was letting them dry, I got to work on the fun felt flower. I die-cut four flowers out of felt and then four flowers out of tulle. I am sure most of you know how to make these flowers; they are super easy and super cute. I hot glued it all together and added it to the card. I also die-cut some felt ric-rac which I then layered onto some lace and stitched to the card. This is one of my favorite parts of the card. I really like the way sewing looks on felt. The sentiment stitched to the top left corner is from an Autumn set from PTI, but it is one of my favorites. I also stamped the "superior quality" image onto a piece of pattern paper and paper pieced it onto the button card for some extra color and detail.

The reason why I was going for a "sewing" theme is because I sewed a cute little coin purse for her gift to which I added a gift card to one of our favorite quilting/fabric shops, some gum, hand sanitizer and some yummy lip gloss. I will post the coin purse on my "Thimbles and Thread" blog soon, but you can see it photographed here with the card. ETA: You can check it out here It isn't a perfect match, but I thought it went pretty well. As far as "matching" goes, I found some fabulous fabric today that is the same print as some of my favorite papers. I will be sewing and card making soon to show you a "perfectly matching" pair!

Friday, March 30, 2012

Easter Blessings

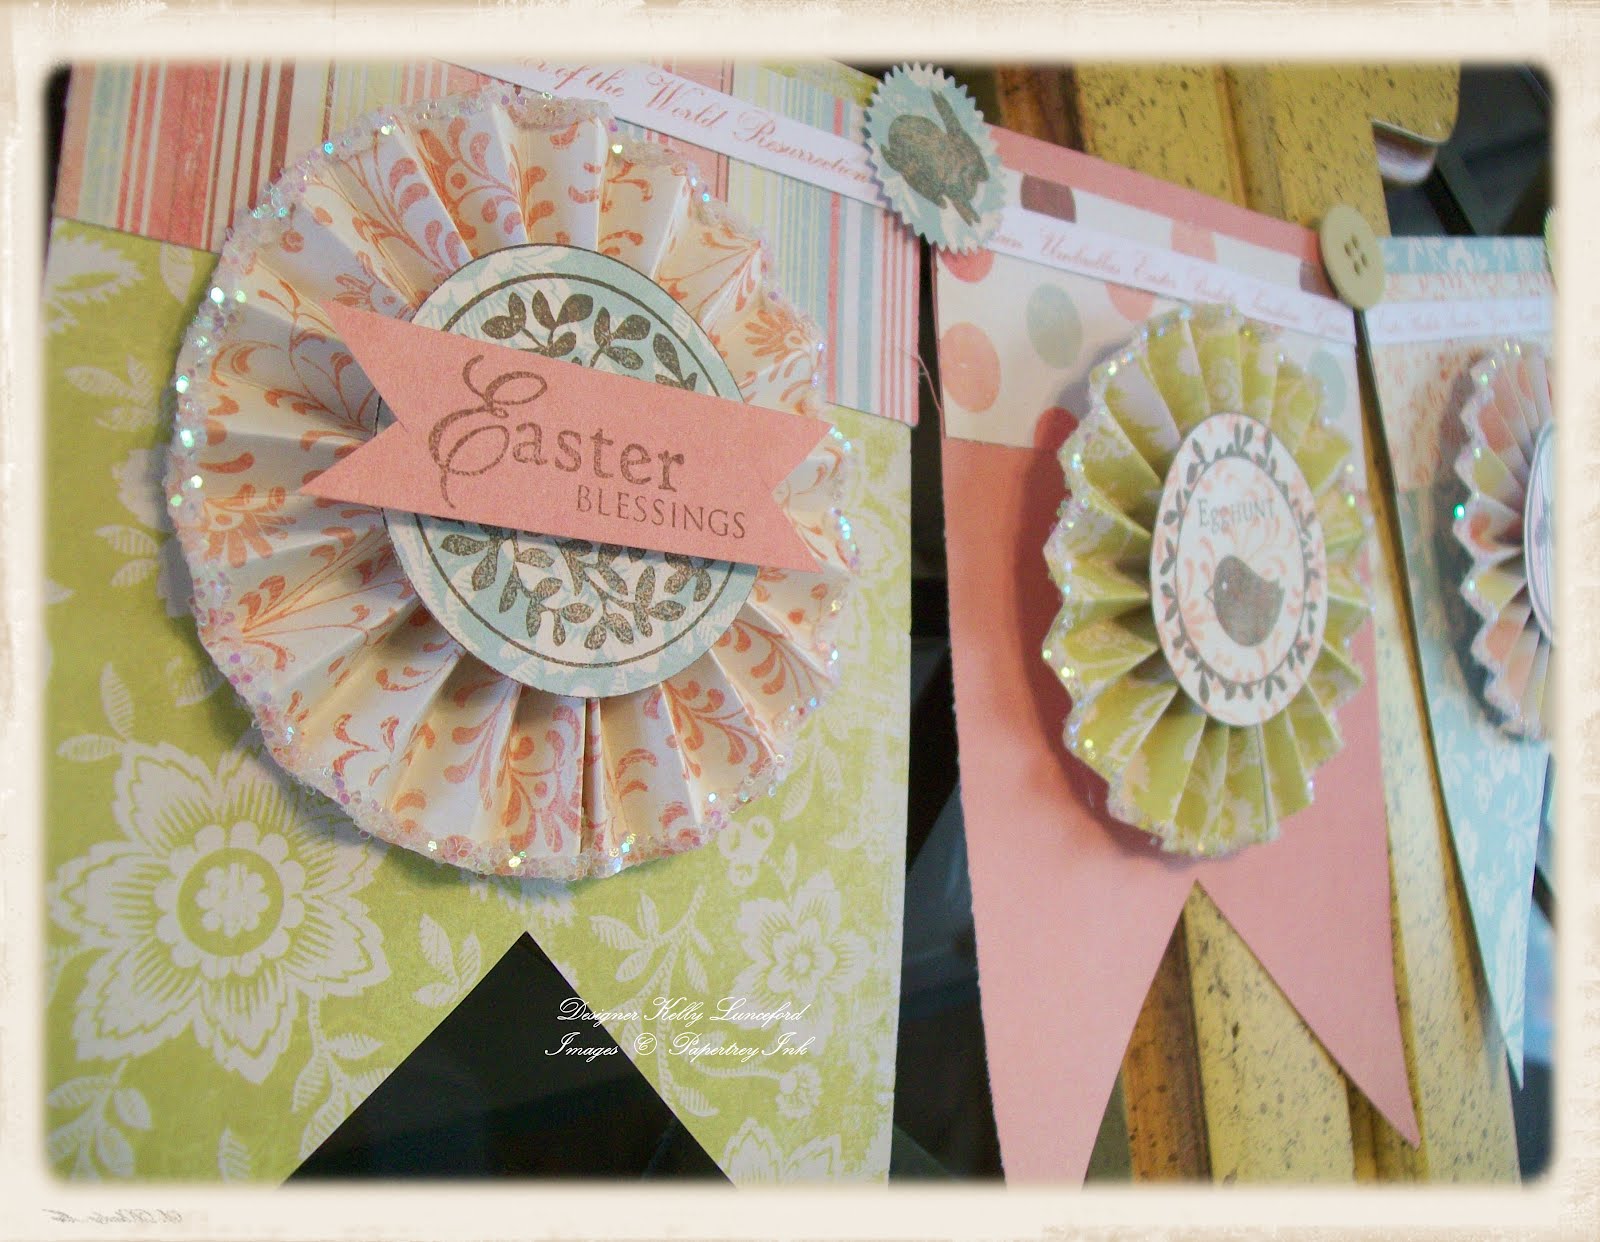
I have gone a little bit crazy this year decorating for spring and Easter. I actually have gotten out almost every single Easter decoration that I own. I can't find a few, which is bugging me, but I am sure they will turn up; maybe around Halloween or Christmas! LOL! Even with all of the bunnies, chicks and Easter eggs, I haven't forgotten what Easter is really all about!
I needed a couple of cards to send out this week, so I made 3 so I could have an extra on hand. I was talking to a friend while I was getting them made and she mentioned that she was in need of a card so I gave her the extra. I used all of the same supplies that I had used on my Easter banner which you can see below so it made it easy. As you can tell, I am still using my old slab of My Mind's Eye paper. I promise the next project will not be using that! LOL!

The stamp set that I used for both of these projects is "Tags for Spring" from PTI. It is one of my favorites, but really only gets used once a year. Everything is pretty straightforward, but I did use some of my yummy new bakers twine that I picked up at the cooking store last month.
I realize that these photos are a little hard to see, but I made them as big as I could. I had someone comment on my St. Patty's banner that the photos are hard to see, but this (photo above) is the largest that I can make them; to my knowledge. If anyone has a suggestion, please let me know.
This is the first banner that I made that isn't a word or a phrase, if that makes sense. Each panel is just a little bit of Spring or Easter.

You will notice on the Easter cards that I used distress ink on all of the edges, but for my banner, I kept it all clean. Sometimes it is hard for me just to leave well enough alone, but I resisted for this project!


I have a few more projects that I have made but haven't posted. I will share them soon! Thanks for fluttering by!

Friday, March 23, 2012

Three cards, three ways, one day!


Yesterday I sat down and got to work on three cards that I needed. I pulled out an older slab of "My Mind's Eye" paper and got started. I needed to make a card for a 3 year old, a 12 year old and a brand-new baby!

For card #1, I kept it simple since it was for the 3 year old (pictured to the right). I knew that I would be using "Just the Ticket" from PTI because the invitation that my son got for the 12 year old's party, was in the shape of a ticket. Of course you all know how much I love to follow a theme. So...I decided to use the same supplies on all three cards. I'm a little bit obsessed with the ticket stamp set lately anyway, if you haven't noticed. I also paired it with the PTI star set as well.

When I first bought "Just the Ticket" I couldn't figure out why I didn't like what I was making and how things were turning out until I realized that I was trying to stamp it all onto white paper. If you look at any kind of ticket like this, they are all printed onto colored paper; usually pink, blue or brown. Since I have been doing it like this, I have really liked the results. The finishing touch is a die-cut ric-rac border and a bit of baker's twine.


Card #2 is very similar to card #1 so I won't go into much detail. In fact, it is very similar to the St. Patrick's day card I made a few posts down.

I did stamp a few black stars at the bottom and then added a bit of glossy crackle accent glue to each of the three circles.


Card #3 is just a tiny little card. I needed something simple and quick to tuck into a baby gift. I was kindof "done" making cards at this point, especially since I was trying to do it off the kitchen table which meant making it in my bedroom so I had stuff strewn all over my bed. All I really wanted to do was go to bed, which wasn't an option at that point.
Again, pretty straightforward, but it is kind of fun to see how easy it is to change the look and still use the same stamp set. Of course, this particular card uses all of the same elements as the others, but they really do make it feel different. I still have some other projects that I have made but haven't share yet, so stay tuned. Thanks for fluttering by!

P.S. I hope you are all enjoying the arrival of spring. I know I am.

Friday, March 16, 2012

Lucky Me Banner

I thought I better get this posted before St. Patrick's Day comes and goes. I decided to make a new banner this year; one for upstairs and one for the entry way.I really wanted my banner longer than the one from last year, but I was really scratching my head trying to figure something out. We aren't Irish, so I couldn't do "Kiss me, I'm Irish" or anything like that. I decided just to go with "Lucky Me" and call it good. I used the PTI St. Patty's day set and another $1 stamp set I bought last year. The image that separates the two words is from Crafty Secrets.


I used my new crackle glossy accent stuff to coat the tiny stamps that I used at the top of each banner piece. I really like how it turned out even though it is hard to see in the photos. I also used the tag die-cut and coordinating stamp set "Just the Ticket" from PTI for some of the accents. I had used it in the card I made a post or two down and really wanted to incorporate it into the banner as well. I purchased all of the paper at Hobby Lobby and while it isn't St. Patricksy at all, I really like the feel. I also sewed up a little bench runner to tie everything together which you can see in the photo at the end of the post.

I decided to add a little circle of tulle to each of the accordion medallions. I had added them to a project that I did a week or so ago, which I will share later. I thought that adding a little more green couldn't hurt! I hope you all have a fun and green St. Patrick's Day. Don't get pinched! Thanks for fluttering by!

Thursday, February 23, 2012

Valentine's Day* wrap up*

No pun intended! However, I did have a lot of fun coming up with fun ways to celebrate Valentine's Day this year and get everyone checked off my list! My husband said,"Isn't Valentine's Day supposed to be a romantic holiday and not so much a "friend" holiday?" to which I replied,"It is both!". I love Valentine's Day way too much not to do fun things for everyone.
It is my tradition to make chocolate dipped strawberries to deliver to friends and family on Valentine's Day and this year was no exception.I also package them the same year after year, the only difference from year to year is the tag. This year I chose to go with the doily theme as I did on my banner a few posts down. I mean, come on, Valentine's Day is the doily holiday. Every year I go to "Dollar Tree" and purchase the faux silver trays (they really are metal, though; not the plastic ones). The strawberries look a little fancier but I don't have to spend an arm and a leg in the process. I used the "Heart Prints" stamp set from PTI for the tags. Simple stamping, but I love how they turned out. I made quite a few different variations using different papers and sentiments, but I didn't have a chance to get them all photographed. In fact, forgive my photography for all of these projects.


I also whipped up a batch of yummy raspberry caramels to give to Emma's dance teacher and a few friends from church. The best thing about these caramels is that I made them pink!! They were so cute! You can't see very well from the photo, but maybe if you squint really hard at the bottom you can see one peeking through the cellophane. It is hard to see from the photo, but for the packaging, I simply used a cellophane bag with a sheet of patterned paper slipped down into the back. Then I attached a doily/label embellishment using sticky strip, tied it up with coordinating ribbon and called it good. I mean, who needs fancy packaging when there are pink caramels inside? Just kidding; you always need fancy packaging. That is my motto. Well...except if you are giving said caramels to small children who would tear said packaging apart in two seconds! LOL!
Speaking of children; Emma's dance class always does a Valentine's exchange and this year I thought I would do something fun. The girls have to have their hair pulled up for class, of course, so I decided to make some fun bows for them to wear. I have purchased a few elastic/bows like this for Emma and every time I use it in her hair I think how easy they would be to make. I chose pink and black for the theme since their dance attire is pink and black.
When you purchase them at the store, they are on a card to hang on the rack so I thought I would make my own. I used a nestabilities die for the tag and "Heart Prints" for the sentiments. I also used one of the label stamp sets from PTI for the border, but I can't think of the name right now. Sorry.
It was fun to see some of the girls wearing their new bows at dance class this week. I also made some coordinating tissue cozies. I had seen this idea with the joke last year, but I saw it after Valentine's Day so I couldn't wait to make some this year.Emma asked if I would make one for her, too, so she could put it into her backpack. I thought the fabric looked cute with the hair bows. I packaged everything up int heart shaped dollar spot baskets with some candy in the bottom. Emma was so excited to take them to dance class for all of her friends. I hope that even though Valentine's Day has passed, you can find some inspiration that you can incorporate somewhere else, or maybe save for next year. I was thrilled that I got so much done for all of the "Valentines" in my life. Thanks for fluttering by!

Monday, February 20, 2012

*Lucky* to count you as a friend

I have been sick ever since last Wednesday. I could feel it coming on in the middle of the night and the dread set in. Moms shouldn't be able to get sick. We should get some type of waiver for the duration of motherhood; well....at least while they are little. Unfortunately, that isn't the case. Not only am I sick, but Rowan has got it as well as Rhys. So...with that being said, not only do I feel awful, but so do the babies.
My dear, sweet friend offered to bring me dinner and as much as I wanted to protest, I really needed it. She brought some super yummy chicken noodle soup, rolls and pumpkin chocolate chip cookies; just what the doctor ordered. I need to return her dishes, so I thought I would make a card to go along with it to thank her.


This is an absolute first.... but I made the card in my bed! LOL! I had to get up to gather my supplies, but for the most part I laid on my bed and glued, cut and fiddled. I think I may have found my new craft space! LOL! Can you imagine? It is never good to be thinking that way, especially when I had the new episode of "Hoarding; buried alive" playing while I was crafting. Maybe I could become a craft hoarder who only crafts in bed with her supplies piling up around her! LOL!
Anyway, I will quit rambling about nonsense and get onto the card. I had some scraps of paper left over from another project, so I decided to use them. They are all from Hobby Lobby, which is becoming the only place to buy paper around here anyway. The colors inspired me to pull out my "St. Patrick's Day" stamps, which is fitting for the season. I still have my Valentine's Day stuff up, but St. Patty's stuff will be going up soon. Most of the images are from PTI, but the circle "mar. 17" image is from a dollar set I got last year. I got a little "die-cut" happy and used my PTI dies for the focal image, the felt ric-rac and tickets. It is so nice to be able to make your own embellishments, especially when you are limited on space. The trim at the top, is just the extra piece from die-cutting the felt ric-rac. I glued it along the inside flap. It isn't going in an envelope, so I didn't mind adding the extra length to the card. If you do add things like this, just remember to grab a bigger envelope. I added a little bit of gold stickles to the shamrock to give it another touch of St. Patty's day charm and called it good. I really would have liked to have added some sewing, but I didn't think sewing in bed would be very easy! LOL! Making this card has made me want to make another St. Patrick's Day banner; surprise, surprise! I love the one I made last year, but I really like these papers, too.

Also, I still have my Valentine's Day projects to show you. I was down to the wire, but I got everything done that I wanted to get done; except for my Valentine's Day countdown calendar. Maybe next year........ Thanks for fluttering by!