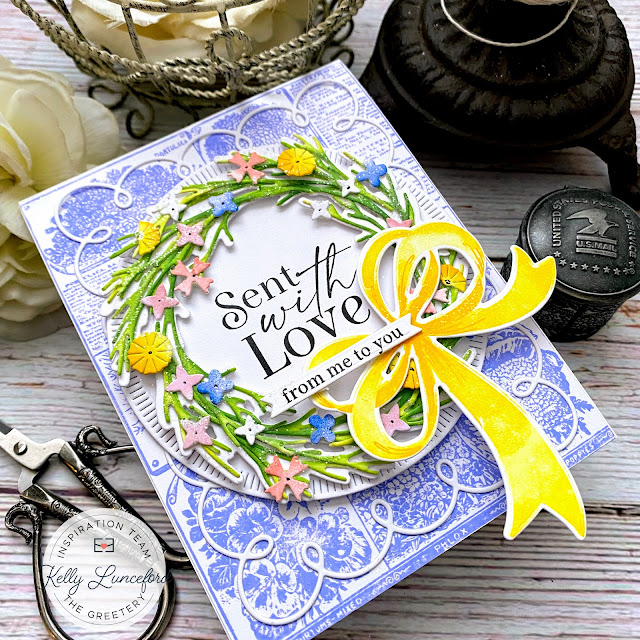
Hello and welcome! It's my turn for this week's T.G.I.F. feature for The Greetery! Today I'm sharing a springtime card using an idea that I’ve had swirling around in my head for a while; actually, since the Rustic Wreath Base die and the Rustic Wreath Twigs die were first released. I thought it would be fun to swap out the twig looking wreath and color it with some green Distress Oxide inks and add some of the petite flowers from the BotaniCuts Wildflower Mix.
To begin, I die cut the wreath base and 4 each of the two twig branches and used the assembly guide to put the wreath together. I used liquid glue and followed each step on the guide until it was complete. I used springy colors for the flowers and attached them using liquid glue and mini foam squares until I was satisfied with the arrangement.I stamped the sentiment, which is from the Lovely Blossoms stamp set, directly in the center of a Crimped Circle using black ink. I added the wreath over the top using foam squares for dimension. The background was created using the Seed Catalog Background stamp on an A2 panel of white cardstock. I also added the swirl die that is included in the Frosted Frames collection to frame the wreath.I added the wreath in the middle of the background panel using additional foam squares. I also stamped the accent sentiment, that is also included in the Lovely Blossoms stamp set, and die cut it using one of the small banner dies in the Sentiment Suite Basics die collection. The bow is from the fabulous Put a Bow on It Stamp/ die set. I used three different colors of ink to the main bow image, layering the ink with finger sponge daubers for a natural look. The detail image was stamped using the darkest of the 3 yellow inks. I added it to the bottom of the wreath and then positioned the accent sentiment portion using mini foam squares.I added the panel to a top-folding A2 card base using liquid glue and then sprinkled some glitter over the top of the wreath for some sparkle and shine. I didn’t have a particular recipient in mind when I sat down to create this card, but I love that it could be used for a sympathy card all the way to a birthday card, depending on your needs. This is one that I’ll add to my stash for a rainy day! Thanks for joining me today! I hope you’ll take some time to re-think new ways to use some of your seasonal supplies for a fresh, new look! Thanks for fluttering by!


1 comment:
Kelly, this is SO PRETTY! ;) I LOOOVE how you've used all the products! Now, If I can learn to do the same! LOL ;)<3
Post a Comment