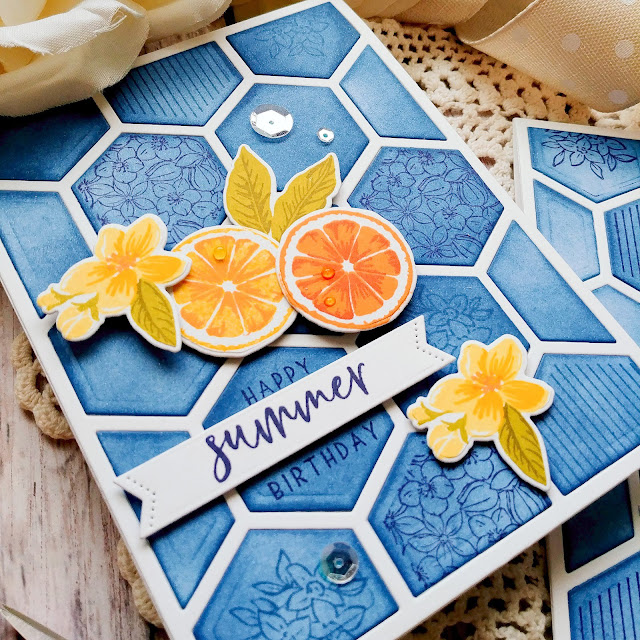
Do you like my pun? LOL! Today's cards were inspired by the clementine packaging from my last grocery order. I do most of my grocery shopping online, so I never know exactly what type of produce I will get, but in this case, it was super adorable! ha ha! I'm not sure if it would have made as much of an impact on me had Pinkfresh Studio not just released the fabulous Pop Out Hexagons cling stamp and coordinating Simply Hexagons die. I wish I would have saved the packaging so I could have referenced a brand or something. It had a cute bee on it with blue hexagons and oranges.
I knew that the Lemon Blossom stamp set would be the perfect complement to these two birthday designs! To begin these two cards, I die cut two white panels using the Simply Hexagons die and carefully removed the inside pieces so I could easily put them back into place after I colored them.
I used liquid glue to adhere the frame portion to two top folding A2 card bases and set them aside to dry. I used a blender brush to add Storm ink to each of the die cut hexagon pieces. Once that was done, I used the detail images from the Hexagon stamp set to stamp different pieces using Stargazer ink. Each card has a different arrangement of designs, which led to the placement of each of the sentiments, which I will talk about a little later on.
I popped each piece back into place and secured them with liquid glue. Once that was done, I set them aside so that I could work on the flowers and fruit pieces.
I Googled what Orange blossoms look like and they are white, which is always tricky when stamping. I decided to go ahead and make them yellow to fit with the colors I was using anyway. I die cut the pieces using the Lemon Blossom die and then stamped them using my mini MISTI. I made some of the oranges lighter in color for interest and variation. I also used a lemon on the other card because I already had a few left over from THIS project.
Once I had all of the stamped images done, I set them aside to work on the birthday sentiment. I didn't really plan this part out ahead of time, so I had to find a blank hexagon on each of the two panels so I could stamp the "happy" and "birthday" sentiments. I lucked out and there was one on each side of the panel, right where I might normally place the sentiment.
I stamped the "summer" portion onto white cardstock and then die cut them using the Sentiment Suite Basics die. It fit nicely into the middle of the two other stamped sentiments. I added it using foam squares for dimension.
This set the stage for me to add in the stamped fruit and flowers. I added a few extra leaves behind the fruit for some extra interest. I was lucky that I had a few left over from the project I linked above.
Once everything was adhered using foam squares, I added a few sparkling clear sequins here and there for some sparkle and shine.
I also spritzed each card with a generous amount of shimmer spray because it is so much fun! It is just perfect for these summer birthday cards! I also added some clear Nuvo drops for some juicy accents on the fruit slices. I'm getting thirsty just typing this! I think I'll head out onto the porch to enjoy this beautiful day with something cold and refreshing to drink! ha ha! Thanks for fluttering by!


5 comments:
You are amazing, it would take me hours and hours to make a card like this, and there would be no time for beverages on the porch!! Love all the details!
oh my..stunning cards!!!
LOVE it!
I love hearing your inspiration stories! Isn’t it great having left- overs (not just for dinner, lol!) I love your cards Kelly, perfect Summer designs! I hope you have a great weekend! 😊
Love the bright blue & orange combo! Great card!!
fabulous color combination and design
Post a Comment