Sunday, December 19, 2021

Papertrey Ink December Countdown 2

Welcome to day 2 of the Papertrey Ink December Countdown! I hope you're all enjoying this last week of Christmas! I'm sad that it will be over before we know it so I'm savoring every second! Earlier this week we had a wonderful snowstorm which means we don't have to dream of a white Christmas, we will HAVE a white Christmas....my favorite! 
I have two projects to share with you today; up first is a cute new set that goes along with the previously released Holiday Wagon stamp set called Loads of Love. I had so much fun filling up the wagon with sweets and treats for Valentine's Day!

My favorites are the sugar cookies, strawberries, and the chocolate box. The balloon is suepr cute, too, of course! Actually, what am I talking about? The whole thing is cute! LOL! Once I had all of my images die cut and stamped, I got to work putting the card together.

I'm a sucker for doilies for Valentine's Day, so the Delicate Doilies die set was the perfect backdrop for this cute wagon. I also layered the middle size in the Love to Layer: Scalloped Circles over the top for even more depth and detail. I added the cute wagon over the top. 

The sentiment, which is from the previously released Just Sentiments: Love Mini stamp set, is heat embossed in white for a nice crisp look! I added some of the pretty blooms from the Loads of Love stamp set around the sentiment.

I added a sprinkling of glitter for some sparkle and shine!

My second card, or project I should say, is a set of cute tea cup tea pockets using the Loads of Healing stamp set. This can be used in the same way as the Loads of Love set with the wagon, but I wanted to show some other ways to use the little images.

I die cut the Cup of Love Die twice; once from Bitty Big: Aqua Mist paper and once from the Bitty Big: Pale Peony paper. I folded them in half and glued them carefully on the handle and the fluted portion at the bottom. I knew I would be tucking a tea packet  into each cup, so I wanted to make sure the top was open and big enough to hold the packet. Please note: I had totally forgotten to tuck the tea in when I was taking photos, so this is the only photo with the actual tea packet! LOL!

For the sentiment portion of each cup, I die cut the piece using the smaller pattern, or should I say "bitty" pattern (ha ha) of the two papers and then stamped the sentiments from the Just Sentiments: Thinking of You stamp set that was featured yesterday.

I added the little images here and there with the tulip bunch on the the little tag.

These will be cute to tuck in with a get-well basket for anyone who is in need of some healing wishes! Thanks for fluttering by!


Saturday, December 18, 2021

Papertrey Ink December Countdown Day 1

Welcome to day 1 of the Papertrey Ink December countdown! I'm currently listening to Christmas music and pining for a cup of hot cocoa (which I'll probably make before the post is through), but it's looking like spring around here! ha ha! Aren't these new Into the Blooms: Pansies dies fabulous??? As hard as it is for me to transition from Christmas crafting, these beautiful dies make it a little bit easier! That being said, I'm not completely done with all of my crafty Christmas, so stay tuned this next week for a few more projects!

I paired these pansies with one of the sentiments from the new Just Sentiments: Thinking of You stamped in black. This sentiment is perfect for a sympathy, get-well, and more....I will tuck this one in my stash for just the perfect time. I die cut all of the flowers from white cardstock and then inked them up using finger daubers and assorted Distress Oxide inks. I added some tiny black dots in the center of each flower using a fine tip marker.

Once the flowers and leaves were all done, I set them aside to create the different design elements to finish this card. I die cut a panel of Royal Velvet cardstock using the Border Bling: Tin Stitch Die and then added the beautiful new Cover Plate: Elegance die over the top that is cut from Lilac Grace cardstock. I actually cut three of them and glued them together for maximum dimension.

Although I hated covering up the beautiful details of this new Cover Plate, I really wanted to ground the sentiment so I die cut an oval using the Nesting Basics Ovals die and added the pierced detail using the Nesting Basics: Pierced Oval dies. I had toyed around with the idea of stamping a different sentiment on a BANNER, so I decided to add that bit of detail coming from behind the oval. I love when things like this fall into place...something I don't think I would have tried otherwise.

From there, I added the flowers and leaves here and there using foam squares and liquid glue. I added some glitter to both the leaves and flowers for some added detail and sparkle.

My next card uses the latest in the Feathered Friends Mini collection. This particular set is a little bit bigger than the other sets and includes two birds, some berries and leaves, a nest, and a perfect branch to perch!

This particular set has quite a few images so I stamped my birds using the stamping guide. I love how these birds come to life as each step is added. I always like to add a little bit of extra shading to different parts of the bird using two colors of ink and a blending brush to tap the colors together and remove any harsh lines.

Once all of the images were  stamped and ready to go, I set them aside to get the background created. I die cut the On the Border: From the Heart Frame die twice from Stormy Sea cardstock and glued them together with liquid glue.

I layered it onto a top folding A2 card base using liquid glue. I stamped the sentiment at the top of the heart using black ink. This is a new sentiment from the Just Sentiments: Thinking of You stamp set. I die cut the heart frame using the Border Bling: Skinny Heart Frames die from the same cardstock and glued it over the top.

I added all of the stamped pieces using foam squares and tucked a few more leaves from the new Pansies set to frame the birds. Thanks for fluttering by!


Monday, December 13, 2021

Papertrey Ink Flash Sale {Joy to the World}

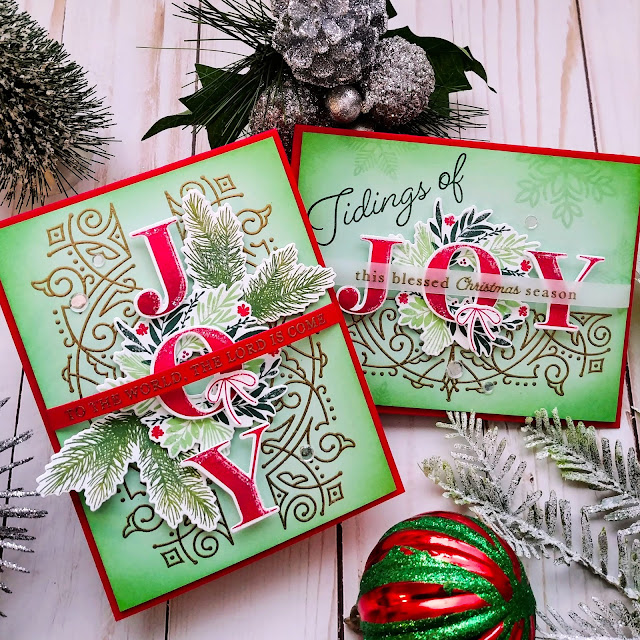
I couldn't resist making a few more Christmas cards for this week's Papertrey Ink Flash Sale...and you can probably bet that next week's will be Christmas, too! I promised a few weeks ago that I would try to avoid red and green, but I decided to switch it up a bit and go with my favorite vintage Christmas combo! I started with two panels of Mint Julep cardstock measuring 4 by 5 1/4 inches. For the vertical layout, I heat embossed the fancy design using the Deco Notes stamp set on both sides of the panel, and just once for the horizontal layout.

I added some Vintage Jadeite and New Leaf ink around the edges of both panels using a blender brush. Once that was done, I set them aside to get to work on the letters and foliage.
I die cut 2 wreaths, 2 bows, and 2 sets of letters using the Season of Joy die set and then stamped them using the Season of Joy stamp set. I used the multiple step wreath images to give it a lot of color and detail. I stamped the darkest portion using Pinefeather ink and then the other portion using both Mint Julep and New Leaf ink. The berries are stamped in Scarlet Jewel and the tiny red flowers are stamped in Pure Poppy.

I happened to have two pineboughs stamped and ready to go from the Corner It: Festive Holiday stamp set so I added those to this vertical design as well. I heat embossed the "to the world, the Lord is come" portion using gold powder on a strip of Pure Poppy cardstock.

The Season of Joy stamp set is one of my all-time favorites, and partly because of the script-y "Tidings of" and the "Christmas" sentiments included in the set. They are that perfect vintage look that I love so much! I stamped it in Pinefeather ink at the top making certain that the wreath would tuck nicely between the loopy letters.

I added some tone-on-tone snowflakes around the perimeter of this design to add some extra detail. I added the heat embossed vellum strip and secured it on the back of the Mint panel. Both cards are adhered to a Pure Poppy card base using foam squares. Each card also got a sprinkling of glitter and a trio of Moonshine sequins. Thanks for fluttering by!


Monday, December 6, 2021

Papertrey Ink Flash Sale {The Sweetest Christmas}

I can't stop with the Christmas cards!!! How about you?? Are you done with your Christmas crafting and want to move on to Valentine's Day or are you still embracing the season? I'd love to hear your opinion because I can pick some Valentine's Day stamp sets for the upcoming Papertrey Ink Flash Sales if you like! Just leave a comment with your preference and I will definitely keep it in mind as I pick for the next few weeks!
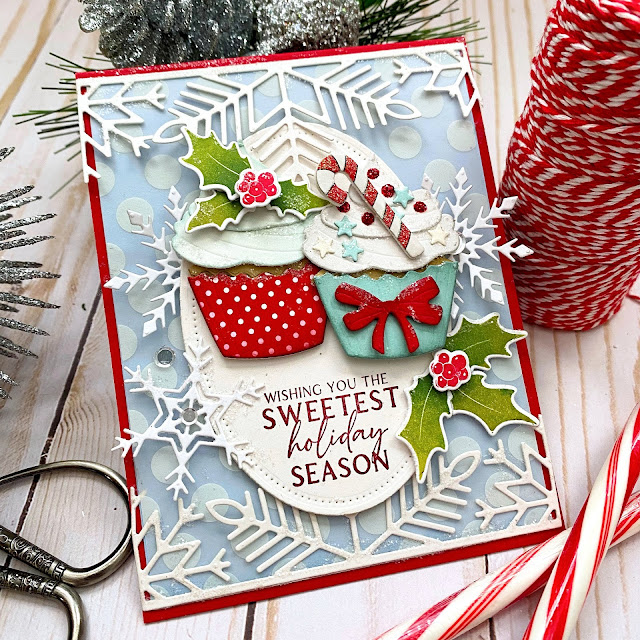
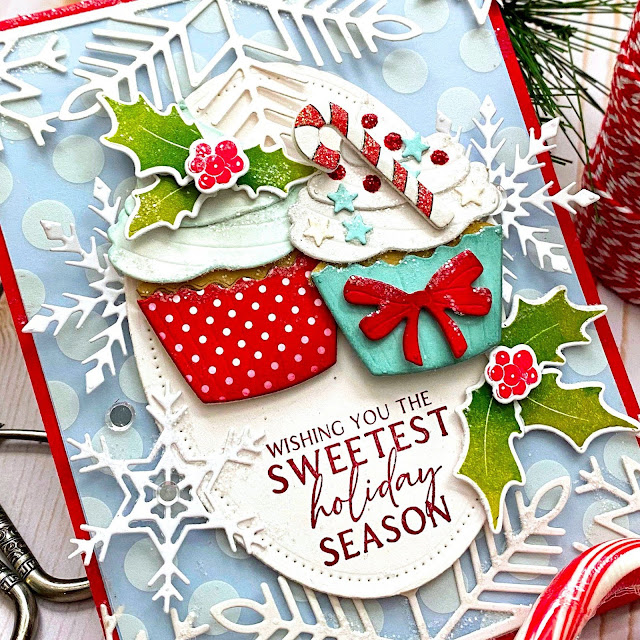
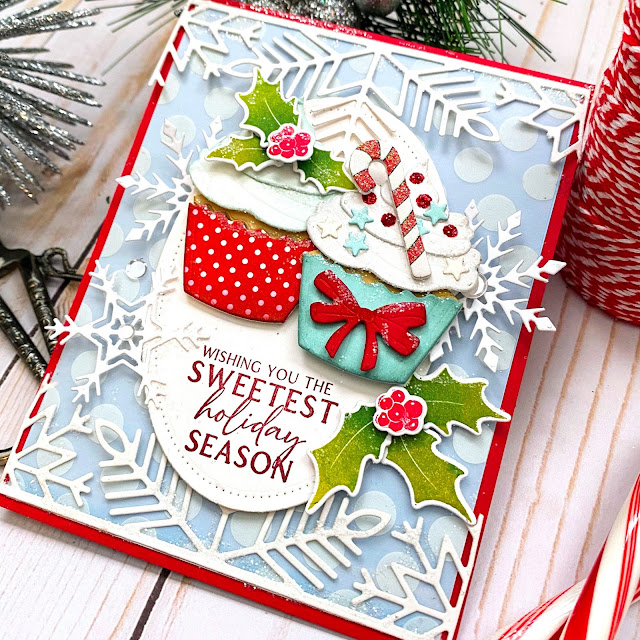
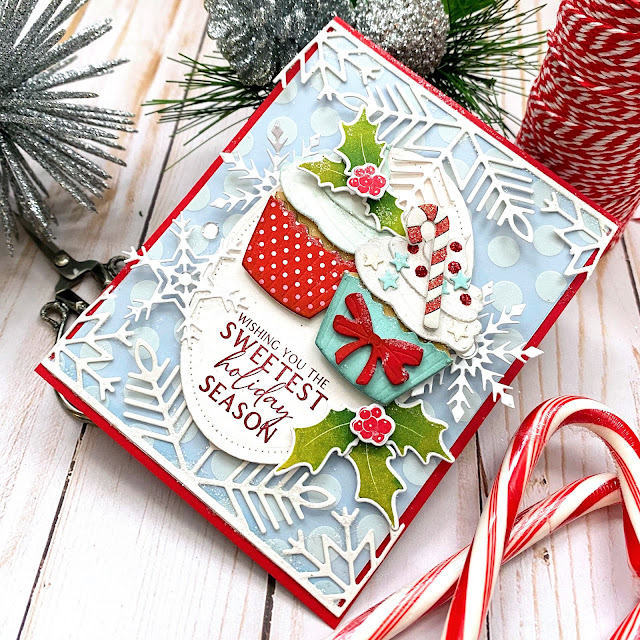
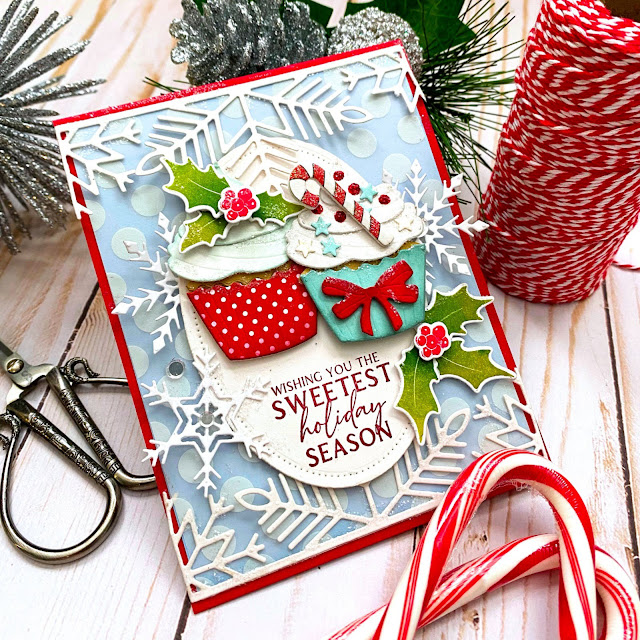
My card for today uses some older favorites paired with some of the new stamps/dies you may have recently added to your collection! I saw a darling illustration of some Christmas cupcakes that inspired today's card! I wanted to incorporate each and every sweet detail and with this combination of products, I was able to achieve the look I was going for!

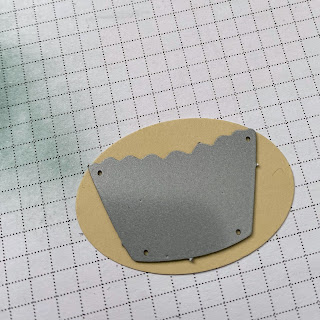
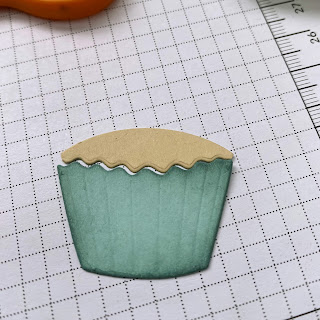
The Sweet Celebration Die was the perfect choice to bring these sweet treats to life! I die cut one liner from Aqua Mist cardstock and added some Ocean Tides ink around the edges for some dimension. The other liner is die cut using Bitty Big: Pure Poppy pattern paper with Scarlet Jewel ink around the edges. I wanted it to look there was an actual cupcake underneath the frosting so I got creative with some paper, punches, and the liner die to achieve this.
 
I used an old SU! oval punch, but you could use any oval die from your stash. I cut it from Fine Linen cardstock and then lined the liner up with the domed top to create the actual cupcake shape.

As you can see, once that was done, it nests perfectly with the liner. I glued it slightly below the liner so that it would be seamless. I did add some darker brown ink around the edges to give it that "golden brown" baked look.
I die cut the frosting from Rustic White cardstock to give it some added detail. I thought that the little specks in the paper could represent vanilla bean flecks! ha ha! I added some Aqua Mist ink around the edges of the red liner cupcake and Weathervane ink around the edges of the other cupcake. I glued the frosting pieces together using liquid glue and set them aside to dry.

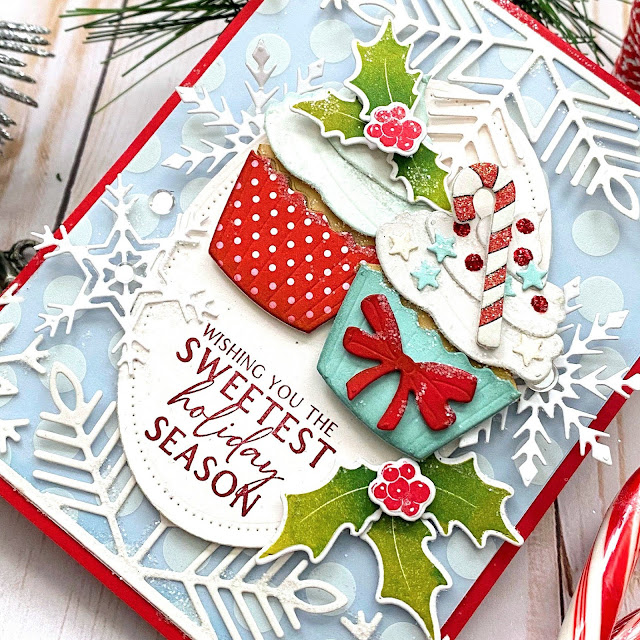
I needed some holly leaves and berries that would be the right scale so I opted for the new Corner It: Festive Holiday that was released last month. I have used it so much this past month! The little red bow is also from the coordinating Corner It: Festive Holiday Die. I cut it from Pure Poppy cardstock and added some Scarlet Jewel ink around the edges using a blender brush.

I die cut the focal oval using the Nesting Basics: Ovals and the Nesting Basics: Pierced ovals. I wanted a sentiment that worked nicely with the sweet cupcake theme and of course this one that says "Wishing you the sweetest holiday season" was the PERFECT choice! It is from the new Just Sentiments: Holiday Tags stamp set that is part of the latest release! I'm obsessed with it and have used it so much!

I cut a panel of Spring Rain cardstock measuring 4 by 5 1/4 inches and layered a piece of pattern vellum over the top. I secured it strategically with glue under some of the hidden polka dots and at the top and bottom where the Splendid Snowflakes Border Die is attached. Once that was one, I was able to assemble all of the design pieces using both liquid glue and foam squares. I also tucked a few snowflakes from the Holiday Cheer Overlay Collection. I finished the cupcakes off with holly, sprinkles, and a sticker candy cane. Of course I couldn't forget the glitter and a few Moonshine Sequins. Thanks for fluttering by!
P.S. My sister has been giving me the Hallmark Cupcake Collection ornaments for quite a few years now. I thought it would be fun to share some quick pictures of those! These look so perfect on my kitchen Christmas tree! Each and every one would be so cute to recreate in paper form!


Friday, December 3, 2021

The Greetery TGIF {Merry Christmas}


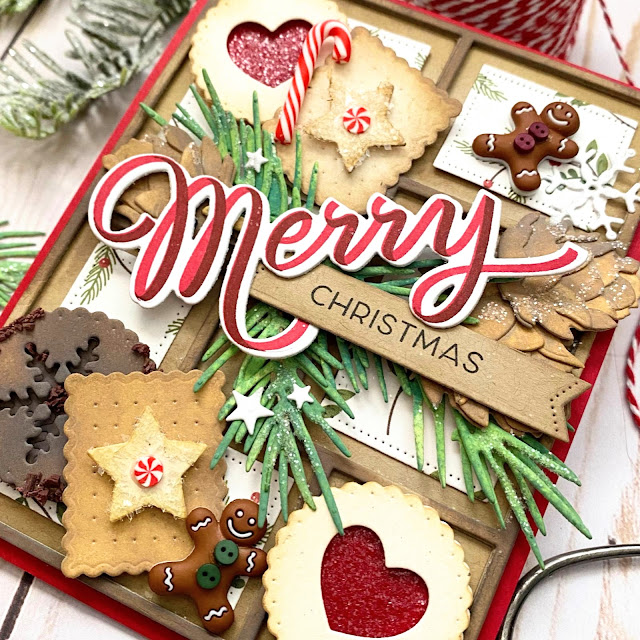
Hi friends! I'm thrilled to be here today with this week’s T.G.I.F! I’ve been having so much fun working on Christmas cards, tags, and crafts! I’ve had the idea for this card swirling around in my mind for a while and it’s always fun to take it from my brain and execute it! Ha ha! This card was inspired by photos I’ve seen of beautiful wooden boxes of cookies and sweets with greenery and things tucked here and there! I love that products from The Greetery makes it possible for me to recreate something like this, but in paper form!

To begin, I got to work creating all kinds of cookies using the Hug in a Mug Sweet Treats die collection. I’m amazed at how realistic they look once you add a little bit of ink blending, Nuvo Crystal Glaze, sprinkles, and glitter! They look good enough to eat, don’t you think? I set all of the cookies aside to dry and got to work on the “box”. The new Curio: Divider and Details II die was the perfect choice to showcase all of these cute cookies! I die cut it 4 times from Kraft cardstock and glued them together using liquid glue. I wanted it to be very dimensional so that it would really look like the cookies were inside.

Once it was glued together, I added some Brushed Corduroy ink around the edges where each point met another. I was trying to achieve a stained wood look, so I didn’t want it to be all one color. I glued it to a 4 by 5 ¼ inch panel of Kraft cardstock that had ink blending around the edges. Once it was glued down, I added some additional ink over the top of those points again. I used the cute layering dies and pattern paper for the inside of each section, minus two; the super tiny one, and one that had a cookie completely covering it.

Next it was time to get to work on the greenery. I used the BotaniCuts Pine Bough dies to make both the pinecones and the pine sprigs. I die cut them from Rustic Cream cardstock and then used Distress 0xide ink to color them. The pinecones also got some colored pencil details for added interest. I just love how realistic everything looks; that really is the key to executing an idea like this….all of the perfectly designed products from The Greetery.

One of my favorite sentiment sets is the Written in Ribbons Stamp set and I knew it would be the perfect choice to have decorating this box of Christmas sweets! I stamped the Merry portion using red and scarlet ink. The “Christmas” portion of the sentiment is stamped in black and then die cut using the must-have Sentiment Suite Basics die collection. Once that was done, it was finally time to put it all together!

I added the cookies here and there using foam squares and liquid glue to give them just the right angle to look like they are propped in the box. I layered the greenery and pinecones over the top letting the sprigs overlap the cookies. The sentiment is adhered to the greenery and pinecones using additional foam squares. The cute little gingerbread boys are actually buttons from my holiday stash. They had two big holes on their tummies so that they can be sewn to something, but I decided to add these micro-sized buttons over the top of the holes using liquid glue. I think I squealed out loud once they were all dressed up!

I tucked them here and there along with one of the candy canes from the embellishment kit that was released last year. I also scattered some snowflakes and stars that are die cut from the Frosty Corners die set. I adhered them with liquid glue and then gave them a sprinkling of glitter along with the pinecones and sprigs! The entire “box” was glued to a top folding red card base using liquid glue.  I was thrilled at how nicely this card came together…I still have a TON of cookies left over, but that can only mean one thing….more crafty projects featuring these sweet treats! Thanks for joining me today and enjoy your holiday crafting time! Thanks for fluttering by!


Wednesday, December 1, 2021

The Great Cover-Up {We Will Sing Joy}

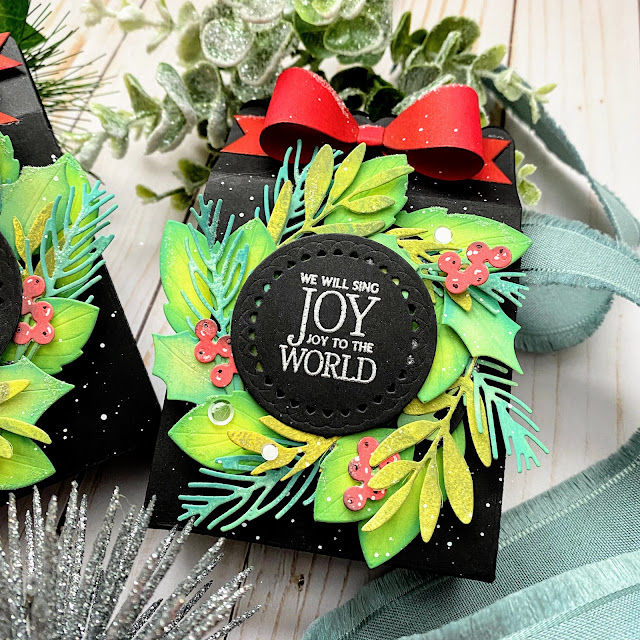
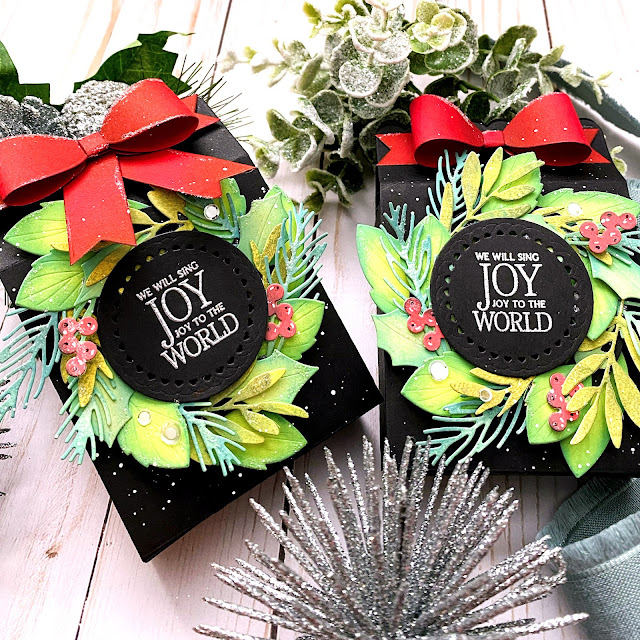
It's December! Wow! The last month of the year...where has it gone? It's my turn for "The Great Cover-Up" feature on the  Papertrey Ink Blog. Since we're all hustling and bustling to get all of our packages wrapped and under the tree, which really is "the great cover-up", I thought it would be fun to create some cute packages for treats or small gifts! I used a mix of old and new for these fun and festive boxes! Please note: as I am typing this, the PTI website is down so I won't be able to link a few of the items. I will try and come back and link when I can.

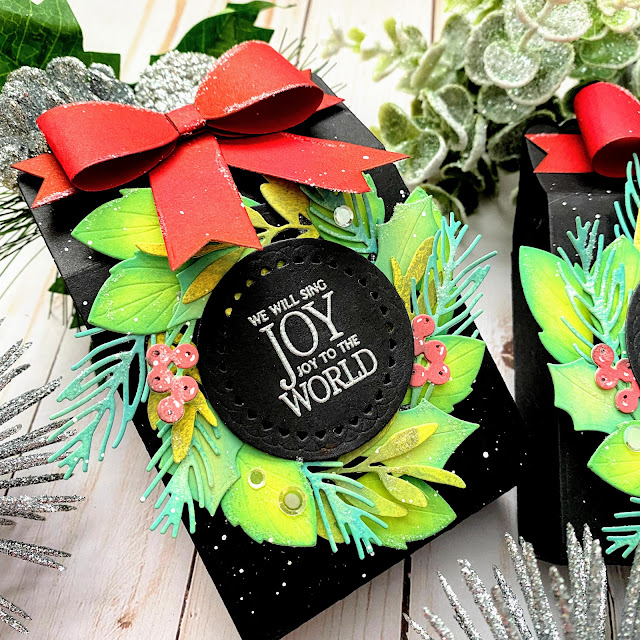
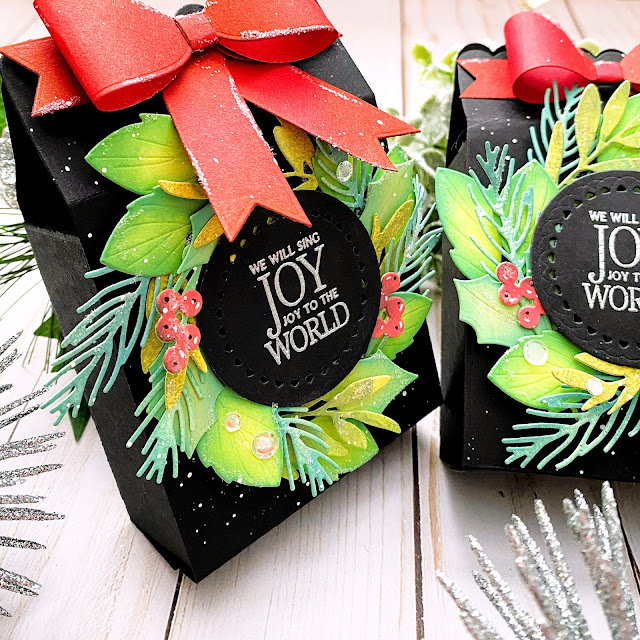
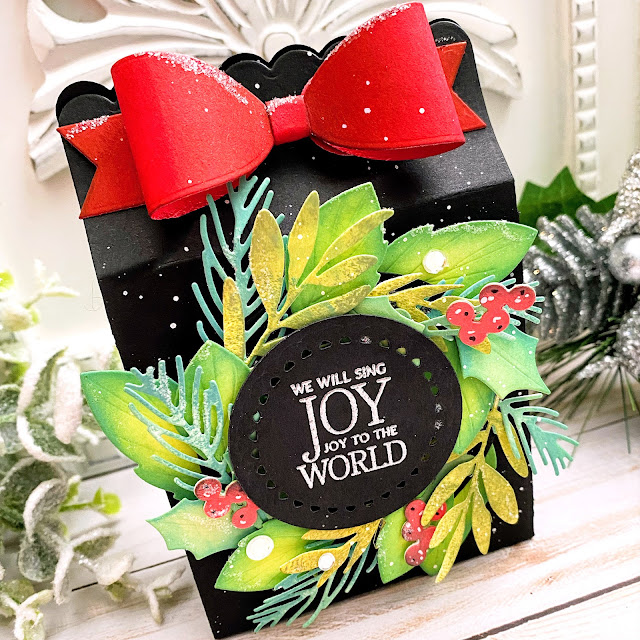
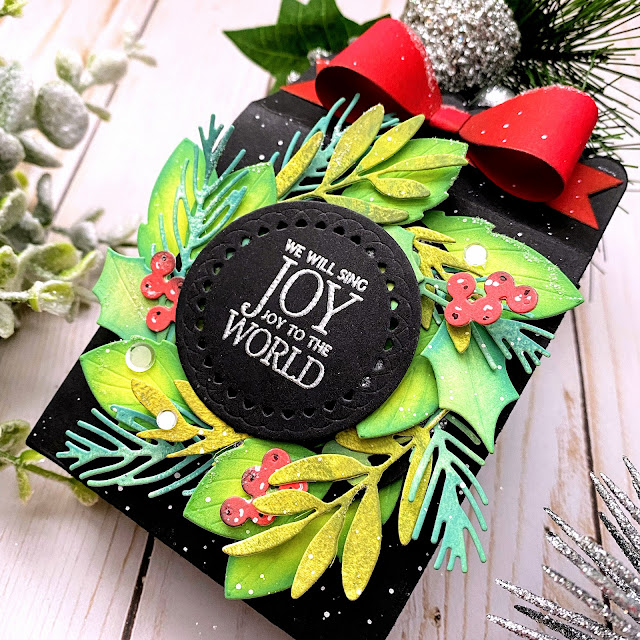
To begin, I die cut a BUNCH of leaves and greenery to create the wreaths for the focal point of each box. The regular looking leaves, both the large and small, are from the newly released Into the Blooms: Peonies die collection. I inked these up with Twisted Citron, Mowed Lawn, and Pine Needles Distress Oxide ink using a blender brush. Next, I die cut the pine branches using the Tag Creations: Modern Gift die (actually, the rest of the foliage and berries are from this collection as well) and colored them using Evergreen Bough and Pine Needles Distress Oxide ink.

The leaves that look like sage, both the large and small sprigs, are colored using Crushed Olive and Forest Moss Distress Oxide ink. The holly leaves are colored using Bundled Sage and Pine Needles Distress Oxide ink. The berry branches are just colored using residual ink from my blending brush, and the berries are colored using Festive Berries, Aged Mahogany, and Black Soot inks.

The funny part about these wreaths is that it looks like I went a little crazy with the saturation tool on my editing software, but in reality, this is just how they look in real life. I almost felt like I needed to set the saturation down so they wouldn't look "fake", but this is really how colorful they are! ha ha!

Once I had all of the foliage ready, I die cut an "O" shape from black cardstock using two circle dies nested together. I was planning on using the wreaths with the center hollow (I hadn't planned the sentiment) so that is why I did it that way. In hind-sight, you can't even tell that they are in fact, paper wreaths! ha ha! Oh well! Anyway, I chose black cardstock since my boxes are black and I didn't want the wreath frame to show. I had fun adding all of the different leaves, berries, and pine sprigs to create each wreath. I didn't have three berry clusters for both wreaths, so I decided to give the bow on that box the extra ribbon "tails".

The boxes are die cut using the Scallop Top Gift Bag Die from True Black cardstock. I layered each wreath in the center of the box, making sure that the leaves weren't going to hang below the box so that they could stand up. Also, I used black Stampin' Dimensionals from SU! for this entire box so that everything was hidden against the black cardstock. Once the wreaths were placed, I added the bows that are die cut using the new Small Dimensional Bow Dies. I opted to hot glue these to the top and secure the box shut using adhesive Velcro dots that were cut in half. This way the recipient doesn't have to "undo" any bows; it stays pretty!
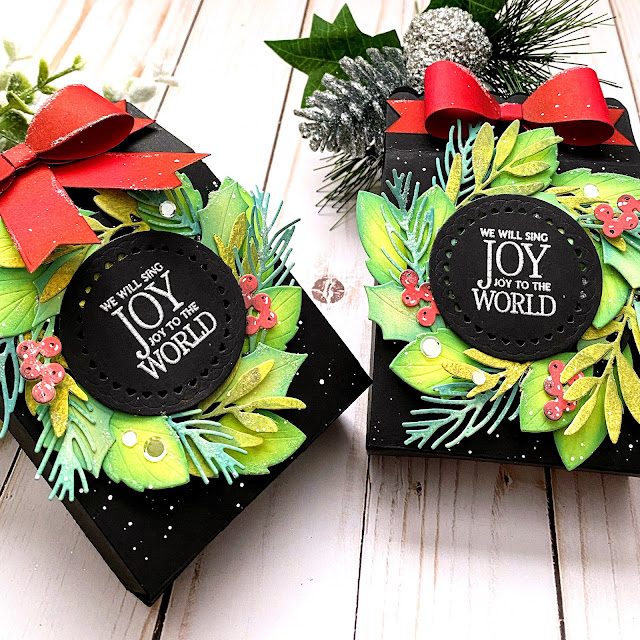
I added white paint splatter at this point and then added the sentiment, which is from the Just Sentiments: Heaven and Nature Sing stamp set. It is heat embossed in silver and die cut using the smallest circle in the Love to Layer: Scalloped Circle die collection. At this point I realized that you couldn't actually tell that it was a paper wreath, but I like how it turned out. Another design option that I toyed around with, was a sentiment stamped on a banner and placed in the middle of the wreath. I might try that, but for a card using this same idea. The finishing touches are some glitter (of course) and a trio of Moonshine sequins. I'm thrilled with how these turned out and can't wait to fill these up with gifts for friends and family! Thanks for fluttering by!