Monday, November 13, 2017

Merry Monday #265 {Winter Wonderland}


Happy Monday, Everyone! I hope you all had a fantastic weekend! I'm here today with this week's Merry Monday Christmas Challenge! I absolutely love the theme this week; Nina has asked us to create a card with an outdoor Winter activity! I knew immediately what I wanted to do! Before I rush into the details of my card this week, I want to let you know that the details, rules and other designers cards can be found HERE. You'll definitely want to head over there to see some fabulous inspiration!

As I mentioned earlier, I knew exactly which set I wanted to use for this challenge, and it really is the PERFECT set: Two Feet Deep from Papertrey Ink. It is one of my favorites of all time! It makes an appearance every Christmas and this year it has gotten a workout already! LOL! So...I knew what set I wanted to use, but after that, I hadn't really settled on anything as far as layout, colors, etc. My husband took me to see Thor Ragnarok last weekend and the lady in front of us had on some cute boots that immediately inspired me. I was a TOTAL creeper and got out of line while my husband was buying popcorn to take a picture of her boots! LOL! I was worried that if I didn't snap a picture, after the excitement of the movie, I might forget. So...the inspiration for the rest of the card comes directly from the poor, unsuspecting boot wearer in front of me!

The boots had a Fair Isle knitted top and a dreamy Winter White suede toe. The boots also boasted two large creamy buttons which were only decorative, I believe. I pulled out another favorite, Fair Isle Motifs and stamped it in Soft Snow and then heat embossed the images in white onto a piece of SU!'s Sahara Sand cardstock. I loved the look of the spooky hill I created on THIS card, and thought it would be fun to try it again for today's design. I know that it looks nothing like a hill for this card, but I wanted the same design element.
I knew that it would be difficult to recreate the suede look of the boots, but I knew that this amazing "knitted" embossing folder would look perfect paired with the Fair Isle pattern. I chose to dry emboss it using a piece of speckled cardstock from SU! that I am sure has since been retired. It turned out exactly like I was hoping for.

The skis are die cut using the coordinating Two Feet Deep die cuts out of Kraft Cardstock and then stamped using "Walnut Stain" distress ink for a vintage, wooden ski look. I heat embossed the metal portions using silver detail embossing powder. I love how they turned out! The sentiment is heat embossed in gold onto a strip of Linen Vellum cardstock. I just love the mix of gold and silver, especially this time of year.
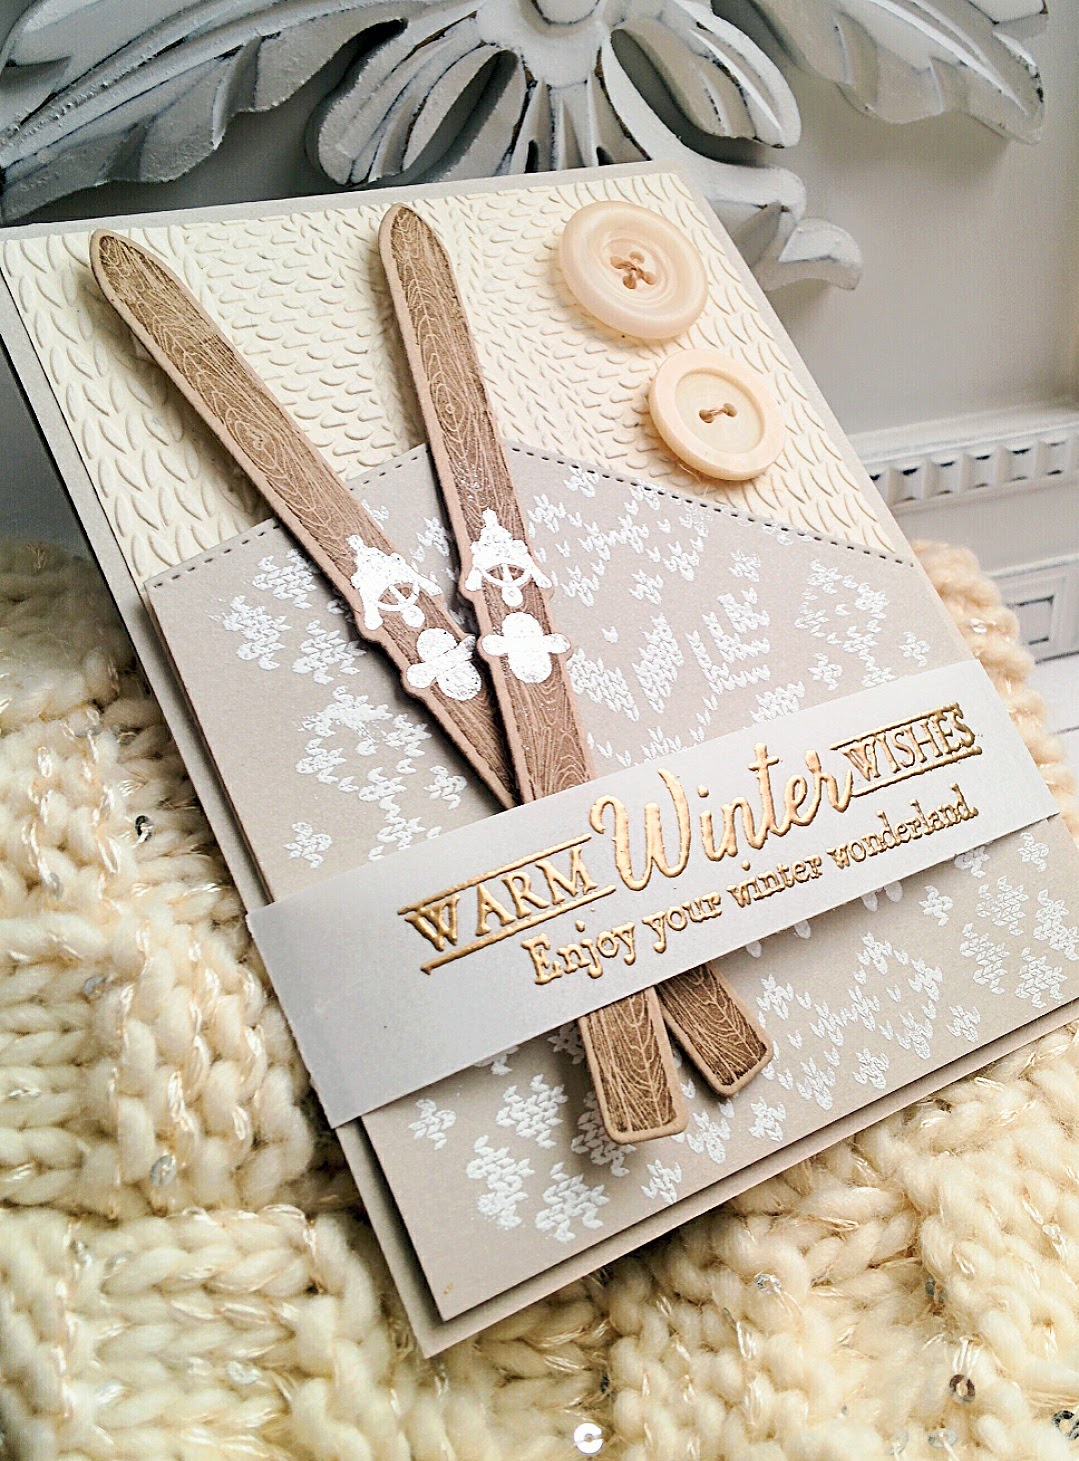
The two Buttons are threaded with Rustic Jute Button Twine and then adhered to the card using glue dots. I was happy with the results of my card in translating the boots into a greeting card. I hope you all get a chance to play along this week! It is so much fun! Thanks for fluttering by!

Sunday, November 12, 2017

A Merry Little Christmas

I've been working on this card since Friday and finally got a chance to finish it last night and now I am here sharing it with you today! I hope you are all having a blessed day filled with love and happiness! My cute boys are gathered around me chattering while I type! I asked my 6 year old how I should greet my readers and he asked why I said a bad word! LOL! I'm not quite sure what he THOUGHT I said! So...Hello and Welcome, friends!
'Tis the Season for me to share Holiday cards that aren't on Monday and are not for my Keeping Christmas series! Speaking of Keeping Christmas...I'm so happy! I went and got some Paperwhite Narcissus bulbs for THIS project and the hot cocoa for THIS project! I'm so excited!


Today's card is the result of some inspiration I got from watching TV. One of the women was wearing a black jacket with bold florals and I knew it would translate nicely into a Christmas design. I've been itching to use my "Flannel Plaid" background stamp that I've had for 100 years and I just love it looks with this card. I heat embossed it in black onto black cardstock for a fun effect. Once that was done, I cut a fancy edge using the To The Point Edger Dies. I also stamped the sentiment from the Happiest of Holidays onto  a strip of red cardstock and heat embossed in gold. I used the same edger die for this as well. I adhered it with foam squares making sure to line it up with the black piece. The green panel is embossed using the "Knitted" folder by Richard Garay. I just love the bold contrast between the red, black and green!

The Christmas greenery is die cut and stamped using the Spruce and Sprigs stamp set and the coordinating dies. I heat embossed the cluster of berries in gold to tie in the sentiment as well as add some interest. The entire thing is spritzed with shimmer spray and then I added some Nuvo Glaze over the top of the red berries for some realistic shine. I always let my red ink dry properly before adding anything liquid to the top because red inks have a tendency to bleed.

I added a few gold Nuvo drops here and there for some extra detail. The entire card is mounted onto a red A2 card base. Join me tomorrow for my Merry Monday Christmas design! Thanks for fluttering by!


Wednesday, November 8, 2017

Mix it Up Challenge #37 {Thanksgiving Wishes}

Hello! I am popping in today to share my card using November's Mix it Up Challenge from SugarPea Designs! I just love the sketch AND the photo! Aren't those leaves lovely? We've really had the perfect Autumn here in Utah; it's chilly enough for sweaters and boots, but gorgeous enough during the day to be outside! I'm sad all of my leaves have fallen, but I decided to make my own colorful leaves to add to my card today!


I've been dying to use this Indian Summer stamp set again to make some Thanksgiving projects and this month's challenge was the perfect excuse! You'll be seeing lots more of this set coming up this month.
To begin, I stamped most of the images from the set using Palette Black ink onto white cardstock and then colored them with LOTS of Copic and Prismacolor markers. After they were colored, I used the coordinating Indian Summer Sugarcuts.I blended Scattered Straw Distress ink onto a piece of Bristol paper. After that was done, I added the green and Kraft strips of paper as per the sketch. The Native American theme really inspired me to add some beads along the top, to the Tee Pee as well as a few scattered near the water. I threaded the beads and sewed them on to the top strip. I just love the detail that they add. The sentiment is stamped in black and then I built a little scene around it.


I had a few images left over so I decided to use them for the inside of the card.  I had a lot of fun with this challenge and I hope you get a chance to play along! The more you play, the greater the chance of winning the  gift certificate up for grabs! Thanks for fluttering by!

Tuesday, November 7, 2017

Color Throwdown #468 {Autumn Wishes}

I'm back today with this week's Color Throwdown Challenge! I'm so thrilled to be this month's guest designer! I'm loving this week's Fall colors and so I went with something traditional in theme with some rustic touches that scream Autumn to me! You can check out the challenge HERE as well as see some fabulous inspiration from the Throwdown Team. 
I was so happy to be able to put this adorable Autumn Scarecrow set to good use again before Autumn turns to Winter and it's put away until next year. I was literally down to SCRAPS of Stamper's Select White Cardstock and it was making me crazy, but I had just enough to get some images stamped and die cut. My order arrived with a whole new pack so I am sitting pretty again! I colored the images using Copic and Prismacolor markers in the challenge colors. I also added a generous helping of Wink of Stella to portions of the pumpkins, the leaves and a bit on the scarecrow. 

I used a white gel pen to add some cross-hatching to the scarf and hat for some added detail and interest. I also added a few highlights to the pumpkin as well. {Tip for the day}...I also use a white gel pen when I accidentally color outside of the outer lines. It's never TOO bad, but the white gel pen covers those little mistakes up nicely! However, I'm sure you NEVER make any mistakes, right? {wink}

I die cut a piece of Kraft Cardstock using the To the Point Edger Dies and layered it on top of a piece of Thanksgiving inspired pattern paper that I picked up at Hobby Lobby. It coordinates nicely with the pattern papers that I used in THIS project. I just used this one today because it included the challenge colors. All of those pieces are added to a brown card base for some contrast and to ground the card. I got to work building the scene once everything was adhered to the base.

I added the sentiment up in the corner, stitching it down using my sewing machine. I also used my Color Spritzing tool using a Chocolate Chip SU! marker here and there for some added interest. A bow of Rustic Jute Button Twine to finish this design! Thanks for fluttering by and I hope you get a chance to play along!

Mugs and Kisses {Hot Cocoa/Cider Box Tutorial}

Hello Friends! As promised, I am here today sharing my "Hot Chocolate/Cider Box" tutorial. I realized that I made a similar tutorial back in 2010 which you can see HERE. I called that a "Tea Box" because it is smaller in size, so use the dimensions I am sharing today if you'd like it to fit Cider or Hot Cocoa packets. You can see the Cider Box project that I made HERE. It is one of my favorite little boxes for holiday and seasonal projects. You can also use it for more than just hot drink packets, of course! I do want to mention that I did have to fold down the top of the cocoa packets to get them to fit, so you'll want to measure your packets before using my measurements and make any adjustments.


I started out by using the new SugarPea Designs stamp set from their latest release called Mugs and Kisses. I knew that I would be using it quite a bit for lots of Holiday projects and today is just the beginning! I am smitten with it! The sayings and images are PERFECT for my project!

I stamped all of the images in black ink, with the exception of the mug image. I stamped it in black first, but then wiped off the ink from the swirly cocoa portion of the image so that I could color that with a brown marker so it would look like cocoa was inside. There are lots of ways to achieve this same look, this just happens to be how I colored mine. After they were stamped and dry, I colored them with Copic and Prismacolor markers.


I used the coordinating Mugs and Kisses Sugar Cuts for all of the images. I assembled the little scenes onto a circle of blue cardstock for each assortment of images. I chose the sentiments for each box based on what images I used. I ended up making 6 boxes total, 3 of each design.


The sentiments are heat embossed in white onto red strips of cardstock. I really liked how the embossing powder stuck here and there so I didn't wipe it away before I used my heat tool. It gave that marshmallow-y, whip-cream-y look I was aiming for! I also added some liquid applique to the mallow's hats as well as the whip cream on the to-go cocoa cups. I used the same technique HERE

I had to add some corregated paper because I am just really into it right now. I corregated the Kraft paper using my paper crimper and then spritzed it with Shimmer Spray because c'mon, who are we kidding???..I'm addicted to the stuff! LOL! 


The boxes are assembled using some Scor Tape on the side and on the bottom. I also add some self adhesive velcro dots to hold it shut. The ribbon is only decorative and is just looped under the top flap and then tied in a bow at the top. I made handles on the Cider Boxes I linked up earlier in the post. In the past, I've punched holes on the side and knotted them, punched holes and added grommets, etc. Lots of different ways to embellish these boxes.
I hope you found this informative and useful! I'd love to see your creations! If you create some of these, leave me a comment so I can come and see your projects!!! Thanks for fluttering by!

Monday, November 6, 2017

Merry Monday #264 {Christmas Cheer}

Welcome to this week's Merry Monday Christmas Challenge! Today Marcia has asked us to create cards using Kraft and Red! I realized that the majority of the cards I have made for this challenge already have used a lot of Kraft and Red, so I was up for the challenge! LOL!

You can read about the rules for the Challenge HERE and see what the other designers have come up with! There are some super cute cards over there so I definitely suggest checking it out!

I've mentioned on more than one occasion the pile of stamps that I got for my birthday...today's card uses one of those sets. I used one of the included sentiments on my card two weeks ago, but I have been itching to use these gorgeous Poinsettias and I knew this week's challenge would be the perfect excuse! To begin, I stamped quite a few of the Painted Poinsettias in Pure Poppy Ink. These are a 3 step stamp, but I opted to just use the bold flower image and the vein image. I embossed the veins in gold AFTER I die cut them so that I wouldn't squish the raised quality. The centers are also embossed and added to the flowers using foam squares.

The leaves are stamped in Antique Linen Distress Ink with gold embossed veins. I really like how they turned out. I'm thinking that I will make some white Poinsettias using this same color combination on a different card. 
The little curly bits are die cut out of gold glitter paper. I actually googled "Poinsettia images" because I was unsure where these are on a real flower. I couldn't find an image with them, so I just put them where I liked! LOL! The sentiment is embossed in gold as well onto a strip of Pure Poppy Cardstock. I had originally planned on having a lot of flowers over the card, but in the end I only used three. I added another one to the inside with a different greeting. The Woodgrain background adds some extra detail and dimension. Once the entire card was put together, I spritzed it lightly with some Shimmer Spray. A few burnished gold sequins finish up this design. Thanks for fluttering by!

Saturday, November 4, 2017

Dedicated to Dawn Papertrey Ink Blog Hop {New Little Bundle}


I'm so thrilled to be participating in today's special Papertrey Ink Blog Hop for papercrafter and product designer extraordinaire, Dawn McVey! You can read about all of the details HERE. She has just undergone her transplant surgery and it has been so wonderful to see her smiling face post-op! She is such an inspiration to me as a papercrafter and a person! She is beautiful inside and out and I am fortunate to be able to call her a friend! That is why I love this industry so much...I have made lots of amazing friends!
We Love Dawn

 We are showcasing some of Dawn's amazing products that she has designed and I am a HUGE fan, so it wasn't hard to look through my stash to find some goodies to create a baby card. Most of the participants are most likely making cards FOR Dawn, but today's card is for another friend. I will be making another card just for her later. Dawn embodies everything that involves kindness and charity, sharing handmade kindness and love, so I didn't think she'd mind.
To begin, I chose to use Gran's Garden to build a pretty floral arrangement. I stamped out all of my images and then cut them using the Coordinating Die Cuts. I already had the Made With Love stamp and Tag Die out from making a project which you can see HERE, which is also dedicated to Dawn. I thought that the pretty flowers would look nice built on the tag base.

The tag is threaded with some Aqua Mist Stitched Ribbon and then tied shut using a snippet of Rustic Cream Button Twine and a Button. I also added some of the polka dot images from Made With Love at the top of the vellum using Fresh Snow ink.

Another one of my go-to sets for babies is the Boutique Borders: Baby mini stamp set. I just love this particular sentiment because this gift is for a mommy-to-be before she delivers her baby. I Die Cut the label and then stamped the sentiment onto a strip of Stamper's Select White Cardstock using grey ink. The label portion is embossed in silver for a professional look. I popped everything up using foam squares for some dimension. I spritzed the entire tag with some shimmer spray for shine.

I layered the tag onto a piece of Aqua Mist Chicken Scratch Gingham paper with a vellum overlay. I also did some zig zag machine stitching to add to the handmade charm.

You can see how the tag coordinates with the handmade items I made for the baby. If you'd like to head to my sewing blog, Thimbles and Thread, you can see all of the other handmade items I made as well.
Here is a quick peek at the "Baby's First Year" flip booklet that I made as well.


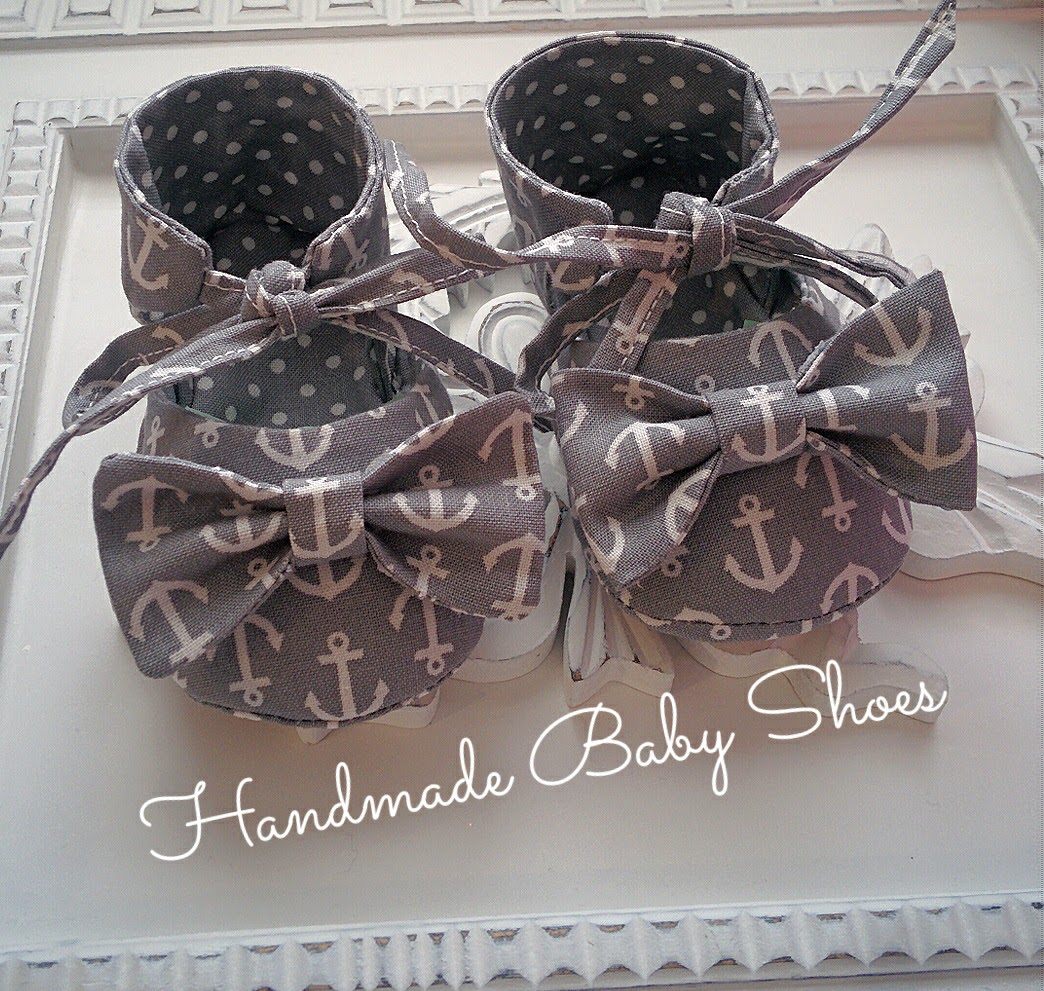
I couldn't resist sharing the shoes that I made. I just love how they turned out! Thanks for fluttering by!