Monday, May 24, 2021

The Greetery Man Made Collection

Hello and welcome, friends! I'm excited to be here today sharing three projects from the new release from The Greetery! This collection is so fabulous and really is perfect for all of the men in your life! Up first is a super cute new set called "Dad Jokes High Steaks"! I chose to create a card and gift to showcase how cute and "punny" this new set is! Before I dive into the details, however, you'll definitely want to head to The Greetery Blog to get pricing and info about each new product! Also, there will be 2 winners of a $50 gift certificate picked from the comments, so make sure to leave comments on each stop of the hop!

As soon as I read this particular sentiment that says "You're not old, you're well-seasoned", I KNEW I wanted to incorporate some type of steak/meat seasoning! I've been working hard in my flower beds and made many trips to the store. The grilling section is right by the flowers and soil, so I grabbed a bottle and gussied it up! I used the new Tartan Builder Stencils, both the regular and diagonal for the card and seasoning bottle.

One of my favorite parts about this new steak set is that you can die cut the fork portion using silver paper to make it look real! 
The seasoning bottle also uses the new Dad Squared stamp set and die to create the "DAD-love you" portion of the sentiment and then the "You're not old, you're well seasoned" is from the new Dad Jokes High Steaks stamp set. I used ScorTape to secure the plaid strip around the bottle, but the back is left uncovered so you can read directions and see nutrition information!
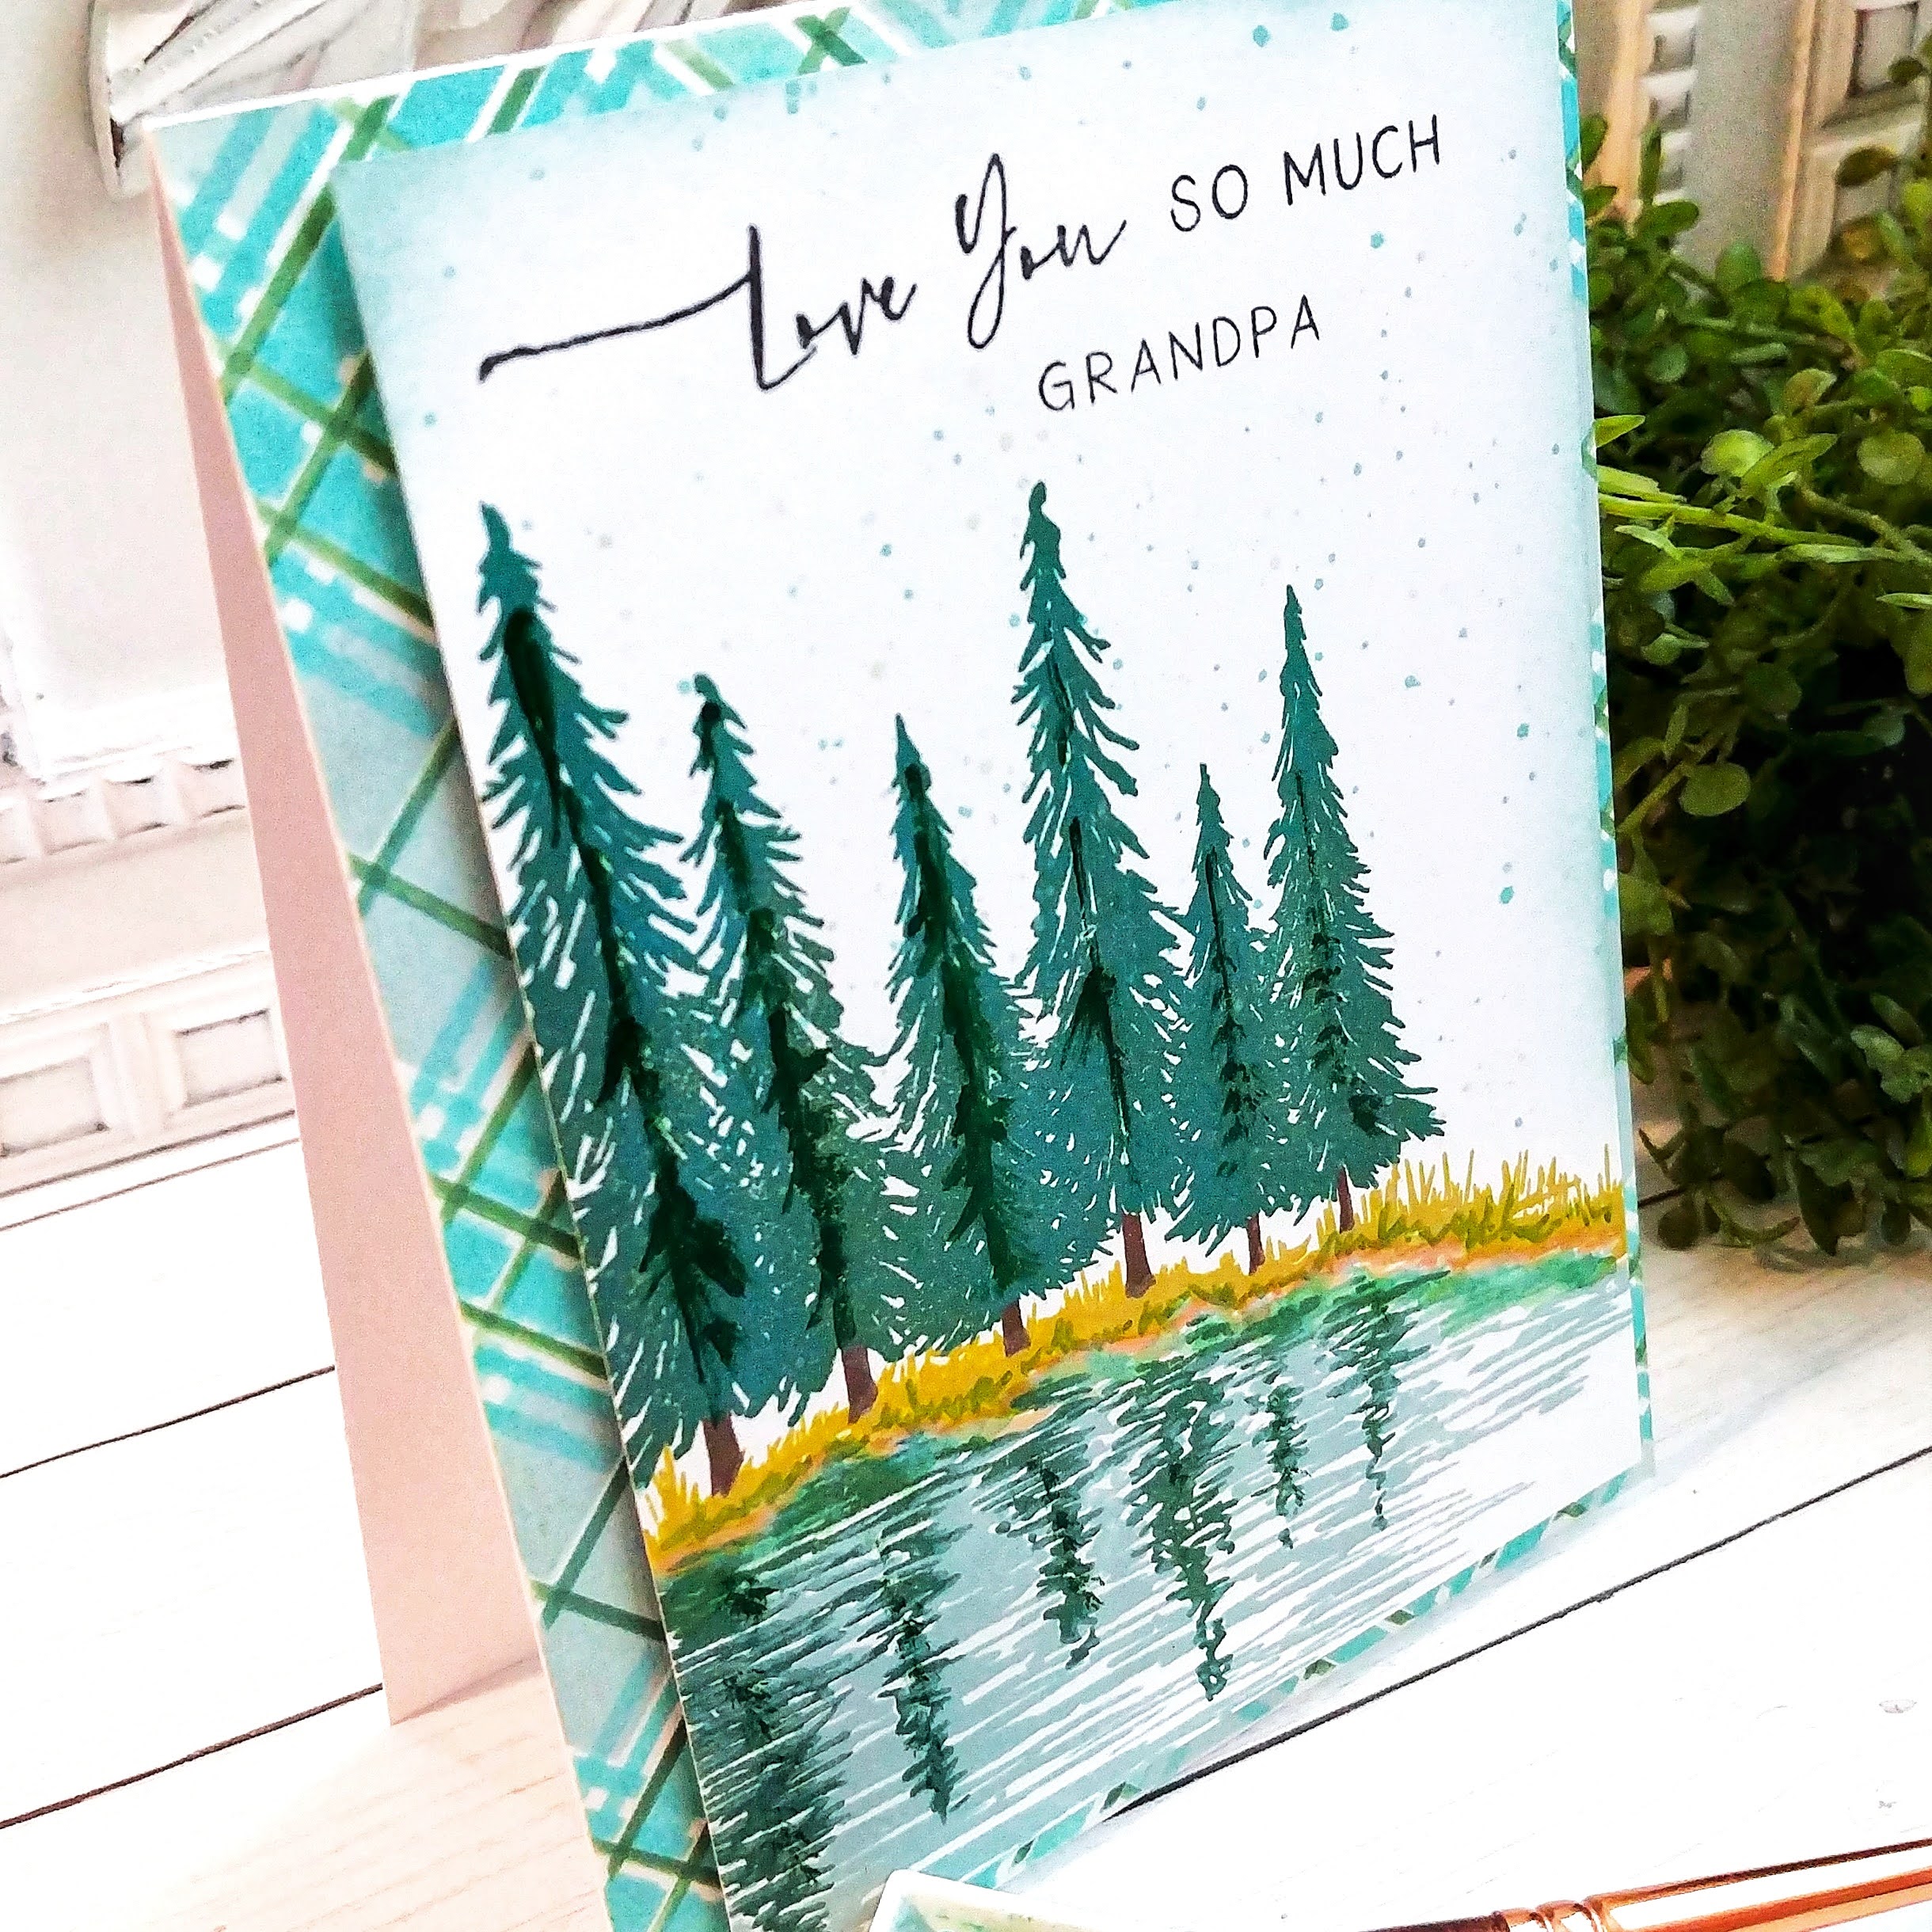
Up next is a fabulous new "artsy" set called Reflections! I absolutely love how easy this set is to use and gives you the look of a watercolor painting effortlessly!

I particularly love that is has the "Grandpa" sentiment to stretch its usefulness even further! As you can see, I've created yet another plaid background using the new Tartan Stencils Diagonal. I used Distress Oxide inks for this background as well. I used Washi tape to secure ALL of the stencils except the two stencils with the pinstripes. I got better results when I secured the stencil down with Pixie spray.

This set also has a coordinating die, which die cuts the tops of the trees and down the side of the grass. I chose not to use it, but now I'm kicking myself after seeing Betsy's lovely samples with it cut! Oh well....that's the beauty of stamps...you can make something over and over again as many times as you like and you never run out, right?
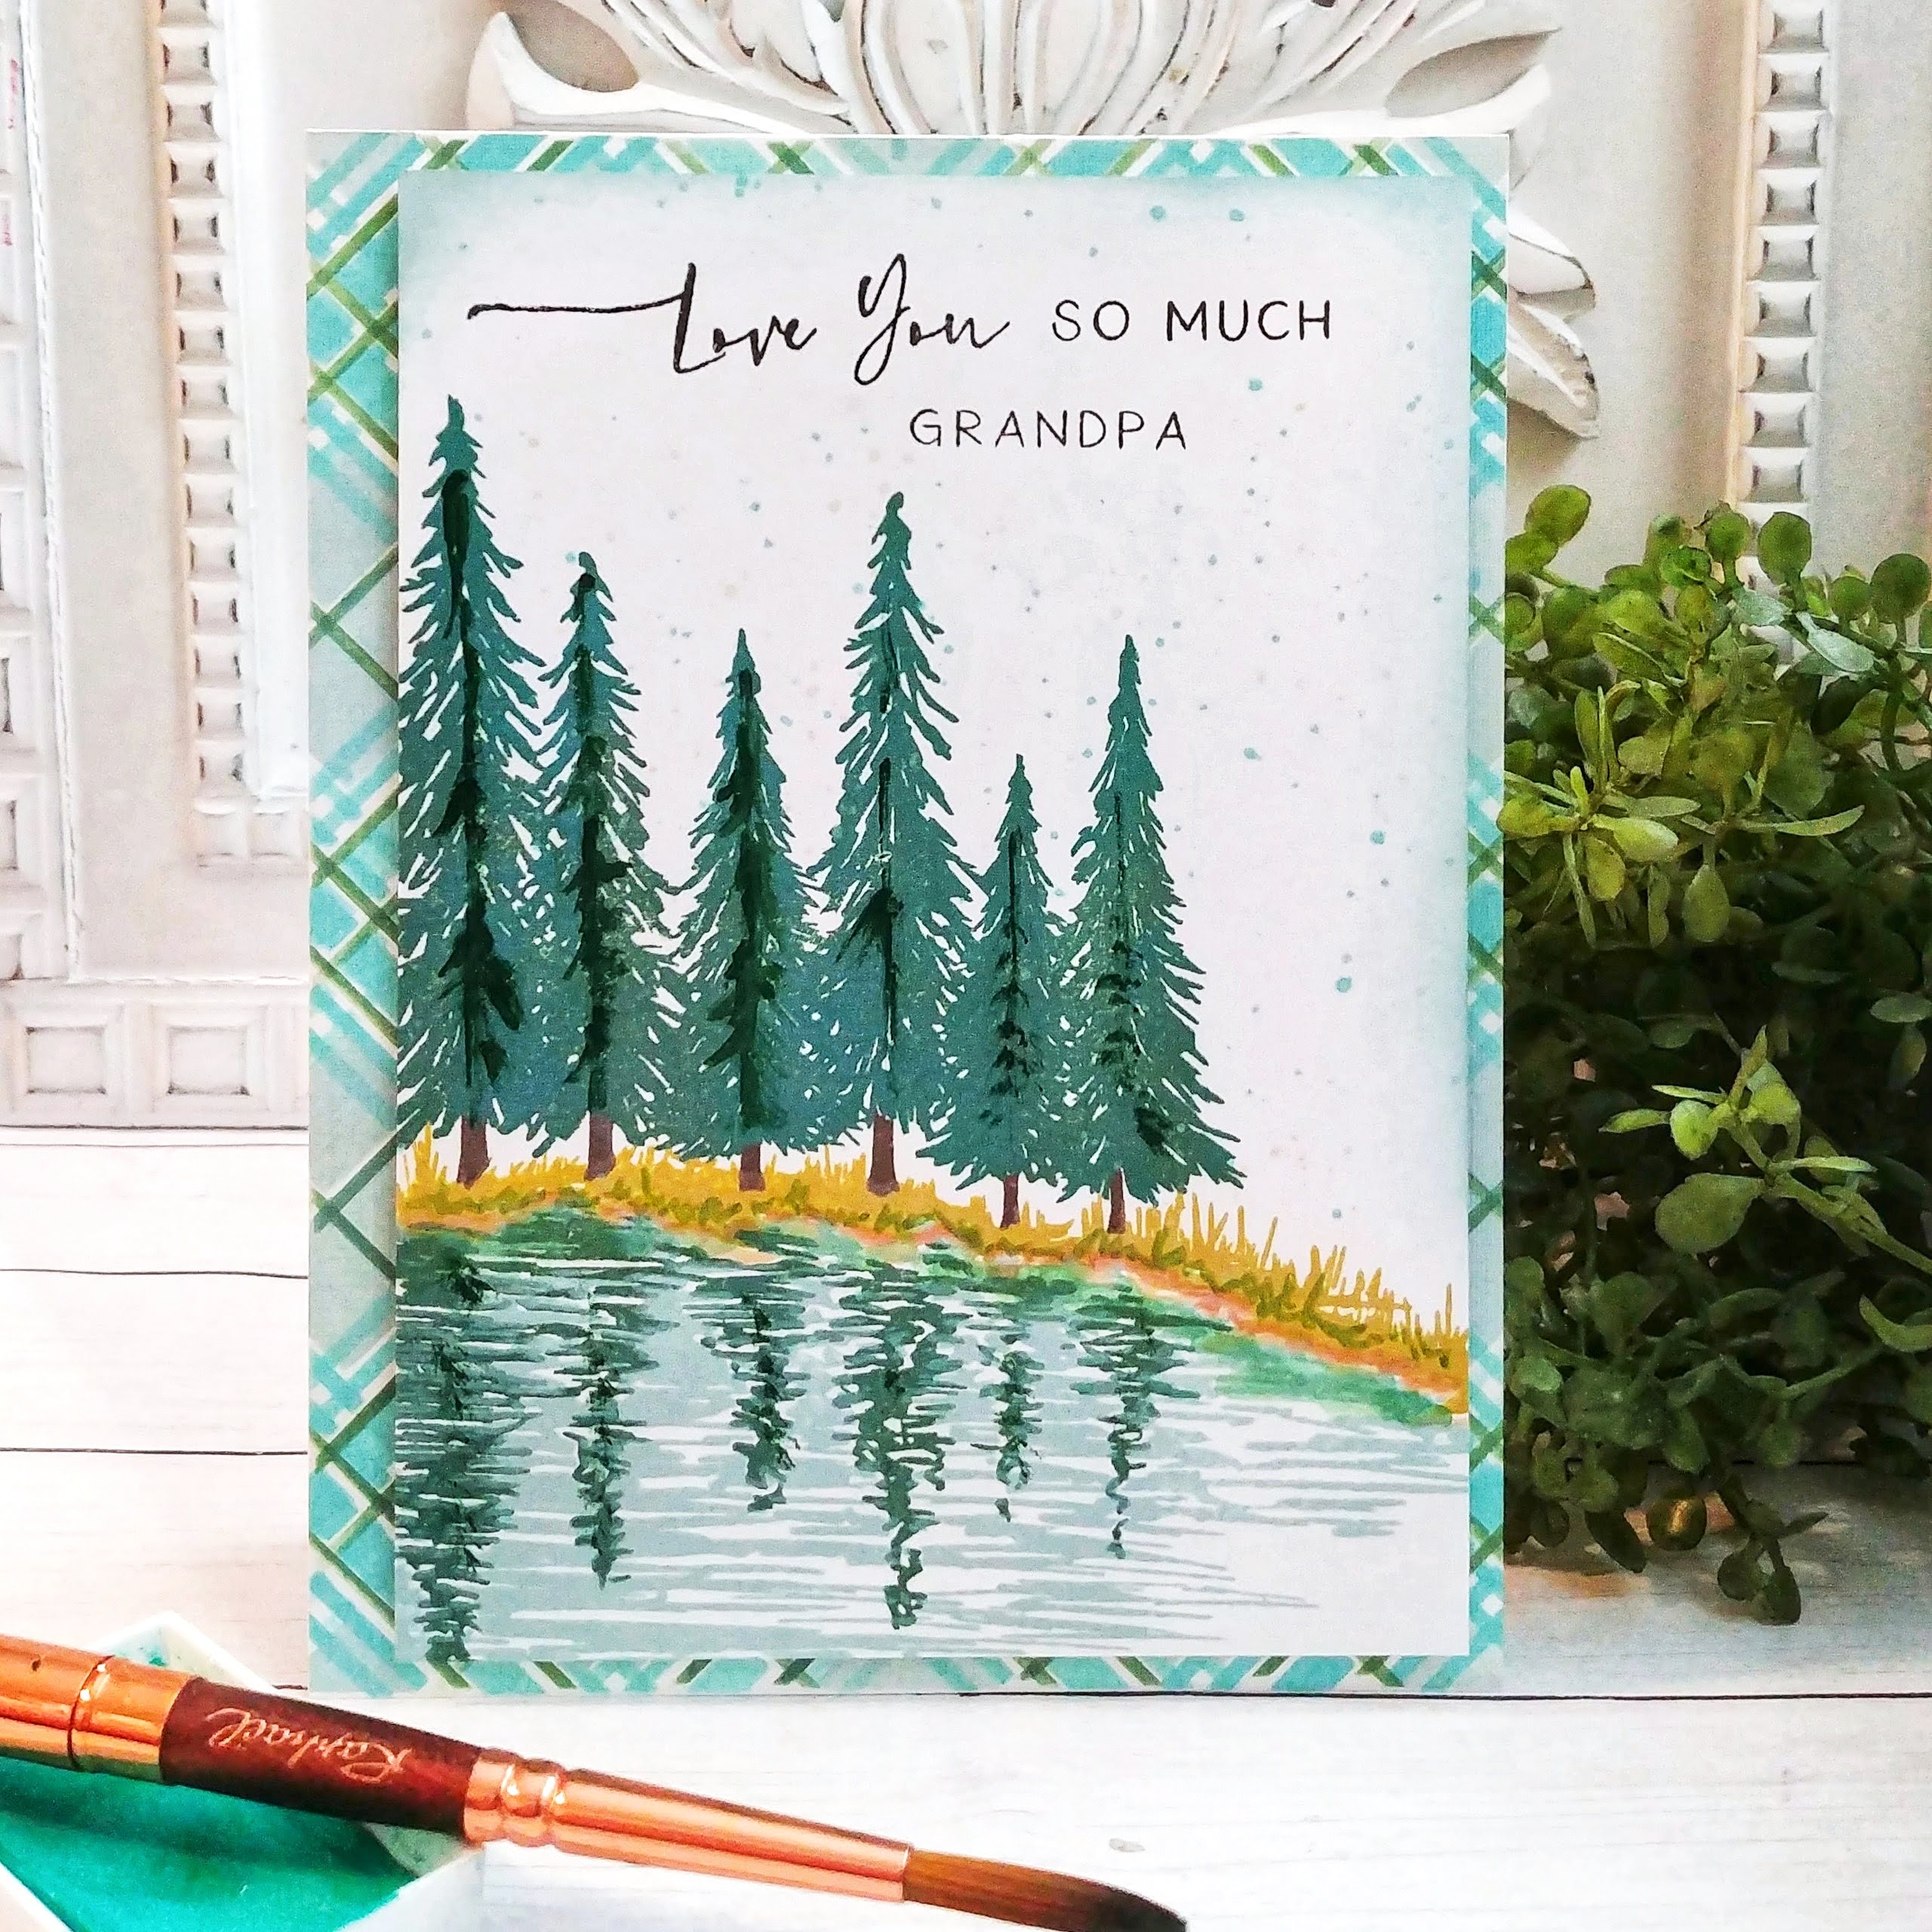
I stamped my images using Distress Oxide ink and then went in with some watercolors to add extra detail. I also used a brown marker to enhance the sand/shore portion a bit as well.
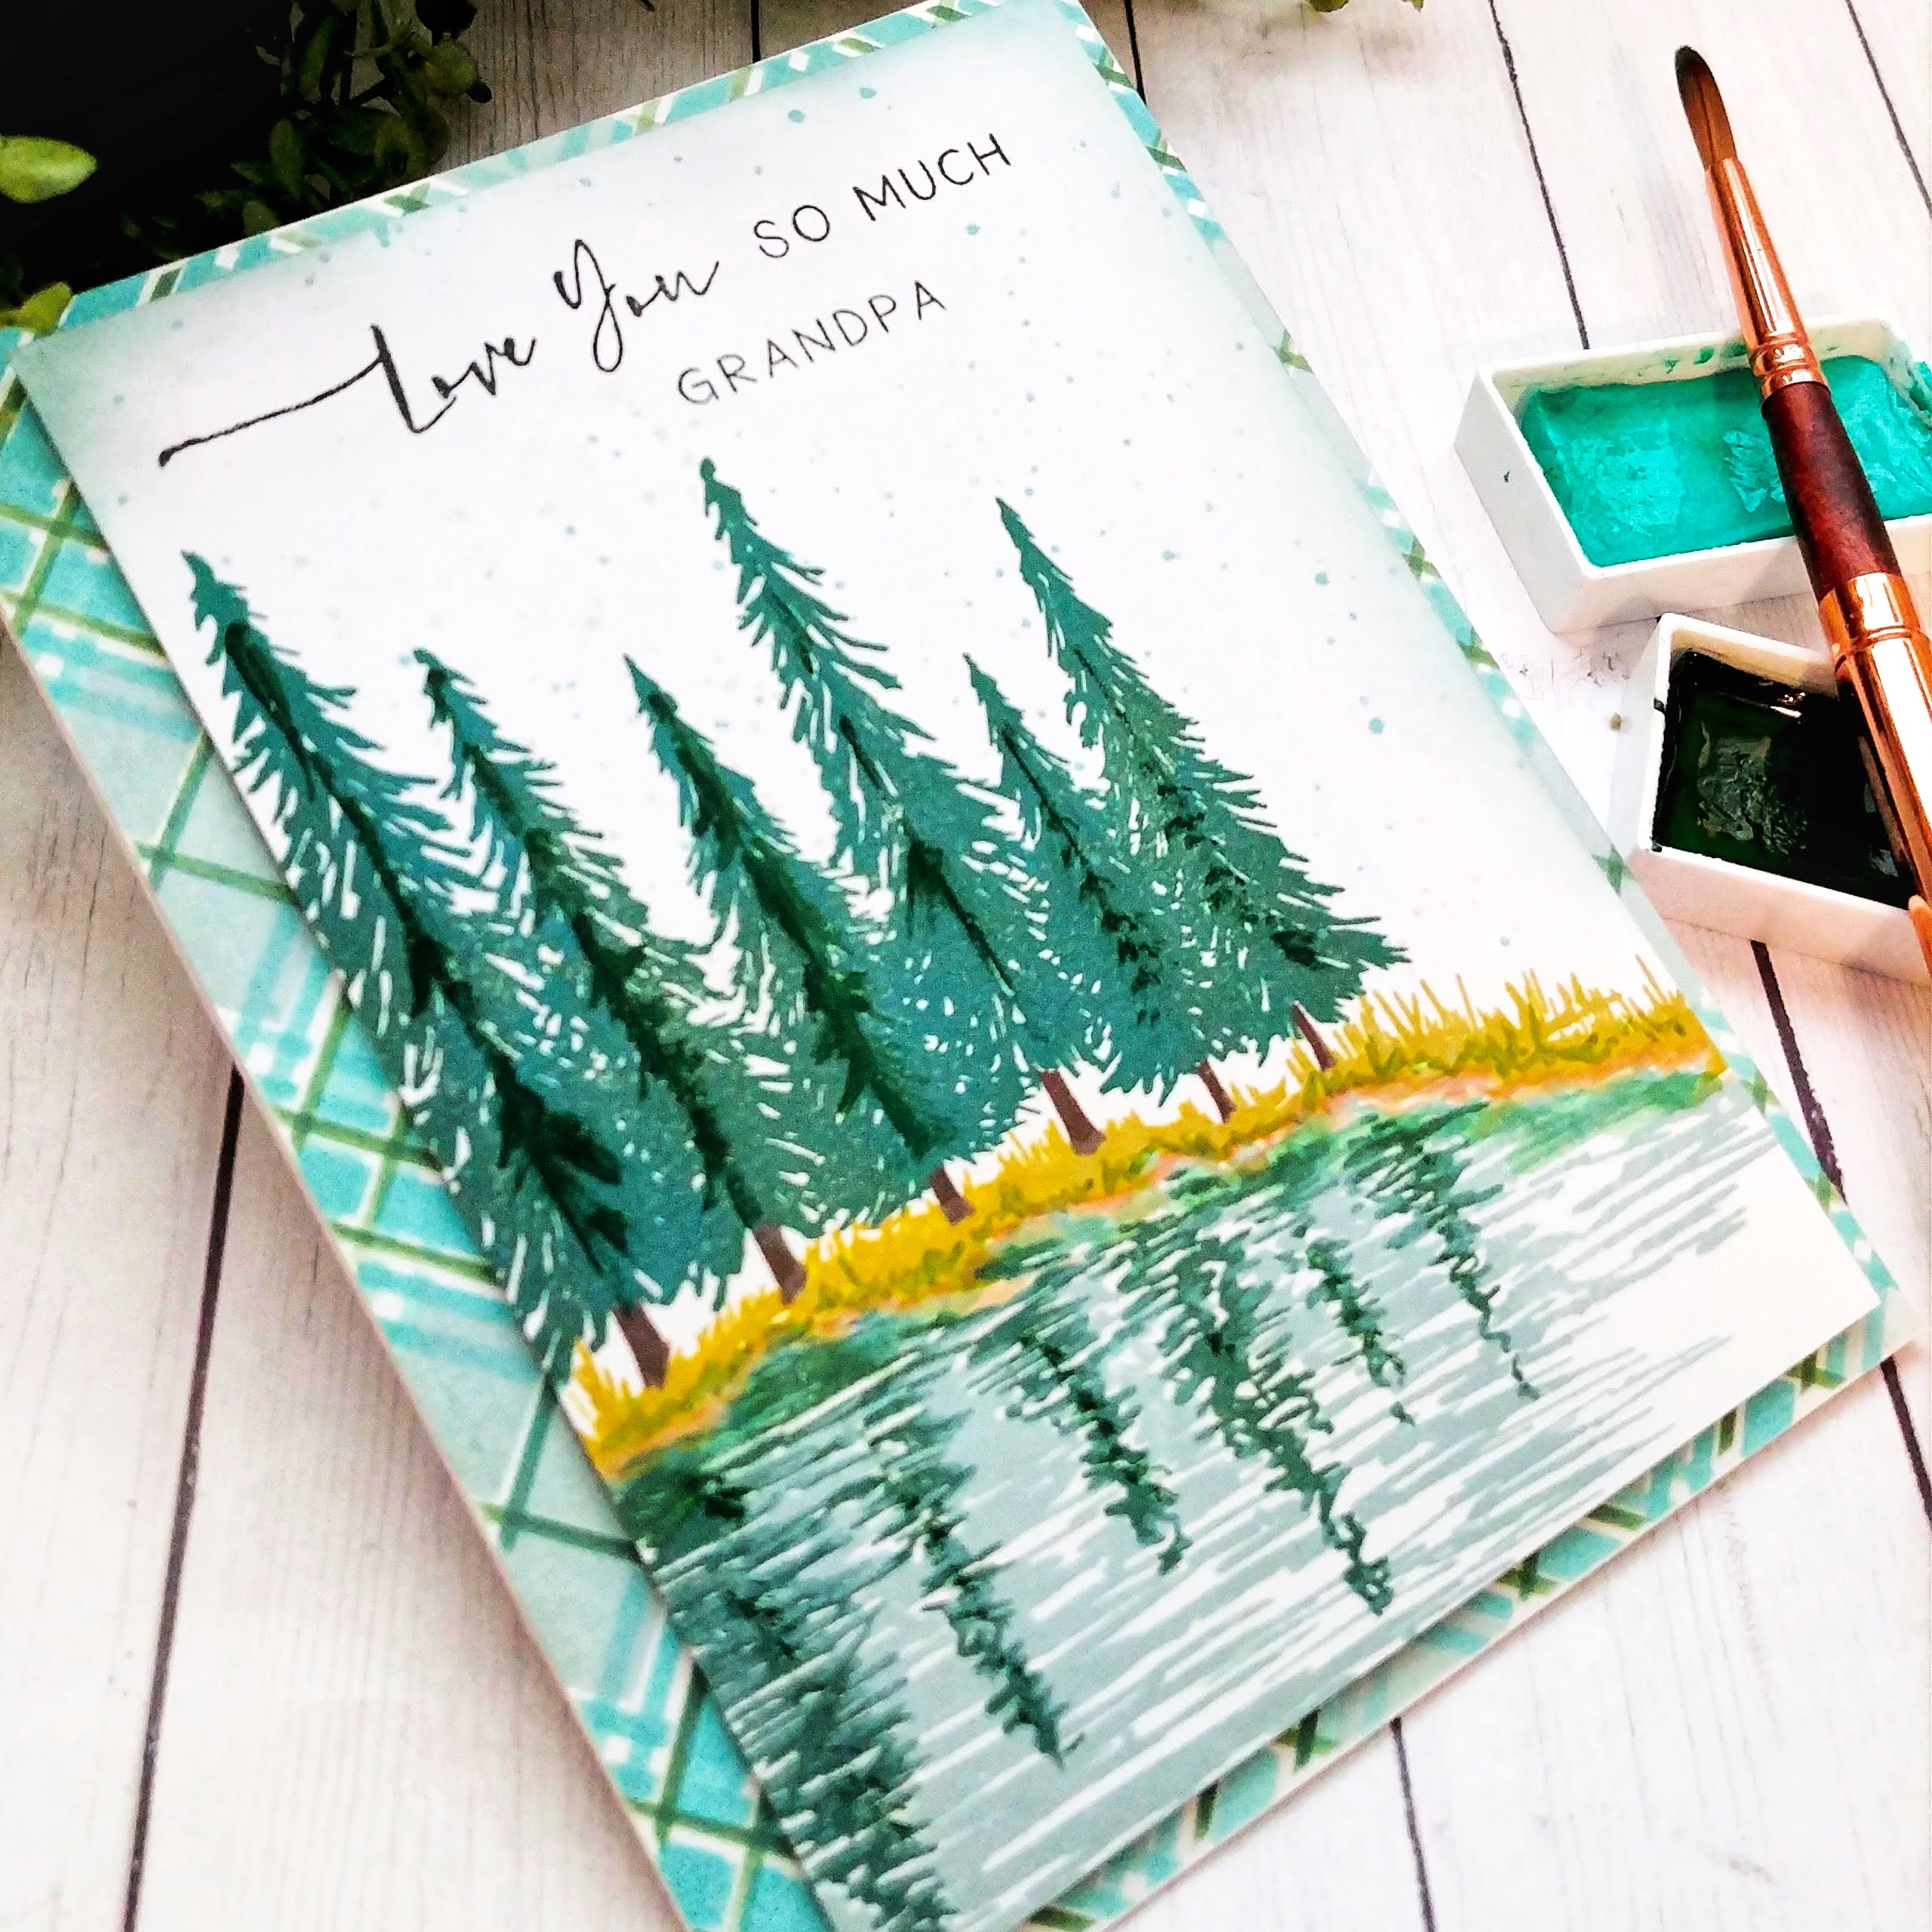
I stamped the different sentiments to create this phrase on my card. The Love You, So much, and Grandpa are all separate so you can mix and match to suit your needs!

I added a bit of ink splatter in both tan and blue to give the card a bit more detail. I cut the panel a bit so that you could see the plaid background peeking out. I placed it on the right side so that you could see the bigger portion of the tartan on the left side.

Even though this is the Man Made Collection, I couldn't help bring in a few flowers! ha ha! I used the new Sentiments Squared stamp/die paired with the new Text Box Die to create this bright and cheery Hello card!

To begin, I had a ball creating the beautiful Forget-Me-Nots. I used the new Fond of Foliage background stamp that was released last month and stamped it in a bright yellow! I love how it turned out, but kicked myself when I realized what a fun tartan background I COULD and SHOULD have made! ha ha!

I had fun creating the "hello" portion of the sentiment and putting it all together! I had a lot of fun using all of these fun new products! Head to the other designers' blogs to see how they've used them!


Saturday, May 22, 2021

Hello Bluebird {Blue Skies Ahead, Friend}

Happy Saturday, friends! I'm sharing a fun card using the new Singing in the Rain stamp set from the latest release from Hello Bluebird! I've been having so much fun as a guest designer for them this month! Utah is in a horrible drought this year, so I'm wanting the rainy vibes! Maybe I should have picked a different sentiment? ha ha! Anyway, this is super fun set and those little ducks are the cutest, don't you think?

To begin this card, I cut a panel of white cardstock measuring 4 1/4 by 5 1/2 inches and then used my NEW FAVORITE Distress ink color: Salvaged Patina! This is the only color that I have bought both pads AND the spray and paint! I'm obsessed with it and have been using it a TON! I used a cloud stencil to add the background clouds and then die cut the new Partly Cloudy Die to glue over the top. I saved a few of the clouds to add back ink to help ground the girl and the ducks. I added a few raindrops here and there using the included raindrop cluster image.

I did some quick ink blending on a scrap piece of cardstock in soft rainbow colors and then die cut the letters to spell the word "FRIEND" using the new Jane Small Alpha Die. I added Nuvo Crystal Glaze over the top and some glitter to the tops for some shine!

The images are stamped in black and then colored using an assortment of alcohol markers and then die cut and added to the panel using foam squares. I also added a small strip of rainbow paper to the bottom for even more color and pattern! Thanks for fluttering by!


Thursday, May 20, 2021

Pinkfresh Studio {Bloom with Grace}


Hello friends! I spent some "just because" crafting time the other day to create this BLOOM card using the new Be Strong stamp set and coordinating Be Strong layering stencil set and die. This one is particularly fun because even though the stamp/stencil is one image, the die cuts out the individual flowers so you can try all kinds of different design ideas!

It's no secret how much I love to use alphabets on my cards and one of the ways that I like to incorporate them is by using one of the key words in a smaller sentiment that is included in the stamp set, like the word "BLOOM" in this particular sentiment. I die cut the letters using the Kelly alpha upper case die, twice for each letter and glued them together with liquid glue. I added some Slumber ink over the top for a hint of color.

I added the letters to a white panel measuring 4 by 5 1/4 inches using small pieces of foam squares. Once that was done, I was ready to add the stamped/stenciled flowers. To create these flowers, I die cut the pieces first and then did the outline stamping. Once that was done, I was able to add the color using the coordinating stencils. I love watching them come to life as each layer of color is added!

I tucked the flowers into the empty white space using mini foam squares and then trimmed the sides using my guillotine paper cutter to square it up. I was able to use some of the discarded pieces to add to some of the smaller empty spaces.

The sentiment is heat embossed in white and layered over the top of some of the letters using black foam squares. The finishing touch is a few jewels in both purple and sapphire here and there. I added the entire panel to a top folding black card base to ground the design! I plan on using this as an unconventional graduation card that my daughter will be giving to one of her friends! Thanks for fluttering by!


Tuesday, May 18, 2021

Pinkfresh Studio {Rare and Beautiful}


 Hello and welcome!  I'm sharing a bold floral card using some of my new favorites! I'm in a "black background" phase right now, so I had fun creating this particular card with black cardstock and white embossing powder paired with the stamping/stenciling!

To begin, I used the Floral Bunch Die to die cut the base for the stamping/stenciling. From there, I stamped the flowers using the Floral Bunch stamp set and then used the coordinating Floral Bunch layering stencil set to bring this beautiful floral image to life. I chose Ballet Slipper, Sparkling Rose, and Raspberry Bliss ink for the main flower image and Lavender and Regal Kiss for the purple flowers. The leaves are inked with Grassy Knoll and Emerald ink for this bright, bold design!
Once I had the flower piece complete, I got to work on the background using the fabulous Diamond Tiles Cling Rubber Stamp. I heat embossed it in white onto the black cardstock for a dramatic, bold look. I also die cut the Stitched Scallop Rectangles using the same black cardstock and layered it over the heat embossed panel using foam squares. From there, I added the flowers using additional foam squares. Now, please note, this is one large image, but I strategically cut it to give me the split piece to maximize my efforts and use this floral cluster in a different way!

I'm currently obsessed with this particular sentiment from the Rare and Beautiful stamp set so I heat embossed it as well and added it over the top of the panel using additional foam squares. I added a few jewels as well for some sparkle and shine! The entire panel is layered onto a top folding A2 card base using foam squares. Thanks for fluttering by!

Sunday, May 16, 2021

Hello Bluebird {Hello Sunshine}


Happy Sunday, friends! I've had a whirlwind few days taking my cute daughter graduation dress (and other end of year occasions) shopping and then we took Senior Pictures! It's so fun seeing her blossom into such a fabulous young lady! 
Despite my whirlwind, it was so fun to sit down and create this cute springtime scene using these cute critters from the latest Hello Bluebird release!

This particular set is called Bloom and Grow and has so many cute and fun images to create fun springtime scenes! I stamped them all out and then had fun coloring them with an assortment of Copic markers. I used the coordinating Bloom and Grow dies to die cut the images.

The background was created using Distress Oxide inks and regular Distress inks. I used brown at the bottom because I just HAD to have Mr. Mole poking up from the dirt. Isn't he the cutest?

I love the little bunny planting his/her pots for the season and watching them grow! I seriously love this new set and can't wait to use even more from the new release over the next week or so! Thanks for fluttering by!


Friday, May 14, 2021

Ink to Paper May Release Countdown Day 4

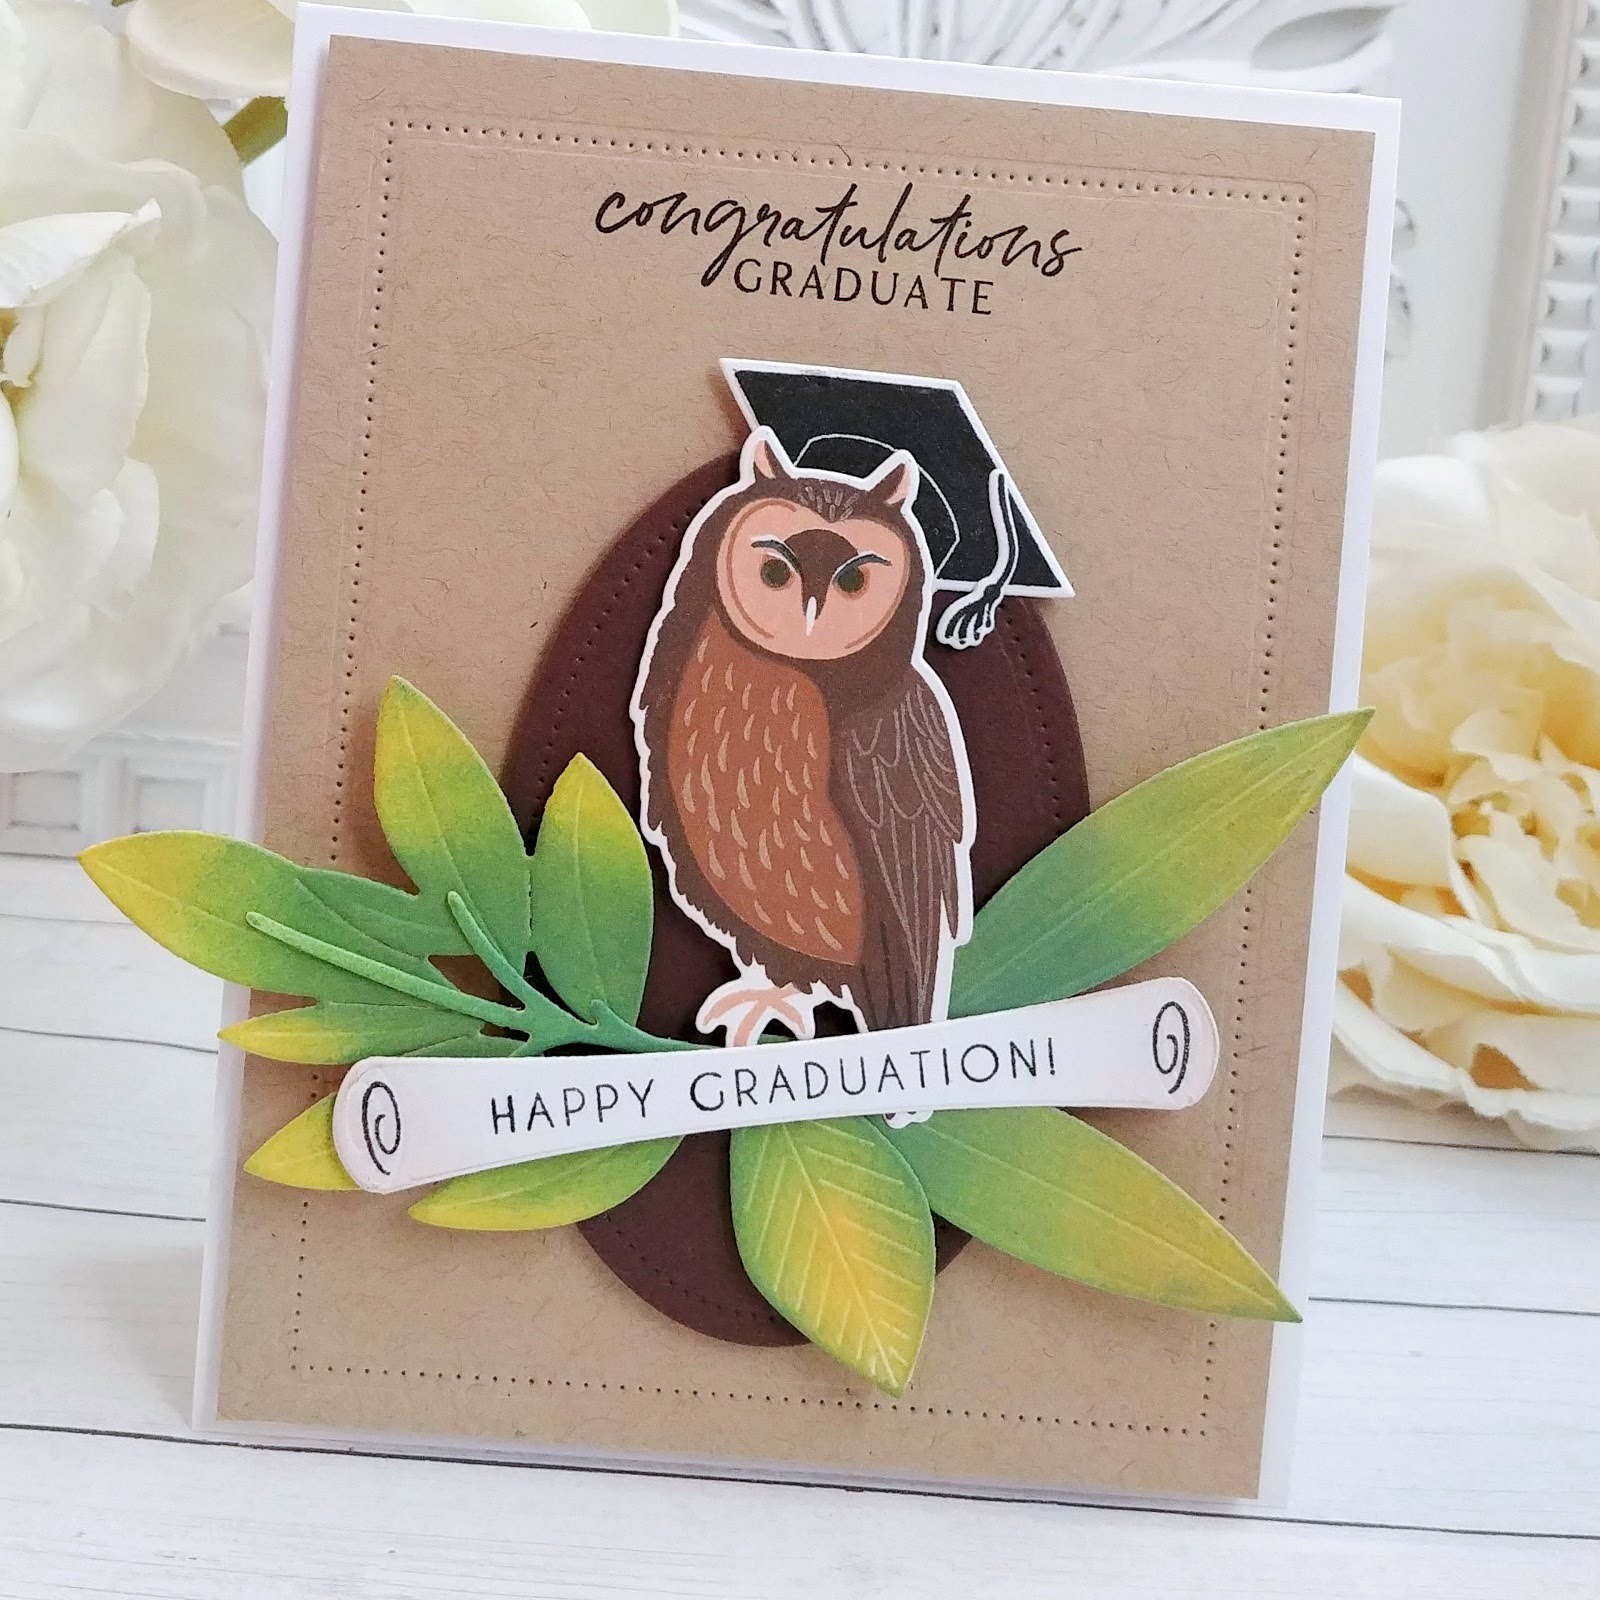
Welcome to the 4th and final day of the Ink to Paper May release countdown! Everything will be available for purchase tomorrow, May 15th, at 10 PM ET! I have two cards to share with you today and first up is this graduation card using the new Feathered Friends 12 stamp/die set. I mentioned the other day how I really wanted to put a graduation cap on the owl, and today I did! ha ha!

Confession time: I was SUPER intimidated by this little owl because he/she has quite a few steps, but I was thrilled to discover how easily everything lines up! In fact, this particular bird ended up being one of the easiest in the series and I love how it turned out!

As you can see, I used the leaves from the new Into the Blooms leaves that were showcased on Wednesday! I'm seriously obsessed and I just can't seem to stop using them! They are the perfect perch for this little owl clutching his diploma, which is from the Go-To Gift Card Holder: Congratulations Graduate die

The cap and tassel are from the Hats Off stamp set. I chose this hat in particular because it is just the right scale for this wise owl! The sentiment at the top is from the new Say It Essentials stamp set.

My daughter is graduating this year so she has a lot of friends who she will be congratulating and this one will be perfect for one of her male friends!

My last card for today and for the release uses the new Perfect Pair: Essentials stamp/die set. This one is similar to the Commodities set that was showcased on Wednesday, but this one is a little bit more "handwritten" and the other one is more of a script. They are both so much fun!

I chose a playful design to highlight the font of the sentiment using the new Summer Seashells dies that were showcased on Tuesday! This card is very similar to the one I made using the shells on Monday, but I had so much fun with the inky background!

The shells are inked up using Distress Oxide inks as well as the backgrounds!

I added some dew drops to give it some watery detail! Thanks for fluttering by!


Thursday, May 13, 2021

Ink to Paper May Release Countdown Day 3

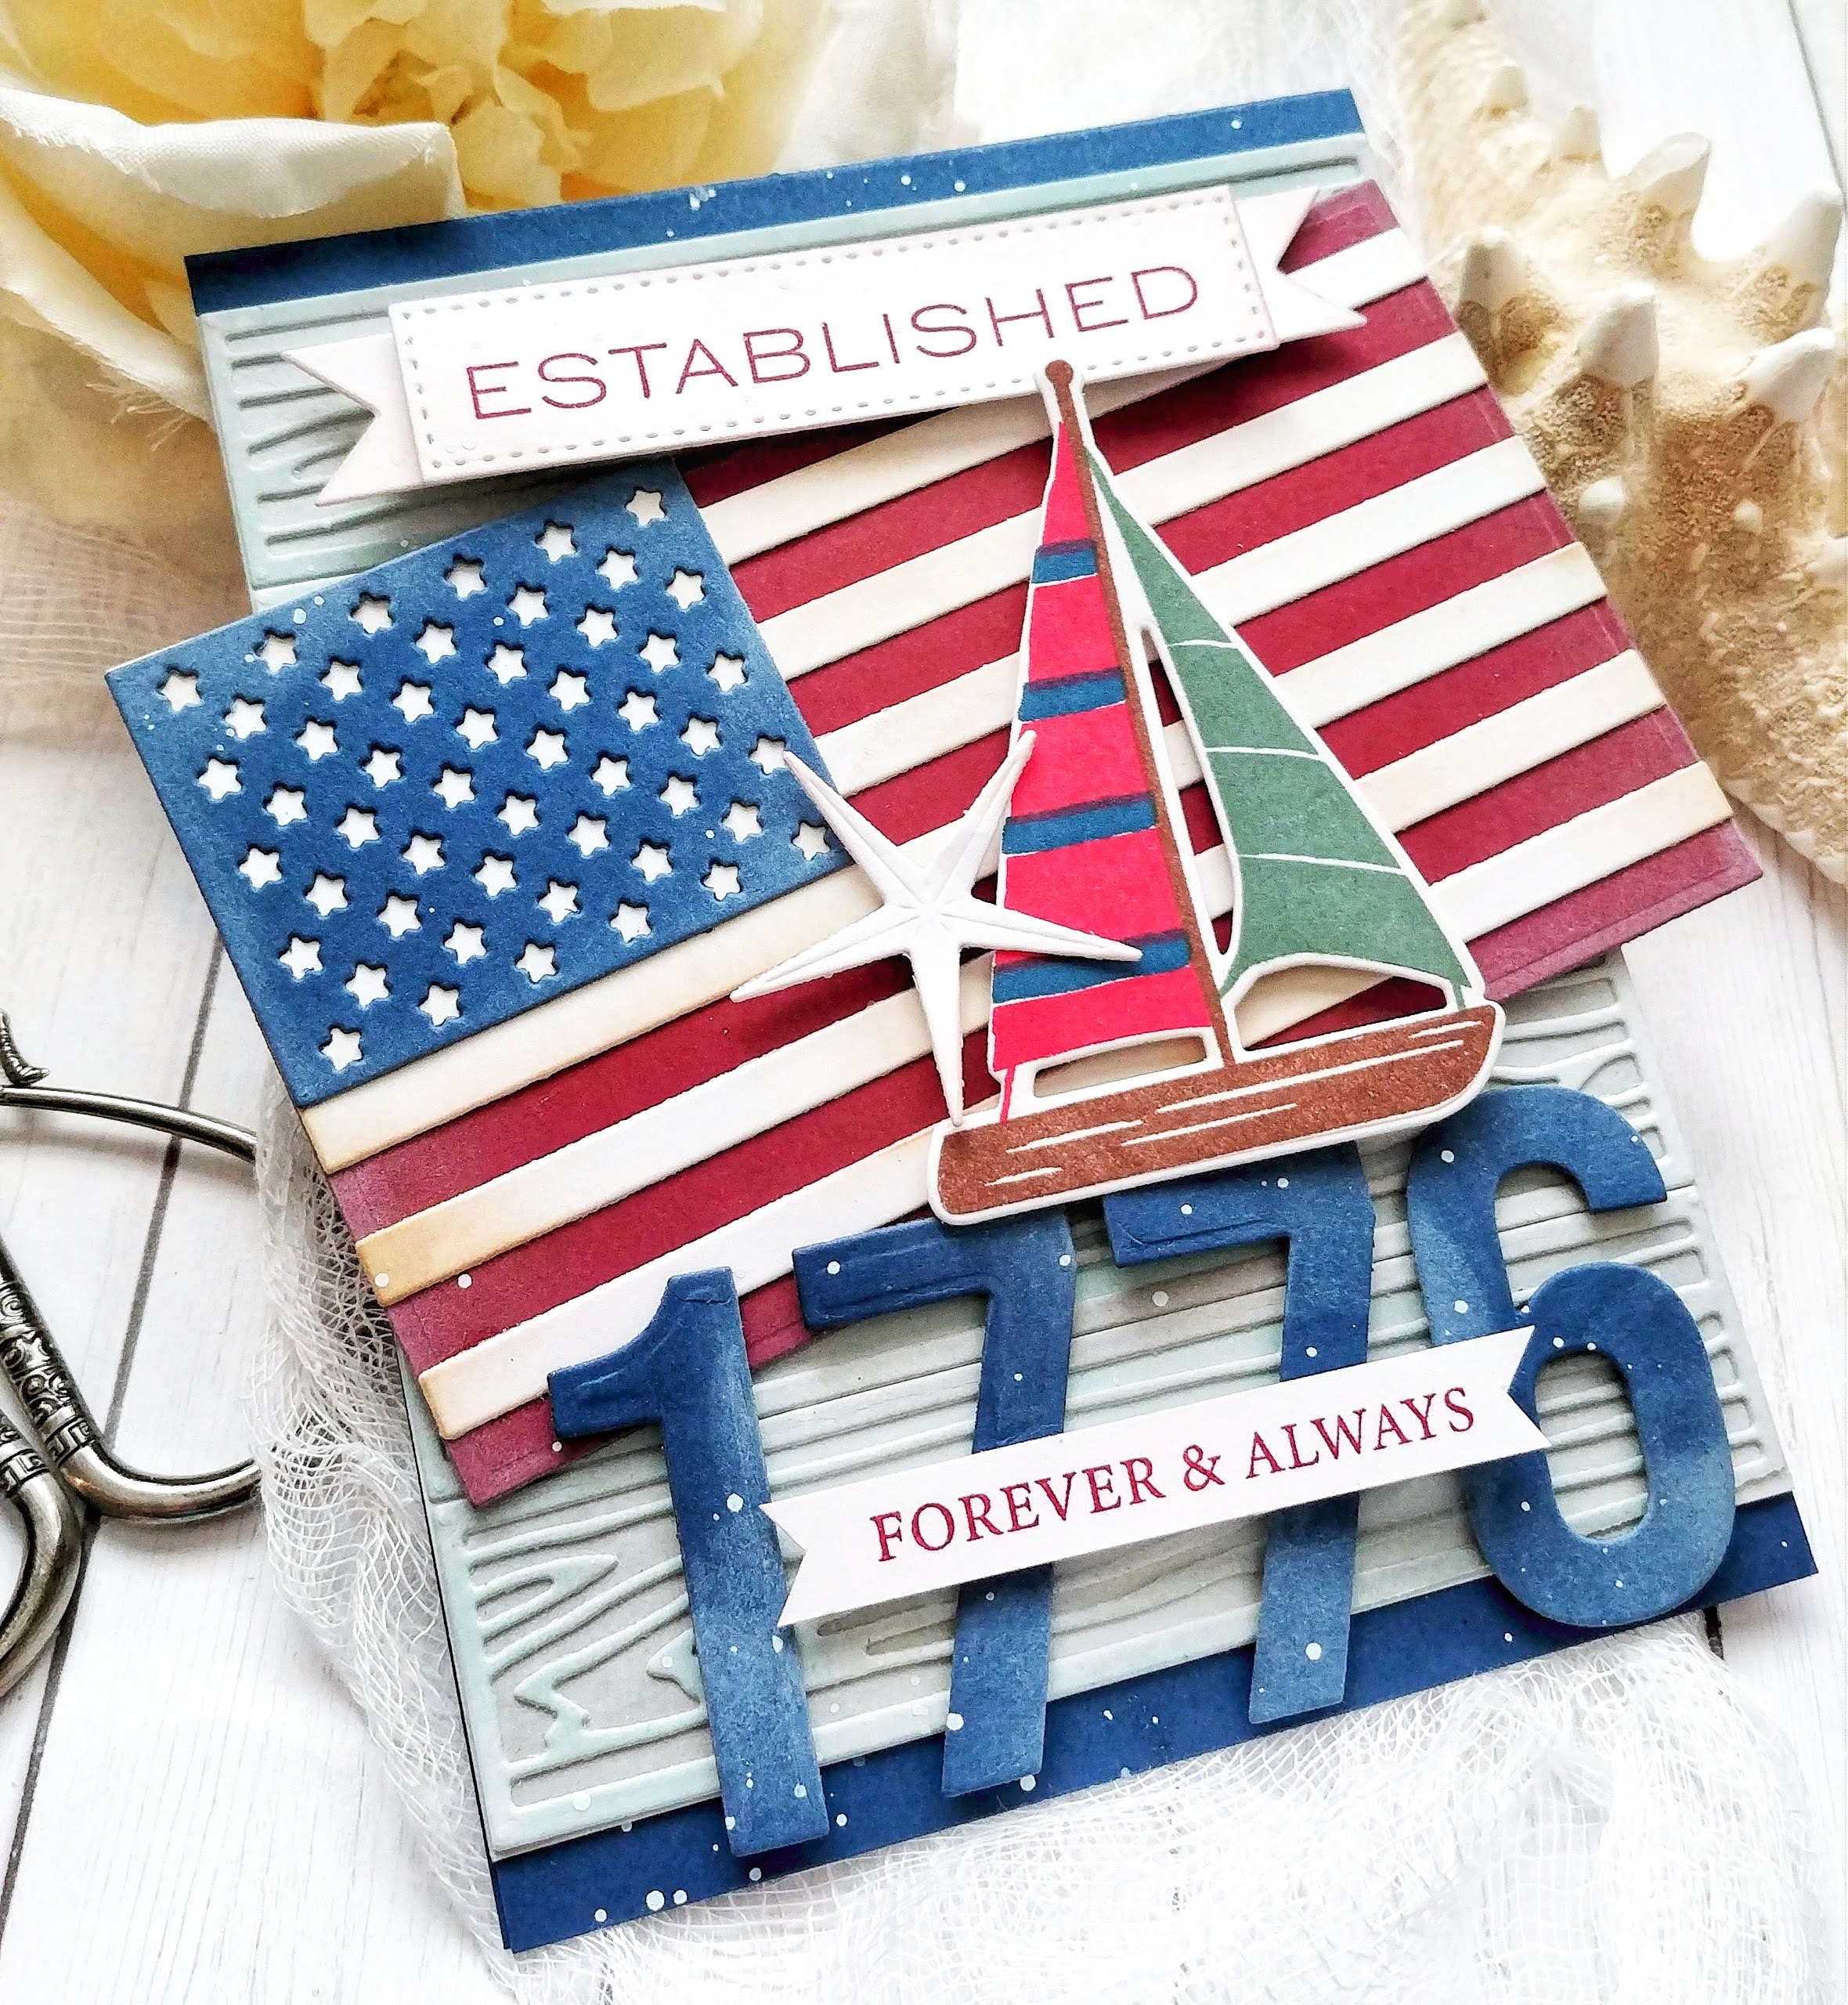
Three Cheers for the Red, White, and Blue! Welcome to day 3 of the Ink to Paper May release countdown! I'm sharing two cards with you today using some fun new patriotic products to celebrate our freedom and those fun summer holidays! We're lucky in Utah that we celebrate two holidays in July both using the American flag and red, white, and blue! I've packed a lot of product onto this first card, but I was just having so much fun I couldn't resist!

My goal as I set out to create this card was to make something "Nautical Americana". I also wanted to create weathered and vintage pieces to capture the look I was going for. To begin, I created a 4 1/4 by 11 inch panel using assorted Distress Oxide inks to get the weathered wood look. Once the panel was complete, I die cut the wood pieces using the Woodwork Die. I cut the rest of the panel to measure 4 1/4 by the length of the 5 boards. I layered the wood pieces onto the panel using liquid glue.

I used the fabulous new Love to Layer: American Flag Dies to create the flag piece. I die cut the pieces using white, Scarlet Jewel, and Enchanted Evening cardstock. I added some Fresh Snow ink and a blender brush to the red and blue portions and some brown ink to the white portions for that true Vintage Americana look. 

I don't think I could have been more pleased that I had the option to add the fabulous "Established" sentiment to the card using the previously released Just Sentiments: Established Mini stamp set. I die cut the numbers using the Numbers Die to create the year 1776 portion of the card. The "forever and always" is from the new Perfect Pair: Commodities stamp set that was showcased yesterday! I had a sailboat left over from the release last month that was the perfect accent for this card. It is from the Seas of Life stamp set. This is the boat I was talking about on Monday that would look so cute with the Message in a Bottle dies! I finished it off with one of the new seashells and a bit of white paint splatter!

My second and final card for today uses the new To Die For Sentiments: God Bless America. I went for a less "in your face patriotic" feel for today's card, but I just love how it turned out!

As you can see, I just can't seem to get enough of these blooms and used them to accent this summery card.

I love this bloom in particular because the colored pencil fits perfectly into the built in grooves of the petals so you can add additional pencil details effortlessly.

I die cut the "God Bless America" piece twice: once from textured gold cardstock and once from white and then glued them together to create a sturdier piece. I layered it across the frame that I created using the Border Bling: Twinkle die. I added the flowers and leaves around the frame here and there and then finished it off with another "forever and always" sentiment that has been heat embossed and some glitter!

This finishes up the countdown for day 3! Join me again tomorrow for the fourth and final day of the countdown with all products going on sale on the 15th at 10 PM ET. Thanks for fluttering by!