Showing posts sorted by date for query Keeping Christmas. Sort by relevance Show all posts

Tuesday, January 16, 2024

The Greetery {Comforting Floral Sympathies}


Hello and welcome! Today I'm sharing a set of floral sympathy cards over on The Greetery Blog, but I wanted to share them here, too.  I sat down a few months ago and mass-produced quite a collection of sympathy cards to have on hand since these types are often needed unexpectedly. I’m saddened to say that my collection has dwindled and I’m in need yet again. As soon as I saw the recently released Comfort and Joy Stamp Set, I knew it would transcend beyond Christmas cards and I couldn’t wait to use the beautiful sentiments on a fresh set of sympathy cards. 

I’m particular about certain design elements and colors on sympathy cards and I will explain my reasoning throughout today’s post. That being said, I’m also known for breaking my own rules, so these aren’t “hard and fast”, but I use my judgement depending on the situation and recipient. (wink) Since these don’t have a particular recipient in mind, it didn’t matter necessarily. One more thing before I dive into the how-to, I don’t usually make “seasonal” sympathy cards, but changing up colors can make them more appropriate for a different season and I will explain that a bit more, too!

To begin, I chose to use the beautifulSpring Meadow Stencil Collection and coordinating Spring Meadow Die. I like using stencils for mass production because you can just go step-by-step, panel by panel. Let’s take a minute to talk about color; as you can see, each of the four cards has a different color combination, but can you believe it’s only because I changed the final color for each of the four cards? Just changing one color can really change the look and feel of your design. I chose the final color to create something more fitting for a  particular season. Keeping the rest of the colors exactly the same makes the mass-production element much simpler!

Once I had the four panels stenciled, I used the coordinating die to cut them out. I set them aside and got to work on the background. For sympathy cards I don’t generally like a lot of layers and design elements, but I DO like visual interest. For today’s cards, I added some vintage patina distress ink to the center of four 4 by 5 ¼ inch panels of white cardstock. I wanted to make sure I concentrated the ink where it would peek out from behind the die cut stenciled flowers. I also added some Hawaiian Shores ink splatter to each of the four panels for some depth and interest.

While the ink was drying, I got to work on the sentiments. I chose 4 sentiments from the Comfort & Joy stamp set that work well outside of Christmas and would work nicely for the sympathy cards. I used black ink and then used the coordinating dies to cut them out. Once I had that done, it was time to decide on a layout for each individual card. Some of the sentiments have the stamped companion sentiment such as “sending” or “sending wishes for”. Because of the intricacies of the die cut florals, I needed to stamp them up at the top or in the corner. I really like how easy it is to tilt the bouquet in either direction for variety. You could also use two for each card and arrange them at the top or bottom and then add the sentiment in the middle; lots of possibilities! I used my mini MISTI to stamp the companion sentiments and then assembled each card one-by-one.

Part of me wanted to add some sequins, but another one of my sympathy card “rules” is that I don’t want anything too flashy, so instead, I opted to spritz each card with a shimmer spray and a light hand! Each of the four panels was mounted onto A2 card bases using foam squares. I’m pleased to add these to my collection and fingers crossed I won’t need so many this year! Sending wishes to each of you for a blessed and happy new year! Thanks for fluttering by!

Thursday, November 30, 2023

In the Spotlight: Season's Greetings + Bonus Tag

Hello friends! I'm sharing a holiday card that is featured in today's Papertrey Ink newsletter and I thought I'd share it here as well with a few more details about the process AND I had a few sprigs and berries left so I am sharing a bonus tag that I made with the leftovers!

This is the finished card, but in the next series of photos, I will share step-by-step instructions on how I created this Christmas design.

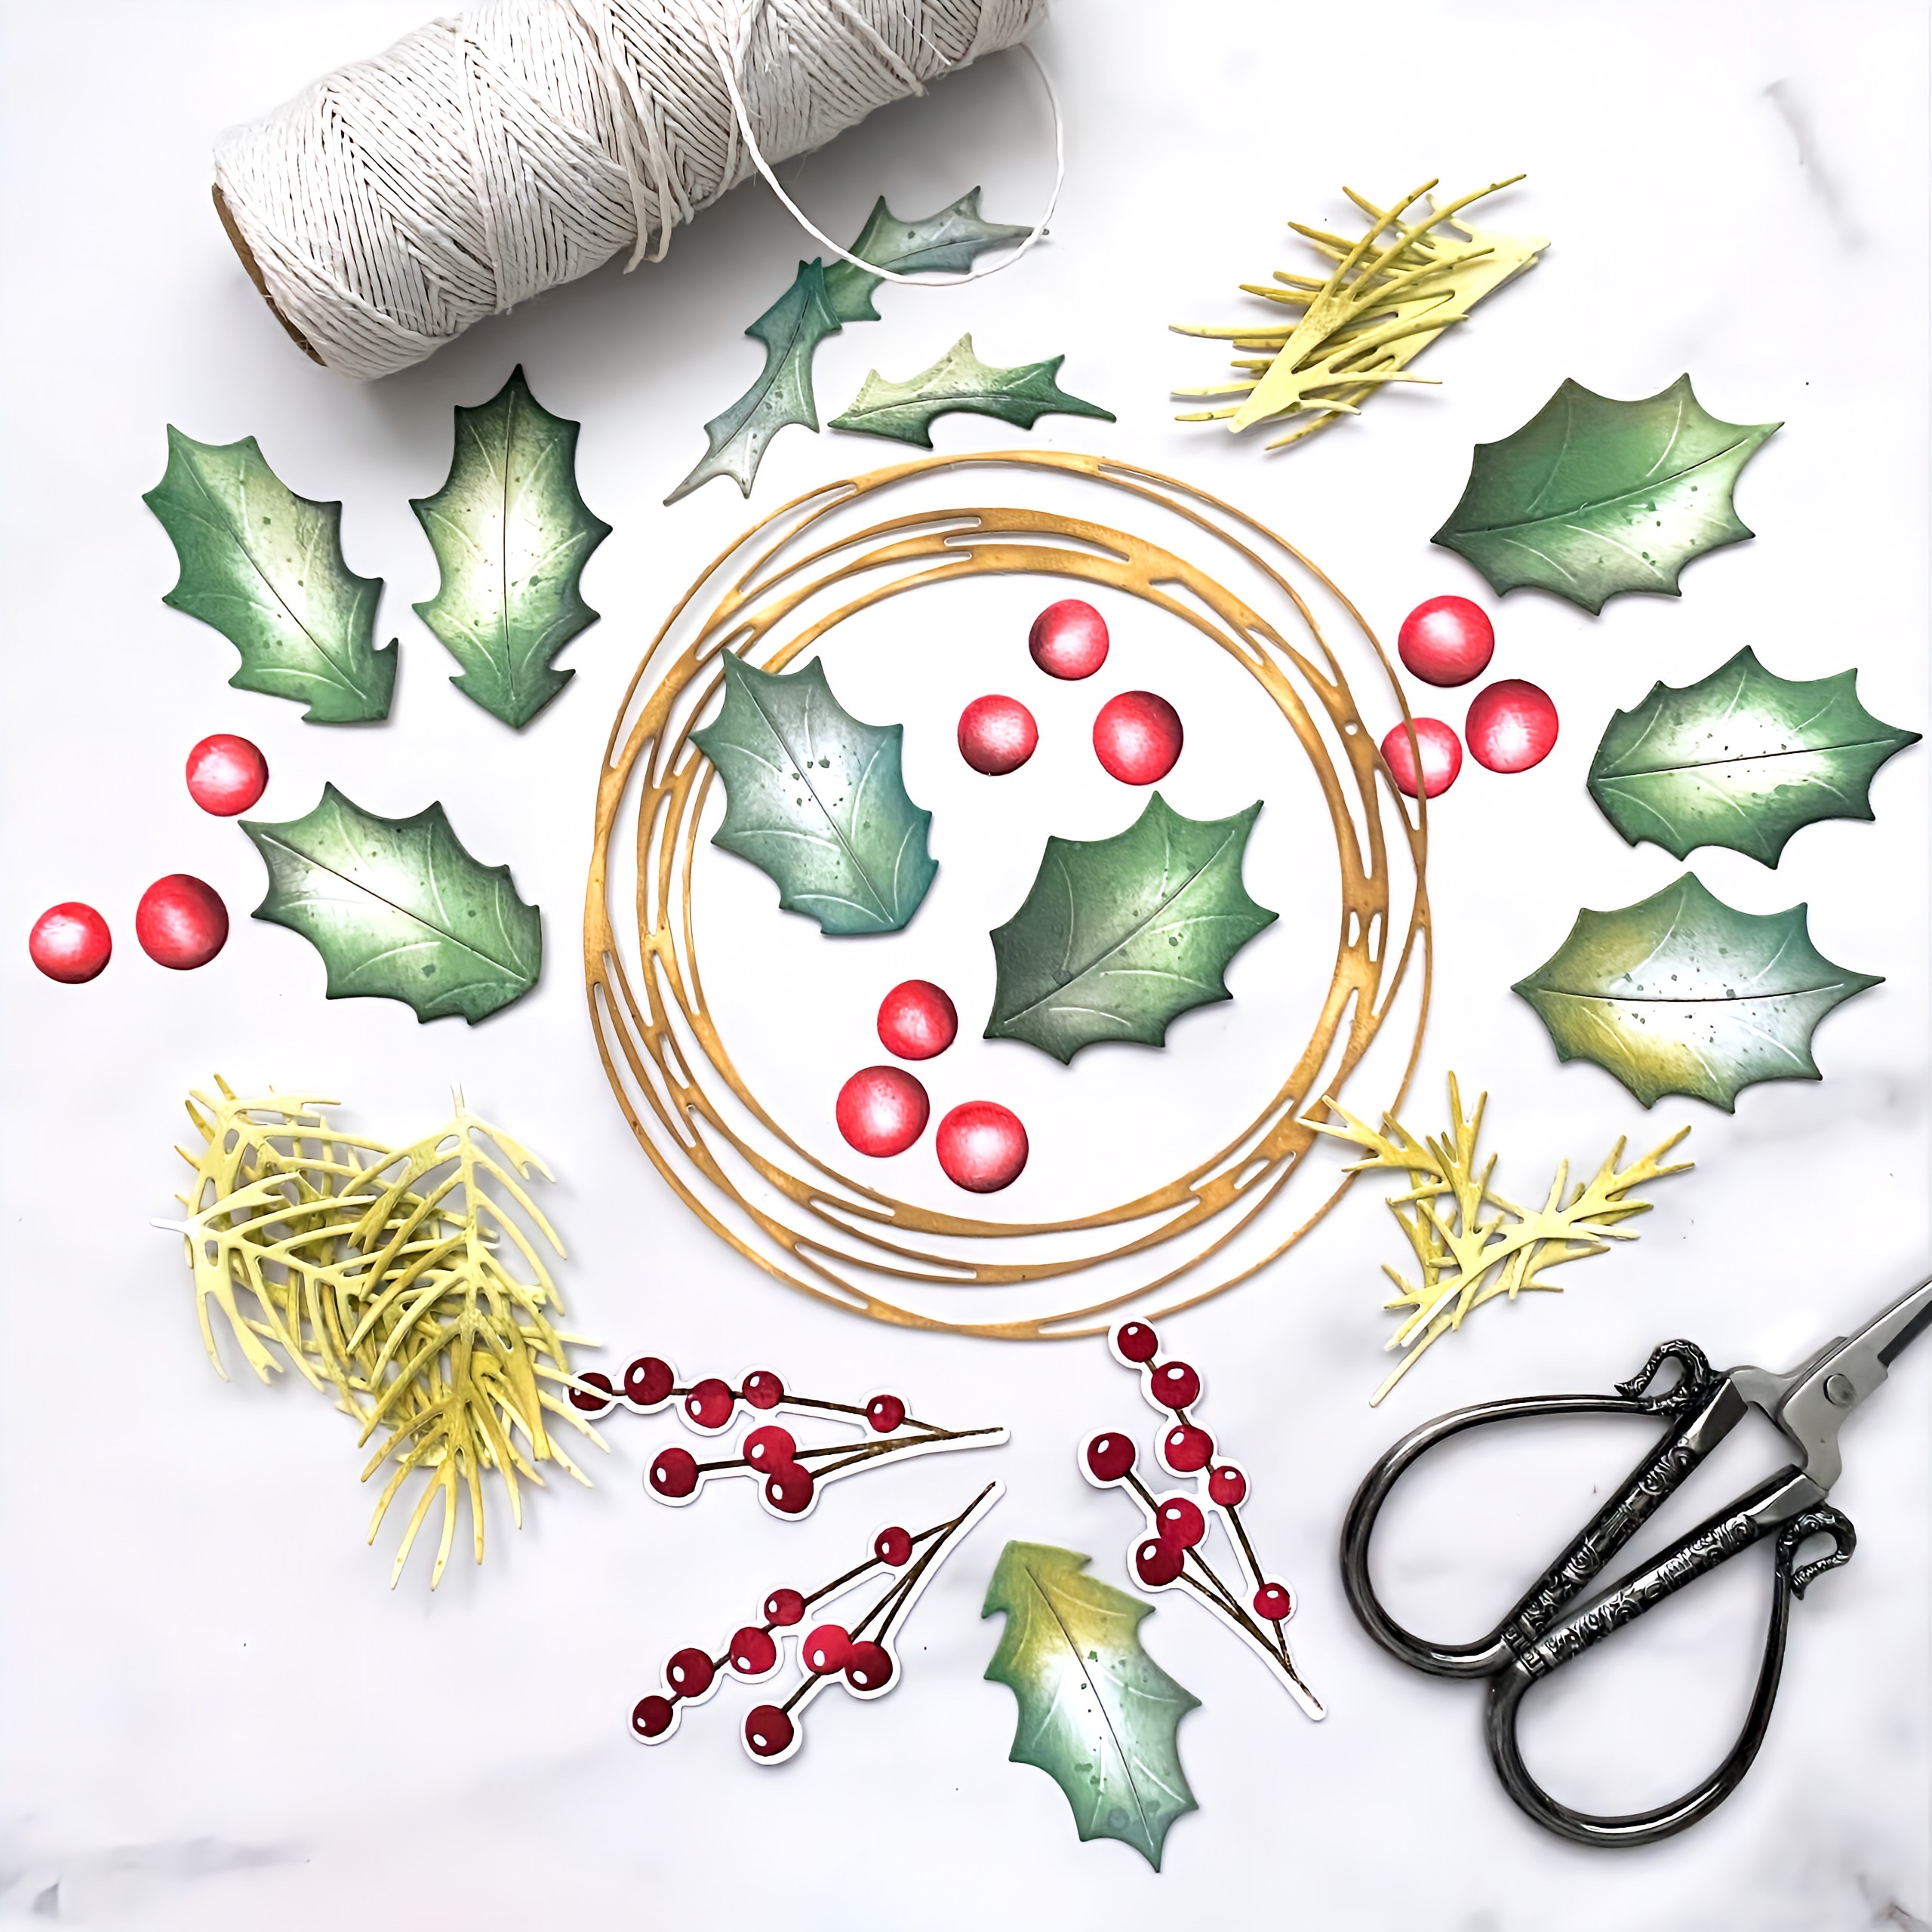
To begin, I die cut and colored all of the pieces I used for my wreath. I used the Into the Blooms: Holly DiesInto the Blooms: Christmas Sprigs dies, the berry branches included in the Christmas Bouquet stamp set, and finally, the wreath from the Forever Snowflake Frame Die. I used an assortment of Distress Oxide Ink Pads for the die cuts and then stamped the berry branches using Pure Poppy, Scarlet Jewel, and Cocoa Bean ink.

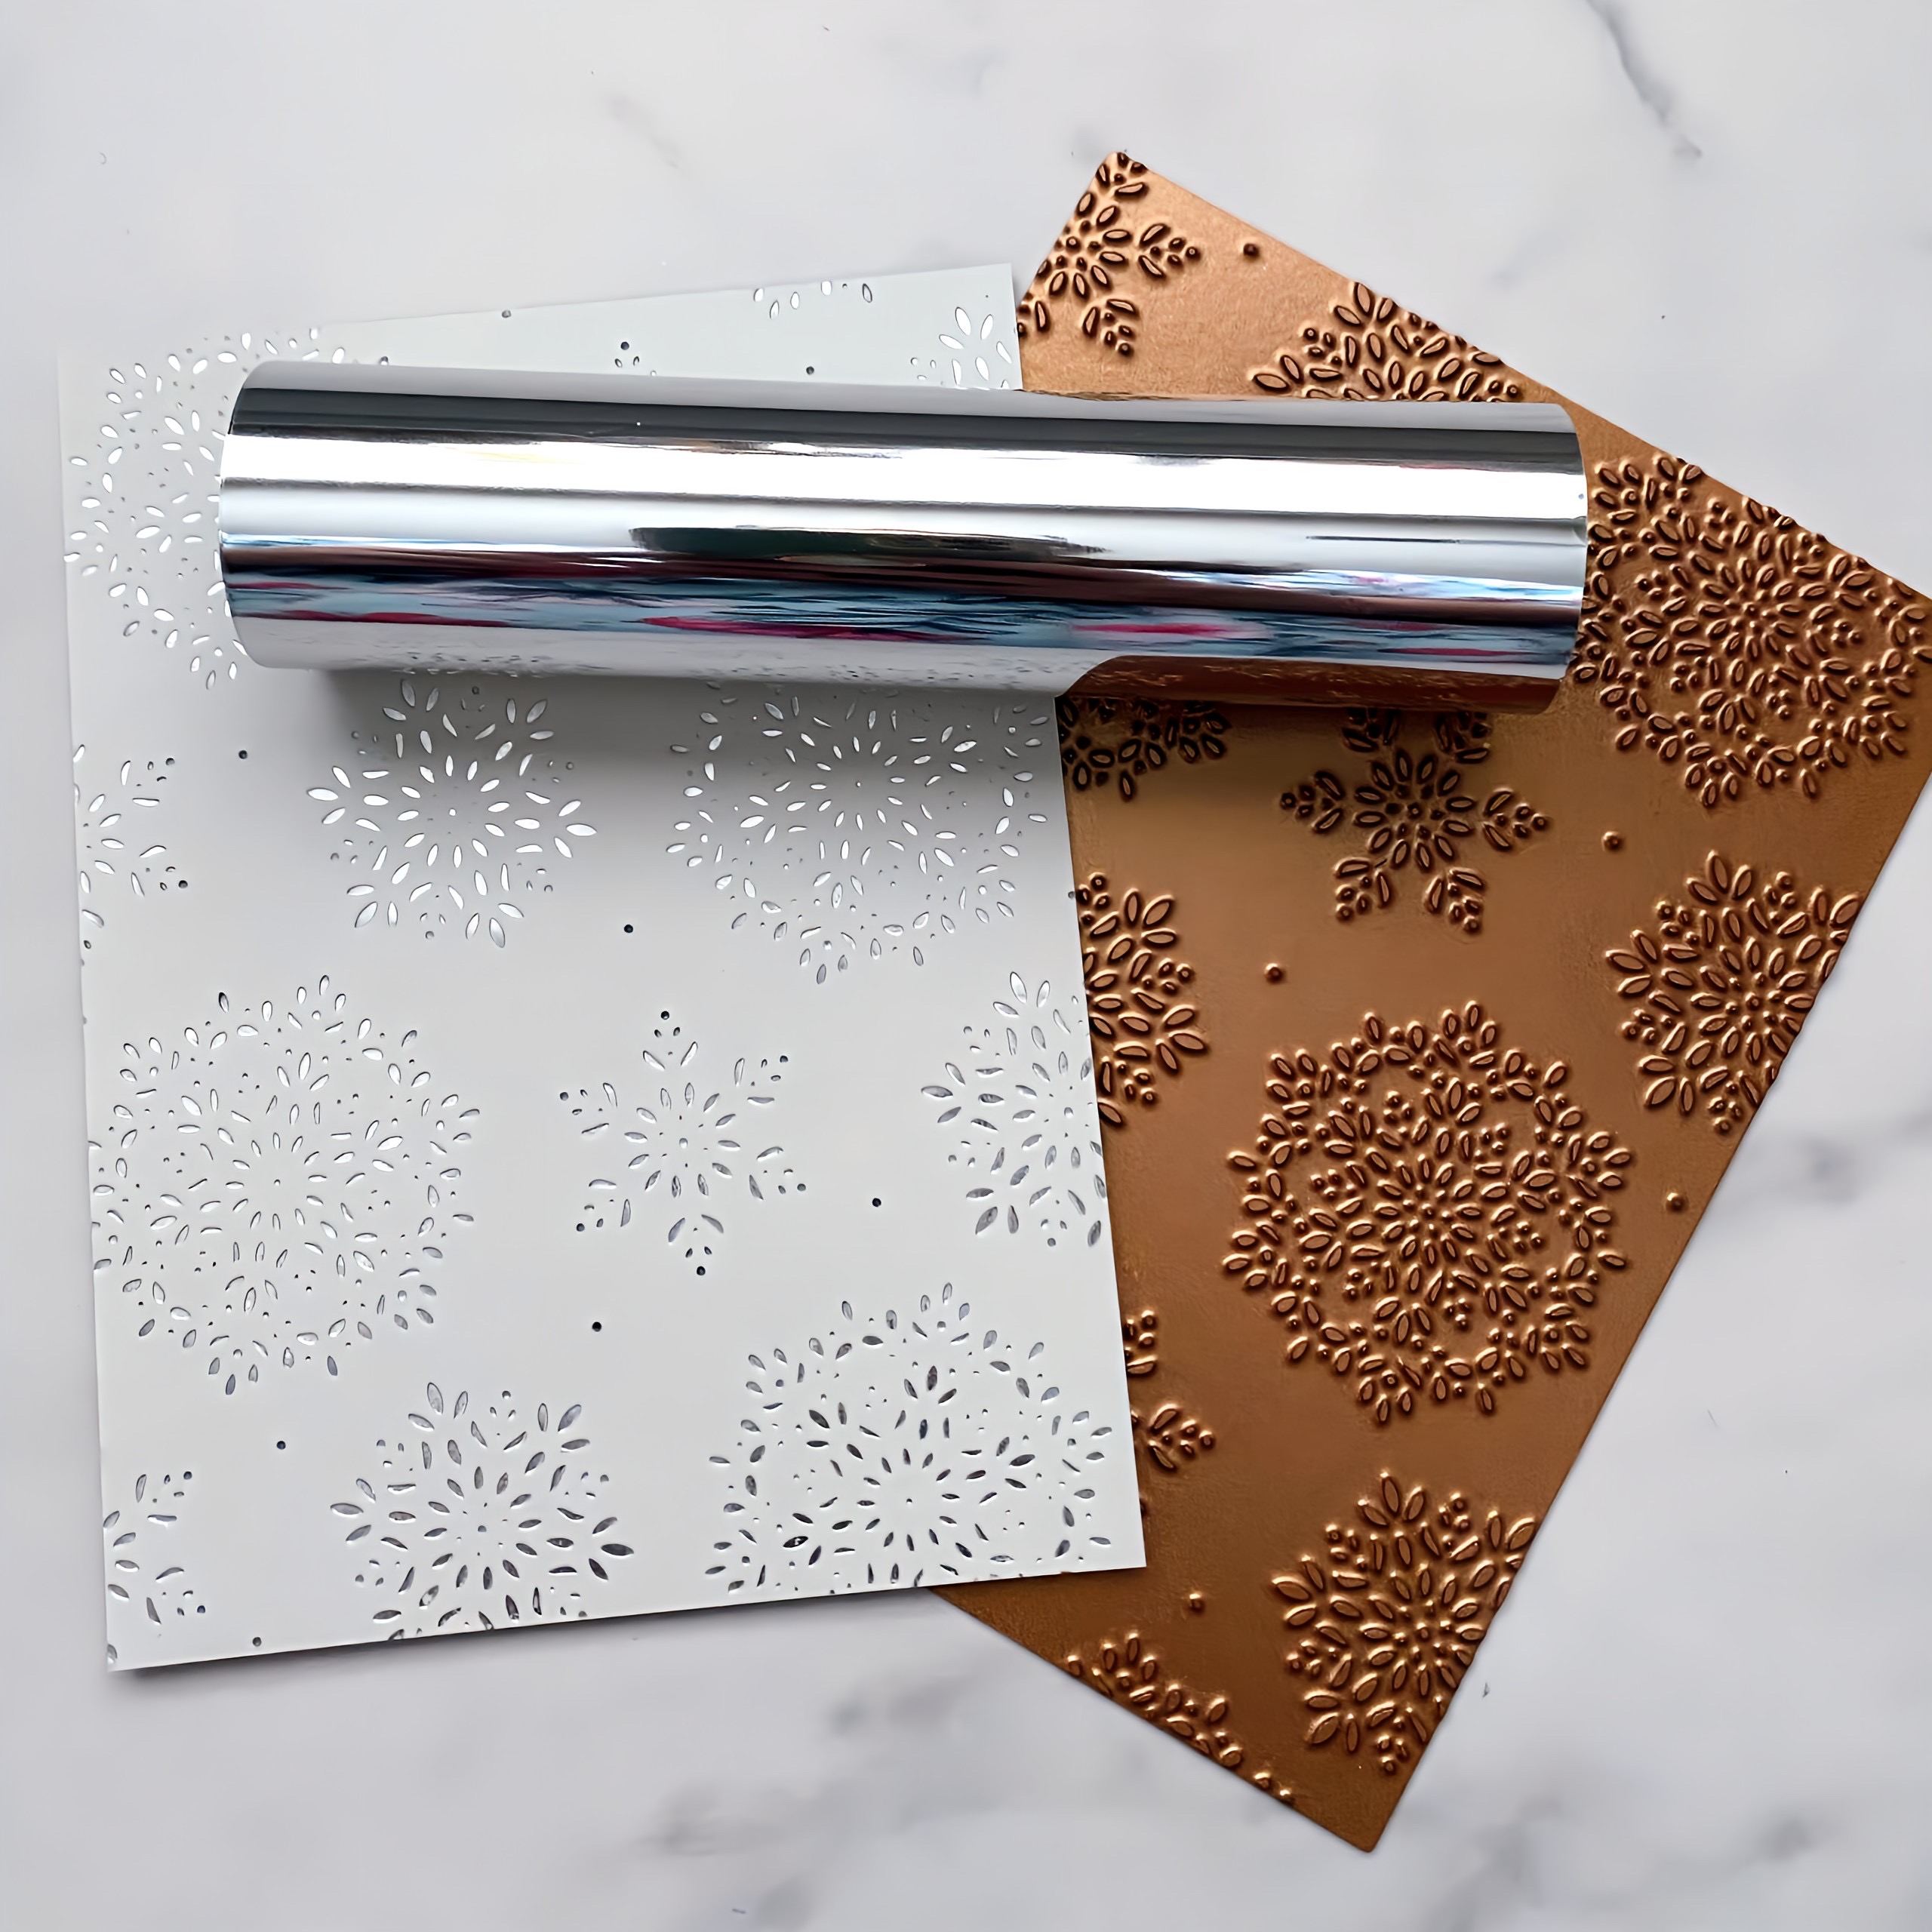
Next, I hot foiled a 4 by 5 1/4 inch piece of Soft Stone cardstock with silver foil. Use the coolest setting on your machine for 15 seconds; this Fanciful Snowflake Hot Foil Plate always provides amazing results without a lot of fussing and guessing which setting!

Glue the wreath to the foiled panel and attached the panel to a white A2 top-folding card base with foam squares.

Arrange Holly, berries, and pine sprigs around the wreath frame using liquid glue and foam squares. Add the stamped./die cut sentiment from the Christmas Your Way stamp set and then heat emboss the accent sentiment using silver powder on a black strip of cardstock.

Finally, add the finishing touches like white puff embossing powder and glitter! I also added black detail to the berries using a fine-tip Sharpie marker. 

Here's the finished card! I forgot to mention that I added some ribbon "tails" to the bottom of the wreath using the Bows Galore die set. I did rip it in half at the top so I could arrange them the way I wanted.

I chose to stamp the Season's Greetings sentiment on the same Soft Stone cardstock as the background to keep the wreath's openness. I used the black sentiment strip to add contrast.

I don't normally mix stamped images and Into the Blooms die cut pieces, but I really felt that the berry sprigs worked nicely with this design.

I like starting off with white cardstock for die cuts like this because it allows me to create built-in "shine" and realism by keeping portions white, like I did on the berries and leaves. 
Since I had some die cut pieces left over AND a few sentiments from the November release, I decided to have some fun and make a bonus tag.

The Happy Holidays sentiment is from the Vintage Holiday Flair stamp set and is one of my favorites from the new release.

I also added one of the postal images from the Deliver by December 25th stamp set and is part of this week's Flash Sale.

For the tag, I used Wow! White Sparkle embossing powder and I absolutely LOVE the result! As you can see in this photo, I went one step further on the berries and added some details with a white gel pen to give them a bit more realism. I gave the entire tag a couple flicks of white paint splatter and called it done! Thanks for fluttering by!


Tuesday, November 23, 2021

Papertrey Ink November Release Day and Flash Sale

Hello friends! It's release day for the November Papertrey Ink release! Even though we packed an entire release into two days of posting, I loved every minute of the creative process using these beautiful new products! Everything will be available for purchase beginning at 10 PM ET! I think this will be a very popular release, so without causing any extra stress, if it were me, I would get my shopping done early. Keep in mind, I DON'T have any "insider" information (ha ha!) this is just my gut feeling. I also wanted to share my card for this week's Flash Sale. These products are on sale now, but you can add them to your cart tonight and still get in on the sale!

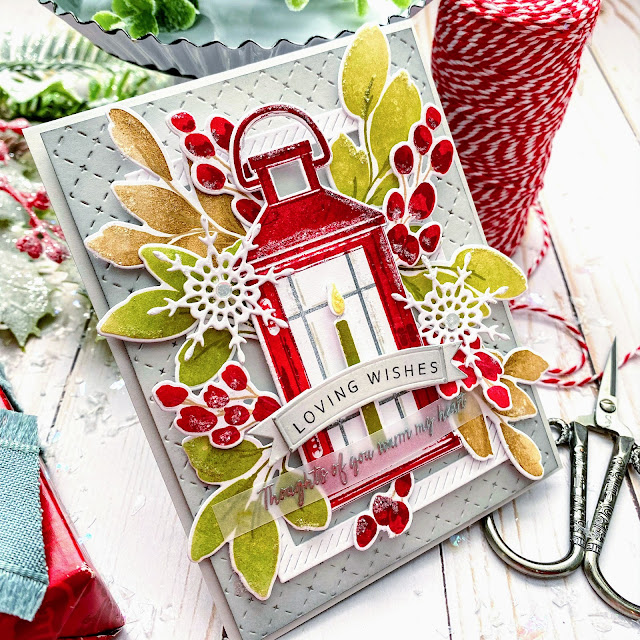
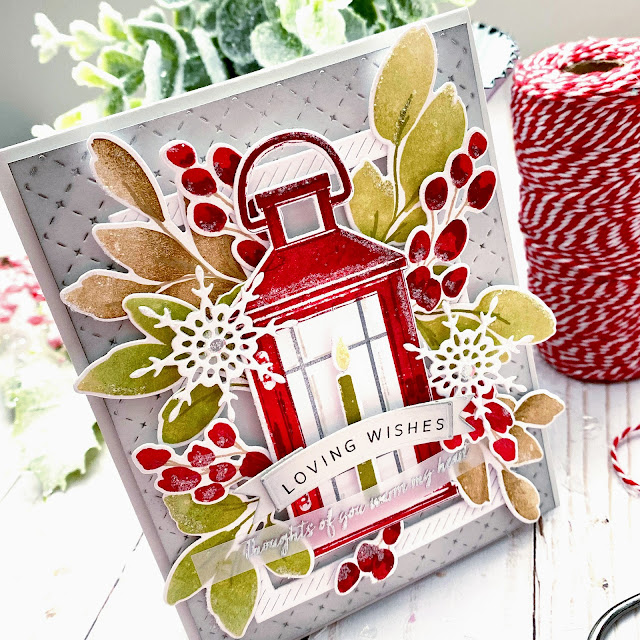
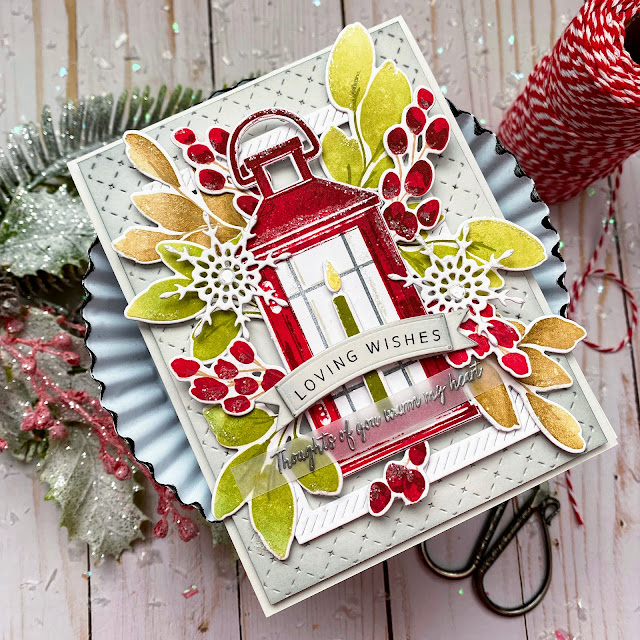
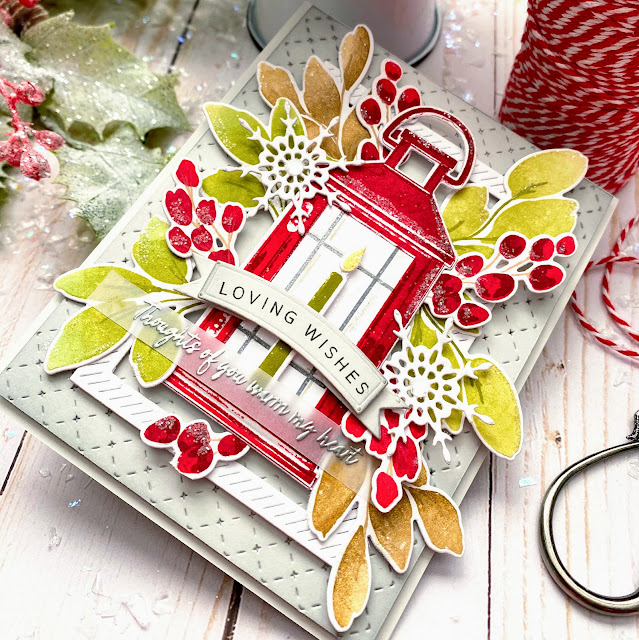
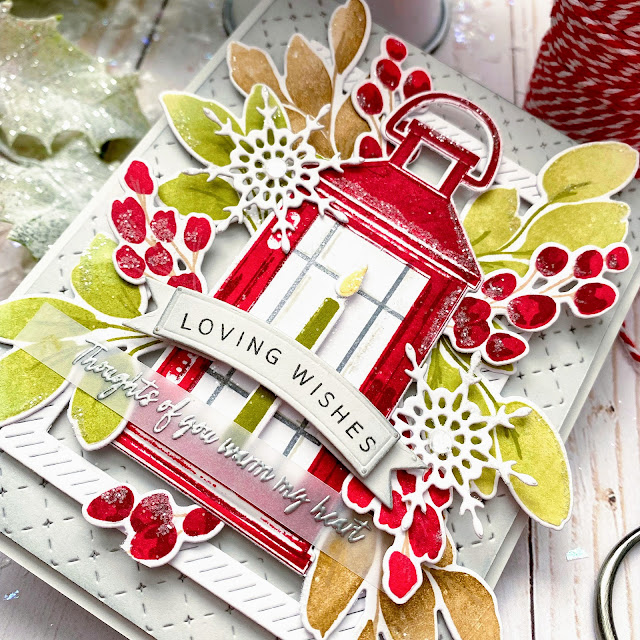
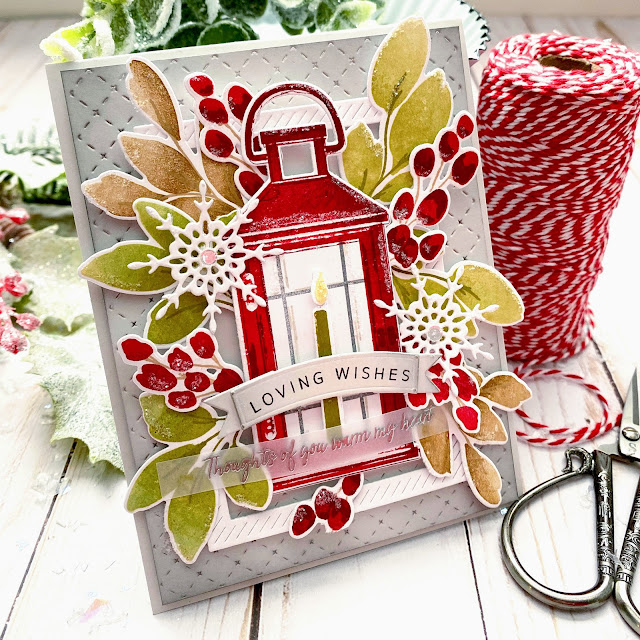
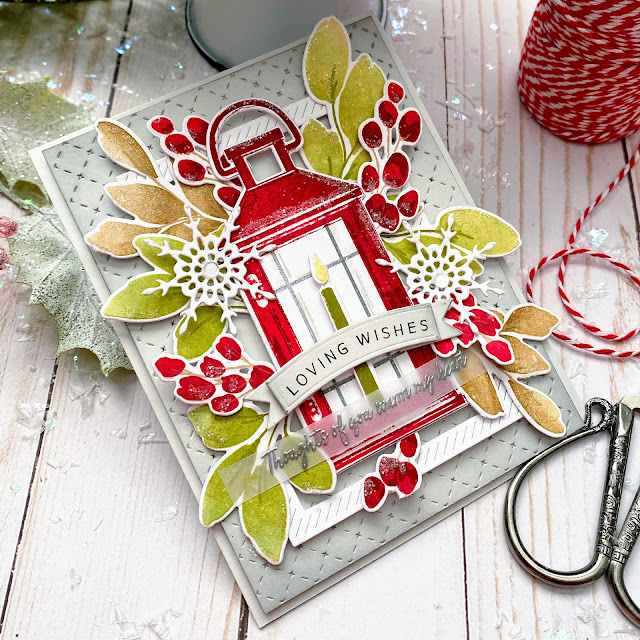
My card for this week's Flash Sale uses an assortment of stamps and dies to create a Christmas inspired "thinking of you" card! I'm planning on using it as a Christmas card, but if I need a "thinking of you" card during December, this will be used for that! To begin, I die cut the lantern, candle, and flame from the Vintage Lantern die set and stamped them in Pure Poppy, Scarlet Jewel, Ripe Avocado, Weathervane, and Harvest Gold inks using the Vintage Lantern stamp set. I set them aside and got to work on the foliage and berries. I die cut just the pieces I planned on using from the Effortless Beauties Die set; the berry clusters and leaves. I stamped them assembly line style using my mini MISTI.

Once the stamped images were all done, I got to work on the background. I cut a 4 by 5 1/4 inch panel of Soft Stone cardstock and then die cut it using the Border Bling: Tin Stitch Die to give it that beautiful detail. I added some Weathervane ink around the edges using a blending brush for some contrast. I layered it up onto a top folding A2 card base using foam squares.

I wanted to frame the lantern so I die cut the smallest frame in the Border Bling: Skinny Diagonals Frames using white cardstock and added it to the base using mini foam squares. Once that was done, I adhered the lantern to the center of the frame. The candle is popped up using a thin strip of foam tape. The "flame" is simply glued to the candle using liquid glue.

I had so much fun tucking the foliage and berries here and there until I liked the arrangement. This is one of those cards where I didn't pre-plan the sentiment! I decided it had been too long since I've used a banner so I die cut the smallest curved banner from the Banner Builder Basics. Once that was done, I chose the "loving wishes" sentiment, which is from the Just Sentiments: Belated Birthday, and curved it on my acrylic block and stamped it in black.

My tip for getting them curved the right way is to place the die cut piece under a clear acrylic block. Once that is done, I look through the block and bend the image/sentiment the way I need it and secure it to the block. Then I just stamp as usual and it turns out great! I also heat embossed an additional sentiment from the Just Sentiments: Warmth onto a strip of vellum using silver powder.

I also couldn't resist adding a few snowflakes from the soon-t0-be-released Cheerful Tag Overlay dies! They look so cute tucked in the foliage framing the lantern. Of course, I added some glitter here and there for some sparkle and shine!

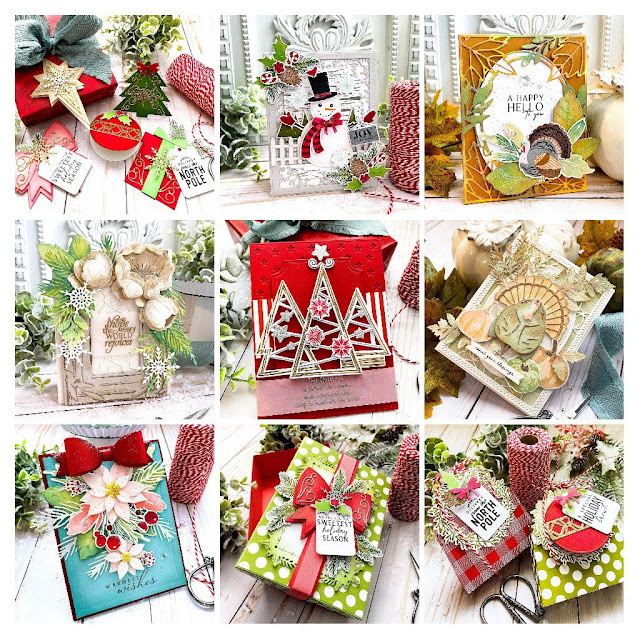
This card was a joy to create and I'm thrilled to add it to my stash of holiday cards! I didn't do my Keeping Christmas series this year, so I was a little bit worried about how my Christmas stash would look, but it's shaping up nicely and I think I will have everything I need! I DO, however, really need to get going on some tags! How about you? Are you ready for Christmas? Thanks for fluttering by!


Monday, November 8, 2021

Papertrey Ink Flash Sale {Merry Christmas}

I hope you're all having a fabulous day! I spent the better half of last week/weekend stuck in bed sick, so it feels good to be here sharing a card, even if I'm not 100 % quite yet! It went from one child to the next and of course, I had to have my turn, too, right? ha ha! 3 came out unscathed and let's hope it stays that way! Fingers crossed!
I created my card for this week's Flash Sale using quite an assortment of some of my favorite products; lots of dies and cute stamps to pull this holiday design together!

I fell head-over-heels in love with the Abundant Blooms stamp set when it was released last year! I especially love the cute pitcher and the ease of use that it provides! I decided to stretch this stamp set a little bit further and see if I could work it into a holiday design, and sure enough, it works! 
To begin, I die cut the pitcher, the stems, and flower pieces using the Abundant Blooms dies and then used my mini MISTI to stamp everything. I used Soft Stone and Weathervane ink for the pitcher, keeping it light and rustic. The stems were stamped using Dark Chocolate ink and Pure Poppy and Scarlet Jewel ink for the flowers. I will explain about the greenery further down in the post, but I do want to mention that I added white paint splatter to both the greenery and flowers prior to gluing anything down.

The thing I love most about this stamp set, aside from the cute pitcher, is the way the flowers float perfectly on top of the stems to really create the illusion of a big, bold arrangement of flowers! The best part is how easy it is to put together!

Next, I die cut the snowflakes for the bottom using the On the Border: Splendid Snowflakes Border Die and set it aside until I was ready to assemble the card. I had mentally visualized all of the bits and bobs I wanted to add, so it was simply a matter of getting them all die cut, inked, stamped, and glued! ha ha!

The pine branches, tag and bow are all die cut using the Tag Creations: Modern Gift Die. I've kept this one close at hand over the last few weeks because all of the different pieces are so perfect for so many holiday cards and projects! The bow is die cut from Pure Poppy cardstock and then I added some Scarlet Jewel ink near the center and on the ends so that it would look more realistic. The tag is cut from Weathervane cardstock and stamped with the Merry Christmas sentiment from the Just Sentiments: Be Merry stamp set. This is another one of those go-to sets that I use all season long!

I die cut the oval using the Nesting Basics: Oval dies and the Nesting Basics: Pierced Ovals to add the cute detail around the perimeter. The last die cut piece is one of my favorite frames: the Border Bling: Skinny Embossed Frames. Once all of those pieces were prepared, I got to work assembling the card. I layered a piece of Bitty Big: Soft Stone pattern paper onto a top folding Soft Stone card base. I added the oval using foam squares, centering it in the middle. I then added the snowflake border, making certain to only glue the part that would be on the bottom edge so it could overlap the oval. I wanted to tuck the pitcher down under it so that the snowflake detail wouldn't be lost. The frame is adhered using 1/8 inch ScorTape for security. I added the pitcher with the flowers and then tucked in the greenery using liquid glue. I added the tag using a mini foam square and then hot glued the bow over the top for security. The finishing touches are tinsel glitter (of course) and a few Moonshine sequins. Thanks for fluttering by!


Tuesday, October 5, 2021

The Greetery Christmas Time Collection Day 2

Welcome to day 2 of full reveals for the Christmas Time collection from The Greetery! I have to admit that I DID turn on a little Christmas music while creating for this release! I used to listen to it year-round when I used to do my Keeping Christmas series, but haven't wanted to until NOW! ha ha! This release has been so much fun and I know you're going to fall in love with the new products being featured today! You can see the full "meet and greet" for the products on The Greetery Blog and don't forget to leave a comment here for a chance to win one of two $50 gift certificates to the shop!

I'm obsessed with this new Hourglass Frame Die and coordinating Hourglass Insert die! I chose to use the "Christmas Time in the Country" stamp/die set to fill my hourglass, but there is also a Christmas Time in the City stamp/die set as well! I used that on my second project, so you can see some additional options for that as well.

I created a "stand-alone" shaker card to highlight this sweet manger scene. I always love to choose images and dies to highlight the true meaning of Christmas, which is the birth of our Savior! I especially love this gold embossed sentiment that reinforces the theme!
 I'm not the best at shaker cards, but I really like how this turned out, even if there were some bumps along the way! ha ha! My first tip is to make sure you don't have glue on your fingers when you touch the acetate! Yes, I did that and had to rip the top layer off and start again! Boo!

To begin this "stand-alone" shaker card, I die cut two of the hourglass frames in gold, and two in Kraft. Since I knew it would be standing on its own, I wanted to reinforce the frames by gluing the gold frame on top of the Kraft. I set those aside and got to work on the actual hourglass and the background. I die cut quite a few of the inserts with the wire still intact to create the frame portion. I didn't use foam with this shaker, but opted to simply "build it up" using multiple frames glued together. In the end, this was the smartest choice since I ended up needing to switch out the acetate. 


Once I had the frames cut and glued, I snipped the dies so I would have the large piece for the backer. This is where I did the stamping/inkblending/scene building. I sponged some ink around the edges and then stamped the star rays using gold metallic ink. I glued the star in theh middle and then added the "Bethlehem" sand, stable and manger. I carefully poured some of the snowflake confetti that is part of this release in the center and then glued the acetate portion over the top! I carefully added the framer portion using a thin foam strip to both the front and back. I also added another plain white backer, but turned around, onto the back of the hourglass piece so I would have a place to write a greeting. Once that was done, I simple added the heat embossed sentiment, which is from the Christmas Time Sentiments set, onto the banner, which is from the Christmas Time Sentiments die set. A few Pine Wisps, tiny stars, and snowflakes finish off this card!

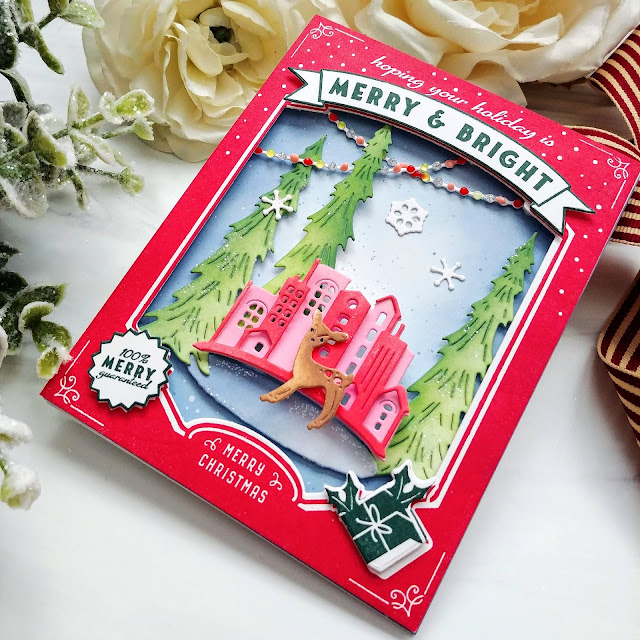
Up next is a card featuring the FABULOUS new Ornament Box Vertical stamp! There is also a Horizontal version to give you a lot of options! Now, you will most likely see quite a few cards today using this stamp with the AMAZING new vintage ornaments, but I wanted to give you another option by using this box top as a shadow box to house all kinds of sweet holiday scenes.

I chose to use the "Christmas Time in the City" dies to create this sweet scene! I also added the deer, which is part of the Vintage Ornament die set.

To begin, I stamped the ornament box in both red and green. I used the coordinating dies to cut out the window and the "Merry and Bright", 100 % Merry guaranteed, and the gift. I used foam squares to add them to the top of the red panel.

The string of lights was created by simply adding an assortment of Nuvo drops carefully to the white die cut. I set them aside to dry while I assembled the city scene. I colored all of the images using Distress Oxide ink and then added them using foam squares.

I had a lot of fun putting this city scene together. You could make this same card, but turn it into a shaker by simply adding a panel of acetate to the window opening. This would be a really easy shaker! ha ha!

I had a lot of fun creating this card, but rest assured, I WILL be using those ornaments STAT! lol! Don't forget to head to the other designers' blogs to see what gorgeous creations they've made! Thanks for fluttering by!
Kelly Lunceford (you are here)


Wednesday, December 23, 2020

Have Yourself a Merry Little Christmas

One more Christmas card to share before the big day arrives! I hadn't planned on making any more holiday designs, but I was completely inspired by the violin and piano musical number that was shared at church on Sunday! I wanted to make two cards to give to the performers with a little Christmas goodie!

The Sing a Song of Christmas stamp set was the perfect choice for these two cards! I started by using the Sing a Song of Christmas dies to die cut all of the pieces that I needed for my cards. I used my Mini MISTI to get them all stamped quickly and easily!

I had a leftover frame that was die cut using the Essentials: Fancy Oval Frame die  on my desk, so I used it to frame the beautiful heat embossed sentiment.

I heat embossed the sentiment onto a panel of Spring Rain cardstock and then added some Blueberry Sky ink around the edges. I also stamped a border at the top in Blueberry Sky ink as well, using the fabulous Fair Isle Borders stamp set

Once that was done, I had fun adding in the foliage, which I had previously stamped from a different project, and the cute musical details. The foliage is from the beautiful Beautiful Berries: Winter Stamp Set and coordinating Beautiful Berries: Winter die set.

I love these beautiful, yet whimsical images, with the snowflake touches! I added some sequins here and there as well as a healthy dose of Shimmer Spray (added after the photographs).

Each focal panel is layered onto a top folding Enchanted Evening card base using ScorTape for security.

I had such a fun time putting these two cards together and hope the recipients will enjoy their tailor-made cards! I made a goal this year to use EVERY LAST bit of my Christmas creations; tags, bags, gift card holders, cards, etc. I ALMOST reached my goal, but I have two cards left and a handful of tags and gift card holders. I had so much fun packaging up sweets and treats, baskets and bags with all of my creations....it's the best time of the year!  After it was all said and done, I wanted nothing more than to get started all over again! LOL! As I mentioned earlier, I won't be doing my Keeping Christmas series this next year, but I don't think that will stop me from pulling out the Christmas sets here and there! ha ha! Anyway, Merry Christmas, Happy Holidays, and Happy New Year to all of you! Thanks so much for all of your love and support this year and always! I have so much planned for 2021, so stay tuned! Thanks for fluttering by!