Showing posts with label nautical cards. Show all posts

Wednesday, July 8, 2026

The Greetery {La Dolce Vita Collection} Day 1

I'm so excited to be here today sharing a few projects using the beautiful and fun new collection from The Greetery called La Dolce Vita! It's jam-packed with SO many wonderful new products that will make you want to fly off to the Mediterranean! Before I dive into the details of my projects, you'll want to head to The Greetery Blog for the official "Meet & Greet" for each of the products being featured today. As always, make sure to leave a comment here, and on each of the designers' blogs, for a chance to win one of two $100 gift cards to the shop!

My first project uses the beautiful and refreshing new Citrus Fields suite of products! I've never made a 5 by 7 card set before, but with the large Citrus Fields Stencil and Citrus Fields Embossing Folder, I couldn't resist! Please note: if you only make A2-sized cards, don't fret; you can cut your cardstock down! Making this larger card set allowed me to challenge myself to create a larger box to hold the cards, which turned out perfectly, thank heavens! ha ha!

To begin, I stenciled four panels using the Citrus Fields Stencil collection. I did each step on each of the four panels rather than stenciling one completely and then moving onto another, if that makes sense. I gave them all a spritz of Shimmer Spray-Sparkle for sparkle and shine and attached them to 5 by 7 white card bases.

For the sentiments, I used the Oblong Octagon Labels Stamp Set along with the coordinating Oblong Octagon Labels Hot Foil and Oblong Octagon Labels Die. I really love how the hot foil elevates the look; it gives a boutique feeling, but with handmade touches.

Two of the sentiments are embossed/foiled on Powder Green cardstock and two on coral cardstock for variation.

I made a belly band to go around the set of cards and envelopes, similar to what you would find on a store bought set. 

I found the envelopes on Amazon and they have a gold trim on the edges to elevate the set as well.

Let's talk about the box lid; if you're not into making boxes, you could make this as a card! The corners use a beautiful new set called Ciao Bella Borders, which I will share on another project today. I used the new Citrus Fields Die for the focal point; it's all cut from white and then colored with blender brushes and dye inks.

I framed the lemons with a frame cut using the Capsule Fixed Border Large and then cut using the beautiful Pretty Picado Die. I layered it onto the pinked layer that is cut using the Capsule Star Studded Borders Die and then some additional detail using the Capsule Filigree Borders Die. The lemons are arranged in the middle using foam squares for dimension. As I mentioned earlier, you could just use this portion for a card design, or even add the yellow portion as well.

My next project uses the beautiful new Coastal Cuttings Die paired with the Ciao Bella Borders Stamp/Die set. I couldn't resist using the Citrus Fields Embossing Folder again for added interest and depth. 

If you fell in love with the Best Bouquet Die, you'll love this as well. It's the same concept for arranging the cluster!

I love the color combination found on the assembly guide, so that is what I used on both cards.

Everything is cut from white cardstock and then I colored each flower/leaf/ etc. using blender brushes and dye inks.

The two cards use the two different options for borders included in the Ciao Bella Borders along with two of the sentiments. 

And now for something FUN! I absolutely adore this new Something Fishy Suite of products; so clever and cute! I've created a shaped birthday card using the Canned Die and the new Something Fishy Stamp/Die set. There is a smaller version of the can called Canned Lite. I didn't get a chance to use it on any projects, but that will soon be remedied!

I used green metallic cardstock for the "rolled down" portion of the can to give it some realism.

There are so many fun different sentiments in the Something Fishy Stamp Set; baby, birthday, celebration, etc. 

There is a die so you can create a pull-tab for an interactive card; that's also on my to-make list! So many fun possibilities! This concludes today's post, but join me again tomorrow for day two of full reveals! Don't forget to leave a comment here, and on each of the designers' blogs, for a chance to win one of the two $100 gift certificates!


Kelly Lunceford {you are here}


Wednesday, March 15, 2023

Take Time to Relax

Happy Wednesday, friends! I hope you're doing well! I went to a 50th birthday party over the weekend and needed a masculine card! I perused my masculine stamp/die sets and settled on the amazing Scene Everywhere: At the Lake . I took the month off that this particular stamp set was released, so I haven't used it until now! It is such a fun set and now that I've played with it, the ideas are flowing! It also happens to be part of this week's Flash Sale.


To begin, I die cut all of the pieces I would need for the card and then stamped them using my mini MISTI. The fun thing about this stamp set is that the dock is a die cut, but then the water and skyline is a stamp, so you can stamp that and then line the dock and the boat up in the negative spaces.


I die cut a piece of Vintage Cream cardstock using the Love to Layer: Torn Edges Die and did the base layer stamping and inking around the edges, adding in a little splatter. I stamped the sentiment in black over the top. I stamped it again on a scratch piece of paper so that I could add a popped up piece above RELAX. 

I love the cute little geese/duck images that are included that you can add to the lake and the extra cloud dies.

I layered the focal panel on to a piece of Enchanted Evening cardstock and then added it to an A2 Kraft panel that was stamped using the Weathered Wood Background Stamp. I added some ink around the edges for contrast.

I didn't want to neglect the inside since this is a milestone birthday! I die cut the number 50 out of Ocean Tides cardstock using the Numbers Die. I also added a little bit of Ocean Tides ink to the edges to weather it a bit. The sentiment is stamped in black and is from the Inside Greetings: Endearing Birthday stamp set.

I  like stamping the inside of cards to make them seem a little bit more professional and polished/finished! I really should take the extra time to do it more often. Thanks for fluttering by!


Sunday, April 11, 2021

Ink to Paper April Release Countdown Day 1

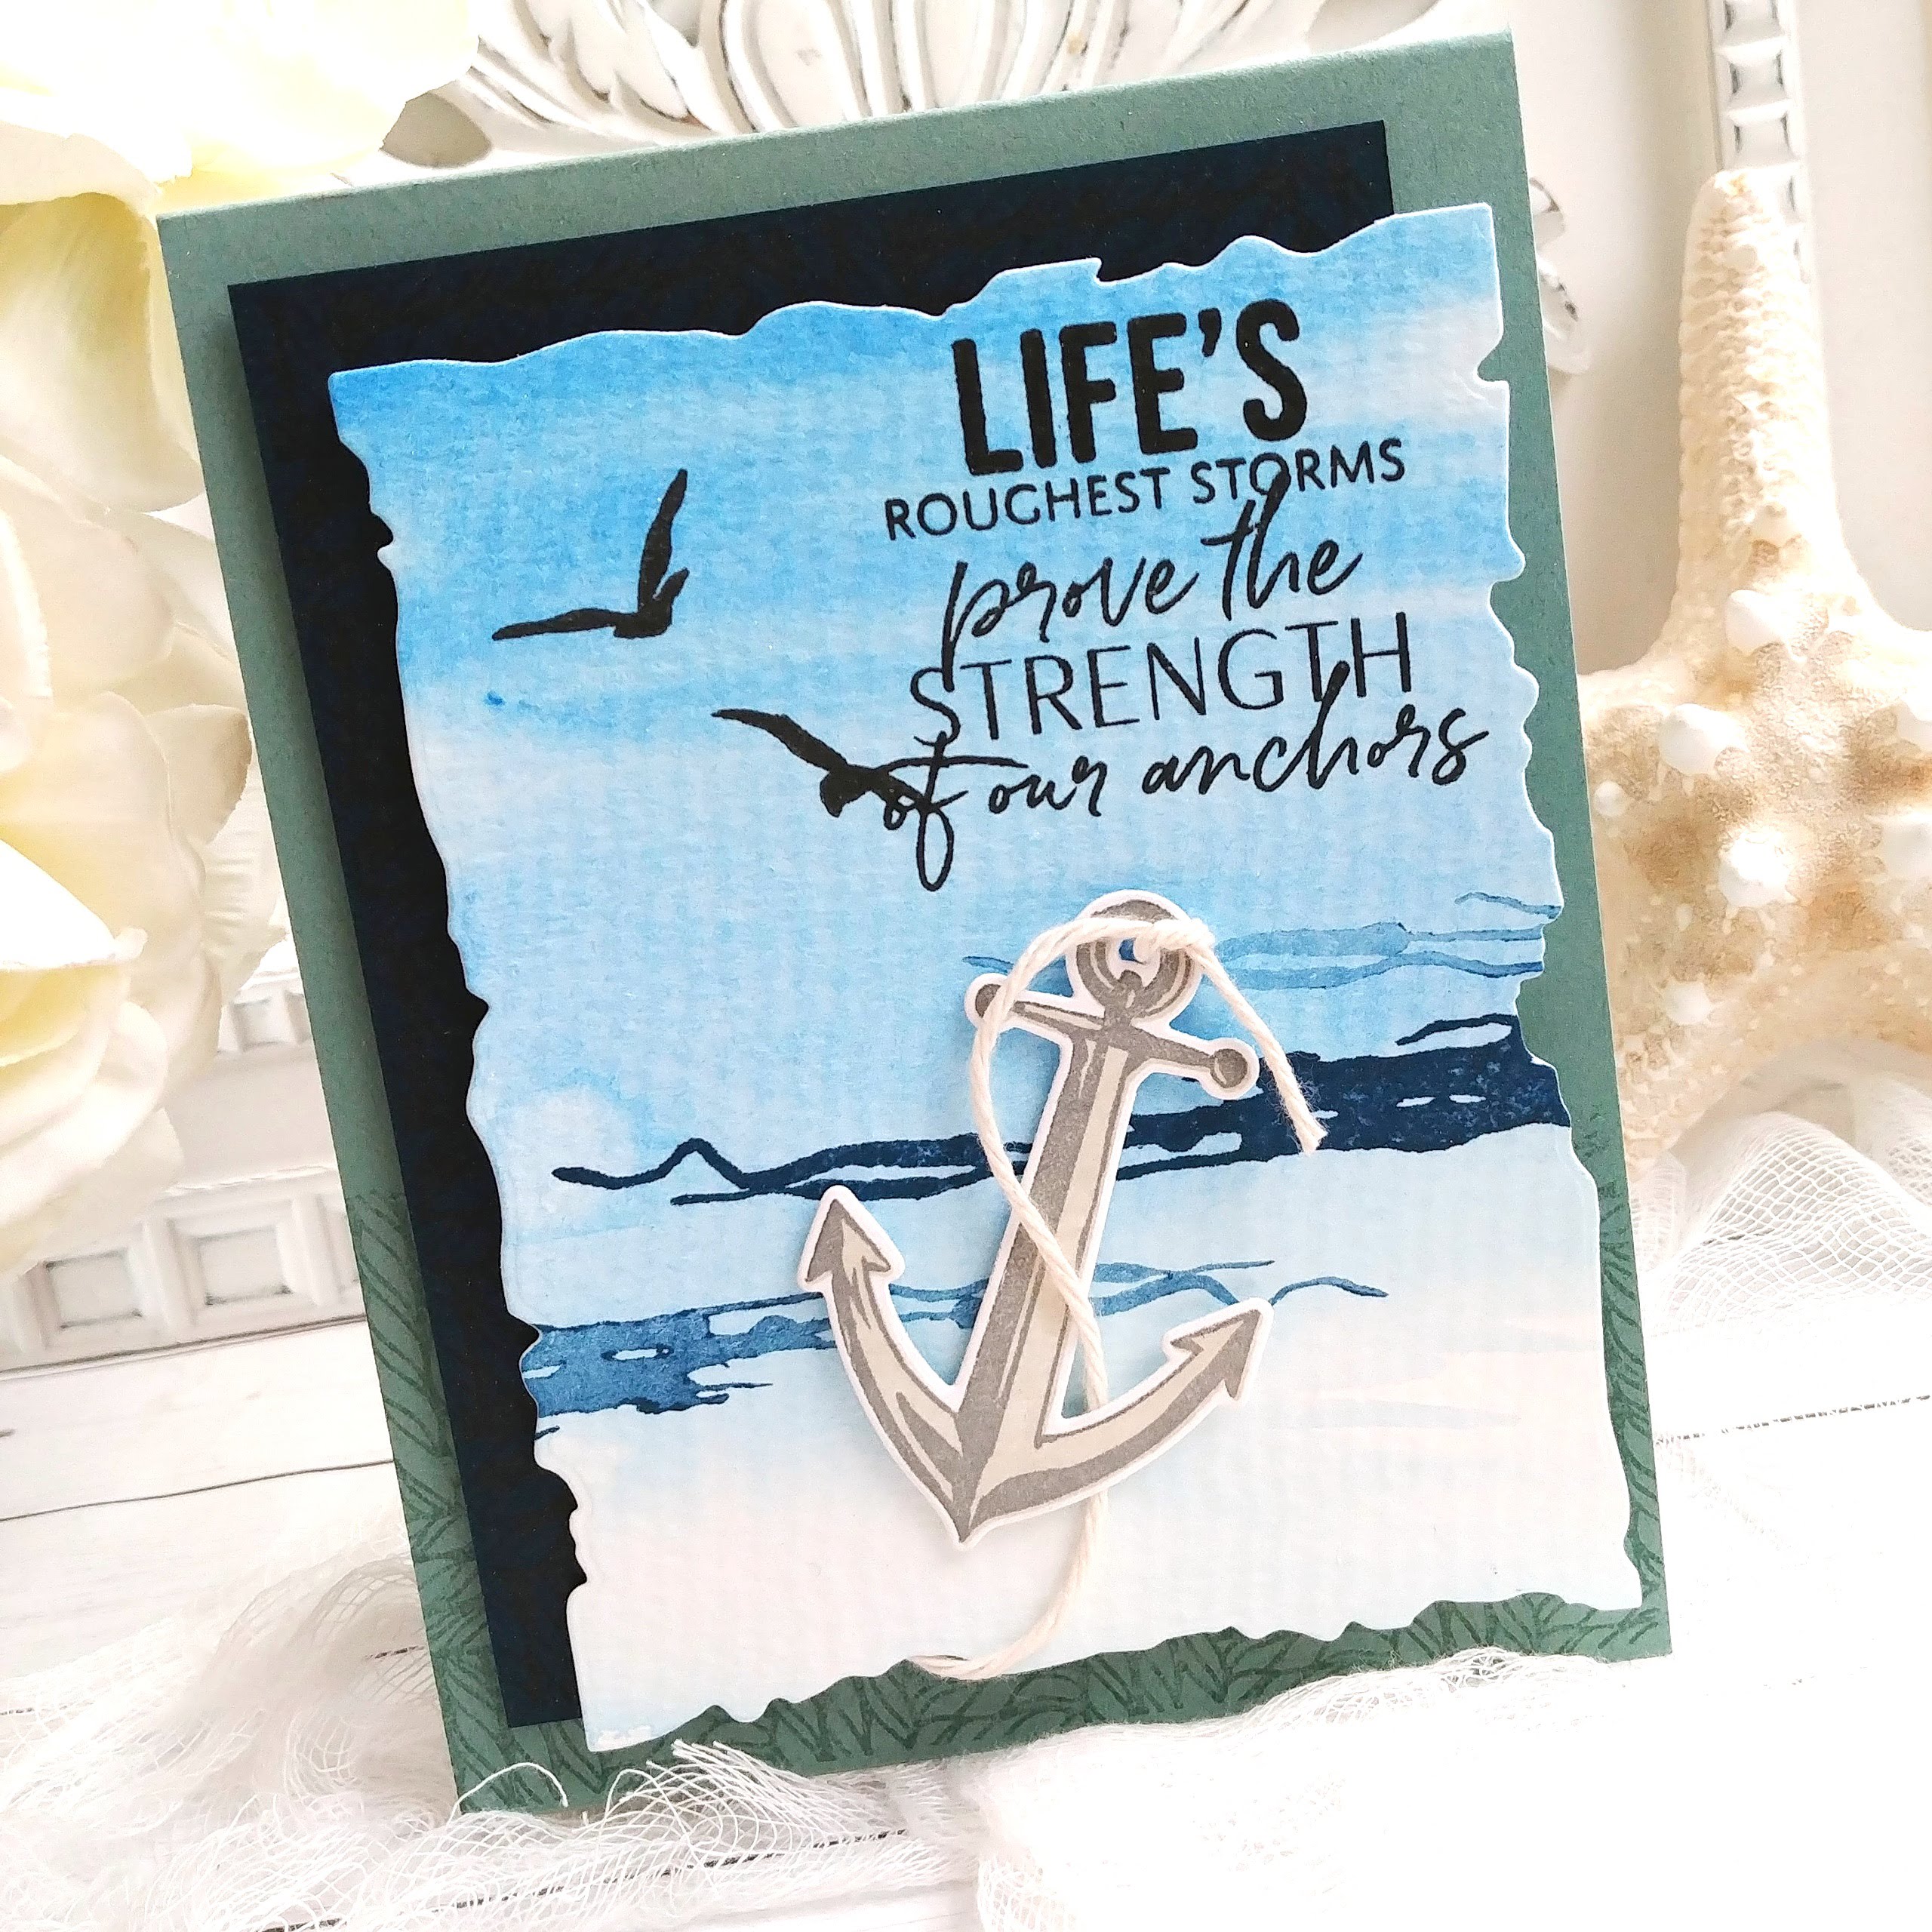
Hello and welcome, friends! It's day 1 of the Ink to Paper April release countdown! I have two projects to share with you today; first up is a card made using the new Seas of Life stamp set and the new Weaved Background! I really love all of the new sentiments included in the Seas of Life stamp set! This one was a particular favorite, so I chose to use it for the theme of my entire card.

To begin this card, I did a simple watercolor wash using a few different blue paints for some variation. I used my heat tool to dry it quickly so I could add the "wave" type image that is included in the Seas of Life stamp set. I inked it up heavily with Enchanted Evening ink and then just stamped it off for the 2nd and third image with the residual ink. I really like how it turned out. Once that was done, I die cut it using the previously released Love to Layer: Torn Edges Dies. I really like the effect it gives this watercolor panel.

I stamped the sentiment and the seagulls on the top using black ink for a stark contrast to the blue background. Did you know that the Seagull is Utah's State bird? We are very used to having many Seagulls all over, but it probably seems weird for others who visit our state to see them here when they are a coastal bird! The seagull is symbol of hope, miracles and prayers answered. If anyone is interested in hearing the story of the seagulls and why they are the State bird, I'd love to tell you! It is such a great story! 


Anyway, back to the card! LOL! I seem to get sidetracked a lot! I die cut the anchor image and then stamped it with the two step images; the solid image is stamped in Soft Stone and the detail image is stamped in Weathervane ink. I tied a knot of Cream Cotton Baker's Twine and then wrapped it around the anchor and secured it to the back of the watercolor panel with a bit of washi tape.

It is hard to see in this photo, but the Dark Indigo panel is stamped with the new Weave background using the same Dark Indigo ink for a tone on tone look. I also used the same background image to stamp the bottom of the Ocean Tides card base.

I offset the blue panel with the watercolor panel for a bit of a whimsical feel. 

I mounted the layers onto the card base using foam squares for dimension. I spritzed the entire things with Shimmer Spray for some sparkle. I love the way sand glints in the sun, so hopefully the recipient will get that same vibe with this nautical card!

My second card is bright and tropical using the new Feathered Friends 10 mini stamp set and die. I really like the sentiment that is included in this set, so I chose to keep it front and center! To begin, I die cut the bird and stamped it in the colors that are used in the assembled example guide. 

I used the fabulous Flourishing Florals stamp set to highlight this sweet colorful bird! I stamped the sentiment directly onto to the Love to Layer: Scalloped Circle

It's no secret how much I love a tone on tone background, so I used the Cover Plate: Trellis Die to die cut a panel of Hawaiian Shores cardstock and glued it onto a 4 1/4 by 5 1/2 inch panel of the same cardstock. I also layered a piece of Bitty Big: True Black pattern paper over the top of the background and then added the circle using foam squares.

I stamped the flowers in Hibiscus Burst and Raspberry Fizz , and a few in Lilac Grace and Winter Wisteria. The leaves are stamped in Green Parakeet and New Leaf inks.

I arranged the flowers here and there and secured them with foam squares. I tucked the bird in the bottom corner as though he's perched among the colorful blooms!

Join me again tomorrow for day 2 of the countdown! Thanks for fluttering by!