Showing posts with label Vintage Designs. Show all posts

Friday, October 31, 2025

Happy Halloween {Retro Trick-or-Treat}

Happy Halloween, friends! I'm popping in to share one last Halloween project using a fun mix of products! I bought these cute Tim Holtz Sizzix Thinlets Retro Halloween dies a few years ago with great intentions and then they just sat. I remedied that this year and now they have graduated from the "new and unused" basket to their proper home with the rest of the Halloween collection! It does make me sad saying goodbye to all of the Halloween goodies until next year.

I created a set of three identical tags and a coordinating card . To begin creating the cats, I die cut all of the base layers from cream cardstock and the detail portion from black. I also cut the eyes and the mouths again from Summer Sunrise cardstock. I wanted the mouth to be more orange so I added some Canyon Clay ink over the top.  I glued the outline to the cream base and added the black mouth back on. I then layered the Summer Sunrise mouth over the top of the black inlaid mouth. I did the double thick mouth so I could add Ranger Glossy Accents. I didn't do this on the first attempt and I wasn't very steady with the gloss, so it got a little messy. The two layers helped remedy that problem so I did it on the other two tags as well as the card.

The cats were inspired by a vintage cat illustration and the cat had an orange polka-dot bow. Some of you may remember having decorations like that when you were a child; I sure loved all of our Halloween cut-outs my mom would hang around the house! The bow was cut from Orange Zest Bitty Big paper using the Wrap-it Ribbons Die and then assembled using liquid glue and foam squares. I did add some Canyon Clay ink around some of the edges, especially around the center, for depth, interest, and dimension.

I was thrilled to find that the Hocus Pocus Patten Paper gave the perfect retro vibe to accent these cute cats! I love this paper, but find it doesn't lend itself to every style of Halloween products, so I'm so happy it works so well with these dies. Each tag has a sentiment from Spooky Sweets II that has been retired for quite awhile, but I just love it so it seems to make an appearance every Halloween. I gave everything a spritz of Sparkle Shimmer Spray for some shine. I punched a hole at the top of each tag and added some True Black Baker's Twine

As I mentioned earlier, I made three tags in total, all identical (with the exception of the messy-mouth cat! haha!) . I used the Love to Layer: Elegant Points Die as the base for my tag. I oftentimes struggle with finding a suitable tag die and I had a lightbulb moment (or maybe a "duh!" moment) and realized I have been neglecting my biggest resource for unique shaped tags: Love to Layer dies AND Reflections dies! These are all the perfect solution for all different shapes and sizes of tags and will come in SO handy this holiday season!

As you can see, I used the largest die included with the Elegant Points for one of the layers on the card. I used the smaller print of that same paper from Hocus Pocus to keep everything cohesive, but not identical. For the card, I also used the wonderful new Circle It: Pierced Die cut from Ocean Tides cardstock with some Stormy Sea ink around the edges . I also added some black ink splatter for additional interest.

I cut a black card base and added the star paper that is included in another older pad of pattern paper from PTI. I think it's called Halloween Prints and is most likely discontinued. I layered everything up using foam squares. It seems I can find a use for the Into the Blooms: Anemones Die no matter the occasion or season! ha ha! I cut two of the leaf designs, the berries, and berry sprigs from white and cream cardstock (just what I had on my desk; no particular reason for both colors) and then colored them with black ink and Stormy Sea ink. I added some black ink splatter and fossilized amber distress spray and then tucked them around the cat.

I did add some glossy accents to the berries and just realized I forgot to add some white gel pen "shine" details so I will need to go back and do that before it gets sent to the recipient. I die cut the BOO word twice, once from Summer Sunrise and once from True Black using the To Die For Sentiments: Halloween Die and glued them together slightly off-set. I tucked the "open if you dare" sentiment in the opening of the O and secured it with a foam square. I had so much fun creating the  card and set of tags! Have a happy and safe day and thanks for fluttering by!


Thursday, May 13, 2021

Ink to Paper May Release Countdown Day 3

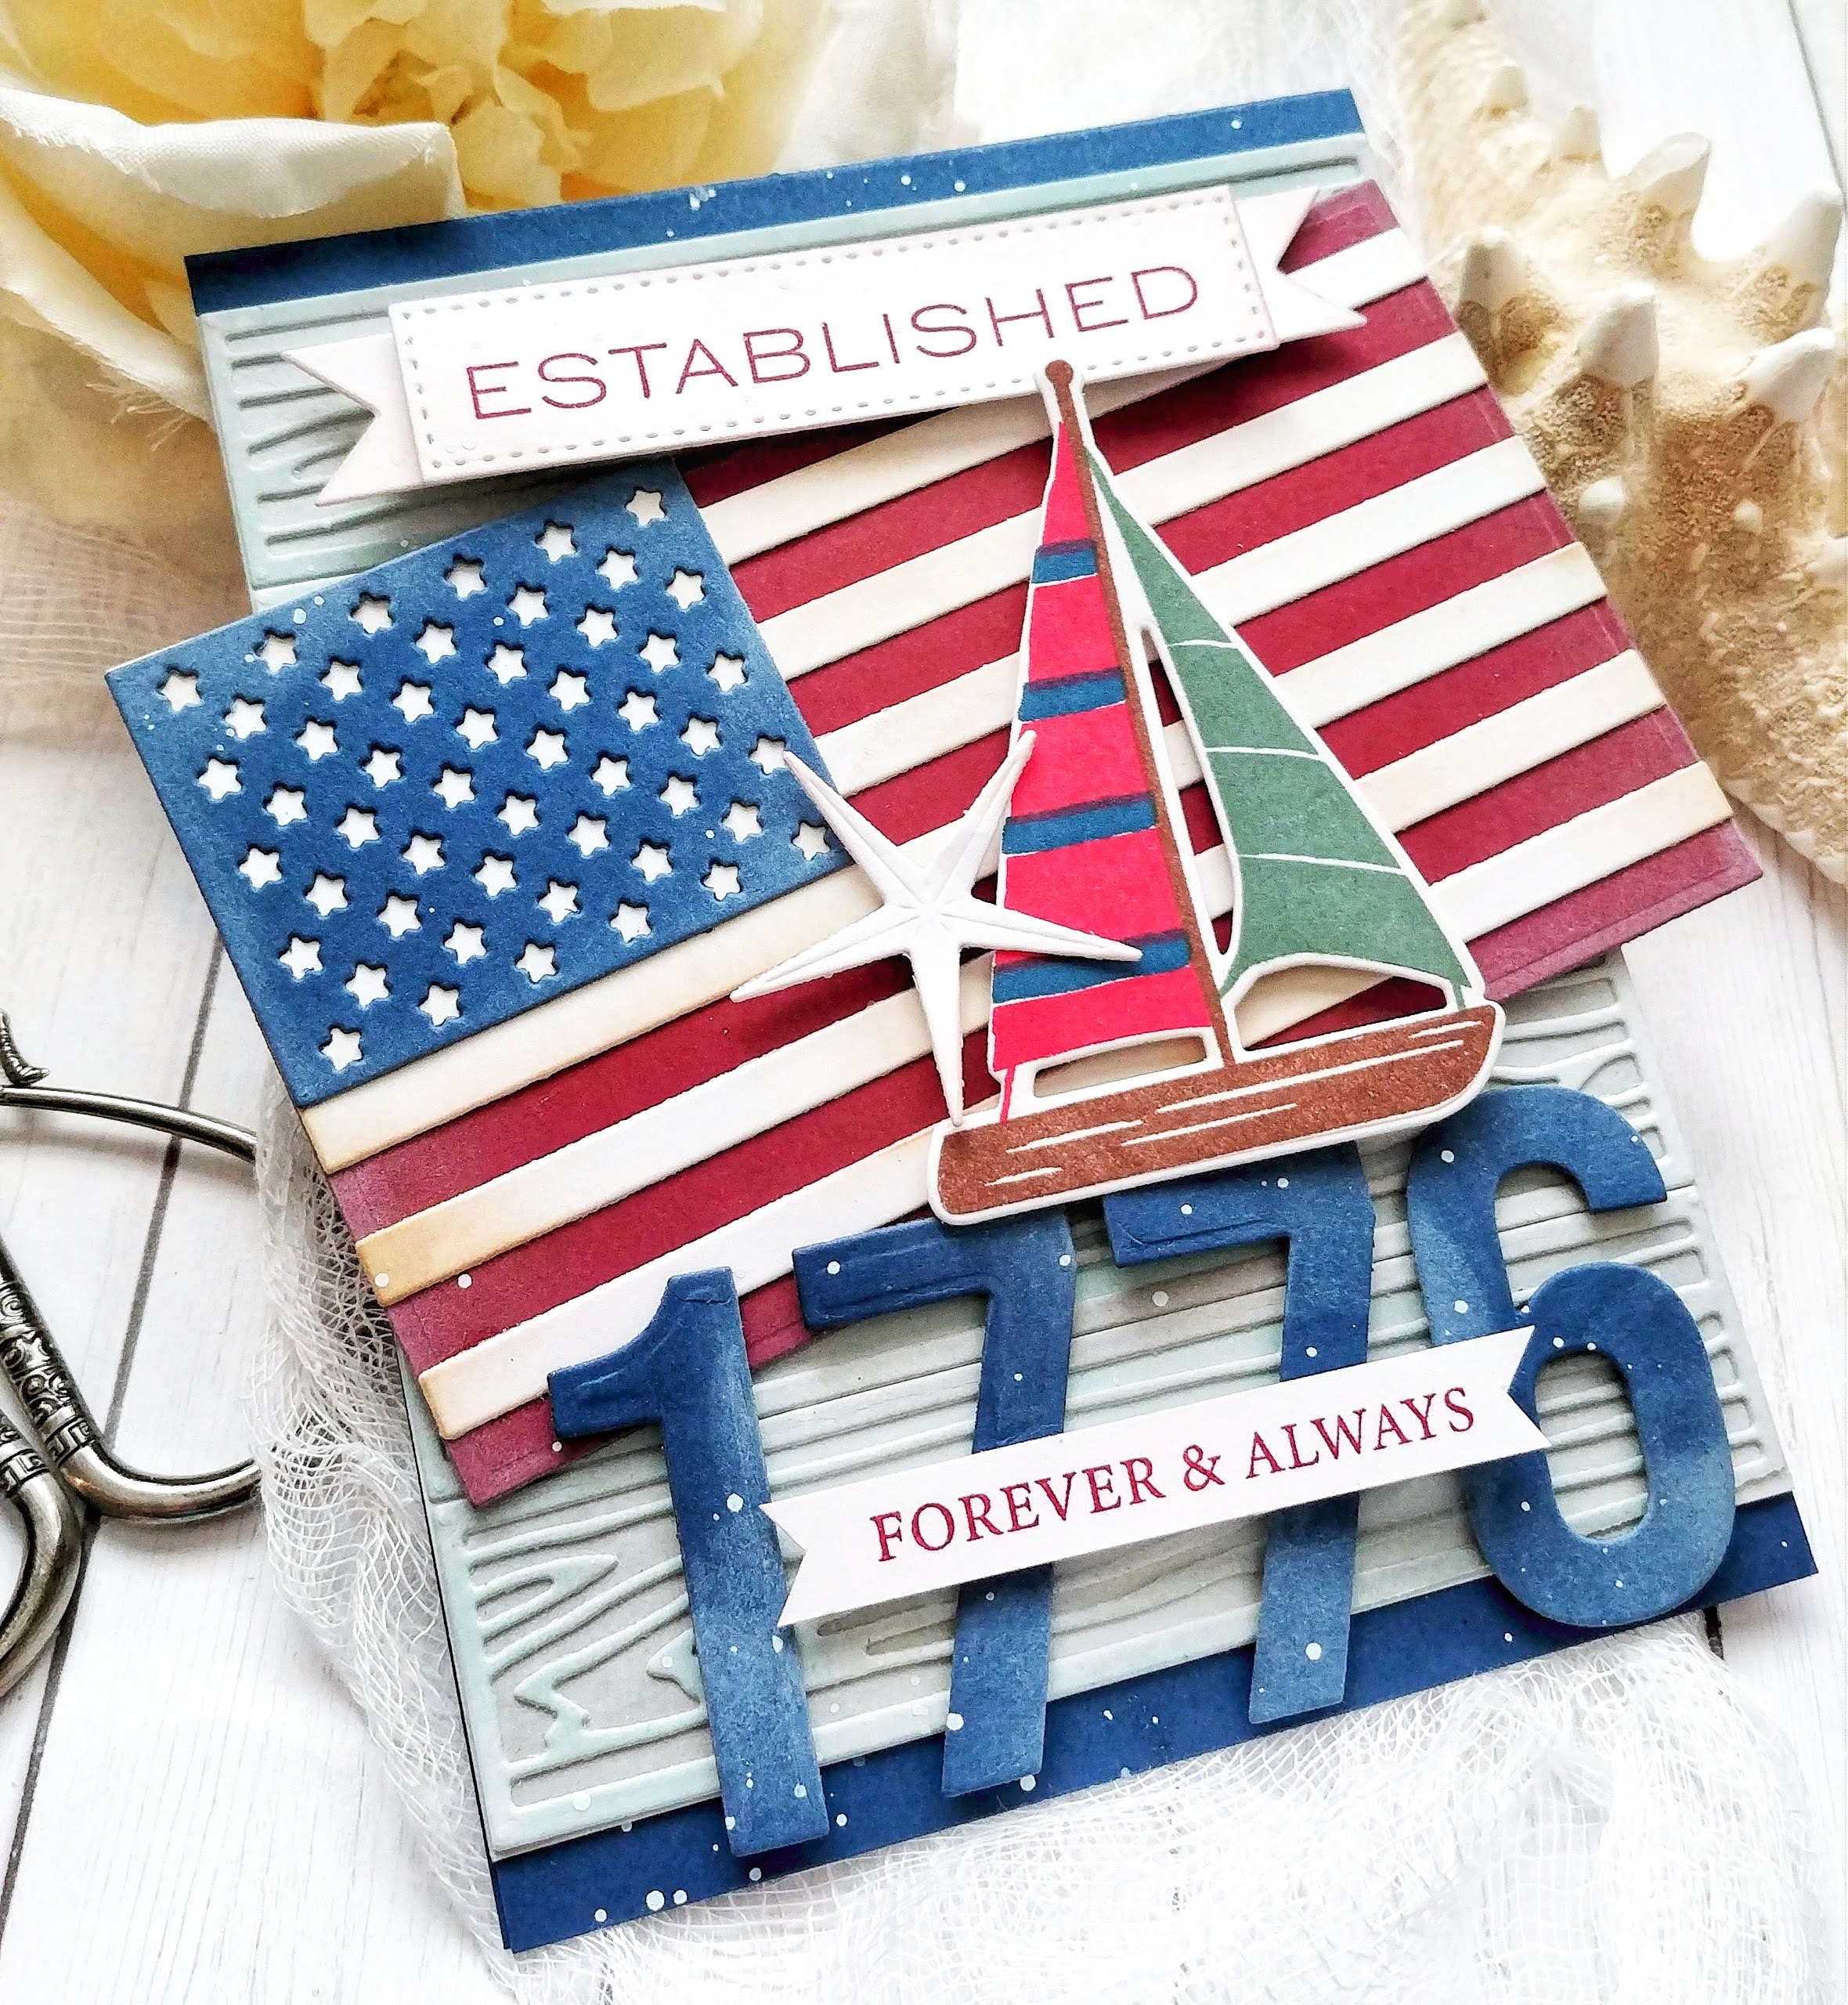
Three Cheers for the Red, White, and Blue! Welcome to day 3 of the Ink to Paper May release countdown! I'm sharing two cards with you today using some fun new patriotic products to celebrate our freedom and those fun summer holidays! We're lucky in Utah that we celebrate two holidays in July both using the American flag and red, white, and blue! I've packed a lot of product onto this first card, but I was just having so much fun I couldn't resist!

My goal as I set out to create this card was to make something "Nautical Americana". I also wanted to create weathered and vintage pieces to capture the look I was going for. To begin, I created a 4 1/4 by 11 inch panel using assorted Distress Oxide inks to get the weathered wood look. Once the panel was complete, I die cut the wood pieces using the Woodwork Die. I cut the rest of the panel to measure 4 1/4 by the length of the 5 boards. I layered the wood pieces onto the panel using liquid glue.

I used the fabulous new Love to Layer: American Flag Dies to create the flag piece. I die cut the pieces using white, Scarlet Jewel, and Enchanted Evening cardstock. I added some Fresh Snow ink and a blender brush to the red and blue portions and some brown ink to the white portions for that true Vintage Americana look. 

I don't think I could have been more pleased that I had the option to add the fabulous "Established" sentiment to the card using the previously released Just Sentiments: Established Mini stamp set. I die cut the numbers using the Numbers Die to create the year 1776 portion of the card. The "forever and always" is from the new Perfect Pair: Commodities stamp set that was showcased yesterday! I had a sailboat left over from the release last month that was the perfect accent for this card. It is from the Seas of Life stamp set. This is the boat I was talking about on Monday that would look so cute with the Message in a Bottle dies! I finished it off with one of the new seashells and a bit of white paint splatter!

My second and final card for today uses the new To Die For Sentiments: God Bless America. I went for a less "in your face patriotic" feel for today's card, but I just love how it turned out!

As you can see, I just can't seem to get enough of these blooms and used them to accent this summery card.

I love this bloom in particular because the colored pencil fits perfectly into the built in grooves of the petals so you can add additional pencil details effortlessly.

I die cut the "God Bless America" piece twice: once from textured gold cardstock and once from white and then glued them together to create a sturdier piece. I layered it across the frame that I created using the Border Bling: Twinkle die. I added the flowers and leaves around the frame here and there and then finished it off with another "forever and always" sentiment that has been heat embossed and some glitter!

This finishes up the countdown for day 3! Join me again tomorrow for the fourth and final day of the countdown with all products going on sale on the 15th at 10 PM ET. Thanks for fluttering by!


Sunday, January 17, 2021

Ink to Paper January Release Countdown Day 2


 Welcome to Day 2 of the Ink to Paper January release countdown! I'm sharing two cards today for even more festive inspiration! Up first is a floral birthday card using the new Vintage Flair and Vintage Flair print stamp sets!

I wanted to embrace the vintage feel of both of these new sets so I chose soft, muted colors to evoke a sense of nostalgia and of days gone by! Can't you just smell your grandmother's perfume or maybe hear her laugh or sing from a distance? I loved listening to my grandma hum as she worked in the kitchen cooking all of her delicious dishes!

Anyway...back to the card, ha ha! I heat embossed the Vintage Flair Print background using white powder onto a white panel. I used Aqua Mist and Hawaiian Shores ink to add some color over the top of the panel. I also used some Hawaiian Shores ink splatter for added detail. I set that aside to work on the terrarium and flowers.
The terrarium is made up of 3 parts...the main large piece, the bottom or "floor" of the terrarium and the thin edge at the back to create the dimensional look. I heat embossed all of the pieces using gold powder. I glued everything together, but didn't glue the top of the "floor" to the main terrarium piece. I knew I would be using the vase inside and wanted to be able to tuck it in the right spot without having it glued down. I stamped the flowers, leaves, vase, and finials. Once all of that was done, I was ready to put my card together. I added the terrarium carefully using strategically place foam squares for dimension. I carefully tucked the vase inside and secured it with additional foam squares.
I had fun adding the flowers, leaves and finials here and there to add extra visual detail. The finishing touch is some Gold Drip Drops ( I gave you fair warning yesterday LOL!). I might have gone a little bit overboard with them, but sometimes vintage style included a little bit of gaudiness, am I right? ha ha! The entire panel is added to a Hawaiian Shores top folding A2 card base using foam squares, but before I did that, I added the gilded edges. This is such an easy way to add some vintage charm to your cards. I simply ran my Versamark ink pad over some of the edges of the card base, sprinkled gold embossing powder and then heat set it. It adds just the right finishing touch.
My second card is more playful and traditional. It uses the new Big Balloons/Big Balloons Sentiments/Big Balloons Coverplate and coordinating stencils! Whew, that's a mouthfull!
I die cut the Big Balloons Coverplate from Hawaiian Shores cardstock and then added the balloons from the Big Balloon stamp set over the top. I used some of the fun accessories, like the bows and flowers to accent the design.
The balloons are created by die cutting the two balloon circles and then adding ink blending around the edges. The largest blue balloon uses one of the stencil sets to create the dots. I also used the "Celebrate" sentiment from the Big Balloon stamp set to stamp directly onto the big balloon.
I added more drip drops AND some glitter for some festive shine! The sentiment at the bottom is from the Blossoming Branches stamp set. Thanks for fluttering by!


Friday, September 25, 2020

Keeping Christmas {It's the MOST wonderful time of the year!}


Hello and welcome! It's the 25th and that means that it's time for the Keeping Christmas Blog Hop! Christmas is exactly 3 months away and the countdown is on! I have two different projects to share with you today. Up first is a set of vintage Santa tags using a new Santa stamp that I got from Amazon this week! Before I dive into the details, here are the links to the other designers' blogs! I can't wait to see what they've been up to!

Kelly Lunceford (Creator)


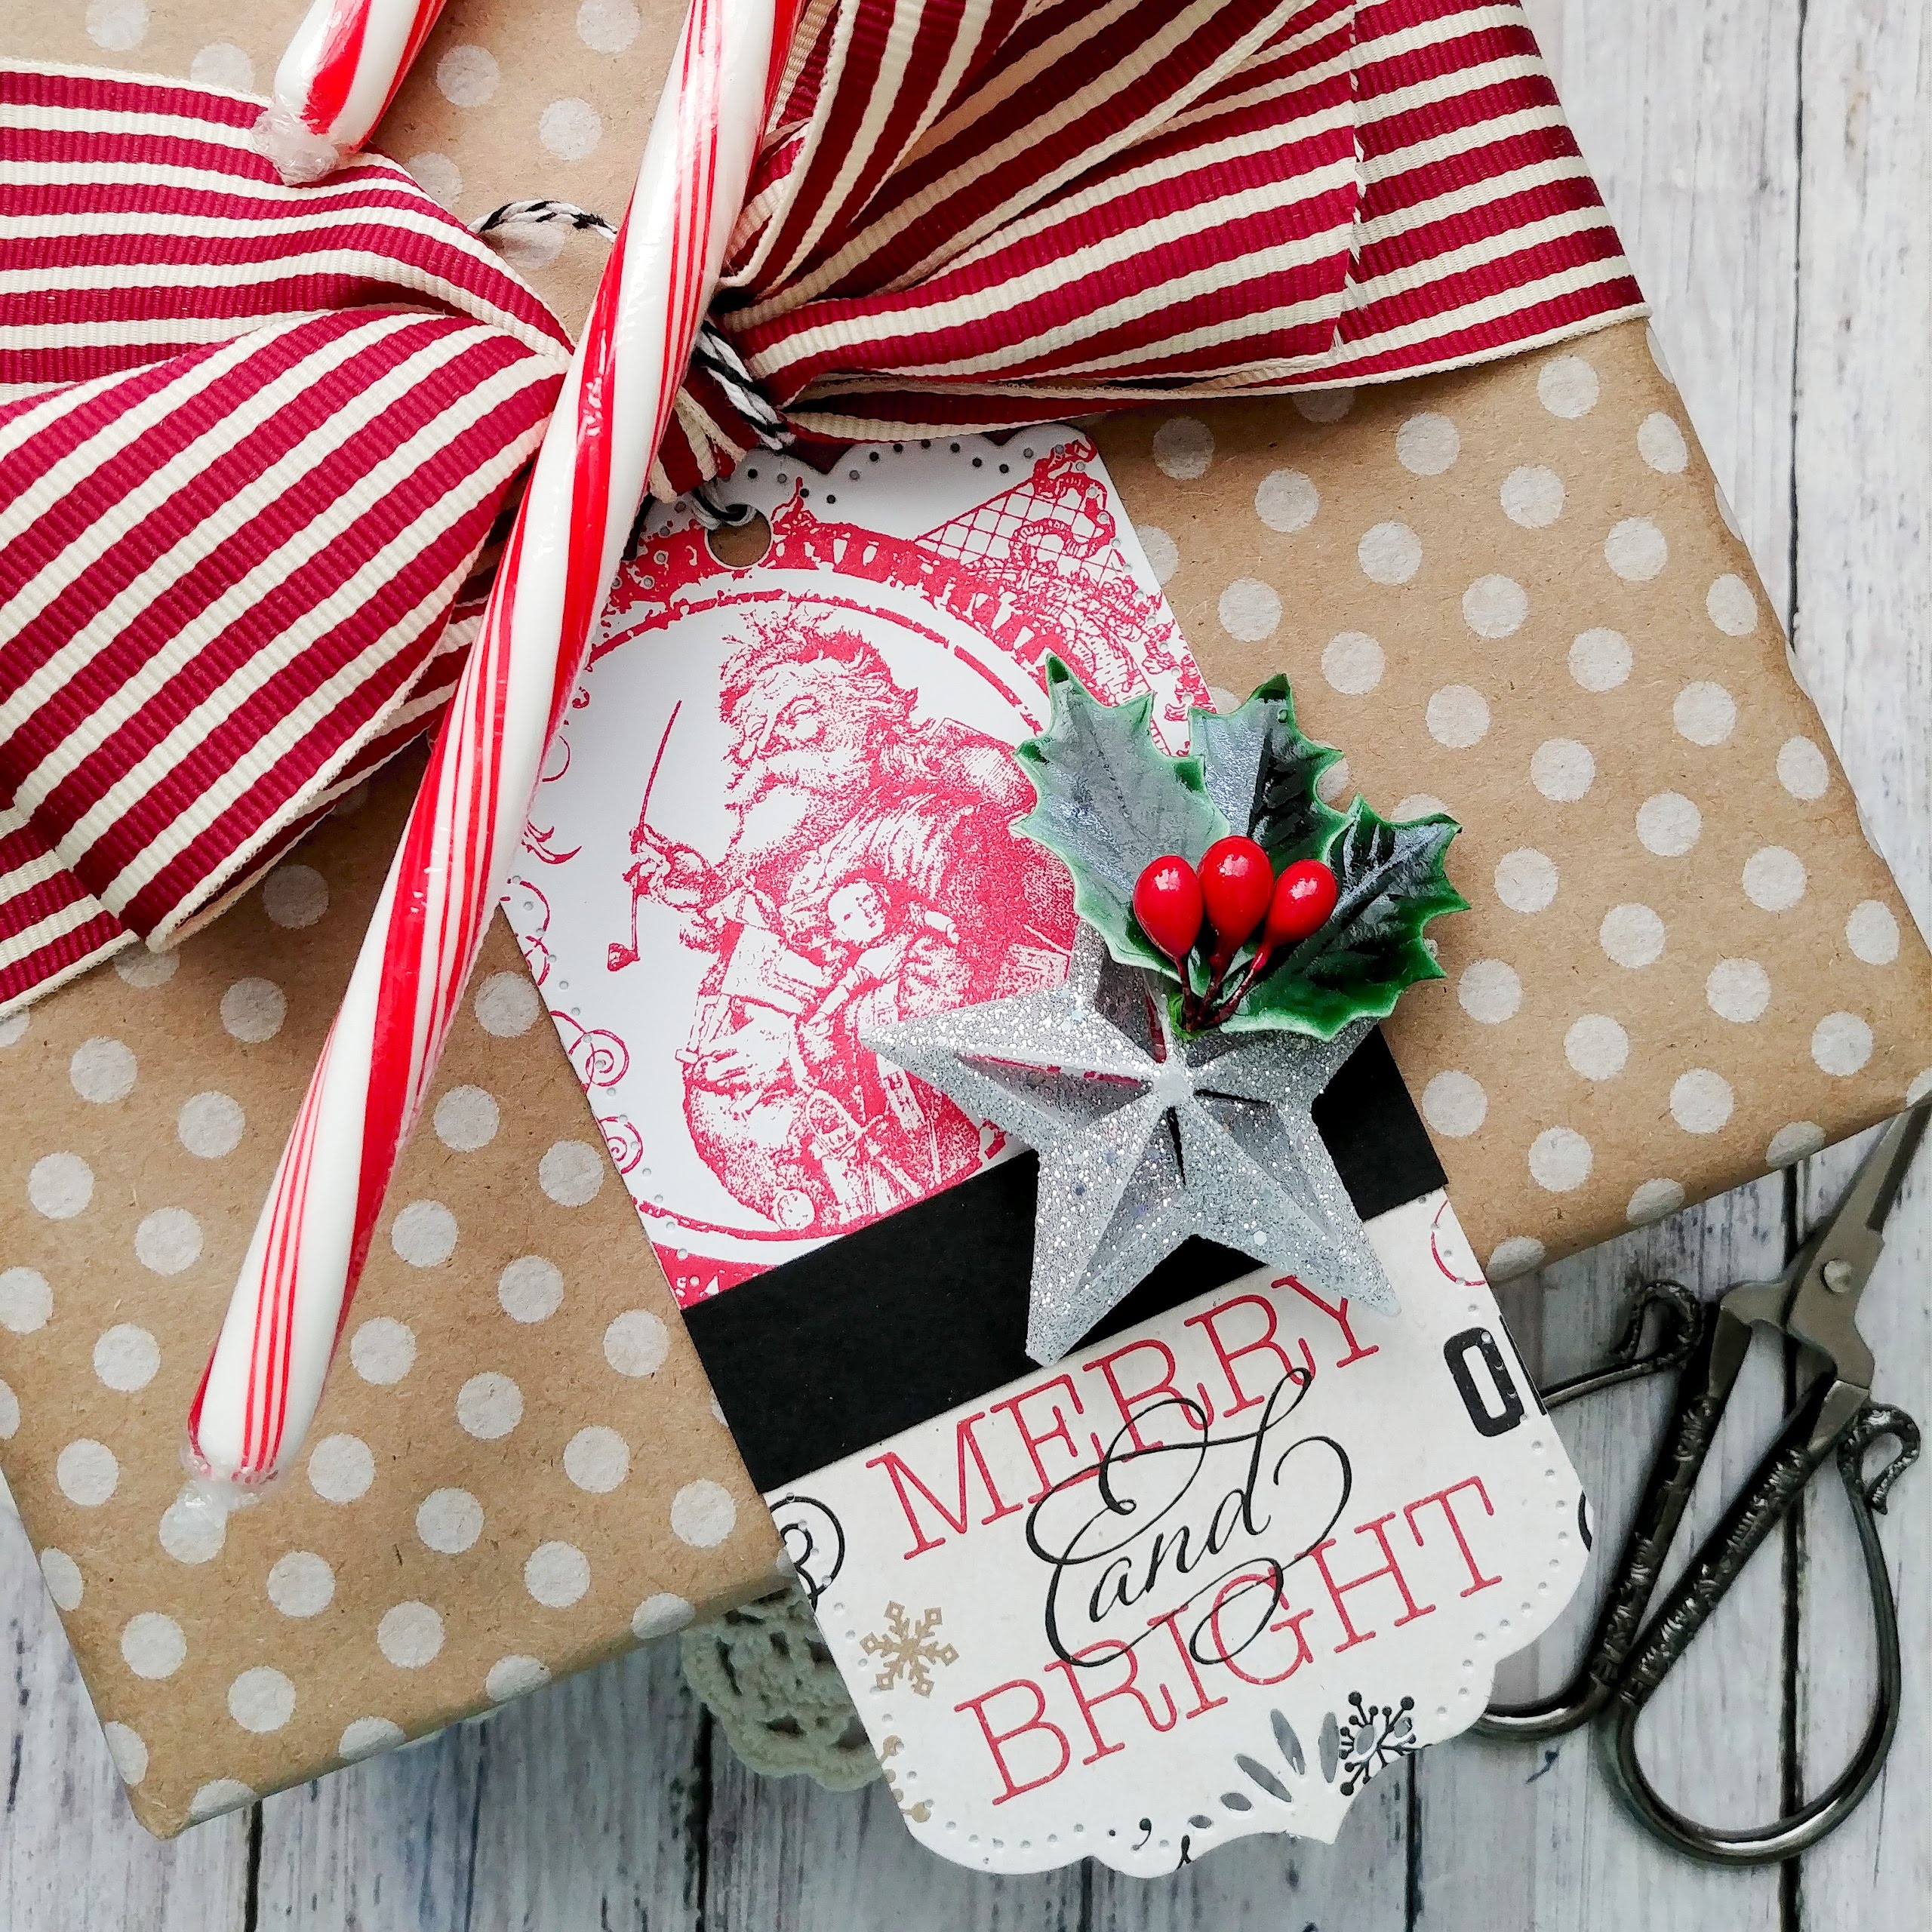
It is from the Deep Red stamp company and I just love how nicely it fits onto these large tags! You can see it HERE. It is quite a large image, but I chose to just use a portion of it on today's tags. 

I die cut three of the Basic Bookmark 3 die out of white cardstock and then stamped the Santa image in Pure Poppy ink. The bottom portion of the tag is die cut using the same die, but this time out of pattern paper, making sure to line it up with the sentiments I wanted to use.

I added a strip of black cardstock where the image and the pattern paper meet. I rummaged around in my Christmas embellishment collection to unearth these fabulous glittery stars!

I added them to the tags using hot glue as well as the holly sprigs that I use so much! I quickly perused the Christmas section at Hobby Lobby the other day and didn't see that they had these in stock yet! I sure hope they carry them again this year...they are one of my favorite go-to embellishments for Christmas crafting!

My next project uses scraps left over from last month's Keeping Christmas post. I have quite a few left over and I thought I'd put them to good use by making some little favor boxes using the Favor It Box 4 die collection.

I also used the Scalloped Tag Collection for the tags all decked out with trees, candycanes, wreaths, snowflakes and gingerbread boys!

I made 5 of these in total, but really could have kept going with all of the scraps I have! I'm planning on using these to fill with a little lotion, lip balm, and sweet treats....most likely a vintage foil wrapped Santa! I think he would be so cute peeking out of the top!

I tied the tags up with some Pure Poppy Baker's Twine and then added the tags using foam squares. I felt this was much easier than trying to tie the twine around the handle of the bag. This ensures that the tag will lay exactly how I want it! LOL!

The sentiments are heat embossed in white onto the tags using Ranger's White Detail embossing powder. This my favorite white powder!


I'm excited to add these to my stash of Christmas creations! This is the time of year where I take inventory of what all I have. Once that is done, I can see which areas need a little bit more attention! I've been a cardmaking machine these last few months with all of my design team commitments, so I think I'm set on cards! Tags are always my favorite! Thanks for fluttering by!


Thursday, February 21, 2019

Inspired By...Time to Write!

It's time for this week's Inspired By Challenge and it is a fabulous one! I sure hope you get a chance to play along! One of the reasons why I am so excited to be a part of this challenge is because I am able to use a lot of supplies that I don't normally get a chance to use! I love creating vintage designs and I don't make them nearly enough!

I was inspired by the frame, the little clock, the flowers and of course the vintage postcards. 

I've had these paper frames for YEARS...I think the copyright on the package said 2007 and I don't think I've used a single one! It was the perfect starting to point to start gathering papers and bits and bobs to add to my card. The paper pad that I used is called "Something Blue" from Prima Marketing and I picked it up a handful of years ago at Hobby Lobby, but I'm pretty sure they still carry it. I layered some of the papers together and added some machine stitching along the edge.

I used an envelope template to create the tiny envelope. I stamped the "1st class mail" image, which is from a retired PTI set, on the front flap. I also stamped some postage stamp images that are from the same set and used the Postage Die to die cut them.

I added some crinkled ribbon, a tiny clock, some tulle, and a paper flower. I tied the ribbon in a bow and then used my heat tool to get it to crinkle like that. It is one of my favorite things to do on my vintage designs. The tulle is gathered and secured using a decorative pin with the end snipped off using wire clippers.

I added a few sparkling clear rhinestones here and there for sparkle. I also spritzed it lightly with shimmer spray. I hope you get a chance to play along. I love seeing what you come up with! Thanks for fluttering by!

Thursday, January 31, 2019

Inspired By #57 {Just my Type}


Hello, friends! It's Thursday and that means that there is another awesome Inspired By Challenge for you to play along with! If you haven't started your Valentine's Day cards yet, or if you're just finishing up, this is the challenge for you! It is chock full of Valentine-y goodness that is sure to spark your creativity!
I just love all of these different home decor signs that really get the creative juices flowing! For my design, I chose to use the framed piece with all of the red hearts. I also used the vintage-y inspiration from the bike piece and added in the typewriter. I almost just made a bike card, but that felt just a hair too literal! ha ha!

 To begin, I grabbed a 6 by 6 paper pad of vintage inspired papers and got to work punching out an assortment of hearts. I punched enough to make three rows of 4 hearts double thick. Once I had them arranged how I wanted, I used a ruler to make pencil lines on a piece of scripted paper from the same pad so that I could arrange them in a straight line as well as sew them that way! LOL! I used a 2 way glue pen for the bottom heart, making sure I didn't put any glue near the center; I didn't want to gum up my needle. I began sewing in the "needle down" position so that I could arrange the heart perfectly on top. The presser foot moved the top heart out of place since it wasn't glued down, but I simply lifted the presser foot with the needle down and then arranged the heart. I did this row by row until I was finished. I really like how it turned out.
Once they were all stitched, I "fluffed" the top heart up so that it gives the card the dimension I was hoping for. I trimmed the long threads, but kept the tails for some added detail. I'm kind of obsessed with these cute little vintage hearts, so don't be surprised if they make their encore performance before the 14th rolls around! LOL!


 I stamped the "Happy Valentine's Day" sentiment along the edge using black ink. I just love the vintage font! It pairs so well with the papers that I chose for today's design! The typed piece that is coming from the typewriter is from the newly released Vintage Type stamp set. There are a lot of words embedded in the text, so I chose to use a piece that had "love" on it. I used my color spritzing tool to add some black splatters across the top for some added interest.
 I adhered the typewriter using a double thickness of foam squares so that the hearts wouldn't lose too much dimension. I also added a few sparkling rhinestones here and there for some added shine. I also added a few squirts of shimmer spray over the top for a hint of sparkle. I plan on giving this card, along with some goodies, to my sons' computer teacher. She always seems so pleasantly surprised when I bring seasonal treats and gifts to her. I think the "specialist" teachers have a tendency to get forgotten. 
This card was such a joy to create; I had so much fun with the papers, the sewing and overall vintage feel. I used to make vintage cards ALL the time, so it is nice to revisit that style every once in a while.  I hope you get a chance to join us this week over at Inspired By! Thanks for fluttering by!