Showing posts with label emboss resist. Show all posts

Tuesday, March 11, 2025

Hugs {Stronger Together}

One of the sweet gals that follows me on Instagram asked if I would be willing to make her sister, who is suffering with cancer, a card! Of course I said yes and got to work making a card for her and another to add to my stash! These two cards are actually similar to another pair I made a few years ago, but this time I chose cool tones to change things up.

To begin the pair, I first used the retired Modern Floral stamp/die from Pinkfresh Studio. I added some additional detail by using color pencils on the leaves and the larger blooms, and a white get pen on the small, darker flowers.

I heat embossed the background using white powder on a white panel and then added the ink around the edges. I die cut the panels out using the Essentials: Stitched Rectangles Die. I really like how nicely the finished edges look!

 I die cut the letters I would need for the YOU sentiment using the Jeff Alpha Die; this is one of my favorite alphabet dies! I die cut them from white cardstock and then added the purple ink using a blender brush. I layered the bouquet using foam squares, used a t-square ruler to place the letters properly.

Both cards feature a heat embossed sentiment; the previous sentiment is from the Simply Sentiments Hello and this one is included in the retired Modern Floral stamp set. I used gold to give both cards a touch of warmth.

I strategically added small dots of glue to the back of the embossing and then added it to the top of the letters.

I had a few bows that were sitting on my desk from a previous project, so I added one to each of the bouquets. A generous spritz or two of shimmer spray, a trio of sequins, and a white card base finishes off the pair of cards. Thanks for fluttering by!


Thursday, February 10, 2022

Papertrey Ink Flash Sale {Let's Celebrate You}

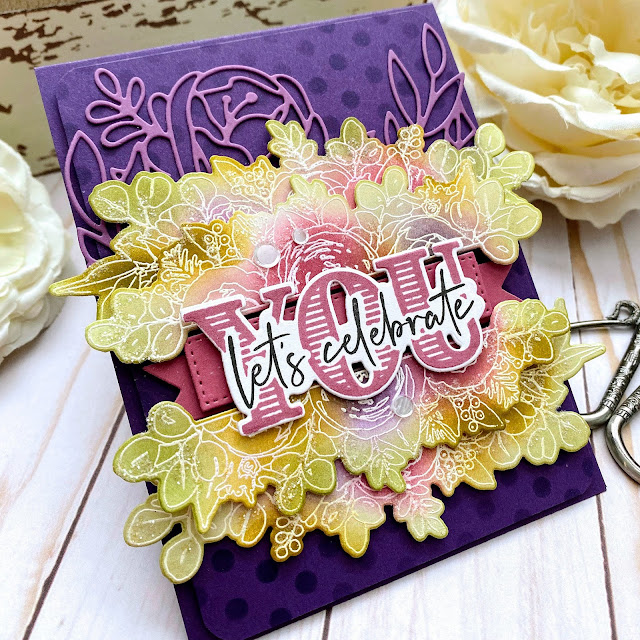
Hello and welcome! I’m here today to share my card for the Papertrey Ink Flash Sale! I tried really hard to pick colors that I don't normally use to give you some fresh cardstock and ink choices on the sale! I think I mentioned in a previous post that I needed to do some re-inking of my inkpads. I sat down last week and got that done, but it made me realize how many colors of ink I don't use very often.
It was easy to bring in a lot of color for this card since I chose to use the beautiful Framed in Florals Stamp Set. To begin, I die cut two of each of the floral bunches using the Framed in Florals Die and then stamped them using Versamark ink. I heat embossed the images using white detail embossing powder and let them cool.

I used mini blender brushes to add all of the different colors of ink: Ripe Avocado, Olive Twist, Lavender Moon, Plum Pudding, Saffron Spice, and Autumn Rose. I love the emboss/resist technique and I love how it turned out on these floral bunches.
Next, I cut a 4 by 5 1/4 inch panel of Royal Velvet cardstock and added the polka-dots using Royal Velvet ink and the Stencil Basics: Dots stencil collection. I rounded the corners using a corner rounder punch for a soft edge.

I used the On the Border: Floral Bliss Die to die cut the Plum Pudding border piece at the top. I glued it near the top and then layered the floral bunches using foam squares.

I used the Mash-Up Birthday die to die cut the sentiment portion and then used my mini MISTI to stamp the sentiments; the YOU using Autumn Rose ink and the "let's celebrate" portion in black.

I also die cut a banner using the Banner Builder Basics from Autumn Rose cardstock and nested it between the two floral bunches. I added the sentiment over the top using foam squares. I added some glitter and sequins to finish it off and then added it to a top folding A2 Royal Velvet card base. Thanks for fluttering by!


Thursday, April 15, 2021

SMILE {I didn't forget your birthday}


 Hello friends! I'm over on the Pinkfresh Studio blog sharing a birthday card using one of my favorite techniques: Emboss Resist! I decided to give it a try paired with stencils and I have to say that I love the results! To begin this design, I used the Floral Focus cling stamp to heat emboss the image using white powder. Once that was done, I used the coordinating Floral Focus layering stencil set to add in all of the bright colors!

Once the panel was all finished, I die cut around the edges using the Essentials: Stitched rectangles dies. I also took a risk and cut that Circle in the lower right corner of the embossed panel to use as anchor point for the rest of the design elements. Thank heavens it turned out! ha ha!
I had so much fun embellishing the circle! First, I created the "smile" tag using the FABULOUS Mini Tags with Fillable Words using an inlaid die cut technique to get the glittery letters! Of course that also meant a glittery bow was needed! I love creating these bows from glitter cardstock because it is so forgiving!
I also added a bit of the same glitter cardstock to the edge of the tag. These tags are perfect to use with pattern paper as well because it has that cute fold-over detail!
The sentiment, which is from the Happy Birthday sentiments stamp set, is heat embossed in gold to accent the glitter pieces! The entire die cut panel is added to a top folding white card base using foam squares for additional dimension.
I had so much fun creating this card and I'm thrilled with how nicely the emboss/resist background turned out using the stencils! Thanks for fluttering by!

Thursday, April 8, 2021

Pinkfresh Studio {A Friendly Birthday Wish}


 Hello friends! I'm sharing this bright, floral birthday card over on the Pinkfresh Studio blog today and wanted to share it here as well! I've been wanting to use the new Joyful Peonies Cling Stamp since the release so I chose to use it for today's card! To begin, I stamped it using black ink and then added the color using the Joyful Peonies Layering Stencils. I chose to color the leaves using a combination of Ocean Breeze and Mermaid Cove ink and then the flowers are colored using Sparkling Rose and Raspberry Bliss ink. 

Once I had all of the stenciling done, I used the Joyful Peonies die to cut it out. I set it aside and got to work on the background. Since I only used a touch of yellow ink for the centers of the flowers, I thought it would be fun to bring in more of the yellow with a sunny background.
First, I heat embossed the beautiful Cling Rubber Stamp: Enchanted Blooms image using white powder. Once that was done, I die cut the embossed panel using the Pop Out: Sunburst Die. I left all of the pieces inside the die and added the Sweet Mustard and Marigold Ink directly over the die for the emboss/resist background. If you do this, remember to wipe the die after you're done. I added foam squares on the backside of the pieces, which were still intact with the die. I carefully laid a 5 1/2 by 4 1/4 inch piece of white cardstock over the top of the foam squares and secured them with pressure.
From there, I simply l lifted the die off of the panel and had perfectly aligned pieces! If your pieces fall out of the die, you can do this same thing, but just use the negative paper portion and you can line them up easily that way, too! I just got really lucky that they all stayed in place!  I added the floral piece over the top using additional foam squares. Note: I didn't end up using the circle portion from the center. I liked the airiness that was created by leaving that off.
A heat embossed sentiment from the Happy Birthday Sentiments and a bow finish off this design! Thanks for fluttering by!

Tuesday, March 16, 2021

Ink to Paper March Release Countdown Day 1

Hello and welcome to day 1 of the Ink to Paper March release countdown! I have a lot to share today using quite a few of the new release products! To begin, I have three cards using a fun new floral set called Prominent Petals! I've also paired these flowers with the new Dainty Deliveries Frame die!

To begin this card, I die cut the Dainty Deliveries Frame out of Lemon Tart cardstock and then layered it onto a panel of the same cardstock using liquid glue. I added the largest Love to Layer: Scalloped Circle die cut in the center and then the medium doily die cut from the Delicate Doilies to use as an anchor for the different colored blooms and leaves!


The two sentiments are from the previously released Lush Bloom stamp set and they are stamped in black and then added to the center of the floral cluster using foam squares.

Each of the flowers has an outline image and then different "filler" stamps for the petals, thus the name "Prominent Petals"!

There's also some of these fun circle clusters for you to add either background details or detail directly to the flower. I will showcase how to use them in a background on my third card today!

My second card for today uses the Dainty Deliveries Frame in a different way. I turned it horizontally onto the vertical panel using liquid glue.

 I chose to create some poppy type flowers for this design using red and black inks for a dramatic look!

The "sent with love" sentiment is also from the Prominent Petals set and I stamped it directly to the white panel underneath the flowers.

I added some black paint splatter over the top of the main panel using a paint brush.

You could also stamp the outline image using something different than black ink for a softer look.

I used the Nesting Basics: Pierced Rectangles dies around the perimeter of the white panel to add even additional detail to this simple design!

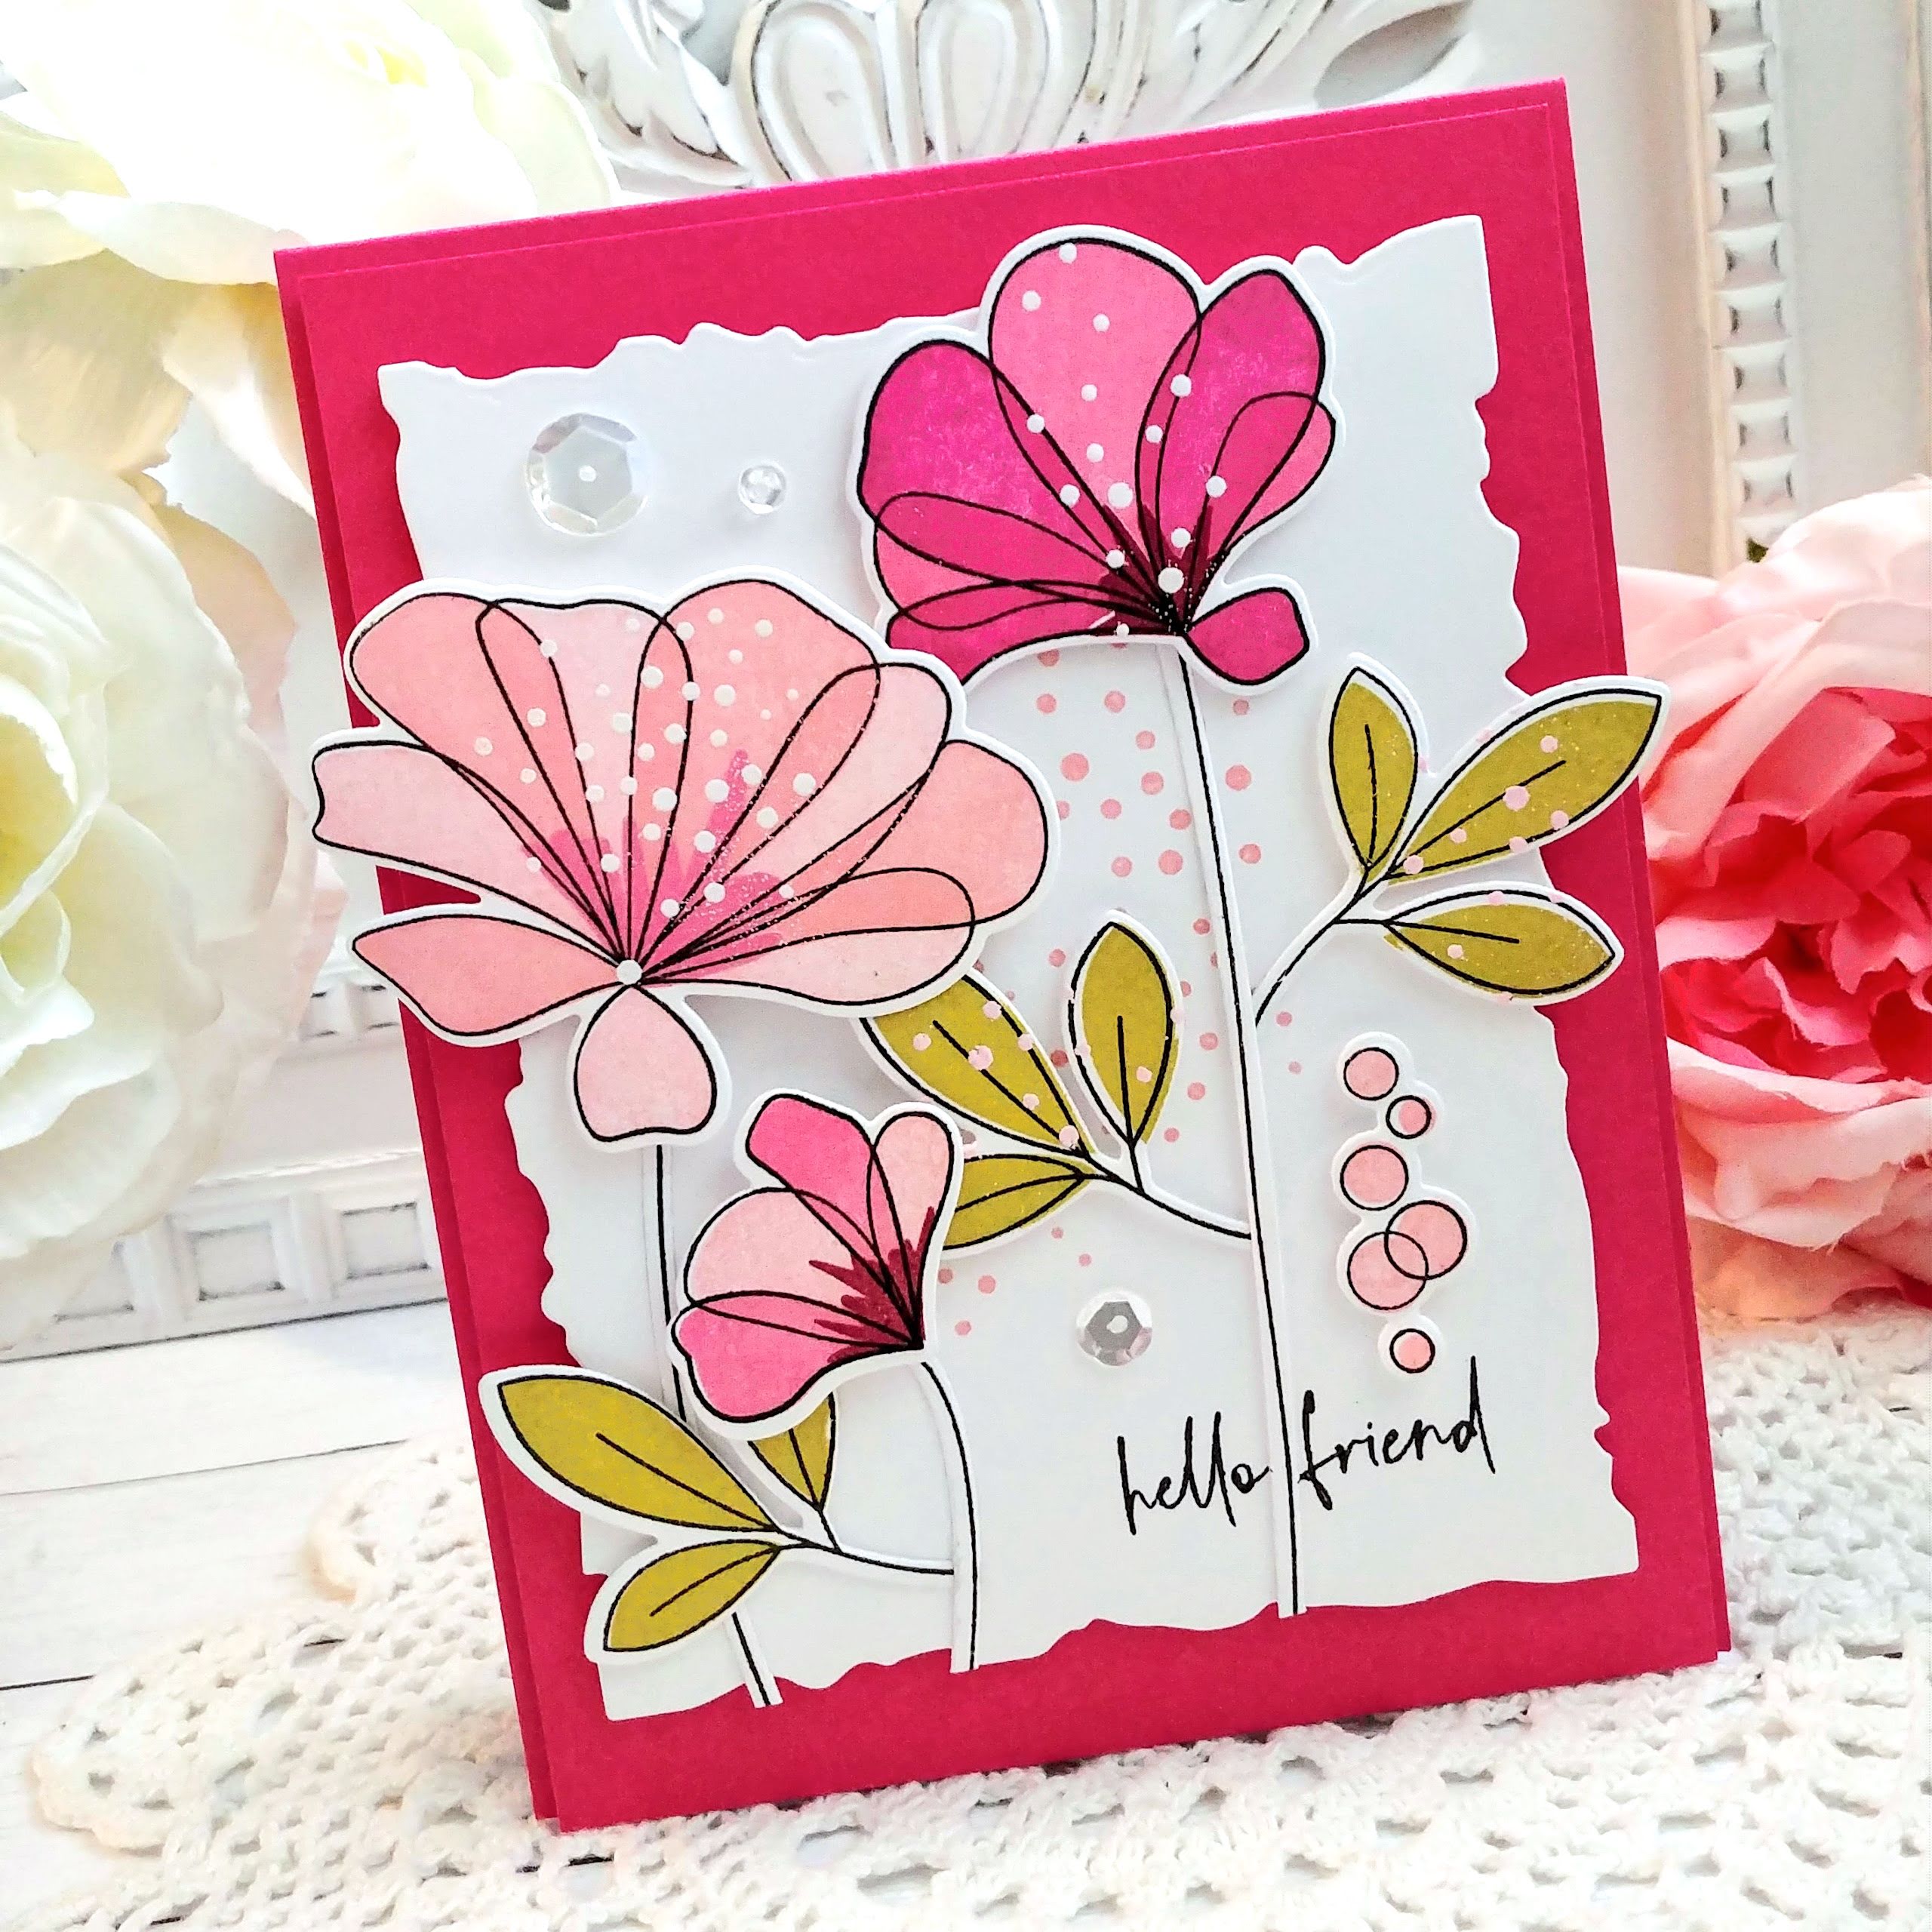
The idea for my third card using the Prominent Petals was actually from the "assembled examples" graphic for the stamp set. I really liked the layout and that it showcased all of the different images together!

I used white and pink embossing powder on the flowers and leaves to give the speckled portions more drama. You can also see how I added the pink portion to the background.

The flowers are all layered onto a panel that was die cut using the new Love to Layer: Torn Edges dies.

It really helps add some visual detail to the edges to keep the design moving!

This "hello friend" sentiment is also from the Prominent Petals stamp set and is stamped strategically between the stem! ha ha!

My 4th and final card for today uses the new "Flying By" stamp set paired with the Dainty Deliveries Frame. I chose to do some emboss resist with the butterfly for a whimsical feeling!

I added the color using blender brushes and then spritzed some water over the top using a spray bottle. I set it aside to dry and got to work on the background.

I added the same colors of ink that I used on the butterfly around the edges of a white piece of cardstock. I then layered the Dainty Deliveries frame over the top using liquid glue and a frame that has some blended purple ink.

I added the butterfly die cut to another one of the Love to Layer: Torn Edges die cuts with foam squares. I added some Hawaiian Shores ink splatter to the card front using a paint brush!

The sentiments are from the "Flying By" stamp set and are added using foam squares.  A few sparkling clear sequins finish off this design! I might need to add some shimmer spray before it heads to its new home! ha ha! Join me tomorrow for day 2 of the release! Thanks for fluttering by!


Thursday, January 14, 2021

Celebrating 13 FABULOUS Years and a GIVEAWAY!!!

Hello and welcome, friends! Today is a very special day...it's the 13 birthday of my blog! Can you even believe it? I can't! LOL! I'm so HAPPY to be here, all of these years later! There were years when I really thought that it would be the last, but my creative spirit has kept me going, even during those difficult "baby raising" years! The most wonderful thing about these past 13 years are ALL OF YOU! I have made such wonderful friends through this crazy paper crafting adventure and I wouldn't trade it for the world! 
So....in celebration...how about a little GIVEAWAY???? I'd like to give one lucky blog reader/Instagram follower a $100 gift certificate to the stamp store OF THEIR CHOICE!!! (U.S. currency only) You can enter BOTH places, but you MUST be a follower of mine on Instagram (please no follow and then un-follow later). I will be drawing randomly from ALL entries on both Instagram and here on my blog. Simply leave a comment letting me know what you have enjoyed here most over the years! That's it...easy, peasy! I won't be posting to Instagram until later in the morning since I am on MT, not ET, but it should be up around 7-8 a.m. The deadline for entries will be Sunday at 12 noon MT. 
And now...on to the cards!

I've created two almost identical cards that would be perfect for Valentine's Day. These cards actually had me thinking of all kinds of 4 letter words. NO, not those 4 letter words, silly! I'm talking about words like LOVE, HUGS, BABY, etc. I thought this design would work perfectly for a card for a baby girl, or a sympathy card using HUGS.

To begin both cards, I heat embossed the Enchanted Blooms Cling Rubber Stamp using white powder and then added the Passion Fruit ink over the top. It's been a while since I've done the emboss/resist technique and I felt it would be perfect for these two Valentine's Day cards. Once that was done, I die cut them using the Diagonal Stitched Rectangles dies. I love the polished, professional edges that it creates.


I die cut the frame using the gorgeous Fancy Oval Frame Die and then adhered it directly to the embossed panel using liquid glue with a precision tip. This set the stage to add the beautiful floral image from the Sending Love and Hugs Stamp Set. I stamped one with the lighter Fresh Pear ink and one with the darker Emerald ink. I layered two die cuts together for a more sturdy piece. This was the perfect platform to add the die cut silver metallic letters and a die cut bow

The letters were die cut twice; once from thick white cardstock and once from the silver specialty cardstock. I glued them together with liquid glue. The bow is secured with hot glue and then I added some glitter to it as well. I warned you about glittery bows, didn't I? ha ha!

The sentiment, which is from the Simply Sentiments Hello stamp set, is heat embossed in silver onto a strip of vellum. I secured it around the focal panel with tape in the back.

I thought I was going to like the one with the lighter green ink, but now I just don't know. This one has such a dramatic feeling with the dark foliage.

I added a few Jewels here and there. I reached for the pink ones, which you would think would be the obvious choice, but in the end I settled on the white ones. They pick up the pink beautifully, while the pink ones were giving this particular design a yellow look! Go figure! That's why it's always nice to play around with different options and don't get to "married" to a certain idea...let yourself enjoy the creative process and scrap an idea if it just isn't working! 
Once again, thanks so much for 13 fabulous years and thanks for fluttering by!