Welcome back for day 2 of full reveals for the new Autumn Air Collection from The Greetery! I have three new projects to share with you today using some products for Halloween and autumn! Make sure to head to The Greetery Blog for the "meet and greet" for each of today's featured products! Also, leave a comment here, and on each of the designers' blogs, for a chance to win one of two $50 gift certificates to the shop!
My first project for today uses the new Hey Honeycomb Halloween suite of products. I chose to feature the cute pumpkin with the orange honeycomb ball that's included in the new mix.
To begin this project, I started off by prepping the honeycomb pumpkin. I die cut all of the pieces for the pumpkin and then used the previously released Hey Honeycomb Basics Die for the flap that says "spooktacular surprise inside". That was stamped using the new Hey Honeycomb Halloween stamp set. I glued it to the side of the orange honeycomb ball and then glued it to the base of the pumpkin using the sticky portion and additional liquid glue for stability.
I really love the texture that the pumpkin has, so rather than covering that up (even though it will EVENTUALLY be covered up with the honeycomb ball) I chose to stamp directly onto that portion and add the sticky star. I used the Foam Adhesive Sheets for the sticky part.
Here you can see how cute it looks with the ball open! I used the Spring Frame Hot Foil and gold foil on a panel of Canyon Clay cardstock. I strategically covered up the tulips using leaves from the To Pie For Die!
The Happy Halloween sentiment is from the Tear Strip Tags Halloween Stamp Set and then I cut it out using the Tear Strip Banners Die.
My next project features the new Grateful Greetings stamp + stencil and die. I just finished reading The Funeral Ladies of Ellerie County and when I saw the Grateful Greetings stamp set, it totally reminded me of the cute cover of the book, so that was my inspiration!
I used Post-It Notes to cover up each letter as I inked them up in the different colors using finger daubers and distress oxide inks. I stenciled the shadow using the same color ink.
The stamp set also has the cute heart image and the cute floral cluster image. I picked the colors from the two letters that only were only represented once, pink and yellow, to stamp the heart and flowers.
I used the Fond of Foliage Background and antique linen distress oxide ink for the background. I added some ink splatter and stamped the companion portions of the sentiment.
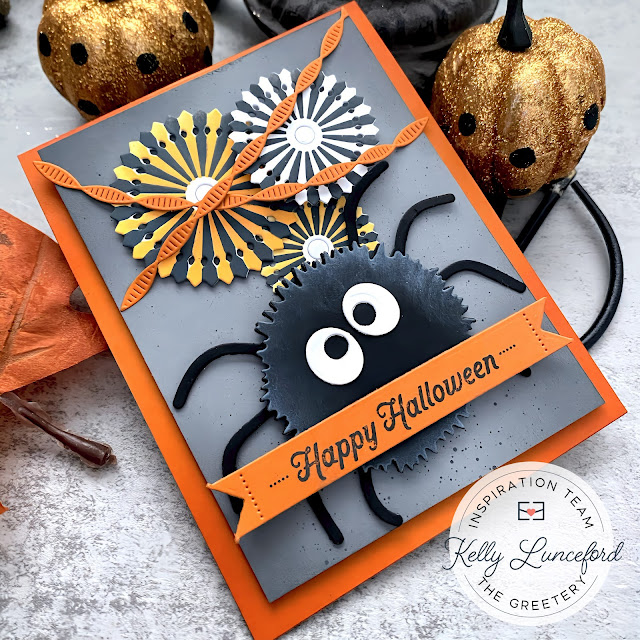
My final card for today and for the release uses the new Hey Honeycomb spider but without the honeycomb ball. These products are designed to be used with our without and I just love that!
It looks like my spooky spider is trying to crash a Halloween party. I used the Pinwheel Party Die and Pinwheel Party Stencil in black and orange for a festive look!
I also hung some Twisted Crepe streamers to add to the festive look!
The spider die consists of three portions: the eyes, the top fuzzy piece for the spider, and then the full body with the legs. This gives you all kinds of options to make your spider and colorful and spooky as you'd like!
This concludes my projects for today and for the release! Everything will be available for purchase beginning tomorrow at 10 AM EDT! Thanks for fluttering by!
Kelly (you are here)


