Hello friends! I'm thrilled and honored to be participating in the Hero Arts My Monthly Hero Kit Blog Hop! I've had so much fun working on these fun Christmas projects using this amazing new KIT! I'm afraid to admit that this is DEFINITELY going to be one of those go-to kits to pull out year after year for all sorts of projects! I mentioned in my last post that I haven't made a SINGLE holiday tag this year! What???? Anyway, this is the perfect kit to pull out, get cozy, and craft the day away!
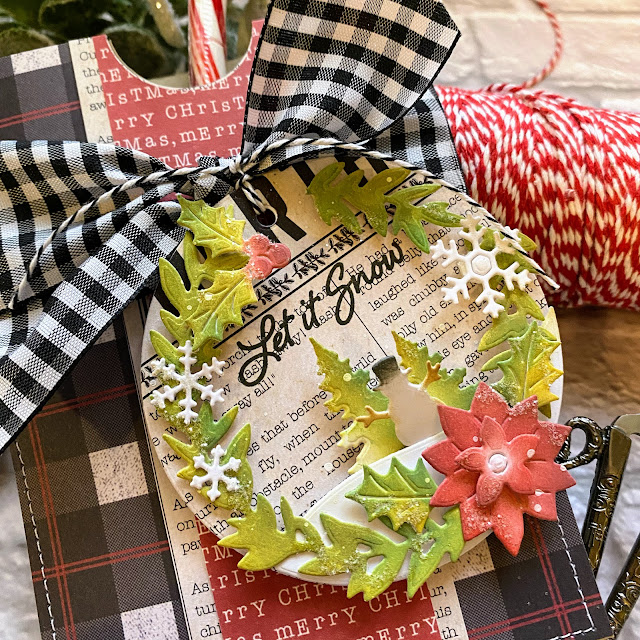
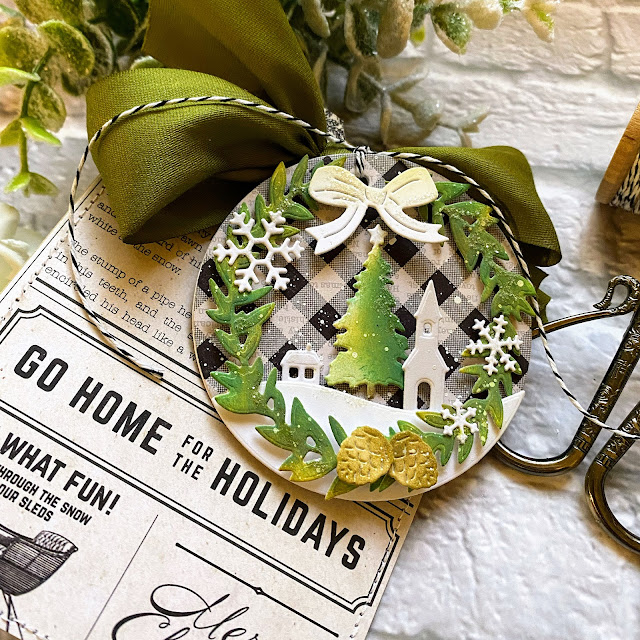
My project for today is one of my favorite gift packaging ideas that I've used for a few years now. I knew that the tag die and coordinating dies would be the perfect thing to accent these cute gift pouches! I went for a vintage Christmas feeling; something I love, but don't get a chance to do a lot of the time! I die cut EVERYTHING 4 times out of heavy weight white cardstock and then colored them using Distress Oxide inks and finger sponge daubers. I still have a BUNCH of die cuts left for many more projects!
I used pattern paper as the backdrop for each of the three tags, using small enough prints so that the scenes wouldn't be too busy. I absolutely adore the beautiful greenery dies that are included in this collection; just perfect to frame each tag and tuck here and there. I chose yellowish greens for all of the trees and foliage, but then added the bluish Pine Needles ink to make them come alive. I know I always say it, but I absolutely LOVE taking white die cuts and coloring them with ink to bring them to life!I made three tags to coordinate with each of the 3 pouches. I tied some big ribbon around each pouch and then added the tag using a bit of twine. Before I added the tags, though, I added some white paint splatter for a snowy look and some glitter, of course! I like to fill my pouches up with a Utah Truffle (mint, raspberry, etc.), a lip gloss and hand lotion from Bath and Body works, maybe a gift card (depending on the recipient), and a traditional red-striped candy cane poking out the top!
These are so much fun to make and the darling tags really make the whole project pop!! I can't wait to gift these to friends and family this year! Thanks for fluttering by!Kelly Lunceford (you are here)


I've never thought of using patterned paper for the sky. I LOVE it
ReplyDeleteBEAUTIFUL WORK, Kelly! You did a SUPER JOB on these little pouches & tags! They just make me SMILE! Off to check out the kit! LOL ;)<3
ReplyDeleteINCREDIBLE designs! I love the vintage feel and the papers!
ReplyDeleteYour tags look so vintage, pretty.
ReplyDeleteBeautiful blending and love the different backgrounds.
ReplyDeleteKelly, I love all the gift pouches and the beautiful decoration using the hero arts kit for nov 2022. Great job, and you make things so beautiful.
ReplyDeleteLove your projects! What is the “Go home for the holidays” paper line?
ReplyDeleteI love these! The patterned paper backgrounds are the perfect idea for these Old-Timey tags!
ReplyDeleteMarisela Delgado said: So beautiful! mariandmonsterd@yahoo.com
ReplyDeleteWow! Your cards are amazing! I love the patterned paper on the backgrounds, so many beautiful details and dimension!
ReplyDeleteFantastic to see you in the line-up, Kelly!
ReplyDeleteLove your spin on this months' kit!
You always have such wonderful paper to accent your projects!
Thanks for your wonderful inspiration.
The backgrounds complement the arrangement with colors & dimension.
ReplyDeleteMelissa
"Sunshine HoneyBee"
Wow!Your projects look great and fun! Thanks for sharing how you created the tags for the holidays!
ReplyDeleteFabulous projects! I love the classic and rustic feel to your designs!
ReplyDeleteBeautiful details on your awesome tags! Love the scenes and the background papers! Fabulous colors!
ReplyDeleteWhat terrific tags! Perfect for gift giving and so detailed! I made special tags a couple of years ago, a different design/color scheme for each family member. We're big on recycle/reuse so they have been used each year.
ReplyDeleteSuch gorgeous tags. Love the designs.
ReplyDeleteThanks for sharing.
I love everything you make. You have such creative vision!
ReplyDeleteLove what you created!
ReplyDelete