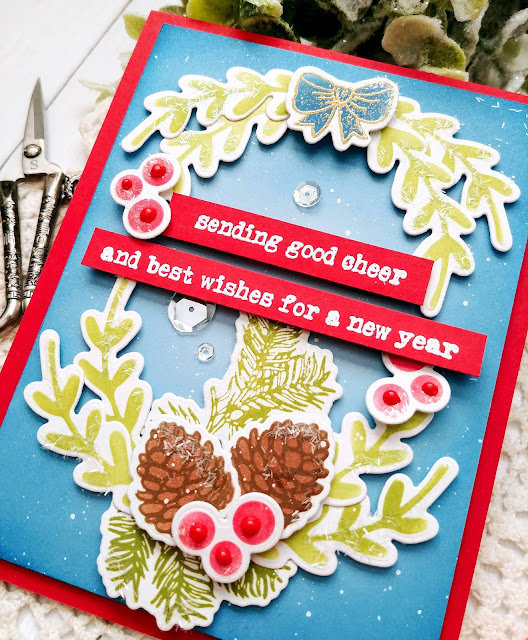
I'm still busy as a bee creating all kinds of holiday/Christmas projects! How about you? Have you started your holiday crafting yet? I'm sharing a card and a couple of tags using the Wendy Vecchi Warm Wishes Stamp/Die/Stencil set. If you saw THIS project, you might have remembered me saying that I did the die cutting and stenciling in an awkward order...I remedied that for this project! ha ha!
Some of the images are "stenciled only" and some are stamped, stenciled, AND embossed! I'll explain how I created all of the images and what inks I used as well! To begin, I stamped the line art images, such as the bow, the holly, and the poinsettia. I actually stamped them first in Watering Can Archival ink, making sure to keep the images in my MISTI for the embossing step. THEN I did the stenciling, and put the sheet back into the MISTI to stamp again using Versamark ink to do the gold embossing. Hopefully that makes sense. I just didn't want to do the stenciling on top of the embossing, so I did that step later.
The bow is stenciled using the Bluebird Blendable ink pad ( I also did one in red for one of the tags) . The arced greenery is all stenciled in Fern Green Blendable Ink as well as the holly (used on the tags). The pine images are stamped directly with Fern Green Archival Ink and they don't have any stenciling.
The outline of the pinecones are stamped in Acorn Archival Ink and then stenciled using Potting Soil Blendable ink. I absolutely love this particular color combination for the pinecones and feel that it gives them a very realistic look!
The two sentiments, which are included in the Warm Wishes stamp set, are heat embossed using Super Fine White Detail Embossing Powder. This is my go-to embossing powder especially for sentiments because it is so fine! It really allows you to keep the integrity of the image without making it chunky or altered in any way!
The holly berry images are stencils only with coordinating dies. I added some Carnation Red Liquid Pearls to each of the berries in varying sizes and placement for a more realistic look. I added some Tinsel glitter to the stamped/stenciled images for some snowy detail.
The focal panel was created by blending some Bluebird Blendable Ink around a piece of Spring Rain cardstock and then I added some white paint splatter over the top.
The entire panel is added to a top folding A2 card base using foam squares for dimension. I cut the focal panel a little bit smaller than I normally do so that it would have a larger red border around it. A few sparkling clear sequins finish off this design!
I had a lot of images left over that were just begging to be used, so I decided to create a few tags using the same colors and supplies to create two cohesive tags.
This tag features the poinsettia image as well as the holly that I didn't use on my card.
The tags use another one of the fun sentiments included in the stamp set. I love the typewriter look that these sentiments have.
You can see the red bow on the tag on the right. I really do love how nice the blue bow looks, if I'm picking favorites!
As I mentioned earlier, I used Tinsel glitter, but in all honesty, I thought I was grabbing my crystal glitter, but I really like how this looks in the end!
I'm getting ready to pull all of my Christmas projects out of storage that I've been working on all year. I plan on putting a long table up and sorting everything by category so when I'm getting ready to do my wrapping/assembling, everything will be visible and at arm's length! Thanks for fluttering by!


Being the second Wendy Vecchi post you’ve done recently, I was curious so I checked them out. I didn’t know they created a blendable ink and I love the blue & browns too. I’m always amazed at your vision when I see a stamp set and the gorgeous cards and tags you create. A simple thank you doesn’t begin to show my gratitude for of ALL your help, all year long. I can only imagine how gorgeous your long table will look! Have lots of fun and a very Happy Wednesday! 😊💖
ReplyDeleteThank you so much, Stephanie! You're so sweet!💓💓💓
Delete