Monday, November 30, 2020

Papertrey Ink/Ink to Paper Flash Sale {A Little Wispy}

Happy Monday, friends! I'm sharing two cards today for this week's Papertrey Ink/Ink to Paper Flash Sale! My cards use a lot of warm tones and gold embossing to highlight the A Little Wispy stamp set! I love that this set has coordinating dies for the large sentiments to allow for creative placement.  The sale will run from today at noon until Wedneday at 4 pm! The sale will include:

INK: Scarlet Jewel, Honey Nut, Saffron Spice, Ripe Avocado, Versamark, Prairie Grass

PAPER: Scarlet Jewel, Honey Nut, Saffron Spice, Ripe Avocado


I used the branches, sprigs, and leaves to create a bouquet bundled together and then accented with the die cut "thankful" word! As we're in the month of "thanks", these would be perfect to send out to those that you missed seeing at Thanksgiving this year!

I made two cards, similar in most every way, but switched the background and frame colors for a different look on each one. I die cut the background panel using the Border Bling: Tin Stitched Die and then layered a trip of Honey Nut cardstock over the top horizontally.

I created a frame piece using the Border Bling Skinny Diagonal Frames dies and added the foliage using mini foam squares to create a natural looking bouquet. I tried to have the ones bending in a certain direction on certain sides, if that makes sense.

I die cut the "thankful" word twice and then stamped it using black ink and then glued them together for a sturdy piece. I added it over the top of the bouquet using strategically placed foam squares.

I heat embossed the "that you are in my life" portion of the sentiment onto a Scarlet Jewel strip using gold powder. I love how it looks in real life, but it was tricky to photograph for some reason! These cards are super easy to put together and would brighten someone's day! I also wanted to say thanks to all of you that brighten my days! I'm behind on replies to your sweet comments, but please know I love reading each and every one of them! Have a wonderful day! Thanks for fluttering by!


Friday, November 27, 2020

The Greetery's Winter Wanderer Release Day

Welcome friends! I hope you all had a fabulous Thanksgiving holiday! We had a hiccup with the turkey, but it all got sorted out and everything turned out wonderfully! I hope any of your "hiccups" got solved as well! ha ha! Now that the hustle and bustle of the holiday is over, it's time to kick up your feet for release day at The Greetery!  Everything will be available for purchase starting at 10 AM ET!  I've created a bonus project to share with you today using many of my new favorites from this release!

I love that this release can be used for the holidays AND winter, but it transcends beyond for year-round projects! The sentiment sets alone have so many possibilities!
Don't forget about the sale in the SHOP that includes the NEW RELEASE as well!


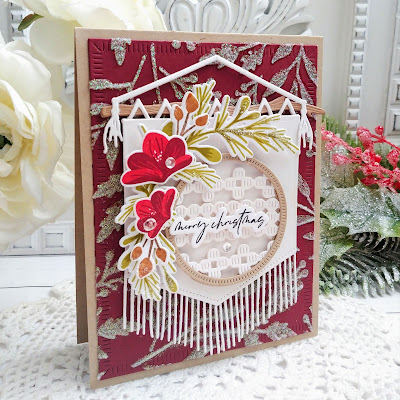
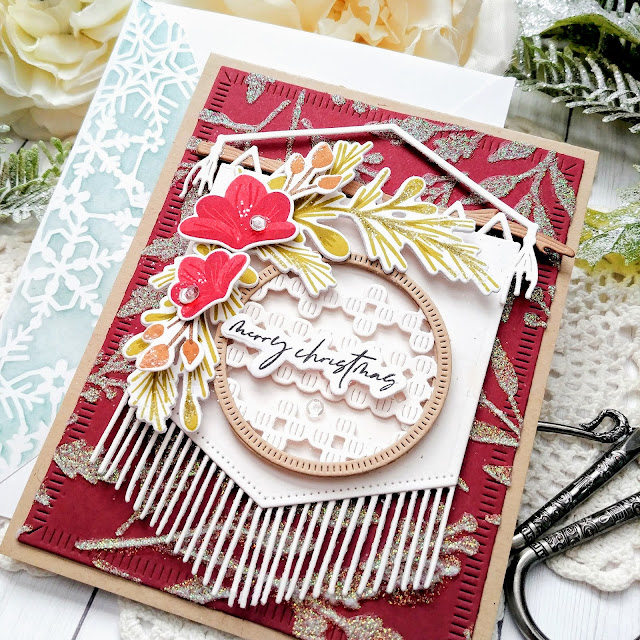
And now...on to my project for today! I couldn't wait to try making some Macrame hoops like Betsy shared on Wednesday! I used it as the focal point on the Boho Banner accented with the foliage and flowers from the new Hoop Wreath stamp/die set.

To begin this design, I used Moonstone Glimmer Paste on a panel of Scarlet cardstock using the Berry Branch stencil that was released last year. I used it on my other Boho Banner card that I shared on Wednesday, but I did a tone-on-tone look and this one is much more vivid!

All of the pieces for the banner are die cut and glued together using liquid glue. I set that aside to dry while I got to work on the greenery and flowers.

As I mentioned before, I used the Hoop and Wreath stamp/die set. I love how it works so well with accenting sentiments and such. I added some extra color to the greenery with a Copic marker.

I used the Macrame Borders for the center of the hoop. The hoop is the smaller of the two that is included in the Hoop and Fringe die collection. The sentiment is from the Hoop Wreath stamp set and has a coordinating die, which I love, so I could float it over the macrame!

Everything was layered up onto the stenciled background using foam squares and liquid glue. I added some glitter to the greenery and berry/bud image using a 2-way glue pen. Of course, there's an envelope made using the Flappable stencil


Wednesday, November 25, 2020

Keeping Christmas {I'm Dreaming of a White Christmas}


Welcome to the last Keeping Christmas post of the year! Actually, it is with a heavy heart that I announce that it will be the last Keeping Christmas post period. When I began this series YEARS ago, it was at a time when I wasn't on as many design teams with as many commitments. Now, I make a lot of Christmas themed projects for each of the different teams, so my need isn't as great. I feel so sad letting this go, and maybe I'll bring it back in the future, but for now, I'm saying goodbye! Thank you to those of you who have been so supportive of it over the years...it means more than you will ever know! Love and hugs to you all! 
I have one last card to share with you today, but don't forget to head to the other designers' blogs to see their fabulous inspiration as we are heading into the homestretch to Christmas!


My card for today uses some of the new, yet-t0-be released stamps/dies from The Greetery! The new items will be available for purchase on Friday at 10 am ET. I will link any older products that I have used on today's card to eliminate confusion on the new vs. the old! A fun announcement in the graphic below! Wahoo!

To begin this snowy design, I cut a piece of blue cardstock to fit just inside the Postal Frames Die. I used the beautiful Frosty Flakes Stencil and some Nuvo Moonstone Glimmer Paste to create the sparkly background. I set it aside to dry while I created the other design elements.

I explained in yesterday's POST how I put the dream catcher together and I used the same steps for this one. I added it to a die cut circle that has been embossed using one of the fun sentiments included in the Catching Snowflakes stamp set.

I also added some of the snowflakes from the Frosty Corners dies to add to the center of the dream catcher as well as the stenciled panel. I added a simple bough of greenery from the Hoop and Wreath stamp set with a snowflake for an accent.

I layered the entire blue panel onto the Postal Frame and then added that to a top folding A2 card base using foam squares for dimension. I added sequins and a sprinkling of glitter for a snowy feel.

I created a coordinating envelope using the Flappable Stencils that were released last year. It is such a fun and easy way to give your card that little something extra, don't you think?

The pens that I have been using in my photos for today's post and my other Winter Wanderer release projects are being released and sold on Friday as well, so you'll want to check those out! 

I kept things clean and natural for the fiber elements of this card to really give it a snowy feel, but you could play around with ink blending on the fringe and the dream catcher to create some colorful accents!

Well friends, this wraps up my final Keeping Christmas post, which makes me sad! Don't fret though, because I'll be sharing Christmas inspiration with each of the design teams I am a part of! Thanks SO MUCH for fluttering by!


The Greetery Winter Wanderer Release Countdown Day 2


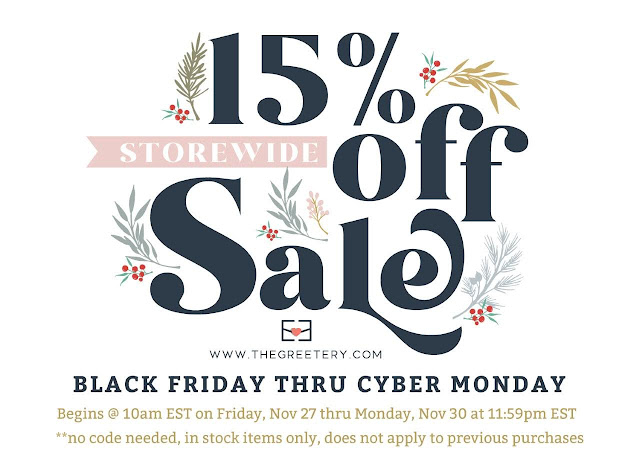
Hello and welcome! It's great to be back with day 2 of the Winter Wanderer release from The Greetery! Before I get started with ANYTHING, though, I have some SUPER exciting news...when the new release goes LIVE on Friday, at 10 AM ET, EVERYTHING storewide, including the new release, will be offered at a 15 % discount! Wahoo! The sale will run until 11:59 ET on Monday!  

Don't forget to leave a comment on the designers' blogs for a chance to win one of the 2 $50 gift certificates being given away for this release! As always, you'll want to head to The Greetery Blog to get a good look at all of the products being showcased today! Also, one more thing...I'm sharing another card using the new Hoop Wreath and Catching Snowflake stamp/die set HERE if you are interested in seeing that.

I have 3 projects to share with you today, and up first is a card using the new Boho Banners die collection paired with the amazing new Bigger Blooms stamp/die set!  This card is really simple and straightforward, but I had a lot of fun putting the banner together and using these gorgeous new blooms!


It's a little bit hard to see in the photos, but I used the Berry Branch Stencil that was released last year to create a tone on tone background on the Scarlet panel! It's such a simple detail, but adds that "little something extra"!

I used A LOT of Rustic White Cardstock for this release. I really like the look and feel it gives to the "fiber" elements that are part of this release, such as the Macrame dies (projects below) and the fringe and tassels on the Boho Banner. It has flecks of color throughout, just like natural macrame yarn/thread. 

I die cut the branch piece twice from Kraft cardstock and then glued them together using liquid glue.  I wrapped the top triangle portion around the branch and secured it with liquid glue around the front and back of the main banner piece. Once that was done, I added the "tassel/string" piece using liquid glue at the knots of the tassel. 

I stamped a bunch of the images from the Bigger Blooms stamp set and used them on two of my projects for today! I added them to the banner using foam squares and liquid glue and then added the sentiment, which is from the Hoop Wreath set, on top of the blooms!

I added a brad to the stenciled panel to create somewhere for the panel to "hang" and then adhered the entire banner. The focal panel is added to a top folding Kraft card base using foam squares. I had a lot of fun creating coordinating envelopes using the Flappable Stencil for a few of my cards for the release. 

My next card uses more of the Bigger Blooms paired with the new Simply Wonderful stamp/die set. I also used the new Macrame Openwork Base Die, Macrame Diamonds die, and the Macrame Borders & Tassels die. These all work together to create beautiful and realistic macrame pieces. I had so much fun putting this background together and then ended up covering a lot of it up! LOL! 

The "wonderful" word is die cut twice, stamped once, and then glued together for stability. I knew it would be "floating" over the intricacies of the macrame pieces, so I wanted it to be sturdy. 

As you can see, here is another one of the rustic backgrounds I was telling you about yesterday. I used the whitewash technique for this one for a more airy look. I stamped the "you" portion of the sentiment directly onto the panel using Black Soot Distress Oxide Ink (also used on the "wonderful") and then got to work adding the different pieces of macrame to create the background.

I added a few of the Bigger Blooms here and there to accent the macrame. I originally had quite a few more on there and laughed when I realized you could hardly see the background. I did some editing, and while it still has a lot, it is much better! ha ha!

I stamped all of the flowers, leaves, and berries using the exact colors that Betsy used on the stamping guide. They looked so beautiful and my color combination brain was tired! ha ha! I love how they turned out! I added glitter and sequins to give them some added detail, sparkle, and shine!

Once again, I created another coordinating envelope using the stencils I talked about earlier. While this particular pattern is made to go with a different set, I think it coordinates nicely with the Bigger Blooms. 

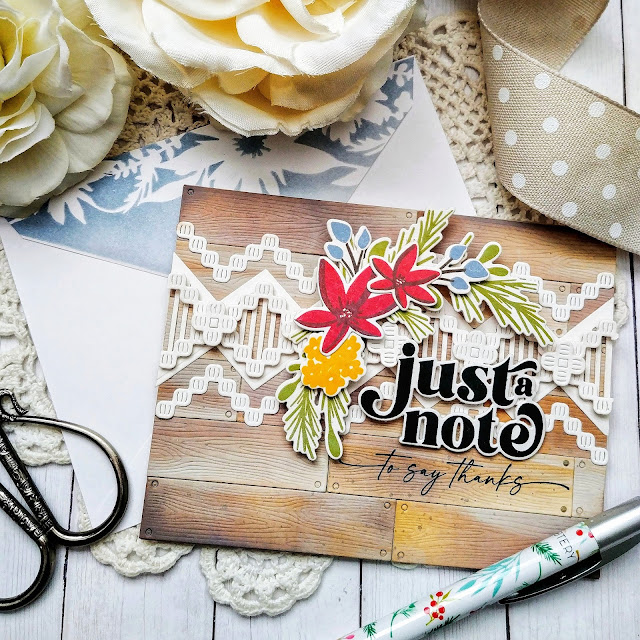
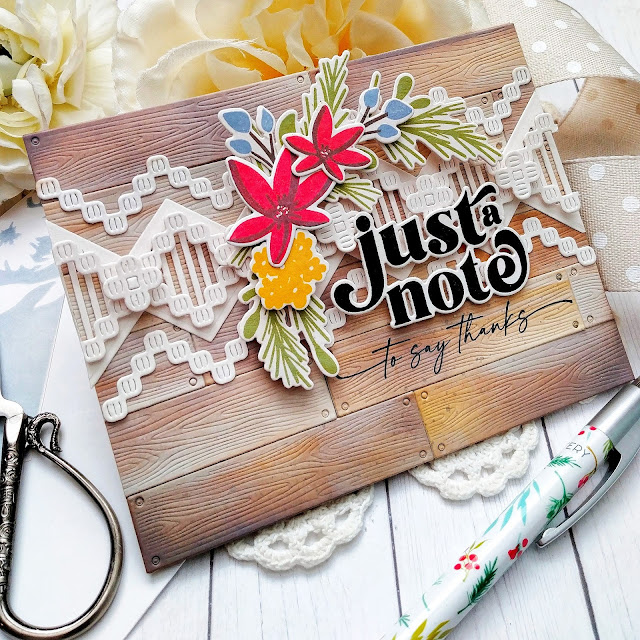
My third and final card for the day and the release uses another fun new sentiment set called Opposites Attract AND another rustic Shiplap background. ha ha! 

This card showcases the Macrame dies a little bit better since I didn't add so many design elements. They are so much fun to use and the pattern possibilities are endless! I chose to keep everything natural looking, but I'll bet the other designers have used color on theirs. I can't wait to see!

I die cut the "Just a Note" sentiment twice and then stamped it once and glued them together. the "to say thanks" sentiment is stamped directly onto the background, like I did on my last card. 

I added the foliage and flowers from the Hoop and Wreath set that was showcased yesterday to accent the sentiment.

Well, friends....that's all for today! Make sure you head to the other designers' blogs to see their gorgeous creations and don't forget to leave a comment to be eligible for a chance to win one of the $50 dollar gift certificates to the shop. Also, don't forget that the pens will be in the shop on Friday as well as the amazing sale going on!
Thanks for fluttering by!


Tuesday, November 24, 2020

The Greetery Winter Wanderer Release Countdown Day 1

Hello and welcome, friends! I hope you're having a wonderful day!  Today is day 1 of the Winter Wanderer collection from The Greetery! I've got two projects to share with you today, and of course the other designers will be sharing on their blogs as well. I'll provide the links at the bottom of this post. You can stop by The Greetery Blog for a complete and comprehensive look at the products being released today! Also, there will be a winner of a $50 gift certificate picked from the comments on the designers' blogs, so don't forget to leave a comment!
Up first is a Christmas card using the new Catching Snowflakes stamp set/die set AND the fabulous new Hoop and Fringe dies. I will be using these dies again on my second project as well. There are quite a few different sentiments for Winter/For You, and one for Christmas, which I chose to use for today's card. I love the "Dreaming of a White Christmas" sentiment and heat embossed it with White Superfine Embossing Powder onto a red circle. This left just enough space to add the snowflake dream catcher in the middle!

For the dream catcher, I die cut the larger of the two hoops three times from Kraft cardstock to create a nice, sturdy piece. I also die cut the actual dream catcher part once out of Rustic White cardstock. I wrapped the ends around one of the hoops and secured it with liquid glue. From there, I was able to glue the other hoops underneath using additional glue. I was able to add it into the red circle using liquid glue. 

I also added another snowflake to the center of the dream catcher and a few others here and there that are die cut using the Frosty Corners dies. I also used the Botancuts Pinebough Dies to create the branches in both corners. I added some chunky glitter to the branches to keep up with the "white Christmas" vibe!

The flowers are from the new Hoop Wreath stamp set, which I'll be showing for my second project. Once I had all of the design elements ready, I got to work putting it together. I cut a panel of Kraft cardstock and used the Knit Wits Stencils and some texture paste to create the background. I added a border that was die cut using the Crimped Frame dies and added it over the top of the stenciled panel using foam squares for dimension. 

From there, I added the dream catcher piece, the pine boughs, and the flowers. A few sparkling clear sequins finish off this snowy design!

My second card for today uses the new Hoop Wreath stamp/die set paired with the Hoop and Fringe dies. These are so much fun and are so easy to use to create these fabulous, trendy hoops! I can't wait to try some using gold cardstock!

I'm warning you now, I went a little bit crazy with the Ship Lap Builder Dies with this release! ha ha! I watched Betsy's fabulous Make and Tell Tuesday Tutorial and had so much fun creating these fun rustic toned backgrounds!

I used both the larger and the smaller of the hoops included in the Hoop and Fringe die collection, once from Kraft and one that was sponged with Walnut Stain Distress Oxide Ink. I added a white center to the smaller hoop and added the die cut "hello" sentiment to the center.

The flowers and foliage were all stamped using assorted Distress Oxide Ink Pads and added to the hoops using foam squares to achieve a lot of dimension.

White paint splatter, glitter and a few sparkling clear sequins finish off this rustic, Boho design! Also, I mentioned the pretty new pens in my tag post the other day, but they will be released in packs of 3 and will be in the shop on Friday with the rest of the release! They are just as pretty as can be! Don't forget to stop by the other designers' blogs:

Join me again tomorrow for day 2 of full reveals and thanks for fluttering by!