Wednesday, April 30, 2008

Fairy Nice Day


Today's Sketch Challenge over at SCS looked like a fun one, so I decided to play. I already had my Fairy Nice set from SU! out from a different card that I made, so I used it on today's card. I really like this set and I am sure I will use it more and more, the older my daughter gets with Birthday Parties and such. I made this card for a birthday party that my daughter is going to in May. I added some stickles to the dress, wings and wand for some bling as well as the brads. I didn't like the primas on the card after all, but I used glue dots to stick them down and I wasn't about to pull them off! LOL! Oh well...I am sure a 5 year old won't care if they don't look *just right*! LOL! Thanks for fluttering by!

Tuesday, April 29, 2008

Color Challenge

I decided to make a 2nd card! I love these colors!


My son is officially back in school as of today. It was weird sending him out the door after a month of no school. I think he is ready to go back; there is nothing quite like recess and friends, especially to a 2nd grader. So...I decided to spend some time this morning making a quick card for today's color challenge over at SCS. I love these colors together. The colors are Purely Pomegranate, Soft Sky, Basic Black. I used Carte Postale which is one of my favorites, but doesn't get used very much. I also added some Syled Silver HodgePodge Hardware to add a little elegance. I have actually been using a ton of it! No hoarding anymore, baby! LOL!

Monday, April 28, 2008

Happy Mother's Day


I was really in the mood to use this paper and the coordinating stamp set "Embrace Life". I decided to make a Mother's Day card. I will probably give this to my MIL, since my Mom reads my blog(Hi Mom!) LOL! I will post the one I make for my Mom after Mother's Day. I send my SU! stamp club a "Card of the Week" in an email, and this will be for this week.


Also, my stamp area is still a huge mess. I don't think I will be cleaning it until tomorrow, so I am postponing the 3rd installment of * A Closer Look* until tomorrow. My son is going back on track and I want to spend today doing something fun with my kids. I will be showing an in depth look at how I store my spools of ribbon. I know this is a tough one for many of us. Thanks for fluttering by.


All Supplies SU! except transparency
Stamps: Embrace Life, All Holidays
Paper: Ginger Blossom DS Paper, River Rock, Groovy Guava, Whisper White
Ink: Black StazOn, Blush Blossom, Groovy Guava, River Rock
Accessories: Aged Copper HodgePodge Hardware, Vintage Brads, Sherbet ribbon originals, liquid glue, chunky glitter, dimensionals, blender pen, transparency

Sunday, April 27, 2008

Gardening Time!


Well, there is nothing like getting back in the swing of things by posting twice in one day.LOL! I was busy cleaning my stamp space and was putting some ribbon away, which is the ribbon on this card, and I knew it would go perfectly with this bunny and carrot image from The Saltbox Studio. This image is meant to be part of the banner collection, but he is so cute on his own, I left him alone. So...needless to say, my area is not clean, but I made a card. It is has been a while since I posted a Saltbox creation since I have been so busy getting ready for my Boutique, so I thought I would share one today. Keep posted for more creations made with this set. I love it!

M.I.A. and more sets!!


Hello! I just have to say that my Boutique at my SIL's was a success. I had a lot of fun and met some fun ladies! I haven't been posting because I was so busy getting everything ready! I am actually postponing today's *a closer look* because my stamp area is a HUGE MESS from trying to get everything ready for yesterday. I have ribbon, stamps, and paper EVERYWHERE! I am sure it will take me quite a while to get it all put back, so I will try and post the new installment tomorrow instead.


I will share a card with you that I made a while back, but sold yesterday at the Boutique. I only have about 4 cards on hand now! Looks like I am going to be a busy girl making cards! LOL!
I have a new list of retired sets that I will be selling. Same shipping and other info as last time.
Also, I have been updating the other list as sets have been sold, so if you still want anything from the earlier list you can still see what is available.
1. Flower Filled-blue rubber-stained images and blocks-$10.00 SOLD
2.Word by Word Background-mounted-$8.00
3. Bundle of Joy-$12.00 Sale pending
4.Looks Like Spring-$12.00
matching punch-$5.oo sale pending
5.Ladybug Picinic-$9.00 sale pending
6. Nature's Secret-$15.00

Wednesday, April 23, 2008

Forever in my Heart


I absolutely love the Spring Silhouettes Designer Series Paper, especially paired with this bird from Always. This is one of my all-time favorite sets! I {love} it! I made this card a while back, but hadn't posted it. I used my Coluzzle for the Very Vanilla circle. I stamped the bird twice, cut one of them and mounted it with dimensionals. I am getting sad that Soft Sky is soon to be retired. Boo Hoo. I have really enjoyed using all of this year's In Colors, but have a few favorites and Soft Sky is one of them. I think next year's colors have a similar blue, so I guess I am okay! LOL! Thanks for fluttering by!

Tuesday, April 22, 2008

G is for Gratitude


I made this card last week after I received the Defining Alphabet in the mail from my SAB sales. For some reason, I couldn't get the photo to upload so I gave up. Hopefully, all will go well today. I am working on another set of cards for the Boutique on Saturday, so I will show those as soon as I am done with the 3rd card design. For this card, I used one of the retired Accents and Elements assortments. I love using these, but rarely pull them out. I *must* start using my stuff more! Can you tell there is a theme lately with me needing to use my stuff! LOL! I had fun with this card! Thanks for fluttering by!

Sunday, April 20, 2008

*A Closer Look* #2


I have decided to break the ribbon installment into two groups. Today I will show you how easy it is to organize and store the dreaded, but delicious, ribbon by the yard. I love purchasing ribbon by the yard at my LSS, but bringing it home can be a nightmare. I finally realized that I could make my own *collections* like I can buy from SU!, SEI, Making Memories, Etc.

For me, it all starts with the Pattern Paper. I chose this beautiful collection from Polar Bear Press which can be seen in the background of my photos and then on the finished card. I then select ribbon that coordinates with the paper. I usually get around 5 yards of each, but for this collection, I only purchased 3.


Once I have my selections, I take a piece of the chipboard backing from my SU! designer series paper, to make a base for my ribon. I then take my 3/4 inch square punch to make indents for each ribbon. I make the indentations at the top, wrap the ribbon, and then punch again. This way I will have perfectly spaced notches. I usually pin it once I have come to the end, but some ribbons are so delicate, that a piece of scotch tape is best. Once I have a finished collection, I add it to my container that houses my ribbon by the yard. I put each card in like a file would go into a filing cabinet so that it uses a small amount of space, but all the ribbon can be seen.


Once I had played with all of that scrumptious ribbon, I thought it was only fitting to create with it. I used my Paris Stamp Set from Cavallini and Co. and added some fun buttons. I love this little flapper girl button. Doesn't she look cute?
Also, I had a comment left last week on where I got my desk. It actually belonged to my Father and wasn't in the *best* condition, so I took a can of black spray paint and painted it, took off the original hardware and replaced it with some nickel drawer pulls. I {love} how it turned out and I {love} creating on a desk every day that belonged to my Dad, who I miss very much. I think about him every day as I sit there and hope that the things I create would make him happy.
So...remember, everything old can be new again with a little TLC. All it takes is a little *vision*!

*****Next week I will be showing you some of the ways that I store my ribbon spools. I will also a fun project that you can do to house some of those spools! Thanks for fluttering by!! *****
Also a HUGE thanks to Elaine for helping me get my pictures and text figured out! You are a gem!

Saturday, April 19, 2008

Berry Sweet


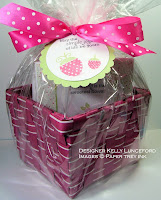
I am sharing another set of cards that I made to sell at the Boutique that I am participating in on Saturday. I have some darling paper from DCWV called Nana's Nursery that has Strawberries and such and I thought this set from Paper Trey Ink. would be perfect! I absolutely love how these turned out. The designs are simple, but that is usually what works best for selling in a set. The paper has glitter on some of the pieces, so I added some stickles to the strawberries to mimic the look.


I found these baskets yesterday and fell in love because they reminded me of a basket that strawberries might come in, so of course I had to use them. I love when a design concept comes together so well. What do you think of this one? Thanks for fluttering by.
Question? Does anyone know how to have text inbetween my photos? I am not a computer gal, so I could use some help. Thanks!


P.S. Stay Tuned for the 2nd installment of *A Closer Look* featuring Ribbon and some fun ideas on storing and organizing!

Friday, April 18, 2008

Rock-a-Bye Baby


I am doing a Boutique with my SIL ( hi Holly) next Saturday, so I am busy getting items ready to sell. I will be selling card sets, so I thought I would share one with you today. These six designs will be packaged up into a clear box as a set. I thought this paper was perfect for gender neutral baby cards. What do you think? Thanks for fluttering by!
Stamps: Nursery Necessities

Ink: Aqua Mist, Spring Moss Perfect Match ink from Paper Trey, Ink.

Paper: Aqua Mist, Spring Moss Perfect Match cardstock from Paper Trey, Ink., Pattern Paper by Tres Jolie, Very Vanilla by SU!

Accessories: Ribbon-Perfect Match by Paper Trey, Ink., Marvy Punch, SU! dimensionals

Thursday, April 17, 2008

Moose You!


My kids have swimming lessons this week and next and it has severly cut into my morning stamp time. In fact, I really need to go make breakfast soon so we can get out the door! LOL!


When I saw this Moose Button in my stash the other day, it reminded me of the SU! set with the moose saying *moose you*. I thought I could make a fun woodsy card with it. I kept all of the design elements rustic for a cohesive feel. I really liked the idea of using the torn notebook look to maybe represent a letter saying how much they were missed. I used the line image from Live your Dream that is currently in the Occasions mini catalog from SU! The alphabet stamps are my oldies, but goodies from PSX. They have been used *so* much over the years. You should see these sad little stamps. You can tell how loved they are! LOL! I used some pattern paper from We R Memory Keepers that looked like crackled paint. It worked perfeclty for this design.


Thanks for fluttering by!


P.S. I posted some retired sets in my previous post that I am selling. I added the link so you can email me if you are interested!

Wednesday, April 16, 2008

Spring Cleaning Sale

I am having a spring cleaning sale of retired sets. I will mail these out with a Flat Rate Envelope which is $4.70. If you purchase more sets that will not fit into a Flat Rate Envelope, I will ship them in a flat rate box box for $8.95 .I will only accept pay pal for payment. Please email me at kellyrory1@msn.com with the sets you would like to buy and I will ship them(U.S. only, please) as soon as your pay pal request has come through. All Stamp Sets come from a clean, pet-free,smoke-free home.

1. Oh, My Word-mounted $12.00
2.Basket Full of Fun-mounted some stained rubber $15.00
3.Autumn-mounted stained wood and rubber-$12.00
4.Set Sail-stained rubber on 2 images-$15.00 SOLD
5. Clowning around-mounted $15.00 SOLD
6. Graceful Words-SOLD
7. Wonderful Words II-mounted $10.00
8. Down to Business-mounted-one image stained $12.00
9. Play on Words-mounted-some stained rubber $10.00
10. Bunny Hugs-mounted-some stained wood-$10.00
11.Love Matters-mounted-some stained rubber-$15.00
12. Hung up on the Holidays-mounted stained rubber and images-$10.00 SOLD
13. Polka Dot Posies-mounted-stained rubber and images-$12.00 SOLD
14. Sweet Spot-mounted stained wood-side mounted-$5.00-SOLD
15. Genuine Articles-mounted stained rubber and images-$10.00

Tuesday, April 15, 2008

For a Friend!


I made this card back in February early March for a friend's birthday, but ended up making something else for her in the end. I never got around to posting it and I thought I would share it with you tonight since I haven't shared a creation in a few days. I hesitated getting this Bali Breeze DS paper, but broke down (of course) and I am so glad that I did. The colors and patterns are fabulous. I have decided that instead of hoarding, I am going to use my pattern papers while they are new and fresh. I usually use them, but end up buying *extras* for later. Well...later usually never comes and I end up with a lot of stuff. I think this way I won't feel guilty buying new stuff, because I have already used my stash. I have used almost every piece of my Summer Picnic paper and have loved every minute. There will always be something cuter, something better coming along, so why not have fun right now? Thanks for fluttering by!

Sunday, April 13, 2008

*A Closer Look* #1


Hello! This week's installment of *a closer look* will show you how I store my smaller items such as brads, buttons, eyelets, photo turns, ribbon charms, etc. The first thing that I do when storing my embellishments is to take them out of the packaging. The packaging for smaller items is much larger than it needs to be and ends up taking up a lot of room. Also, the way that I have organized these items makes them easy to view which is essential for me when I am creating. Sometimes I have the *right* thing in mind for my project, but more often than not, the creative process takes over and I like searching for the *perfect* accent or embellishments. This often yields itself to fun color combos, interesting layouts and maybe those items that haven't felt much love lately.


I purchased the cases that store my eyelets, photo turns, snaps, ribbon charms, etc. many years ago at the LSS and I am not sure what brand they are, but I believe Provo Crafts has similar storage. I really like how many varieties of eyelets I can store, but see them easily through the clear top containers. My drawer holds three of these cases nicely and each case holds 20 vials. If I don't have a lot of one variety, I will mix two together if the variety can be seen easily through the top. This drawer also hold my SU! hodgepodge hardware and essential ink pads that don't fit into my color caddy. I can only imagine what kind of mess and how much room that many *packages* would take up. I am sure I would need two or three drawers to cram the product plus packaging and then I would never remember what I had in there. LOL!


The cases that store my brads and buttons are from Darice, the stitchery company, and are designed to hold cards of embroidery floss, but I find that they are a perfect design for items like brads, buttons, eyelets, etc. Again, I can see what I need at a glance. I have grouped like items together for continuity and ease. These two cases, sit nicely on a shelf and maybe take up 4 inches of height. One case holds buttons and one holds brads. I also have some glass jars on top of my storage shelf which can be seen in the magazine photo that holds many buttons. I use these buttons alot for various projects. The jars are glass, so again, I can see exactly what it inside. Not only is is functional, but they look nice, too!


Now....imagine if everything that I have just shown you was still in it's original packaging. What a nightmare!!! Not only would it rarely if ever get used, but once the package was open, everything would spill out and be a huge mess. So...get those pacakges open, store like items together and have fun creating.


I hope you have enjoyed this installment of * A Closer Look* and I hope that some of the tips will help you organize your space.


Next week: Ribbon...I will be showing you storage for all kinds and types of ribbon!


FYI-Today's storage tips are for my non SU! embellishments. My SU! brads, buttons, eyelets, etc are housed in the FANTASTIC stack and store caddy. I love this because I can see what I have got, it rotates and holds A LOT of product. The packaging that the SU! buttons, brads, eyelets, etc. come in, fits perfectly into the slots.

Thursday, April 10, 2008

*Release Day*


Hello and Good morning! Today is release day over at The Saltbox Studio for all of the fabulous new sets! You will want to head over early to get your stamps! I have had such a fun time using all of the new images as well as the old. I have one more card for you today in celebration of the release. I can't seem to get enough of this little mouse with the seed bag. He is so cute and so fun to use with the birds and bird houses. I paired the image with an amuse notecard that has been cut and adhered to a 5 by 5 card. I wanted to keep the *primitive* feel, so I added some green gingham ribbon, which I love. Thanks for fluttering by!


P.S. Sunday will be the first *A closer look* installment, so stay tuned!!!!

Wednesday, April 9, 2008

Sneak Peek #4


I was itching to use this Mama Mouse and more set, so I decided to make a baby card. I just love this mobile! This will be the last sneak peek until the Launch Tomorrow! I sat down and made a darling baby girl card, I was just finishing up and SMUDGE!!! right in the middle of the card. So...I decided to scrap it and make a baby boy card. I love this little baby mouse in the basket. This set comes with so many accessories, the possibilities are endless! I have really enjoyed seeing all of the creative ways the other design team members have used these sets. You can check out their creations on their blogs which are located on my sidebar under The Saltbox Studio logo. You won't want to miss seeing all of their fabulous creations! Also, stop by The Saltbox Studio blog to see more sneak peeks!!! Tomorrow is my son's Birthday so I will be posting my launch day design, but then I have a big family event for my son on Saturday, so things will be quiet until Sunday.

Tuesday, April 8, 2008

A Color Challenge


Yes...today's color challenge over at SCS was a real challenge. The colors for today were Real Red, Glorious Green and Night of Navy. I reached for my Garden Whimsy set, because I thought the tulip image would be perfect. The first of my red tulips bloomed yesterday, so I thought they would be fitting. I don't think my glorious green or night of navy markers have ever been used. They were so juicy and crisp. I just made a simple card for today, because I have quite a few things to get done today. Thanks for fluttering by!

Monday, April 7, 2008

Sneak Peek #3


Isn't this church birdhouse the cutest? I fell in love with it the moment I saw it. I thought this sentiment worked nicely with it also. I used the fences set as well to give it a church yard "feel". My daughter saw me stamping the fence and asked if I was making a Halloween card. hello? NO!!! I hope this card doesn't give off a Halloween vibe, however, her saying that gets the wheels turning for future cards. LOL~! I am seriously loving all of the new sets and images from The Saltbox Studio. I can't seem to get enough. I have tons more ideas that I can't wait to share. I have also been enjoying seeing the darling creations from the rest of the team; so clever and creative!!!!


Sunday, April 6, 2008

Sneak Peek #2


When I was growing up, my Grandma had a beautiful birdbath in her backyard. I was so thrilled to see a birdbath in the new set "Tweets" from The Saltbox Studio. I have had a lot of fun using it. I made a simple card today using one of the birds from this set as well. I love coloring these birds blue for some reason. Keep posted for more sneak peeks!! Check out the other design team members for some fabulous designs! You can find links to their blogs on my sidebar under The Saltbox Studio logo.

Saturday, April 5, 2008

Window on my World


I was fortunate enough to have Stampin' Up! come to my home and photograph my creative space. I was thrilled and honored for them to come. Let me just tell you how stressed I was, too! Many of you have left me sweet comments or contacted me about my space. And no...it is not always that clean! LOL! I am going to start a new *series* on my blog that I mentioned in an earlier post. Some have wondered where the "rest" of my stuff is. No...this is not all of my stuff, but yes...it is the *stuff* that I use for my creations. So...with that in mind, I have decided that I will show you *a closer look*. That will be the name of my posts when I do them. I will most likely do those posts on Sunday. What these posts will entail will be a specific area of my space so that you can see how I organize so much stuff. While it doesn't look like there is alot, when you take *a closer look* you will see how much can be stored in a small area. I hope that this *series* will be beneficial to those who are seeking new organizational strategies. Please leave me your comments or if there is something you have a question about and I will try to address those in my posts! Thanks for fluttering by.

Friday, April 4, 2008

Think Spring: Sneak Peek


As I told you before, I have been having a lot of fun using the new images from The Saltbox Studio. I think on this card I may have had a little *too* much fun! LOL! I added a lot of different images from some of the new sets. I am really not one to make a *scene* (hee hee), but I had a lot of fun putting these images together. I used the fences set from the original release, but paired it with the new. I am so excited how well the old works with the new. I used 3 of the new sets; Tweets, Tweet houses, and Tweet Companion. I love birds and anything to do with them, so these images were right up my alley. I had so much fun working with them.

Keep posted for more new designs using these fabulous new sets!

Thursday, April 3, 2008

Stamp Club Projects


I have been one busy woman! I have been stamping up a storm, but with super secret stuff! LOL! I am so excited for the new stamp release from The Saltbox Studio. I have been having so much fun with the new images. They are *so* me! I have gotten the green light to start the sneak peeks TOMORROW! yes...that's right! I have a fun card that I have been working on tonight that I will post tomorrow! Since I am out west, you are all gonna have to wait until I get my lazy bones outta bed. We have year round school and my son is off track, so I am taking advantage of sleeping in! LOL!
In the meantime, I will share the two projects that my stamp club did on Tuesday night. Now...disclaimer here...my scrapbook project was stamped a little wonky. I was in a super big hurry and I will have to fix it, but just look past it for now! LOL! I found these darling mini-albums at the Target Dollar Spot last fall. I didn't know which paper to use, but the green is *almost* wild wasabi, so when I saw East Coast Prep DS paper, I knew what to do! We will be making pages each month to add to the book using the same paper for continuity.
The second project is a criss-cross box (template created by Nichole Heady) that I got off of her blog. I used SU!'s new Summer picnic DS paper and Tart and Tangy! I love that collection!!!! Super cute!
Stamps: Tart and Tangy, Define your life
Paper: Bashful Blue, Real Red, Whisper White, Summer Picnic DS paper
Ink: Old Olive marker, real red marker
Accessories: Scallop punch, circle punches, dimensionals, real red striped grosgrain ribbon, 1/8 inch hole punch
Scrapbook supplies:
Stamps: Labelicious, Define your Life, Jumbo outline alphabet
Ink: Tempting Turquoise, Real Red, Whisper White
Paper: Whisper White, East Coast Prep DS paper
Accessories: Album from Target, Real Red 5/8 inch grosgrain ribbon, wild wasabi double stitched ribbon, Pumpkin pie striped grosgrain ribbon, stylized silver hodge podge hardware ( I told you I wasn't going to hoard it anymore) crop-a-dile, Designer Label Punch, Earth Elements Brads